
Are you thinking of starting your own backyard flock or raising chickens for the first time? If so, successfully brooding chicks is an essential skill to master. Brooding, in simple terms, is providing care and warmth to newborn chicks until they’re old enough to transition to a coop. It’s a crucial step in their development, and getting it right can make all the difference between healthy, thriving chickens and those that struggle to survive. In this comprehensive guide, we’ll walk you through the basics of chick development, explore different types of brooders, and show you how to manage temperature and humidity for optimal growth. Whether you’re a seasoned chicken owner or just starting out, our expert tips will help you confidently care for your new additions.
Understanding Chick Development
As you embark on the exciting journey of brooding chicks, understanding their development stages is crucial for providing optimal care and ensuring a healthy start to life. In the next few paragraphs, we’ll break down the key milestones.
Stages of Embryonic Development
As you embark on brooding your chicks, it’s essential to understand the early stages of their development. From fertilization to hatching, the process is a remarkable journey that sets the stage for their growth and success.
The first 24 hours after fertilization are critical, as the sperm penetrates the egg yolk and begins to divide. By 36-40 hours post-fertilization, the embryo has developed into a compact ball of cells called the morula. As you approach day 3, the embryo starts to differentiate into distinct layers: ectoderm (outer layer), endoderm (inner layer), and mesoderm (middle layer).
By day 4-5, the embryo has formed a primitive streak, which will eventually develop into the embryo’s three main germ layers. The embryonic development milestones are crucial for brooding, as they determine the chick’s overall health and viability. For example, if you notice any delays or irregularities in these stages, it may be an indication of incubation issues or environmental stressors.
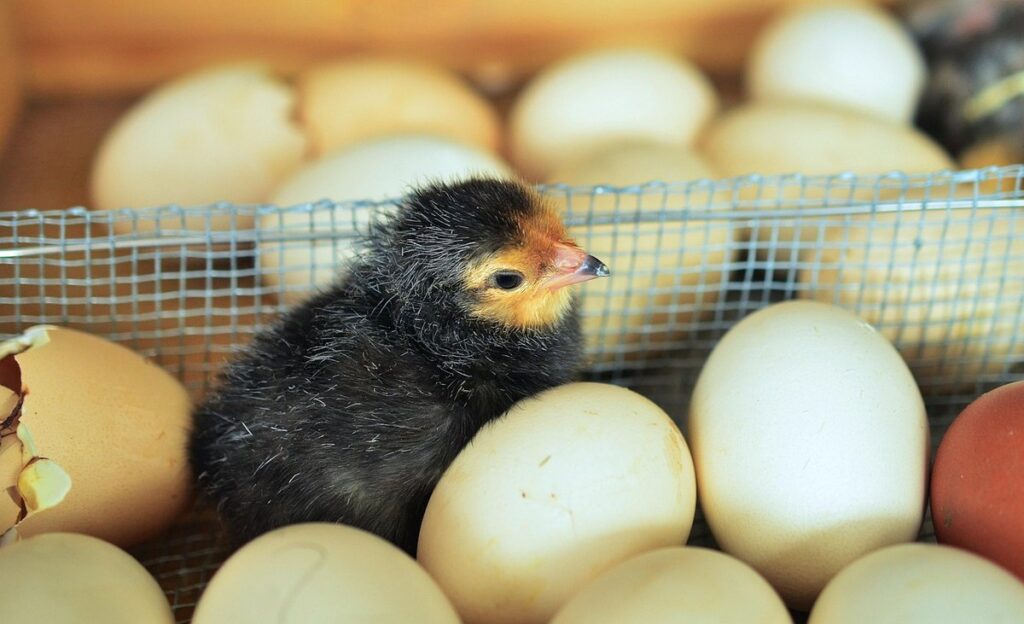
As a general guideline, by day 18-20, the embryo has formed feathers, beak, and claws, and is now fully developed for hatching. Proper temperature control and humidity during brooding are essential to ensure that the chick emerges healthy and strong.
Importance of Proper Brooding Techniques
Proper brooding techniques are vital for the successful rearing of chicks. At different stages of development, chicks have distinct needs that must be met to ensure optimal growth and health.
In the first few days after hatching, chicks rely heavily on their yolk sac for energy and warmth. However, as they grow, their requirements shift. Around 3-4 days old, chicks start to develop their down feathers, which provide insulation but are not enough to keep them warm in cold environments.
To create an optimal environment for growth, it’s essential to understand these changing needs. This involves providing adequate ventilation, maintaining a consistent temperature between 90-100°F (32-38°C), and ensuring access to fresh water and feed.
Providing a clean and draft-free brooder is also crucial as chicks are susceptible to respiratory infections in cold environments. Keep the area quiet and stress-free by minimizing handling and noise levels.
Monitor your chicks regularly, adjusting the environment as needed to ensure their comfort and well-being.
Choosing the Right Brooder
When it comes to raising healthy and happy chicks, selecting the right brooder is a crucial decision. Let’s break down the key factors to consider when choosing the perfect one for your flock.
Types of Brooders Available
When it comes to choosing the right brooder for your chicks, you’ll want to consider the various types available. Let’s break down some of the most common options: heat lamps, ceramic heat emitters, and forced-air brooders.
Heat lamps are a popular choice among chicken keepers, but they can be hazardous if not used properly. They emit infrared radiation, which can cause burns or even start fires if left unattended. To use a heat lamp safely, make sure to place it at least three feet away from the chicks and ensure that it’s securely fastened to prevent tip-overs.
Ceramic heat emitters are another option that’s gaining popularity. They’re safer than heat lamps since they don’t emit radiation or generate heat through infrared rays. Instead, they warm the air around them, creating a cozy microclimate for your chicks. One benefit of ceramic heat emitters is their energy efficiency – they use up to 50% less power than traditional heat lamps.
Forced-air brooders are a more advanced option that uses fans to circulate heated air throughout the brooder. They’re ideal for large flocks or for those who want a low-maintenance brooding system. However, they can be expensive and require more setup time. If you’re new to brooding, it may be best to start with a simpler option like heat lamps or ceramic heat emitters before investing in a forced-air brooder.
Considerations When Selecting a Brooder
When selecting a brooder for your chicks, there are several key considerations to keep in mind. First and foremost, think about the space requirements of your brooder. A good rule of thumb is to provide at least 1-2 square feet of space per chick. This will give them room to move around comfortably and reduce stress on your part.
Another important factor is energy efficiency. If you’re planning to keep your chicks indoors, consider a brooder that’s designed for low energy consumption. This can help you save money on your electricity bill and reduce your carbon footprint. Some popular options include heated waterers and radiant heat mats, which provide gentle warmth without wasting energy.
Maintenance needs are also crucial when choosing a brooder. Consider how easy it is to clean the brooder, as well as any other maintenance tasks that may be required. Look for a brooder with a removable floor or tray, making cleaning a breeze. Additionally, consider a brooder with built-in ventilation to prevent ammonia buildup and ensure good air quality.
Ultimately, your chicks’ health and happiness depend on a safe and comfortable environment. By choosing the right brooder, you can provide them with the best possible start in life.
Setting Up the Perfect Brooding Environment
Creating a suitable environment for your chicks is crucial, so let’s dive into setting up the perfect brooding space that will keep them happy and healthy. This includes choosing the right location and equipment.
Temperature Management
Temperature management is a crucial aspect of creating a perfect brooding environment for your chicks. The temperature requirements vary significantly across different stages of development, and it’s essential to provide the right conditions to ensure healthy growth.
For day-old chicks, the ideal temperature range is between 90°F (32°C) and 95°F (35°C). As they grow, you’ll need to reduce the temperature gradually. By around seven to ten days old, the temperature should be lowered by 5-7°F (3-4°C), reaching a comfortable 85°F (29°C).
To manage temperature effectively, consider using a thermometer to monitor the brooder’s temperature. You can also use heating mats or heat lamps to regulate the temperature. Just remember to place these devices at a safe distance from the chicks to prevent burns.
Maintaining optimal temperatures helps promote healthy development and growth in your chicks. A well-managed brooding environment will ensure that your chicks develop strong immune systems and reach their full potential.
Humidity Control and Ventilation
Maintaining optimal humidity levels and proper ventilation is crucial to prevent respiratory issues and keep chicks healthy. When it comes to brooding chicks, a relatively low humidity range of 40-50% is recommended to reduce the risk of bacterial and fungal infections.
However, maintaining this balance can be challenging. You’ll want to ensure your brooder has adequate ventilation to remove excess moisture and prevent ammonia buildup from droppings. A simple way to achieve this is by placing a pan or tray with a 1-2 inch layer of rice hulls under the brooder’s heat source. As the chicks scratch and move around, they’ll kick up the rice hulls, allowing them to absorb excess moisture.
In addition, consider installing a ventilation system that provides airflow equivalent to at least 10-15% of the brooder’s total volume per minute. You can also use fans or increase air exchange rates by opening windows or adding vents.
Managing Chicks During the Brooding Period
As a new brooder, keeping your chicks safe and healthy during this critical period requires careful attention to their environment and daily needs. This section will walk you through essential tips for successful chick management.
Feeding and Hydration Strategies
Providing your chicks with fresh water and nutrient-rich feed is crucial during the brooding period. It’s essential to establish a feeding and hydration routine that meets their specific needs.
Chicks need access to fresh water at all times, so make sure to place their watering system within easy reach. Change the water frequently to prevent bacterial growth and contamination. You can use a shallow dish or a specialized chick waterer with built-in filtration systems to minimize mess and ensure cleanliness.
As for feed, chicks require nutrient-rich starter feed that’s formulated specifically for their age and breed. A balanced starter feed typically contains around 18-20% protein, which is essential for growth and development. You can start offering medicated starter feed on the first day of life to help prevent coccidiosis, a common health issue in young chicks.
Make sure to follow the manufacturer’s guidelines for feeding amounts and gradually introduce more food as they grow. A good rule of thumb is to provide 1-2% of body weight in feed per day. For example, if you have 10 chicks weighing 100 grams each, offer around 1-2 kilograms of starter feed daily.
Remember, providing a constant supply of fresh water and nutritious feed will help your chicks grow strong and healthy during the brooding period.
Health Monitoring and First Aid
Monitoring your chicks’ health closely is crucial during the brooding period. This is because they are more susceptible to diseases and infections due to their immature immune systems. To ensure you catch any issues early on, it’s essential to perform regular checks on their overall condition.
Start by observing their behavior and appetite. Chicks that are lethargic or show a decrease in appetite may be experiencing health problems. Check for any unusual droppings, as this can indicate an issue with their digestive system. Keep the brooder clean at all times to prevent the spread of diseases.
Common issues that may arise during the brooding period include wet butt syndrome, respiratory infections, and scours. Wet butt syndrome is caused by a lack of ventilation in the brooder or poor cleaning habits. Respiratory infections can be prevented by maintaining good hygiene practices and providing enough space for the chicks to move around. Scours, on the other hand, are often caused by bacterial or viral infections.
Be prepared to act quickly if you notice any unusual symptoms in your chicks. Keep a first aid kit on hand that includes essentials like vitamin B complex powder, antibiotic ointment, and eye wash solution.
Transitioning Chicks to Grower Feed
As you get ready to wean your chicks from starter feed, it’s essential to transition them to grower feed smoothly and safely. Here are some tips to help you make this crucial switch.
Understanding Nutritional Needs
As chicks transition from starter feed to grower feed, it’s essential to understand their changing nutritional needs. By around 4-6 weeks of age, chicks typically require a more substantial caloric intake and increased levels of protein to support rapid growth.
During this period, they need an adequate supply of energy-rich nutrients like carbohydrates and fats to sustain their increasing activity levels. Grower feeds usually contain higher amounts of these macronutrients compared to starter feed. Look for feeds with added vitamins and minerals that help maintain overall health and immunity.
To identify when chicks are ready for grower feed, monitor their weight gain, feather development, and overall appearance. If they seem sluggish or lethargic, it may be a sign that they’re not getting the nutrients they need from their current diet. Typically, growers should transition to the new feed by 4-5 weeks of age.
A gradual transition period, usually lasting 7-10 days, is recommended to prevent digestive upset and ensure chicks adapt smoothly to the new nutrient profile. Start mixing small amounts of grower feed into their existing starter feed, gradually increasing the proportion over time. This will help them adjust to the change in nutrition without experiencing adverse effects.
Tips for a Smooth Transition
When transitioning chicks to grower feed, it’s essential to do so gradually and carefully to avoid shocking their system. A sudden change can lead to digestive upset, decreased appetite, and even mortality.
Start by introducing a small amount of grower feed into the chicks’ diet 2-3 days before making the complete switch. You can mix it with starter feed in varying proportions, such as 25% grower feed and 75% starter feed. This allows the chicks to gradually get accustomed to the new feed without feeling overwhelmed.
Monitor their water intake and adjust the transition rate based on individual chick needs. If you notice any adverse reactions, slow down the transition process or revert to starter feed for a few days before resuming.
A smooth transition also involves maintaining cleanliness and hygiene in the coop and feeding areas. Ensure that all equipment is clean and sanitized, and store grower feed separately from starter feed to prevent cross-contamination. By following these guidelines, you can minimize stress and ensure a seamless transition to grower feed for your chicks.
Common Mistakes to Avoid When Brooding Chicks
As you prepare to brood your chicks, it’s essential to know what not to do – common mistakes can be costly in terms of time, stress, and even chick health. Let’s take a closer look at the most critical errors to avoid.
Temperature-Related Errors
When brooding chicks, it’s easy to get caught up in ensuring their basic needs are met, but temperature-related errors can have a significant impact on their development. One common mistake is keeping the brooder too hot or cold. Chicks need a consistent temperature between 90-95°F (32-35°C) for the first week, dropping by 5°F (3°C) each subsequent week. If the temperature fluctuates, chicks can become stressed, leading to respiratory issues and stunted growth.
Another mistake is failing to provide adequate ventilation. Chicks produce ammonia-rich droppings that can quickly build up in a poorly ventilated brooder, causing respiratory problems. To avoid this, ensure good airflow by placing the brooder in a well-ventilated area or using a fan to circulate air. Monitor temperature and humidity levels closely, taking corrective action if you notice any issues. For example, if the brooder is too hot, move it to a cooler location or use a thermostat to regulate the temperature. Regularly checking on your chicks will help you identify potential problems before they become major issues.
Other Common Mistakes to Watch Out For
When brooding chicks, it’s easy to get caught up in the excitement of watching them grow and develop, but overlooking some crucial details can lead to serious health issues. Inadequate ventilation is a common mistake many backyard chicken keepers make.
Proper airflow is essential for maintaining a healthy environment, especially when raising young chicks. If your brooder or coop doesn’t have adequate ventilation, it can quickly become stagnant and harbor ammonia from the chicks’ droppings. This not only poses health risks to the chicks but also leads to respiratory problems.
Maintaining good hygiene practices is also vital when brooding chicks. Cleaning the brooder regularly and removing soiled bedding on a daily basis will help prevent the buildup of bacteria, parasites, and fungi that can harm your chicks. Make it a habit to disinfect any equipment or surfaces with a pet-safe cleaner to keep disease at bay.
It’s also crucial to monitor temperature fluctuations in the brooder, as this can lead to heat stress or cold stress in chicks. Keeping a consistent temperature between 90-100°F during the first week and gradually lowering it by 5°F each week is key to preventing health issues.
Conclusion
As you’ve learned the ins and outs of brooding chicks, it’s essential to take a moment to recap what we’ve covered. From understanding chick development to creating an ideal environment for growth, we’ve discussed the crucial factors that contribute to healthy and happy chicks. Now that you’re equipped with this knowledge, it’s time to put it into action. Remember to keep your brooder clean, ensure proper ventilation, and maintain a consistent temperature between 90-100°F (32-38°C) during the first week.
As you care for your chicks, always prioritize their well-being and be prepared for any unexpected issues that may arise. Don’t hesitate to seek advice from a veterinarian if you have concerns about your chicks’ health or behavior. By following these guidelines and staying vigilant, you’ll set your young birds up for success and watch them grow into robust, thriving chickens.
Frequently Asked Questions
Can I use a cardboard box as a brooder for my chicks?
While it’s tempting to repurpose household items, using a cardboard box as a brooder can be risky. Cardboard boxes often have gaps and are prone to moisture accumulation, which can lead to temperature fluctuations and humidity issues that compromise chick health. Instead, consider investing in a purpose-built brooder that provides optimal ventilation, insulation, and ease of cleaning.
What if I notice temperature-related errors during the brooding period?
Yes, temperature-related errors are common when brooding chicks. Monitor your brooder’s temperature closely, ensuring it remains between 90-100°F (32-38°C) for the first week. Use a thermometer to track temperature fluctuations and adjust as necessary. If you’re using an electric heat lamp, be cautious not to overheat the area, which can lead to stress on the chicks.
How often should I clean the brooder during the brooding period?
Cleaning the brooder regularly is crucial for maintaining a healthy environment. Aim to clean the brooder at least twice a day, removing soiled bedding and replacing it with fresh material. This will help prevent disease transmission and maintain optimal ventilation.
What are some common mistakes to watch out for when selecting a brooder?
Some common mistakes when selecting a brooder include choosing one that’s too small or too large for your flock size. Also, be mindful of the brooder’s ventilation, insulation, and ease of cleaning features. Consider the type of bedding you’ll use and ensure it’s suitable for the brooder’s design.
How do I know if my chicks are getting enough humidity in the brooder?
Chicks require a certain level of humidity to stay healthy. Aim for a relative humidity of 50-60% during the first week, gradually increasing it to around 70-80% by the end of the second week. You can use a hygrometer to monitor humidity levels and adjust your ventilation strategy accordingly.