
When bringing home new chicks, setting up their environment is crucial to ensure they grow strong and healthy. One of the most critical aspects to consider is the brooder temperature, as it directly impacts their development from day one. Getting this right can make all the difference in determining the health and well-being of your flock. A well-maintained brooder not only keeps your chicks comfortable but also helps prevent costly mistakes that could lead to lost productivity or worse – the loss of your birds. In this comprehensive guide, we’ll take you through the ideal brooder temperature settings for both starter and grower stages, sharing essential tips on maintaining a healthy environment that fosters optimal growth.
Understanding the Importance of Brooder Temperature
Getting the brooder temperature just right is crucial for your chicks’ health and development, so let’s dive into why it matters. A stable and optimal environment can make all the difference in their growth.
The Critical Role of Temperature in Chicks’ Development
As you’re setting up the perfect brooder for your chicks, it’s essential to understand the critical role temperature plays in their development. Brooder temperature is crucial because it directly impacts your chicks’ growth rate, health, and survival.
A stable and optimal temperature range between 90-100°F (32-38°C) is vital for the first week of life. This temperature allows the chicks to develop their metabolism, which in turn affects their ability to regulate body heat and resist diseases. Studies have shown that chicks kept at an optimal temperature exhibit improved growth rates, with some studies indicating a 10-15% increase in weight gain.
However, if the brooder temperature is too high or too low, it can lead to serious health issues. For example, overheating can cause respiratory problems and even death, while underheating can slow down their growth rate and make them more susceptible to diseases.
To ensure your chicks thrive, keep a close eye on the temperature in the brooder and adjust as necessary. A good rule of thumb is to reduce the temperature by 5°F (3°C) every week until they’re around six weeks old. This will help you avoid any potential health risks and give your chicks the best chance at a healthy start in life.
Factors Influencing Brooder Temperature Requirements
When it comes to setting the optimal brooder temperature for your chicks, several factors come into play. The breed of chicken you’re raising is one significant consideration. Different breeds have varying heat tolerance levels, so it’s essential to research the specific needs of your chosen breed. For example, some popular backyard chicken breeds like Leghorns and Rhode Island Reds are more tolerant of cooler temperatures than others.
Another crucial factor is the age of your chicks. Chicks need a warmer environment as they develop from hatchlings into mature chickens. Generally, brooder temperature requirements decrease as chicks grow older. A good rule of thumb is to start with an initial temperature around 90-95°F (32-35°C) for the first week and then gradually reduce it by 5-10°F (3-6°C) each week until they’re about six weeks old.
Climate also plays a significant role in determining brooder temperature requirements. If you live in a cold region, you’ll need to provide additional heat sources or use specialized heating equipment designed for cold climates. Conversely, if you reside in a hot and humid area, you may need to adjust the ventilation system to prevent overheating.
Recommended Brooder Temperature Ranges
When it comes to keeping your chicks healthy and happy, setting the right temperature in their brooder is crucial. This section will walk you through recommended brooder temperature ranges for different ages of chicks.
Starter Brooders (0-4 Days Old)
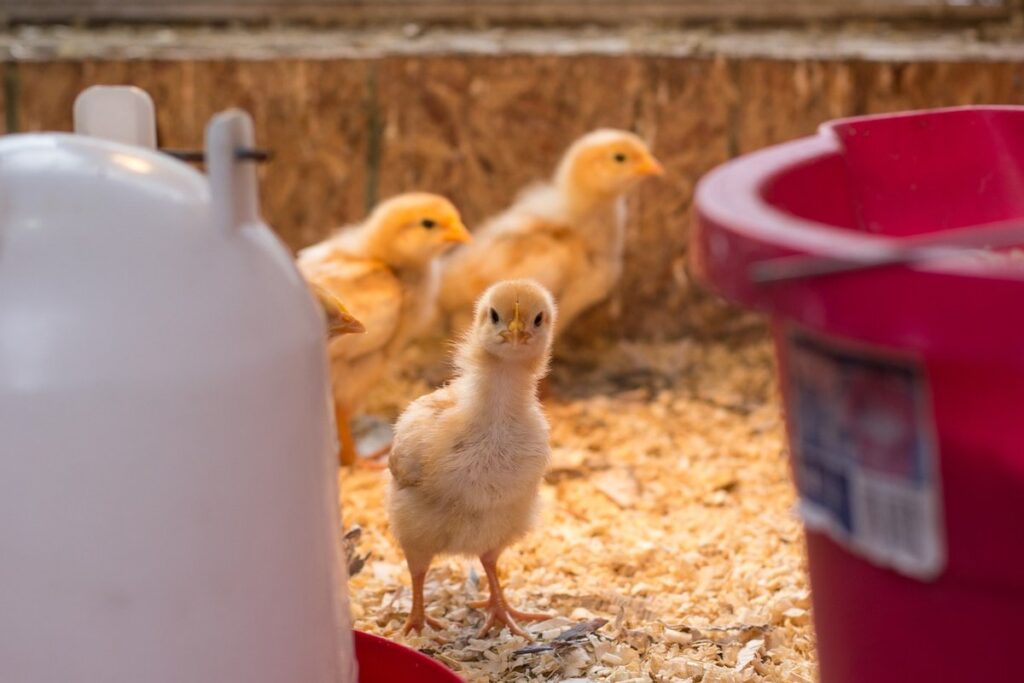
For chicks between 0 to 4 days old, it’s essential to maintain a precise temperature range to ensure their survival and healthy development. A starter brooder temperature of around 99-100°F (37-38°C) is ideal for the first few days after hatching. This higher temperature helps to compensate for the chick’s initial loss of heat, allowing them to regulate their body temperature more efficiently.
As you bring your chicks home from the hatchery, it’s crucial to provide a warm and humid environment. A relative humidity level of 50-60% is recommended during this critical period. You can achieve this by misting the brooder with water several times a day or using a humidifier specifically designed for poultry.
It’s also essential to monitor temperature and humidity levels closely, as chicks can quickly succumb to cold stress. Aim to reduce the temperature by 1-2°F (0.5-1°C) every few days until you reach around 95°F (35°C) at 4 days old. By following these guidelines, you’ll be providing your chicks with the best possible start in life.
Grower Brooders (5-21 Days Old)
As your chicks transition from fragile hatchlings to energetic growers, their environmental needs also shift. For brooder temperatures between 5-21 days old, the general guideline is to maintain a temperature range of around 90°F (32°C) for the first week, gradually decreasing by 5°F (3°C) every day thereafter until reaching 70°F (21°C).
This decrease in temperature helps regulate growth rates and prevent overheating. For example, if you’re caring for Leghorns or other lightweight breeds, they may require a slightly warmer environment than heavier breeds like Orpingtons. A good rule of thumb is to start with the recommended breed-specific temperature guidelines and adjust based on your local climate.
In areas with mild temperatures (60-80°F/16-27°C), you can aim for a lower starting point, such as 85°F (29°C). Conversely, in colder climates (below 40°F/4°C), it’s essential to provide supplemental heat to maintain the recommended temperature range. Be sure to monitor your chicks’ behavior and adjust the brooder temperature accordingly – if they appear stressed or lethargic, it may be a sign that the environment is too hot or cold.
Environmental Factors Affecting Brooder Temperature
When it comes to keeping your chicks safe and healthy, understanding how environmental factors affect brooder temperature is crucial. From humidity levels to air circulation, we’ll explore these key considerations together.
Insulation and Ventilation
When it comes to maintaining a stable brooder temperature for your chicks, insulation and ventilation play a crucial role. Proper insulation helps retain heat within the brooder, while adequate ventilation ensures that stale air is exchanged with fresh air, preventing overheating.
A well-insulated brooder can be as simple as adding extra bedding material or using thermal curtains to block cold drafts. For example, you can use shredded paper or straw to create a thick layer on the floor of the brooder. This not only absorbs moisture but also helps retain warmth. On the other hand, over-insulation can lead to overheating, so it’s essential to strike the right balance.
Ventilation is equally important and should be maintained at a rate of 1-2 air exchanges per hour for optimal health and comfort of your chicks. To ensure proper ventilation, you can use windows or install vents that allow fresh air to circulate while preventing cold drafts from entering. A good rule of thumb is to provide about one square foot of ventilation space for every 10 square feet of brooder area. By balancing insulation and ventilation, you’ll be able to maintain a stable environment that promotes healthy growth and development in your chicks.
Lighting and Heat Sources
When it comes to regulating brooder temperature, many farmers and backyard chicken keepers overlook the importance of lighting. However, proper lighting can play a significant role in maintaining an optimal environment for your chicks.
Incandescent bulbs are not recommended as they produce heat in addition to light, which can cause overheating issues. Instead, opt for specialized poultry-grade lamps or LED lights specifically designed for brooder use. These lights emit minimal heat and provide the necessary UV-A spectrum that’s crucial for chick growth and development.
In terms of safe heat sources, you have several options available. Heat lamps are a popular choice, but be sure to follow proper installation guidelines to prevent overheating. Ceramic heat emitters or infrared heaters can also be effective, as long as they’re placed at the correct distance from the chicks. A general rule of thumb is to position heat sources so that chicks can move away if needed. This will help prevent overcrowding and ensure a comfortable environment for your growing flock.
Monitoring Brooder Temperature
To ensure the health and safety of your chicks, it’s crucial to monitor brooder temperature closely, as fluctuations can be detrimental. This section will walk you through a simple, effective monitoring process.
Thermometer Types and Placement
When it comes to monitoring brooder temperature, choosing the right thermometer is crucial. There are several types of thermometers available, each with its own strengths and weaknesses.
Digital thermometers are a popular choice for their accuracy and ease of use. They typically come with a probe that can be placed in the brooder, allowing you to monitor temperature from a distance. Look for digital thermometers with a high accuracy rating (±0.1°C or ±0.2°F) and a wide temperature range (around 32-122°F or 0-50°C). Some popular brands include Taylor, ThermoWorks, and Lavelle.
Infrared thermometers are another option, using radiation to measure temperature. They’re often more accurate than digital thermometers at high temperatures but can be less reliable in drafty areas. Always place the thermometer probe or sensor at least 3-4 inches away from any heating elements, walls, or corners to ensure accuracy.
When choosing a thermometer, consider factors like durability, waterproofing, and ease of cleaning. Some thermometers come with built-in alarms or alerts for temperature fluctuations, which can be helpful in large brooder setups.
Make sure to follow the manufacturer’s placement guidelines for your chosen thermometer. Generally, it’s best to place the probe near the chick’s breathing zone (around 2-3 inches off the floor) and at least a foot away from any heating elements.
Setting Up a Temperature Recording System
Setting up a reliable temperature recording system is crucial to accurately monitor brooder temperatures. You’ll want to choose a device that can transmit data wirelessly to your smartphone or computer for easy monitoring. Consider investing in a digital thermometer with an onboard memory, which can store temperature readings over time.
Connect the thermometer to a temperature logger or data collector app on your phone or tablet using Bluetooth or Wi-Fi connectivity. Ensure the app is specifically designed for poultry farming and compatible with your device type. Some popular options include the Brooder Monitor and Pullet Pal apps.
Regularly calibrate your thermometer to ensure accuracy, as this can impact the reliability of your temperature readings. Compare temperatures between multiple devices to cross-validate results and identify any discrepancies. It’s also essential to document and save all recorded data for future reference or in case you need to troubleshoot issues with your brooder.
When selecting a temperature recording system, consider factors like durability, power requirements, and ease of use. Opt for devices that are specifically designed for agricultural use, as these often meet the high standards required for monitoring poultry.
Best Practices for Maintaining Optimal Brooder Temperature
To ensure your chicks stay healthy and thrive, it’s essential to maintain a consistent brooder temperature within the ideal range. Let’s explore some best practices for achieving this.
Regular Cleaning and Maintenance
Regular cleaning and maintenance are crucial aspects of maintaining a healthy brooder environment. A dirty or poorly maintained brooder can lead to the spread of diseases among the chicks, which can be devastating for their health and development. To prevent this, it’s essential to establish a regular cleaning schedule.
Clean the brooder at least once a day, removing soiled bedding and replacing it with fresh material. This will help reduce the risk of disease transmission and keep the environment clean and dry. Additionally, disinfect all surfaces, including walls, floors, and feeding and watering equipment, using a solution of 1 part bleach to 9 parts water.
It’s also vital to maintain proper ventilation in the brooder. Remove any debris or blockages from vents and ensure that they are functioning correctly. A well-ventilated brooder will help prevent ammonia buildup from urine and manure, which can be toxic to chicks. By incorporating regular cleaning and maintenance into your routine, you’ll create a healthy environment for your chicks to grow and thrive.
Troubleshooting Common Temperature Issues
Sudden drops or spikes in brooder temperature can be alarming and stressful for chicks. However, knowing what to do when this happens can help minimize the risk of health issues.
If you notice a sudden drop in temperature, check that your thermometer is accurate and calibrated correctly. Ensure that the thermometer is placed in a spot where it won’t come into contact with drafts or warm air from heating sources. You may need to adjust the position of the brooder or add extra bedding material to insulate it.
On the other hand, if you notice a sudden spike in temperature, ensure that your heat source isn’t malfunctioning and check for any blockages in the ventilation system. Make sure that there’s adequate airflow and reduce the amount of bedding material if necessary.
Regularly checking your brooder’s temperature and taking prompt action when issues arise will help maintain a stable environment for your chicks to grow healthy and strong.
Frequently Asked Questions
What if I’m running multiple brooders at different temperatures, how can I ensure they’re all maintained correctly?
Maintaining multiple brooder temperatures requires careful planning and organization. Consider investing in a temperature recording system to monitor the temperature of each brooder simultaneously. You can also set up separate thermometers for each brooder and place them in easy-to-access locations. This way, you’ll be able to quickly identify any temperature discrepancies and make adjustments as needed.
How often should I check the temperature in my brooder during extreme weather conditions?
During extreme temperatures (either hot or cold), it’s essential to monitor your brooder temperature more frequently. For every 10°F (5°C) change outside, adjust your brooder temperature by 1-2°F (0.5-1°C). This will help maintain a stable environment for your chicks. Consider investing in a weather station that can also track humidity levels to ensure optimal conditions.
Can I use different heat sources for my starter and grower brooders?
Yes, it’s recommended to switch to a lower-wattage heat source as your chicks mature. For example, you may start with a heat lamp in the starter phase but switch to a ceramic heat emitter or a thermostatically controlled heat mat during the grower phase. This will help prevent overheating and promote healthy growth.
How can I ensure my thermometers are accurate and reliable?
To guarantee accurate temperature readings, choose thermometers specifically designed for poultry applications. Digital thermometers with high-precision sensors are ideal for brooder temperature control. Always place thermometers in the same area where your chicks will be housed, and consider calibrating them regularly to maintain accuracy.
What if I notice a sudden drop or rise in temperature, what steps should I take?
No immediate action is required if you notice a slight temperature fluctuation (±1-2°F). However, if the temperature drops below 90°F (32°C) or rises above 100°F (38°C), take swift action. Adjust your heat source, add insulation, or increase ventilation as necessary to stabilize the environment and prevent potential health issues for your chicks.