
Hatching quail eggs can be a thrilling experience, but it requires careful attention to detail and a good understanding of the process. If you’re new to raising quails or trying your hand at incubation for the first time, choosing the right breed is crucial for success. Some popular breeds, such as Japanese Coturnix and Button quails, are known for their high hatch rates and gentle nature. However, even with proper breeding stock, hatching can be a gamble without the right conditions and techniques.
In this article, we’ll explore expert tips and techniques for successfully hatching quail eggs, from selecting breeds to natural incubation methods that mimic the quails’ natural environment. We’ll cover everything you need to know to increase your chances of successful hatching, including ideal temperature and humidity levels, turning and monitoring egg development, and avoiding common mistakes that can lead to failed hatch rates.
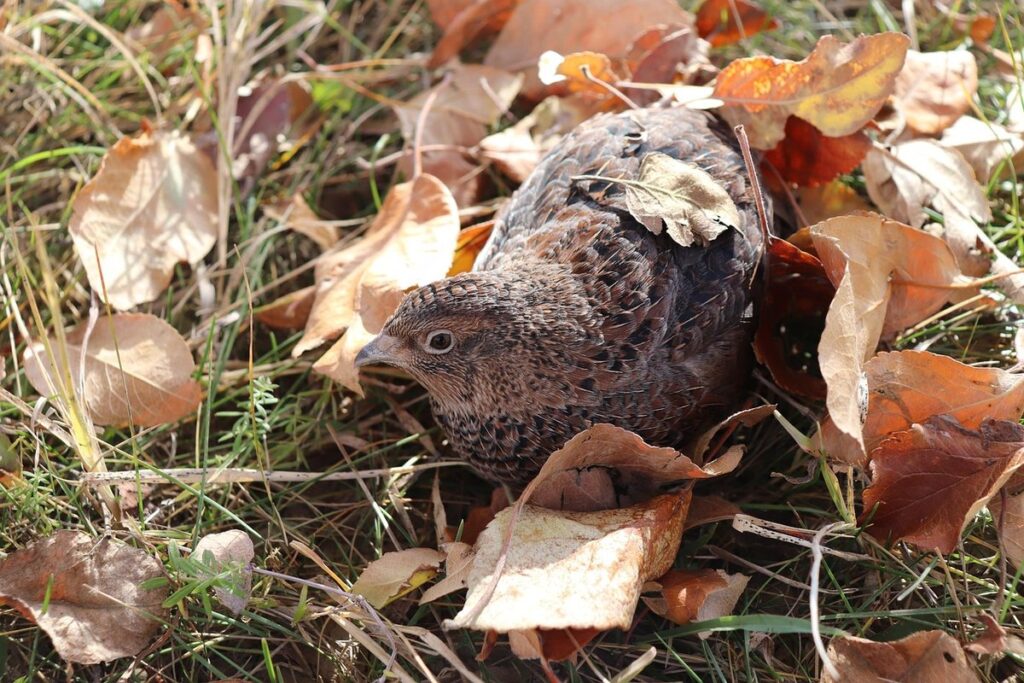
Choosing the Right Breeds
When choosing a breed of quail for hatching, it’s essential to consider their temperament, egg-laying capacity, and ease of handling. You want a breed that thrives under your care.
Characteristics of Successful Hatching Breeds
When selecting quail breeds for hatching eggs, there are key characteristics to look out for that can significantly impact the success of your hatch. One crucial factor is fertility rate – a breed with high fertility rates will naturally have more viable eggs. Look for breeds like Coturnix, Chinese Painted, and Japanese Quails, which boast impressive fertility rates above 90%.
Another essential characteristic is egg size. While smaller eggs are not always indicative of lower quality or viability, larger eggs generally carry higher chances of successful hatching. Some popular quail breeds known for laying medium to large eggs include Button Quails and Java Quails.
A breed’s history also plays a significant role in determining its suitability for hatching eggs. Researching the origin and development of your chosen breed will help you understand any potential genetic predispositions or weaknesses that may impact hatch rates. Some heritage quail breeds have been specifically developed for their high fertility, robust growth, and consistent egg-laying capabilities.
When evaluating a new breed for hatching, prioritize those with a proven track record of success and seek input from experienced breeders to ensure you’re making an informed decision.
Factors Influencing Fertility Rates
When selecting quail breeds for hatching eggs, it’s essential to consider the factors that influence fertility rates. The age of the breeding stock is a significant factor, with most breeders agreeing that birds between 1-2 years old produce better eggs.
Proper nutrition is also crucial in maintaining healthy fertility levels. A well-balanced diet rich in vitamins and minerals ensures that quails receive all necessary nutrients to support reproductive health. For example, calcium and vitamin D3 are essential for eggshell production and development.
Health conditions, particularly respiratory diseases, can significantly impact fertility rates. Regular health checks and vaccinations help prevent outbreaks and maintain the overall health of the flock.
Effective management practices also play a critical role in maintaining high fertility levels. This includes providing adequate space, proper ventilation, and maintaining cleanliness within the breeding area. A good rule of thumb is to ensure that each bird has at least 1-2 square feet of space per bird, and maintain a clean environment by regularly cleaning feeding and watering areas.
Quail breeders can also optimize their breeding program by keeping accurate records of fertility rates and identifying any patterns or issues within the flock.
Preparing the Breeding Stock
Before you start collecting eggs, it’s essential to prepare your breeding stock properly, which includes selecting healthy quails and setting up a suitable environment for them. A well-planned approach will ensure a successful hatching process.
Optimal Housing Conditions for Breeding Quails
When it comes to breeding quails for hatching, providing optimal housing conditions is crucial for their health and productivity. Quails are social birds that require adequate space to move around comfortably, so ensure you provide at least 1-2 square feet of floor space per bird.
Temperature control is also vital during the breeding season. Quails prefer a temperature range of 65°F to 75°F (18°C to 24°C) with a slight drop in temperature at night. You can achieve this by installing thermostats and heaters, ensuring that the temperature remains consistent throughout the day.
Lighting is another essential aspect of quail housing. Quails need UV light to stimulate egg production and breeding behavior, so provide a balanced spectrum of lighting that mimics natural daylight. A photoperiod of 14 hours of light and 10 hours of darkness will help regulate their reproductive cycle.
Maintain high standards of sanitation in the quail enclosure by cleaning it daily and disinfecting all surfaces regularly. This will prevent diseases from spreading among the flock, ensuring the health and well-being of your breeding quails.
Nutrition and Supplementation
When it comes to breeding quails for egg hatching, providing optimal nutrition is crucial. During breeding season, quails require a balanced diet rich in protein, vitamins, and minerals. A good quality commercial quail feed should be the main staple of their diet, but you may also need to supplement with additional nutrients to ensure they’re getting everything they need.
Calcium is an essential mineral for quail health, particularly during breeding season when egg production increases. You can provide crushed oyster shells or cuttlebone as a source of calcium. However, make sure not to overdo it, as excessive calcium can lead to kidney problems.
In addition to calcium, you may also need to supplement with vitamins A and D3, which are important for maintaining strong bones and overall health. You can add these supplements to their feed or provide a grit mix specifically formulated for quails.
Some practical tips include providing fresh water at all times, offering a variety of fruits and vegetables as treats, and making sure the quail’s enclosure is clean and well-ventilated. By paying attention to your quails’ nutritional needs, you can help ensure they stay healthy and productive throughout breeding season.
Egg Collection and Storage
When collecting quail eggs for hatching, it’s essential to handle them gently and store them properly to ensure their viability until incubation. Proper storage techniques are outlined below.
Best Practices for Collecting Quail Eggs
Collecting quail eggs for hatching requires careful attention to detail to prevent damage and maintain cleanliness. When removing eggs from the nesting boxes, it’s essential to do so gently to avoid cracking them. Use a soft-bristled brush or your fingers to carefully sweep away any debris that may be stuck to the eggshell.
To minimize the risk of breakage, collect eggs frequently, ideally every 6-8 hours during peak laying periods. This will also help you identify any potential issues with the hen’s health or nesting behavior. When handling eggs, make sure your hands are clean and dry to prevent transferring bacteria to the delicate surfaces.
If an egg does crack during collection, do not discard it immediately. Instead, carefully assess whether it can still be used for hatching by checking its internal integrity using a soft light source or a candling tool. If the yolk is visible through the crack, it’s likely that the embryo has already died, and you should dispose of the egg to prevent contamination.
Regularly cleaning the nesting boxes will also help maintain hygiene and reduce the risk of bacterial infections. Change the bedding material frequently, and disinfect any soiled areas with a gentle, non-toxic cleaner specifically designed for use in poultry environments.
Proper Storage Techniques for Fresh Eggs
When it comes to storing quail eggs for hatching, proper storage techniques are crucial to ensure their quality and viability. You’ll want to store them in a cool, dry place away from direct sunlight, which can cause the embryo to develop unevenly.
For long-term storage, consider using an egg carton or a specialized quail egg storage container that maintains a consistent humidity level. This will help keep the eggs fresh for up to 7-10 days. If you don’t have access to such containers, a simple cardboard box with airholes can also work.
To maintain optimal temperature conditions, store the eggs in a location with a consistent temperature between 50°F and 60°F (10°C to 15°C). Avoid storing them near heat sources or drafty areas that could cause the eggs to cool or warm up too quickly. Always handle the eggs gently, as rough handling can damage the embryo inside.
When transferring eggs from one storage location to another, make sure they’re wrapped in a paper towel or cloth to prevent accidental breakage. With proper care and attention, your quail eggs will remain safe and secure until hatching time.
Artificial Incubation Methods
When it comes to hatching quail eggs, you’ve got a few artificial incubation methods to choose from. Let’s take a closer look at each one and their specific requirements for success.
Setting Up a Quail Egg Incubator
Setting up a quail egg incubator requires attention to detail and precision to ensure a successful hatch. To begin, you’ll need the following equipment: an incubator specifically designed for small eggs like quails (usually around 20-30 inches in size), a temperature gauge, a thermometer, a hygrometer, and a humidifier.
First, position the incubator on a flat surface and ensure it’s stable. Next, set the temperature to around 99-100°F (37°C) for the first 24 hours, then reduce it by 1-2% each day until you reach 98°F (36.5°C) on the 18th day. This gradual drop in temperature mimics the natural decrease in temperature during incubation.
Maintain humidity levels between 50-60% by adjusting the humidifier as needed. Monitor the temperature and humidity closely, making adjustments only when necessary. You can also use an egg turner to minimize manual handling of eggs. It’s essential to follow the manufacturer’s guidelines for your specific incubator model to ensure optimal performance. By following these steps, you’ll be well on your way to successfully hatching quail eggs.
Monitoring and Maintaining the Incubation Process
Monitoring and maintaining the incubation process is crucial for successful hatching. As you monitor the quail eggs’ development, keep track of their progress by noting the date, temperature, humidity, and any visual changes.
Embryo development stages typically occur as follows: day 1-3 – fertilization; day 4-6 – morula formation; day 7-10 – blastocyst stage; day 11-14 – gastrulation; and day 15-18 – organogenesis.
During this process, potential issues may arise. Be aware of factors such as temperature fluctuations (ideally between 99°F to 100°F), humidity levels (50-60%), and excessive egg movement or handling.
If you notice any problems, troubleshoot them promptly: low fertility rates might indicate incorrect incubation temperature; inconsistent development could be due to inadequate humidity control; and irregular air circulation may cause uneven embryo growth.
Keep in mind that quail eggs are more sensitive than chicken eggs. Regular checks on the incubator’s temperature, fan settings, and egg rotation ensure optimal conditions for healthy development.
Natural Hatching Methods
When it comes to hatching quail eggs, many breeders swear by natural methods that mimic the birds’ wild environment. In this section, we’ll walk you through these techniques step-by-step.
Creating an Ideal Brooding Environment
Creating an ideal brooding environment for quail eggs is crucial for successful hatching. The first step is to maintain a consistent temperature between 99°F and 101°F (37°C to 38°C). You can use a thermometer to monitor the temperature, making sure it’s not too hot or cold.
Humidity levels are also vital in creating an ideal environment. Quail eggs need a humid atmosphere to hatch successfully. Aim for a humidity level of around 60-70%. You can achieve this by placing the incubator in a covered area or using a damp cloth to maintain moisture.
Proper ventilation is equally important. Ensure good airflow by keeping the incubator away from walls and windows. This will prevent moisture buildup and reduce the risk of mold growth. Remember, quail eggs are sensitive to extreme temperatures and humidity levels. By controlling these factors, you’ll create an ideal environment for natural hatching.
When setting up your brooding area, consider using a dedicated space with minimal distractions. Keep the area clean and well-ventilated to promote healthy development. With attention to temperature control, humidity levels, and ventilation, you’ll be well on your way to successfully hatching quail eggs.
Assisting With the Hatching Process
As you wait for your quail eggs to hatch, it’s essential to know when and if they are successful. A successful hatch is characterized by the eggshell membrane breaking away from the chick’s beak, allowing it to pip (break through) and emerge completely. You’ll notice this happening around 72-96 hours after incubation begins.
However, not all hatches are smooth sailing. Be aware of potential complications such as stuck eggs (the chick is unable to break free), egg binding (the yolk or membranes stick to the inside of the shell), or unviable embryos. If you notice any unusual swelling, blood on the eggshell, or the egg’s temperature drops significantly, intervene immediately.
If a hatch is successful, ensure proper post-hatch care for your new chicks. Keep them in a safe, warm environment (around 90°F) and provide adequate food and water. You’ll also want to monitor their stool output; quail chicks should produce droppings within the first 24 hours of hatching.
Remember that monitoring temperature fluctuations is crucial during this time. Ensure your incubator or brooder maintains a consistent heat source, as temperature fluctuations can be detrimental to newly hatched quails.
Tips for Success and Troubleshooting
Now that you’ve got your quail eggs safely incubated, let’s dive into some crucial tips to ensure successful hatching, along with troubleshooting solutions to common problems.
Common Issues Affecting Hatch Rates
When it comes to hatching quail eggs, there are several common issues that can affect hatch rates. One of the most significant factors is poor fertility. This can be due to a number of reasons, including the age and quality of the breeding stock, as well as the condition and handling of the eggs.
Proper egg handling is crucial to ensuring high fertility rates. Eggs should be handled gently and kept in a clean environment to prevent damage and contamination. If you’re purchasing eggs from a breeder, make sure they have good practices in place for collecting and storing eggs.
Another common issue affecting hatch rates is incubator malfunction. This can be due to a number of factors, including incorrect temperature settings, humidity levels that are too high or low, or issues with the ventilation system. Regular maintenance and monitoring of your incubator is essential to preventing these types of problems.
If you’re experiencing difficulties with hatch rates, it’s also possible that there may be an issue with egg handling mistakes during collection or transportation. Eggs should be stored in a carton or container that provides adequate protection against shock and vibration. By being mindful of these potential issues and taking steps to prevent them, you can help ensure higher hatch rates and healthier chicks.
Advanced Techniques for Improving Hatching Success
As you’ve gained experience with hatching quail eggs, it’s time to take your skills to the next level. Embarking on advanced techniques can significantly improve hatch rates and overall success. One crucial aspect is embryo selection. When choosing which embryos to incubate, consider factors such as egg shape, size, and any visible cracks or imperfections.
Artificial insemination (AI) is another technique that yields impressive results. This method involves introducing fertile sperm directly into the oviduct of a quail hen. Not only does AI boost hatch rates, but it also allows for more precise control over breeding programs. Research has shown that well-executed AI programs can increase hatch success by as much as 30%.
Genetic improvement is also essential for long-term success. By selecting and breeding quails with desirable traits – such as robust health, disease resistance, and exceptional egg-laying abilities – you’ll be building a strong foundation for your flock’s future. Consult reputable breeders or experts to guide you in identifying the best genetics for your program.
Frequently Asked Questions
What are the ideal temperature and humidity levels for natural incubation of quail eggs?
Quails naturally incubate their eggs at a consistent temperature between 99°F (37°C) and 100°F (38°C), with a relative humidity of 50-60%. To replicate this environment, you can use a well-insulated brooder or a quail egg incubator set to maintain these temperatures. A hygrometer will help monitor the humidity levels.
Can I collect eggs from the coop for hatching, or do they need special handling?
Yes, you can collect eggs from the coop for hatching, but it’s essential to handle them gently to avoid cracking the eggs. Collect eggs frequently to prevent damage and contamination. Store fresh quail eggs in a cool, dry place until ready for incubation.
How often should I turn the eggs during the incubation process?
Quails naturally turn their eggs every 30-60 minutes. To replicate this process artificially, use an automatic egg-turner or manually rotate the eggs 3-4 times daily. Ensure consistent turning to prevent the yolks from sticking to one side.
What are some common issues affecting hatch rates, and how can I troubleshoot them?
Common issues include temperature fluctuations, humidity imbalance, poor egg quality, and inadequate egg handling. To troubleshoot, monitor your incubation conditions closely, ensure proper ventilation, use a good egg turner, and maintain cleanliness in the brooder.
How do I know if an egg has started to pip or if it’s still viable?
A pipping quail egg will show signs of cracking on the shell, usually around day 7-10 of incubation. To determine viability, gently candle the eggs after day 7, looking for blood vessels and a clear embryo outline. If unsure, consult a poultry expert for guidance.