
If you’re an avid backyard farmer or simply looking to bring some excitement into your life, raising quails can be an incredibly rewarding experience. With their charming appearance and delicious eggs, it’s no wonder why many are turning to quail breeding as a fun and profitable venture. However, successfully breeding and hatching quails requires careful planning and attention to detail. From selecting the right breed to creating an optimal environment, it’s essential to understand the intricacies of quail care. In this comprehensive guide, we’ll take you through the ins and outs of breeding and hatching quails, covering topics such as breeds, setting up a suitable environment, breeding programs, nutrition, and health considerations. By following our expert advice, you’ll be well on your way to successfully raising these delightful birds.
Choosing the Right Breed
With so many fascinating quail breeds out there, it can be overwhelming to decide which one is right for you. This section will help guide you through the process of selecting a breed that fits your experience and preferences.
Understanding Quail Characteristics
Quail breeding and hatching can be an exciting venture, but it’s essential to choose the right breed for your needs. With over 30 recognized breeds of quails, each with its unique characteristics, temperament, and egg-laying abilities, selecting the perfect one can be a daunting task.
Let’s start by looking at some popular breeds: Japanese Quail, Button Quail, Chinese Painted Quail, and California Quail. Japanese Quails are known for their prolific egg-laying, producing up to 300 eggs per year, making them an ideal choice for commercial breeders. On the other hand, Button Quails are small, gentle birds that thrive in pairs, while Chinese Painted Quails are prized for their stunning plumage.
When choosing a quail breed, consider your experience level and space constraints. If you’re a beginner, Button Quails or Japanese Quails might be an excellent starting point due to their hardiness and adaptability. If you have limited space, California Quails are a great option as they require less space than other breeds.
It’s also essential to research the specific needs of each breed, including diet, temperature requirements, and exercise needs. By understanding the unique characteristics of each breed, you can make an informed decision and choose the perfect quail for your operation.
Considering Space and Climate Requirements
When it comes to choosing the right breed of quail for breeding and hatching, considering space and climate requirements is crucial. Different breeds have unique needs when it comes to space and climate, so it’s essential to research and understand these requirements before making a decision.
For example, some breeds like Japanese Coturnix Quails are well-suited for small spaces and can thrive in apartments or backyards with minimal square footage. They require about 2-3 square feet of space per bird and prefer temperatures between 65-75°F (18-24°C). On the other hand, larger breeds like Button Quails need more space – around 4-5 square feet per bird – and can tolerate a wider temperature range, from 60-80°F (15-27°C).
When assessing your quail’s climate requirements, consider factors such as humidity levels, ventilation, and natural light. For example, some breeds are sensitive to high humidity, while others prefer dry environments. Ensure you provide adequate shelter, food, water, and nesting areas for your quails. Researching the specific breed you’re interested in will help you create an optimal environment that meets their unique needs.
Researching Quail Breeding Programs and Associations
When it comes to choosing the right breed of quail, researching reputable breeding programs and associations is crucial. This ensures not only the health but also the quality of the quails you’ll be working with. A good breeding program prioritizes genetics, sanitation, and humane treatment.
To get started, look for breeders who are registered with national or local quail associations. These organizations often have strict guidelines and standards in place to ensure the welfare of the birds. Some notable associations include the American Bantam Association (ABA) and the Quail Breeders Club (QBC).
Check if the breeding program has a transparent history, providing information on their breeding lines, hatch rates, and health testing protocols. A reputable breeder will also have a strong understanding of genetics and be able to provide you with information on the specific traits you’re looking for in your quails.
When researching breeders, pay attention to reviews, testimonials, and word-of-mouth recommendations. This can give you valuable insight into their reputation and breeding practices. By doing your due diligence and selecting a reputable breeder or association, you’ll be more likely to end up with high-quality birds that will thrive in your care.
Setting Up a Quail Breeding Program
To successfully start a quail breeding program, you’ll need to set up a dedicated space for your birds and acquire the necessary equipment. This section will guide you through that process.
Preparing the Environment
When setting up a quail breeding program, it’s essential to prepare a suitable environment for your birds. This means creating a clean, safe, and healthy space where they can thrive.
Start by selecting the right enclosure – either individual cages or group coops. For smaller operations, cages are ideal as they allow for easy monitoring of each bird’s health and behavior. Group coops, on the other hand, promote social interaction among quails and can be more cost-effective in larger setups.
Regardless of your chosen setup, ensure it is well-ventilated to prevent ammonia buildup from droppings and keep your birds comfortable. Provide adequate lighting – both natural and artificial – as this will impact egg production and chick development.
Sanitation and hygiene are critical components of a quail breeding program. Clean the enclosures daily by removing soiled bedding, disinfecting surfaces with a solution of 1 part white vinegar to 9 parts water, and replacing it with fresh material. This will help prevent disease outbreaks and maintain your birds’ overall health.
Regularly inspect equipment for signs of wear or damage and replace them as needed to avoid contamination and ensure the well-being of your quails.
Acquiring Healthy Quails
When acquiring healthy quails for your breeding program, it’s essential to purchase from reputable breeders or hatcheries. Look for established businesses with good reviews and a proven track record of producing high-quality birds. Reputable sellers will be transparent about the quail’s lineage, health history, and any genetic testing they may have done.
When selecting quails for breeding, there are several factors to consider. First, check the bird’s overall appearance and behavior. Healthy quails should have bright eyes, clean feathers, and a lively demeanor. Next, inspect their feet and legs for signs of injury or disease. Pay attention to any labored breathing or unusual vocalizations.
It’s also crucial to ensure that your quails are free from diseases such as coccidiosis, histomoniasis, and respiratory infections. Reputable breeders will provide documentation on the health status of their birds and may offer guarantees against certain diseases. Finally, consider the genetic diversity of the quails you’re purchasing. A diverse gene pool is essential for maintaining a healthy breeding program.
By following these guidelines, you can acquire healthy quails that are well-suited for your breeding program and help ensure its long-term success.
Understanding Quail Nutrition and Health
When setting up a quail breeding program, it’s essential to understand the nutritional needs of these birds. Quails are omnivores and require a balanced diet that includes proteins, carbohydrates, fats, vitamins, and minerals.
A good starting point is to provide a commercial quail feed as the main staple, supplemented with fruits, vegetables, and insects for added variety. For example, you can offer leafy greens like kale or spinach, fresh fruits like berries or apples, and live insects like crickets or mealworms. However, be cautious not to over-supplement, as this can lead to nutritional imbalances.
Quails are also prone to certain health issues, such as coccidiosis, respiratory problems, and vitamin deficiencies. To prevent these diseases, ensure that the coop is clean and well-ventilated, provide a dust bath for quails to regulate their body temperature, and supplement with probiotics or vitamins D3 and E.
Common signs of nutritional deficiencies include lethargy, weight loss, or feather plucking. Be attentive to your quail’s overall health and adjust their diet accordingly. It’s also crucial to ensure access to fresh water at all times. By prioritizing proper nutrition and health care, you’ll set your quails up for success in your breeding program.
Breeding Quails: Selection, Mating, and Incubation
When it comes to successfully breeding quails, selecting the right birds is crucial. In this next part, we’ll cover everything you need to know about quail selection, mating, and incubation.
Selecting Suitable Parents
When selecting suitable parents for breeding quails, it’s essential to consider several factors that ensure healthy and fertile offspring. Firstly, age plays a significant role in the selection process. Breeder quails should be between one to three years old, as they have reached maturity and are at their prime reproductive stage.
It’s also crucial to assess the weight of your potential breeding birds. Quails with an ideal weight for their breed will ensure optimal fertility. Aim for quails that weigh 80-120 grams for most breeds.
Egg production is another vital factor in selecting suitable parents. You want breeding birds that can lay a steady supply of fertile eggs consistently throughout the year. A good rule of thumb is to select quails that produce at least six eggs per week.
Lastly, genetic diversity is critical when choosing parent birds. Inbreeding can lead to weakened immune systems and reduced fertility in offspring. Select parents from different bloodlines or breeds to maintain a healthy gene pool and reduce the risk of inherited diseases.
When selecting your breeding stock, prioritize quails with robust health, high egg production, and good fertility rates. With careful selection, you’ll set yourself up for success and increase the chances of raising healthy and thriving quail chicks.
Understanding Mating and Fertility Issues
When it comes to breeding quails, understanding mating and fertility issues is crucial for successful reproduction. To identify fertile males and females, look for physical characteristics such as plumage condition, body weight, and overall health. A healthy rooster should have a well-groomed appearance, while a hen’s laying history can indicate her fertility.
However, common fertility issues in quails include low sperm count, testicular problems, or egg yolk peroxidase (EYP) deficiency in females. To mitigate these issues, ensure that your birds receive a balanced diet and adequate space for exercise. A 1:5 to 1:10 rooster-to-hen ratio is recommended to prevent stress on the males.
Another critical factor is age. Breeding quails should be at least six months old, with roosters matured enough to perform their duties effectively. Monitor your birds’ behavior and mating habits closely, as signs of fertility issues can manifest in irregular courtship displays or reduced reproductive activity. By paying attention to these factors, you’ll be better equipped to identify and address potential fertility problems early on.
Incubation Techniques and Best Practices
When it comes to incubating quail eggs, proper temperature control and humidity management are crucial for successful hatching. The ideal temperature range for incubation is between 99°F (37°C) and 100°F (38°C), with slight variations depending on the breed. A digital incubator or a thermometer can help you maintain this precise temperature.
Humidity levels should be maintained between 50% to 60%. You can use a humidifier or cover the eggs with a damp cloth to achieve this. Turning the eggs is also essential, as it prevents the embryo from sticking to the shell and ensures even development. Aim for 3-5 turns per hour, using a turning device specifically designed for quail eggs.
Some breeders prefer a “dry” incubation method, where humidity levels are kept low (around 40%). This can be beneficial for certain breeds or in areas with high humidity. However, it’s essential to research the specific needs of your quail breed before attempting this method. Regularly monitoring temperature and humidity levels will help you identify any issues early on and ensure a healthy hatch rate.
Hatching Quail Eggs: Tips and Tricks
Now that you’ve successfully incubated your quail eggs, it’s time to learn how to hatch them successfully. Here are some valuable tips to ensure a healthy start for your new quail babies.
Monitoring Egg Development
Monitoring egg development is crucial to ensure a successful hatch. To do this effectively, you’ll want to observe the eggs closely for any signs of incubation. Start by checking the eggs daily, preferably at the same time each day, as you’ll be able to track changes more easily.
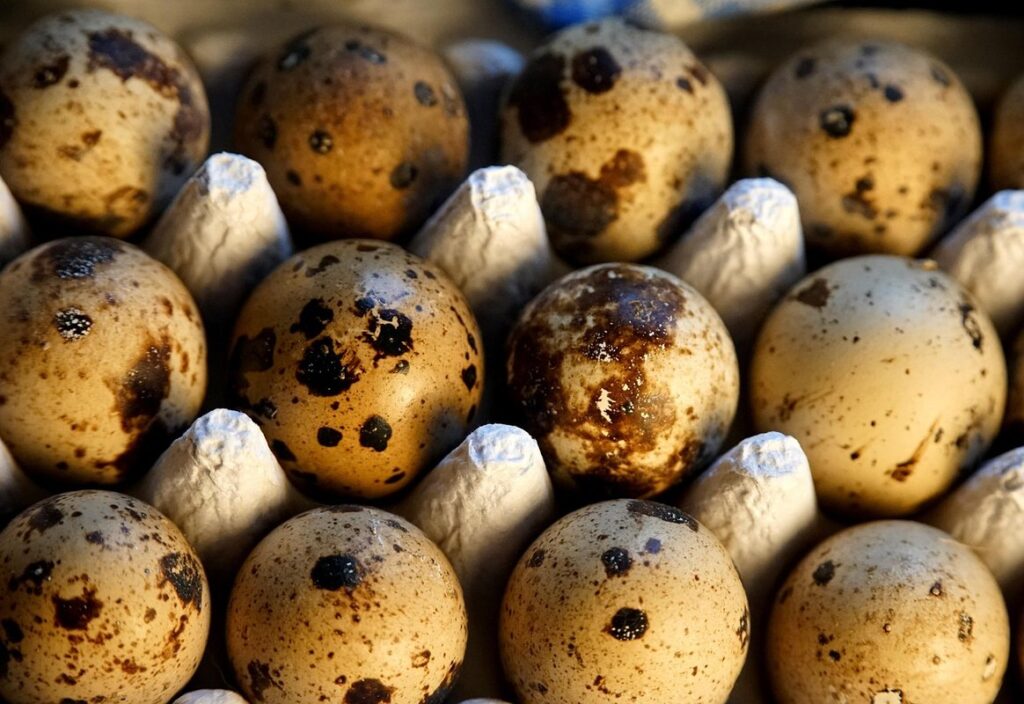
Look for the air sac’s position in the egg – it should move upward toward the pointed end. The yolk should also settle closer to the top, leaving a small space between it and the white. As incubation progresses, the eggs will turn from shiny to dull, indicating that embryonic development is underway.
Keep an eye out for potential issues such as cracks or bloodstains on the eggshell, which can be signs of bacterial contamination or internal damage. Monitor humidity levels in the incubator closely – 50-60% relative humidity is ideal during quail egg development.
If you notice any unusual odors or a decrease in temperature, take action immediately to correct the issue. Finally, listen for pip sounds around day 17-18; this usually indicates that hatching is just around the corner.
Preparing for Hatching Day
As hatching day approaches, it’s essential to be aware of what to expect and know the signs of incubation failure. Quail eggs usually hatch between 16-18 days of incubation at a temperature of around 99°F (37°C). On the day before hatching, you may notice the eggs stop rocking or moving as much as they did earlier in the incubation period.
On actual hatching day, listen carefully for peeping sounds coming from the eggs. This is usually around 24 hours after pipping (the moment when the chick breaks out of its shell). If there are no peeps within this timeframe, it’s likely that something has gone wrong during incubation.
Some common signs of incubation failure include: delayed or absent pipping, cracked or broken shells, and an unusual or foul odor emanating from the eggs. Be sure to check your incubator temperature settings, humidity levels, and egg turning mechanism before concluding that a hatch failure is due to an issue outside of these variables. Regularly monitoring your quail’s health and adjusting their living conditions accordingly will greatly improve your chances of a successful hatch.
Caring for Newly Hatched Quails
When you finally see those little quail chicks pip out of their eggs and take their first wobbly steps into the world, it’s a moment that can bring tears of joy to even the most seasoned breeder. But caring for newly hatched quails requires more than just cooing over their cute antics – it demands attention to detail and a solid understanding of their needs.
First and foremost, make sure your brooder is set up with adequate ventilation and temperature control. Newly hatched quails are fragile and sensitive to drafts, so ensure the enclosure is draft-free and kept at around 90-95°F (32-35°C). For the first few days, it’s essential to maintain a humid environment – ideally between 50-60% relative humidity.
Feed them a starter feed that’s specifically formulated for young birds. You can start introducing treats like millet or oats once they’re about three days old. Fresh water is also crucial – make sure it’s changed frequently and kept in shallow, easy-to-reach containers to prevent spills.
Monitor their overall health closely, keeping an eye out for signs of stress, dehydration, or disease. A good rule of thumb is to provide one gallon of food and 1.5 gallons of fresh water per bird per day. With proper care and attention, your quail chicks will thrive and grow into robust, healthy birds in no time.
Raising Quail Chicks: Growth Stages and Nutrition
Quail chicks grow rapidly, and understanding their specific growth stages is crucial for providing optimal nutrition. This will help you ensure your young quails develop into healthy birds.
Understanding Quail Growth Stages
Understanding quail growth stages is crucial for raising healthy and thriving quails. From embryonic development to juvenile stage, each phase requires specific care and attention. Let’s break down the key growth stages of quails.
Embryonic development begins when a fertile egg is incubated at 99-100°F (37-38°C) for about 16-18 days. During this period, the embryo develops vital organs, feathers, and body parts. Keep in mind that turning eggs daily is essential to prevent sticking to the walls of the incubator.
After hatching, quail chicks emerge blind and helpless but start pecking at their surroundings almost immediately. They require a temperature range of 90-95°F (32-35°C) for about two weeks, after which it can be gradually reduced to adult levels. Feeding quail chicks is critical during this stage; provide a starter feed with a mix of crumbled oats and commercial chick starter.
Between six to eight weeks, your quails will start molting, or shedding their old feathers to grow new ones. During the juvenile stage, they should be fed a balanced diet that includes grains like wheat, corn, and millet, along with fruits and vegetables.
Meeting Nutritional Needs at Each Stage
As quail chicks grow and develop, their nutritional needs change significantly. It’s essential to provide them with the right diet at each stage of growth to ensure they thrive.
During the first week of life, quail chicks require a high-protein diet to support rapid growth and development. A starter feed specifically formulated for game birds or quails is ideal during this period. This type of feed typically contains 20-25% protein, which meets their needs for muscle growth and feather development.
As quail chicks grow older, they need less protein but more calories for energy. At around 4-6 weeks, you can transition them to a finisher feed that has around 16-18% protein. This type of feed will help support their continued growth and prepare them for laying or breeding purposes.
In addition to commercial feeds, it’s also essential to provide quail chicks with fresh water and access to calcium-rich foods like crushed oyster shells or cuttlebone. This ensures they have the necessary nutrients to develop strong bones and eggshells.
Proper nutrition at each stage of growth is critical for raising healthy, productive quails. By providing a balanced diet that meets their changing nutritional needs, you can help your quail flock thrive.
Managing a Successful Quail Flock
To keep your quail flock thriving, it’s essential to understand how to manage their daily needs and create an optimal environment for growth and health. We’ll walk you through the key factors to consider.
Maintaining Records and Tracking Progress
Maintaining accurate records and tracking progress is crucial to the success of a quail breeding program. Without proper documentation, it’s easy to lose track of important details such as individual bird identification, breeding schedules, hatch rates, and egg production.
To get started, invest in a reliable record-keeping system that suits your needs. You can use digital tools like spreadsheets or apps specifically designed for poultry management, or stick to traditional methods using paper logs or notebooks. Make sure to include essential information such as:
• Quail identification (name, age, sex, and genetic lineage)
• Breeding schedules and pairings
• Egg collection and incubation dates
• Hatch rates and chick survival rates
• Health checks and vaccination records
Regularly review your records to identify patterns and areas for improvement. For instance, you may notice that certain breeds are more prolific egg layers or have higher hatch rates. This information will help you make informed decisions about breeding stock selection, nutrition, and environmental conditions.
By keeping accurate records and tracking progress, you’ll be able to refine your quail breeding program over time, leading to healthier birds, better reproductive performance, and ultimately, a more successful operation.
Balancing Production and Welfare
As a quail breeder, you’re likely familiar with the constant juggling act of managing a successful flock. One of the most delicate balances to strike is between egg production and animal welfare. On one hand, you need a steady stream of eggs for breeding and hatching purposes. On the other hand, you must prioritize your birds’ health and well-being.
To achieve this balance, start by creating a safe and comfortable environment for your quails. This includes providing ample space, clean living quarters, and access to nutritious food and fresh water at all times. Monitor your birds’ behavior and adjust their diet accordingly – for example, offering more protein-rich feed during breeding seasons when egg production is high.
In addition to environmental considerations, also pay attention to stress levels within the flock. A stressed quail is unlikely to produce eggs regularly or thrive overall. To mitigate this, ensure a calm atmosphere by reducing noise levels and providing adequate hiding places for your birds. By striking this balance between productivity and welfare, you’ll not only maintain a healthy flock but also enjoy higher egg yields and better breed quality in the long run.
Conclusion: Tips for Long-Term Success
As you begin your quail breeding and hatching journey, it’s essential to keep in mind that long-term success requires patience, dedication, and a well-thought-out plan. To ensure you’re setting yourself up for success, start by establishing clear goals and objectives for your quail operation. What do you want to achieve? Are you looking to breed a specific type of quail or focus on hatching healthy chicks? Having a clear vision will help guide your decisions and keep you motivated throughout the process.
Regularly monitor and record your breeding and hatching progress, tracking factors such as egg fertility rates, chick mortality rates, and hatchability. Analyzing this data will enable you to identify areas for improvement, make informed decisions, and refine your techniques over time. By staying organized, adapting to challenges, and continually learning from your experiences, you’ll be well on your way to achieving long-term success in quail breeding and hatching.
Frequently Asked Questions
How can I ensure the health and well-being of my quails, especially during breeding season?
Regular veterinary check-ups, proper nutrition, and a clean environment are crucial for maintaining your quails’ health. Ensure they have access to fresh water, nutritious feed, and adequate shelter from extreme temperatures. Regularly monitor their behavior, droppings, and overall condition to catch any potential issues early on.
Can I breed quails in areas with harsh winters or extreme temperatures?
Yes, some breeds are more tolerant of cold or hot climates than others. Research the specific temperature requirements for your chosen breed and take necessary precautions such as providing insulation, shelter, or using climate-controlled enclosures. Always prioritize your quails’ comfort and safety.
How do I manage space constraints when breeding quails in a small backyard?
Quail breeds like Button Quail or King Quail are ideal for smaller spaces due to their compact size and reduced egg-laying requirements. Consider vertical farming techniques, nesting boxes, or using coops with built-in perches to maximize space efficiency while maintaining optimal living conditions.
What are some common mating and fertility issues I should be aware of?
Male-female ratio imbalance, inadequate lighting, poor nutrition, and stress can affect fertility rates. Ensure a 1:2-3 male-to-female ratio, provide adequate light (14 hours/day), offer balanced feed, and minimize quail stress through regular cleaning and maintenance.
How do I handle incubation failures or hatching issues?
Keep accurate records of egg collection dates, incubator settings, and hatch rates to identify potential problems. Regularly clean the incubators, monitor temperature and humidity levels, and ensure proper turning and handling techniques. If issues persist, consult with experienced breeders or a veterinarian for guidance.