
Composting chicken bedding is a simple yet effective way to create nutrient-rich fertilizer for your garden while reducing waste and improving chicken health. If you’re like many backyard farmers, you likely generate a significant amount of soiled bedding from your chickens each week. Instead of disposing of it as waste, consider giving it new life by turning it into compost. This sustainable practice not only reduces the environmental impact of your farm but also provides a valuable resource for your garden. In this article, we’ll explore the benefits and process of composting chicken bedding in detail, from setting up a composting system to harvesting rich, fertile soil for your plants. By following these steps, you can create a closed-loop cycle that nourishes both your chickens and your garden.
Introduction to Composting Chicken Bedding
Composting chicken bedding is a great way to recycle waste from your coop and create nutrient-rich fertilizer for your garden. In this section, we’ll explore the basics of composting chicken bedding.
What is Composting Chicken Bedding?
Composting chicken bedding is an innovative way to reduce waste and create a valuable resource for your garden. The process starts by lining your chicken coop‘s nesting boxes with materials like wood shavings, straw, or hay. These materials are designed to absorb moisture and odors, making them perfect for keeping the coop clean.
As the chickens use these bedding materials, they break down into a nutrient-rich compost over time. This compost is not only free from chemicals but also teeming with beneficial microbes that can help your plants thrive. The best part? You don’t need to do anything except provide the right environment for the bedding to decompose.
To compost chicken bedding effectively, make sure to use materials that are high in carbon content like straw or hay. These materials will help speed up the decomposition process and create a nutrient-rich compost. Simply add a 2-3 inch layer of bedding material to your coop’s nesting boxes and let nature do its magic. With regular maintenance and monitoring, you can have a steady supply of compost for your garden in no time!
Importance of Composting Chicken Bedding for Gardening
Composting chicken bedding is an essential practice for gardeners who want to create nutrient-rich soil without harming their environment. One of the primary benefits of using composted chicken bedding as fertilizer is its high carbon-to-nitrogen ratio. This balance ensures that microorganisms can break down organic matter efficiently, releasing valuable nutrients for plants.
When you add composted chicken bedding to your garden, it helps improve soil structure by increasing water retention and aeration. This leads to healthier roots, increased plant growth, and better yields. For instance, a study published in the Journal of Environmental Science and Health found that using compost as a fertilizer improved crop yields by 30% compared to traditional synthetic fertilizers.
To incorporate composted chicken bedding into your gardening routine, mix it into your existing soil or use it as a top dressing for your plants. Start with a 2-inch layer and gradually increase the amount based on your garden’s specific needs. This approach will not only enrich your soil but also promote biodiversity in your garden ecosystem.
Types of Materials Suitable for Composting Chicken Bedding
When it comes to composting chicken bedding, knowing which materials are suitable can make all the difference. Let’s explore some popular options that you might not have considered before.
Wood Shavings: A Popular Choice for Chicken Coops
Wood shavings are a popular choice for chicken coops due to their ease of availability and affordability. Many home improvement stores carry them, making it simple to purchase the right amount for your coop. However, there are some potential drawbacks to consider. One significant concern is dust production – wood shavings can create a lot of dust when chickens scratch or move around in them. This dust can be problematic for chickens with respiratory issues and may even exacerbate allergies.
In terms of composting, wood shavings tend to break down relatively slowly compared to other materials. To make the most of their composting potential, it’s essential to mix them with carbon-rich materials like straw or hay. This combination will help create a balanced compost pile that can be used as fertilizer for your garden. Additionally, ensure you’re using untreated wood shavings to avoid introducing chemicals into your compost and potentially harming your chickens.
To get the most out of wood shavings, it’s crucial to monitor their moisture levels – too much dampness can lead to mold growth.
Straw and Hay: Alternatives to Wood Shavings
When it comes to composting chicken bedding, straw and hay are two popular alternatives to wood shavings that can provide similar benefits with some key differences. One of the main advantages of using straw is its high carbon content, which makes it an excellent addition to your compost pile when mixed with nitrogen-rich materials like manure or food scraps.
However, there are also some drawbacks to consider. Straw can be quite dry and prone to ignition, especially if it’s not properly stored. To minimize this risk, make sure to keep straw in a well-ventilated area away from heat sources. Additionally, straw may attract pests like rodents and mites, so be sure to monitor your coop regularly for signs of infestation.
Hay is another option worth considering, but its higher moisture content means it can be more challenging to compost. You’ll need to ensure that hay is properly dried before adding it to your compost pile to avoid creating anaerobic conditions that can lead to unpleasant odors and pests. When using either straw or hay, remember to layer them with other materials like leaves, grass clippings, or food scraps to create a balanced carbon-to-nitrogen ratio in your compost pile.
When choosing between straw and hay, consider the moisture content and pest-harboring potential of each material. If you live in an area with high humidity, hay might not be the best choice due to its higher moisture levels. On the other hand, straw can be a great option if you’re looking for a low-cost, readily available material that’s easy to compost.
By understanding the pros and cons of using straw and hay as composting materials, you can make an informed decision about which one works best for your needs. Just remember to always follow proper storage and layering techniques to ensure a healthy and balanced compost pile.
The Composting Process for Chicken Bedding
Now that you’ve collected your chicken bedding, let’s walk through the composting process step-by-step to turn it into nutrient-rich fertilizer. We’ll cover what to expect and how to optimize each stage of decomposition.
Factors Affecting the Composting Process
When it comes to composting chicken bedding, several factors influence the rate at which it breaks down into nutrient-rich compost. Temperature plays a significant role, with optimal temperatures ranging from 130°F to 140°F (54°C to 60°C). If the pile is too hot or too cold, the process slows down or even halts.
Oxygen levels are also crucial; adequate airflow ensures that microorganisms can breathe and function properly, while anaerobic conditions lead to foul odors and reduced decomposition. To maintain optimal oxygen flow, turn your compost pile regularly, ideally every 2-3 days during the initial stages.
Another critical factor is the carbon-to-nitrogen (C:N) ratio. A balanced mix of “green” materials (high in nitrogen, such as chicken manure) and “brown” materials (high in carbon, like straw or shredded newspaper) helps to regulate decomposition rates. Aim for a C:N ratio of 20:1 to 30:1 for efficient composting.
Aiming for these conditions can make all the difference in the effectiveness of your composting process. By keeping an eye on temperature, oxygen levels, and carbon-to-nitrogen ratios, you’ll be able to produce high-quality compost that’s perfect for fertilizing your garden or yard.
Monitoring and Maintaining the Compost Pile
Regular turning and aeration of the compost pile are crucial steps to ensure optimal breakdown rates and minimize odors. By doing so, you’ll be creating an environment that’s conducive to decomposition.
To turn the pile, start by checking if it’s ready for turning – this is usually after 7-10 days when you notice the temperature has peaked at around 130°F (54°C). Use a pitchfork or shovel to gently mix the materials from the bottom up. Be careful not to compact the pile as you turn, which can hinder the process.
Aerating the pile involves adding more materials like brown matter, carbon-rich items such as leaves or shredded newspaper, and mixing them in well. This introduces oxygen into the system, promoting healthy microbial growth and speeding up decomposition.
Consider adopting a regular schedule for turning the pile – say every 3-4 days during hot summer months when temperatures are high. As you do this, pay attention to odors – if they become overwhelming or unpleasantly pungent, it may indicate too much nitrogen-rich material in the mix.
Challenges and Considerations for Composting Chicken Bedding
Composting chicken bedding can be a bit tricky, especially when it comes to dealing with moisture and pests that can quickly get out of hand. Let’s dive into some common challenges you might face in the process.
Managing Odors and Pests in the Compost Pile
Composting chicken bedding can be a great way to turn waste into a valuable resource for your garden. However, it’s not without its challenges. One of the biggest concerns is managing odors and pests that can develop in the compost pile.
Ammonia buildup is a common issue when composting chicken bedding. This occurs when the nitrogen-rich urine from the chickens breaks down and releases ammonia gas. To mitigate this, you can add more carbon-rich materials like shredded newspaper or cardboard to balance out the nitrogen levels in your compost pile. This will help absorb some of the excess moisture and reduce the amount of ammonia released.
As for pests, there are several types that can infest a compost pile, including rodents, flies, and even cockroaches. To keep these pests at bay, make sure to turn your compost regularly to introduce oxygen and speed up the decomposition process. You should also add a 1-inch layer of finished compost on top of the pile to deter pests and prevent them from laying eggs.
Another way to minimize odors is by ensuring good airflow within the compost pile. This can be achieved by turning the pile frequently or using a compost aerator tool to loosen up the materials and allow air to circulate through the pile.
Potential Health Risks Associated with Composted Bedding
When it comes to using composted chicken bedding as fertilizer or incorporating it into your garden soil, there are some potential health risks to be aware of. One concern is the presence of pathogens such as E. coli and Salmonella, which can survive the composting process and potentially harm humans if ingested.
These pathogens can contaminate the soil and water, posing a risk to people who come into contact with it. For example, in 2012, an outbreak of Salmonella was linked to contaminated compost used in a community garden in California. This highlights the importance of taking precautions when handling composted chicken bedding.
To minimize the risks, make sure to follow proper composting and handling procedures, such as turning the compost regularly and allowing it to mature for at least six months. It’s also essential to test your compost for pathogens before using it in your garden. Consider investing in a soil testing kit or consulting with a local nursery or extension office for guidance.
By taking these precautions, you can safely incorporate composted chicken bedding into your garden while minimizing the risk of health issues.
Benefits for Chicken Health and Welfare
When it comes to providing a healthy environment for your flock, compost chicken bedding is more than just a convenient solution – it can also have a significant impact on their overall well-being.
Reduced Risk of Disease and Parasites
Using compost chicken bedding has been shown to significantly reduce the risk of disease and parasites in your flock. According to research, the composting process kills off pathogens such as Salmonella, E. coli, and Campylobacter, which can be present in traditional bedding materials like pine shavings or straw. These bacteria are often introduced into the coop through the bedding itself, where they thrive and spread disease among the birds.
But how does composted chicken bedding keep your flock healthy? For one, it has a lower pH level than other bedding options, making it less hospitable to pathogens that prefer more alkaline environments. Additionally, the heat generated during the composting process can reach temperatures of up to 160°F (71°C), effectively killing off any bacteria or viruses present.
To incorporate composted chicken bedding into your flock’s environment, consider the following tips: start by adding a thin layer of fresh compost to the coop floor, followed by a deeper layer of shredded newspaper or hay. Replace the top layer regularly to maintain its effectiveness and prevent pathogens from building up again.
Improved Litter Box Management
Composting chicken bedding can be a game-changer for litter box management. One of the most significant benefits is reduced cleaning frequency. When using traditional litters like wood shavings or sand, you may need to change them daily to keep your coop clean and odor-free. But composted bedding allows you to go longer between cleanings – often 7-10 days – because it’s not only absorbent but also antimicrobial.
This means less time spent scooping out poop and soiled bedding, and more time for yourself! Not only is this a time-saver, but it also reduces the amount of waste generated. Think about all the bags of old litter you’d typically need to dispose of regularly – composting eliminates that entirely. Simply add soiled bedding to your compost pile, and let nature do its thing.
To make the most of this benefit, remember to keep your compost bin close to the coop for easy maintenance. Regularly turn the compost pile to ensure it breaks down quickly, and don’t forget to balance “green” materials (like fresh manure) with “brown” ones (like dried leaves or straw). With a little practice, you’ll be enjoying a cleaner, healthier coop – and reduced waste – in no time!
Tips for Starting Your Own Composting System
Now that you’ve decided to turn your chicken bedding into nutrient-rich compost, let’s dive into some essential tips for setting up a successful composting system.
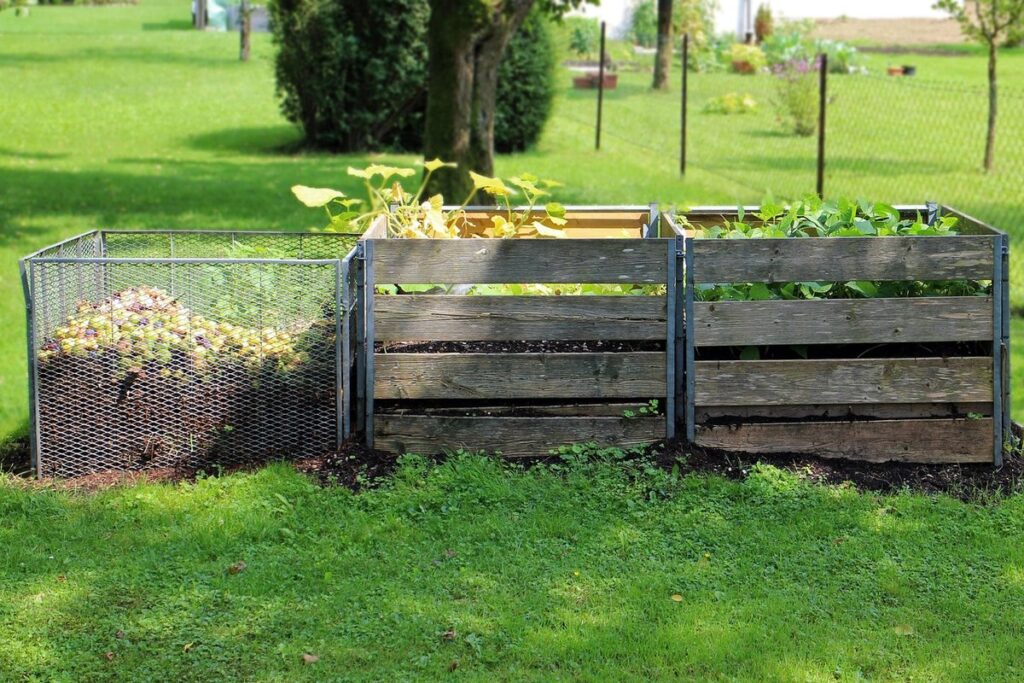
Setting Up a Compost Pile or Bin
To set up an effective composting system for your chicken bedding, start by selecting a suitable location. Ideally, this spot should be close to the area where you collect waste, but not too close to your chickens’ living space to avoid pest attraction. Ensure good airflow by placing the pile or bin on a slight incline or elevated surface.
Choose a composting method that suits your needs: an outdoor compost pile, a worm composter, or a small indoor bin for scraps and excess materials. If opting for a traditional pile, select a location with easy access to water for regular moisture checks.
Consider the size of your operation when selecting a compost bin. A larger capacity may be necessary if you’re managing multiple coops or have high waste output. When selecting materials, choose brown (dried) and green (wet) items in equal proportions to create a balanced mix. Avoid adding raw meat, dairy, or oily foods as these can attract pests and create unpleasant odors.
Regularly maintain your pile by turning it every 7-10 days to aerate the contents and speed decomposition. Keep your composting system at least 3 feet away from any structures to allow for easy maintenance and future expansion.
Maintaining a Healthy Balance in the Compost Pile
Maintaining a healthy balance in your compost pile is crucial for optimal breakdown rates. This means keeping an eye on two key factors: the carbon-to-nitrogen ratio and moisture levels.
To monitor these factors, start by checking the temperature of your compost pile daily. A healthy pile should reach temperatures between 130-140°F (54-60°C), indicating that decomposition is occurring at a rapid rate. As you add new materials to the pile, aim for a balance of “green” and “brown” materials. Greens include high-nitrogen sources like chicken bedding, manure, or food scraps, while browns are carbon-rich materials like straw or leaves.
Aim for a mix of 2/3 browns and 1/3 greens to maintain an ideal C:N ratio. Be mindful that if you add too many greens, the pile may become too wet and smelly, or even attract pests. Conversely, too many browns can lead to dry, slow decomposition. Regularly turn your compost pile (about every 7-10 days) to ensure adequate oxygen flow and speed up breakdown rates.
To achieve optimal moisture levels, maintain a consistency similar to a damp sponge – not soggy, but not dry either. Monitor your pile’s temperature and adjust its moisture accordingly. This will help prevent anaerobic conditions that can lead to unpleasant odors or slow decomposition.
Frequently Asked Questions
What are the ideal carbon-to-nitrogen ratios for composting chicken bedding?
The ideal C:N ratio for composting is between 25:1 and 30:1, with a balance of “green” materials (high in nitrogen) like chicken droppings and “brown” materials (high in carbon) like straw or wood shavings. This balance allows for efficient decomposition and prevents unpleasant odors.
Can I use composted bedding immediately after it’s finished, or do I need to let it mature further?
It’s generally recommended to let the composted bedding mature for a few weeks before using it in your garden. This allows excess moisture to evaporate, making it easier to handle and reducing the risk of disease transmission.
How often should I turn my compost pile to ensure optimal decomposition?
Regular turning helps maintain oxygen flow, speed up decomposition, and prevent anaerobic conditions that can produce unpleasant odors. Aim to turn your compost pile every 7-10 days during hot weather or more frequently if you notice signs of stagnation.
Can I add meat scraps, dairy products, or oily foods to my compost pile?
No, it’s best to avoid adding these types of materials as they can attract pests and create unpleasant odors. Stick to carbon-rich brown materials like straw or wood shavings and nitrogen-rich green materials like chicken droppings and vegetable scraps.
How do I know if my compost pile is too dry or too wet?
Check the compost’s moisture level by squeezing a handful: it should hold its shape but crumble easily when released. If it’s too dry, add water; if it’s too wet, turn in more brown materials to absorb excess moisture.