
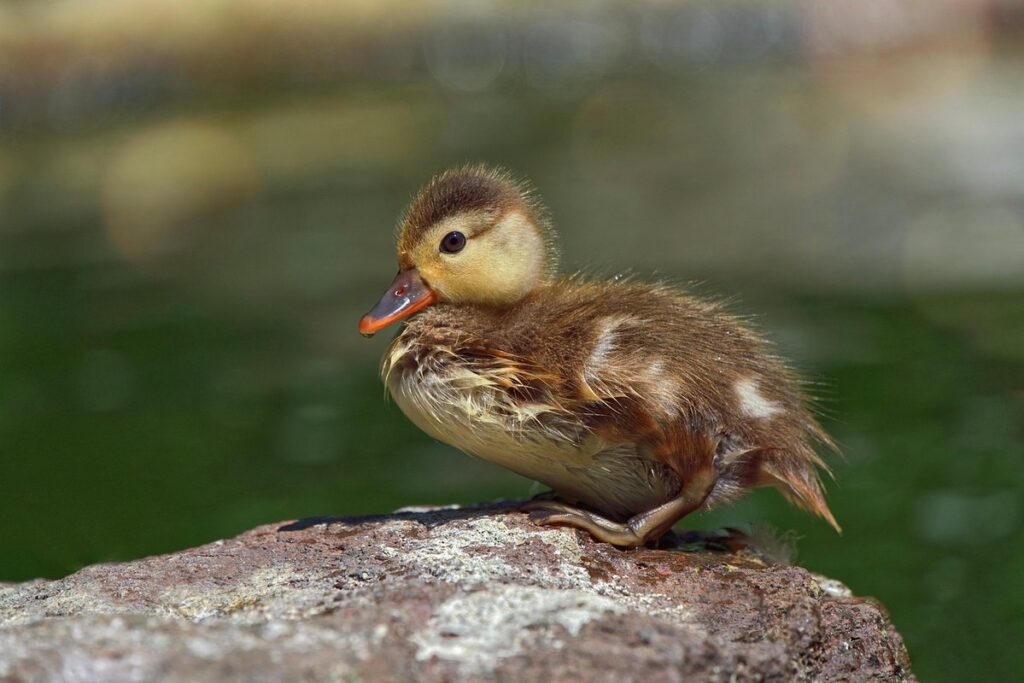
Raising ducklings can be a delightful experience, but ensuring their optimal growth requires attention to detail, especially when it comes to providing the right environment. One crucial aspect is maintaining the perfect temperature with a heat lamp, and this is where many new parents struggle. The ideal temperature for your brooder varies depending on the developmental stage of your ducklings, and getting it wrong can lead to health issues or even fatalities. In this article, we’ll walk you through how to choose the right heat lamp temperature for each stage of your ducklings’ growth, as well as essential tips on setting up a safe and healthy brooder. We’ll also cover common mistakes and offer troubleshooting advice to ensure your feathered friends thrive under your care.
Understanding the Importance of Heat in Brooding
When it comes to raising healthy ducklings, providing the right temperature is crucial for their development and survival. Let’s dive into why heat plays a vital role in brooding.
The Role of Heat in Incubation
When it comes to incubation and duckling development, heat plays a crucial role. A consistent temperature is essential for the embryo’s growth and development, as well as for the hatching process itself.
A safe temperature range for incubating duck eggs is between 99°F (37°C) and 100°F (38°C). However, the temperature of the heat source can vary depending on the stage of incubation. For example, during the first 24 hours, a slightly cooler temperature of around 98°F (36°C) is recommended to prevent over-cooking.
As the embryo grows and develops, it requires more heat to support its increasing metabolism. A sudden drop in temperature can be detrimental to the developing duckling, potentially leading to slowed growth or even death. Conversely, a consistent and stable heat source helps to maintain optimal conditions for growth and development.
By providing a reliable heat source and maintaining a safe temperature range, you’ll help ensure that your ducklings develop properly and hatch healthy. Keep in mind that it’s essential to monitor the temperature closely, especially during critical stages of incubation, to prevent any potential issues.
Choosing the Right Temperature for Your Brooder
When selecting a heat source for your duckling brooder, there are several factors to consider. First and foremost, you’ll want to think about the wattage of the lamp. A good rule of thumb is to choose a lamp that produces between 100-150 watts per 1-2 square feet of space. This will give your ducklings a comfortable temperature without overheating them.
Another important consideration is the type of heat source you use. Ceramic lamps are often preferred because they emit dry heat, which is gentle on your ducklings’ sensitive skin. Infrared lamps, on the other hand, produce a more intense heat that can be beneficial for larger brooders or in colder climates. However, they can also dry out the air and cause discomfort if not used properly.
It’s essential to read reviews and research different options before making a decision. Consider factors like durability, ease of use, and energy efficiency. You may also want to consult with other duck keepers or veterinarians for recommendations on the best heat sources for your specific situation. By choosing the right heat source, you’ll be able to provide your ducklings with a safe and comfortable environment to grow and thrive.
Common Mistakes to Avoid When Using Heat Lamps
When using heat lamps for duckling brooding, it’s essential to be aware of potential pitfalls that can lead to health issues or even fatalities. One common mistake is overheating, which can occur if the temperature is set too high or if the lamp is placed too close to the ducklings. A good rule of thumb is to maintain a temperature range of 90-100°F (32-38°C) for the first week and gradually decrease it by 5-10°F (3-6°C) each subsequent week.
Another mistake is underheating, which can be just as detrimental as overheating. This often occurs when the heat lamp is not powerful enough or is placed too far away from the ducklings. To avoid this, ensure that the heat lamp is specifically designed for poultry and has a sufficient wattage to maintain the desired temperature.
Heat lamp placement is also crucial. Avoid placing lamps directly above food and water dishes, as this can cause them to become contaminated. Additionally, keep the lamp at least 2-3 feet away from any combustible materials, such as bedding or nesting boxes. Regular monitoring of the ducklings’ behavior and adjusting the heat lamp temperature accordingly will help prevent overheating and underheating issues.
Determining the Optimal Temperature Range for Ducklings
When it comes to keeping your ducklings warm and cozy, getting their environment just right is crucial. In this next part, we’ll explore how to determine the perfect temperature range for your little ones.
Understanding Duckling Developmental Stages
As you care for your ducklings, it’s essential to understand their developmental stages and how temperature affects their growth and health during each stage. From hatch to maturity, ducklings go through distinct phases that require specific temperature conditions.
The first week is critical, as the ducklings rely on external heat sources due to their underdeveloped feathers. A consistent temperature of 90-95°F (32-35°C) ensures they have enough energy for growth and development. As they grow, their metabolic rate increases, and they require a slightly cooler environment. By around 7-10 days old, you can gradually decrease the temperature by 5-10°F (3-6°C) to promote healthy digestion.
Between 2-4 weeks of age, ducklings start to develop their feathers and become more mobile. They need a temperature range between 70-80°F (21-27°C), which allows them to forage and exercise without overheating. After this period, they’ll continue to grow rapidly until maturity. To determine the optimal temperature range for your ducklings, consider factors like breed, age, and environmental conditions.
Aim to maintain a thermometer in the brooder or enclosure to ensure you’re providing the right environment for your ducklings’ growth and development.
Setting Up Your Brooder for Success
Creating a well-designed brooder is crucial for raising healthy ducklings. First and foremost, you’ll want to ensure adequate ventilation to prevent the buildup of ammonia from their droppings. A good rule of thumb is to provide at least 1 square foot of space per duckling in the brooder. This will give them enough room to move around and reduce stress.
For optimal temperature control, position your heat lamp so it’s not directly above the waterer or feeder. This helps prevent overheating and keeps the food and water from freezing. You can also consider using a thermometer to monitor the temperature in different areas of the brooder. Aim for a temperature gradient that allows ducklings to regulate their own body heat.
When setting up your brooder, keep in mind that ducklings are naturally curious creatures. Provide some hiding places or visual barriers to give them a sense of security. For example, you can use cardboard boxes or small enclosures made from hardware cloth to create cozy nooks for them to retreat to when they feel stressed.
Monitoring Temperature: Tools and Techniques
Monitoring temperature is crucial when it comes to duckling brooding. You’ll want to use a variety of tools and techniques to ensure you’re within the optimal range for healthy growth.
One of the most common tools used is a thermometer. There are two types: analog (dial) thermometers, which can be less accurate but easier to read, and digital thermometers, which provide quick and precise readings. Some popular options include mercury-free thermometers with high-temperature accuracy and wireless remote thermometers for easy monitoring.
Another tool worth considering is a heat mat. These mats are designed specifically for brooding ducklings and can provide consistent temperature control. They’re often used in combination with other heating sources, like heat lamps or ceramic heat emitters, to maintain the perfect environment.
To accurately monitor temperatures, it’s essential to understand how to place your thermometer correctly. Typically, you’ll want to position it about 6-8 inches above the ducklings’ heads, allowing for accurate readings without coming into contact with the wetting agents often used in brooders. This will also prevent any risk of overheating or underheating.
When selecting a thermometer, look for one that is specifically designed for use in high temperatures and has an accurate range (usually 40-110°F). It’s also crucial to take multiple readings throughout the day, as temperature fluctuations can be significant in these environments. By using the right tools and techniques, you’ll have peace of mind knowing your ducklings are receiving optimal care.
How to Choose the Right Heat Lamp for Your Needs
When selecting a heat lamp for your ducklings, there are several factors to consider that will ensure they stay safe and comfortable in their environment. Let’s explore these key considerations together.
Types of Heat Lamps Available
When it comes to choosing the right heat lamp for your ducklings, selecting the type of heat source is crucial. There are several types of heat lamps available, each with its own benefits and drawbacks.
Ceramic heat lamps, for instance, use a ceramic heating element that radiates warm infrared light. These lamps are often preferred by breeders due to their energy efficiency and even heat distribution. However, they can be more expensive than other options.
Infrared heat lamps, on the other hand, emit far-infrared radiation, which is similar to body heat. They’re ideal for areas with high humidity or where moisture control is a concern. Infrared lamps can also help reduce bacteria and fungi growth.
Radiant heat sources, such as quartz or halogen bulbs, provide intense heat but may not be suitable for larger areas or sensitive ducklings. Some breeders also opt for specialized heat lamps like ceramic-coated metal or reflector-style radiant heaters.
When selecting a heat lamp type, consider the space, number of ducklings, and your specific needs. Research each option’s advantages and limitations to make an informed decision that prioritizes your feathered friends’ comfort and well-being.
Wattage and Coverage Area: What You Need to Know
When selecting a heat lamp for your ducklings, two crucial factors to consider are wattage and coverage area. These two elements will significantly impact the temperature distribution within the brooder and the overall design of the space.
Wattage refers to the amount of power produced by the heat lamp in watts (W). A higher wattage usually means more intense heat, but it’s essential to strike a balance between providing sufficient warmth and avoiding overheating. For example, if you’re using a 250-watt heat lamp for your ducklings, ensure that there’s adequate ventilation in the brooder to prevent moisture buildup and maintain air circulation.
The coverage area is equally important, as it determines how far the heat will reach from the source. A larger coverage area means less intense heat over a wider space, while a smaller coverage area results in more focused but potentially hotter temperatures. To calculate the ideal coverage area for your brooder, consider the square footage of the space and choose a heat lamp that can provide sufficient warmth without overheating the area.
Energy Efficiency and Safety Considerations
When it comes to keeping your ducklings warm and safe, energy efficiency and safety considerations are crucial. You want a heat lamp that not only provides adequate warmth but also minimizes energy consumption and reduces the risk of accidents.
Look for heat lamps with automatic shut-off features, which can save you money on your electricity bill while ensuring the lamp turns off when not in use or if it tips over. This feature is especially important around ducklings, as they can be curious and may accidentally knock the lamp over.
To ensure safety, position the heat lamp at least three feet away from any combustible materials, such as bedding or curtains. You should also choose a lamp with a secure base to prevent it from tipping over. Consider a heat lamp with a thermostat, which allows you to set a specific temperature and automatically adjusts the heat output.
Regularly check your heat lamp for signs of wear and tear, and replace any damaged cords or bulbs immediately. By prioritizing energy efficiency and safety features, you can provide a warm and safe environment for your ducklings while minimizing your environmental impact.
Safety Precautions for Using Heat Lamps with Ducklings
When using heat lamps around your ducklings, it’s essential to follow some critical safety precautions to prevent accidents and ensure their health. This section highlights key guidelines to keep in mind.
Electrical Shock Hazards and Prevention Tips
When using heat lamps with ducklings, it’s essential to be aware of the electrical shock hazards associated with them. Water and electricity don’t mix well, making areas around water sources or wet environments particularly hazardous.
Ducklings are naturally curious and love exploring their surroundings, which increases the risk of getting too close to a heat lamp. Wet surfaces can conduct electricity, posing a significant threat to your feathered friends. According to the National Electric Code (NEC), 90% of electrical shock-related fatalities occur in areas with water.
To prevent electrical shocks around heat lamps:
* Always ensure the heat lamp is at least 3 feet away from any source of water.
* Use a GFCI (Ground Fault Circuit Interrupter) outlet near the heat lamp to provide an extra layer of protection against ground faults.
* Regularly inspect your heat lamp’s cord and plug for signs of damage or wear. Replace it immediately if you notice any issues.
* Consider using a heat lamp with a built-in thermal cut-off, which will automatically shut off the lamp in case it overheats.
By following these simple precautions, you can minimize the risk of electrical shocks and create a safe environment for your ducklings to thrive.
Overheating Risks: Symptoms and Solutions
When using heat lamps to warm your ducklings, it’s essential to recognize the signs of overheating and take immediate action to prevent harm. If you notice your ducklings displaying lethargy or lack of energy, it could be a sign that they’re getting too hot. Similarly, panting is another common symptom of overheating in young ducks.
Monitor your ducklings’ behavior closely, as these early warning signs can quickly escalate into more severe health issues. In extreme cases, prolonged exposure to high temperatures can lead to heat stress or even death. To mitigate this risk, ensure that the heat lamp is at a safe distance from the ducklings, and adjust the temperature accordingly.
A good rule of thumb is to maintain a temperature range between 80°F to 90°F (27°C to 32°C) near the brooder. You can also place a thermometer in the brooder to monitor the exact temperature. Additionally, make sure the heat lamp is not pointing directly at any ducklings, as this can create hotspots and exacerbate the risk of overheating.
Regularly inspect your ducklings for signs of stress or discomfort, and adjust their environment accordingly. By being vigilant and taking proactive steps, you can ensure a safe and healthy environment for your young ducks to grow and thrive.
Brooder Maintenance and Cleaning Best Practices
Regular brooder cleaning and maintenance are crucial to preventing bacterial growth and heat-related hazards when using heat lamps with ducklings. Bacteria can quickly accumulate on surfaces, especially near the heat source, and spread disease among your ducklings.
To maintain a clean and safe environment for your ducklings, make it a habit to clean the brooder daily. Start by removing any bedding material that has become soiled or wet, and replace it with fresh, dry material. Next, use a disinfectant solution to wipe down all surfaces, including walls, floors, and any equipment.
Regularly check the temperature gauge on your heat lamp to ensure it’s within the safe zone (around 90-100°F) for ducklings. You should also inspect the heat lamp itself for any signs of damage or wear, such as cracks in the glass or loose wiring.
Additionally, keep an eye out for signs of ammonia buildup from bedding material, which can be toxic to ducklings at high levels. By staying on top of brooder cleaning and maintenance, you’ll help create a healthy environment for your ducklings to grow strong and thrive under their heat lamp.
Troubleshooting Common Heat Lamp Issues
Sometimes heat lamps can malfunction, and it’s essential to know how to identify and fix common issues so your ducklings stay safe and warm. Let’s tackle these problems together!
Fixing Overheating Problems with Your Ducklings
When dealing with overheating issues with your ducklings, it’s essential to address the problem promptly. One of the most effective ways to fix overheating problems is by relocating the heat lamp. This might seem like a simple solution, but it can make a significant difference in maintaining a comfortable temperature for your feathered friends.
Consider moving the heat lamp to a higher location or positioning it at an angle to direct the heat away from your ducklings. You can also try rotating the heat lamp every few hours to ensure that the heat is evenly distributed. If you’re using a heat lamp with a reflector, make sure it’s clean and unobstructed to maximize its effectiveness.
Increasing ventilation in the enclosure is another crucial step in preventing overheating. Ensure good airflow by opening windows or installing vents, which will allow hot air to escape and fresh air to enter. A well-ventilated environment can help regulate temperatures and prevent heat buildup. By implementing these simple adjustments, you can create a more comfortable and safe space for your ducklings to thrive.
Dealing with Underheating: Signs and Solutions
As a duckling owner, it’s essential to recognize the signs of underheating and take corrective action to prevent it from affecting your feathered friends’ growth and development. One of the most common indicators of underheating is huddling. If you notice your ducklings clustering together or forming tight groups, it may be a sign that they’re trying to conserve body heat.
Slow growth is another telltale symptom of underheating. Ducklings need a warm environment to grow and thrive. If the temperature in their enclosure is too low, it can slow down their growth rate, leading to stunted development. Check your ducklings’ weight regularly and compare it with their expected growth charts to identify any potential issues.
To adjust the temperature settings, start by increasing the heat lamp’s distance from the ducklings or adjusting the timer to provide more warmth during colder periods. You can also try adding a thermostat to regulate the temperature and prevent overheating. By monitoring your ducklings’ behavior and making adjustments as needed, you’ll be able to create a comfortable environment for them to grow and thrive.
Additional Tips for Successful Heat Lamp Use
Now that you’ve got a good grasp on duckling heat lamp temperatures, let’s dive into some valuable additional tips to ensure your little ones stay safe and cozy. These extra precautions can make all the difference in their development.
Incorporating Alternative Heating Sources
When it comes to providing warmth for your ducklings, relying solely on heat lamps isn’t always feasible. Weather conditions, power outages, and other emergencies can leave you searching for backup solutions. Fortunately, there are alternative heating sources that can supplement or replace heat lamps when needed.
Heat mats, for instance, offer a safe and reliable way to provide warmth without the risk of heat lamp accidents. These mats can be placed under the brooder or even in a separate enclosure to keep your ducklings cozy. Just ensure you choose a mat specifically designed for use with waterfowl, as some may not be suitable for their unique needs.
Another option is hot water bottles. Filled with warm water, these can provide a gentle heat source that won’t overheat your ducklings. Simply place the bottle in the brooder or under a towel to distribute the warmth evenly. As an added precaution, always monitor the temperature of the water and adjust as necessary to prevent overheating.
Remember, it’s essential to have alternative heating sources on hand to ensure your ducklings stay warm and healthy in case of emergencies.
Best Practices for Monitoring Brooder Temperature
When it comes to monitoring brooder temperature, it’s crucial to strike a balance between providing warmth and preventing overheating. To ensure the optimal environment for your ducklings, make it a habit to check the temperature frequently, especially during the first few weeks of life.
Aim to check the temperature at least 3-4 times a day, taking note of any fluctuations or changes in temperature readings. You can use a thermometer specifically designed for poultry to get accurate readings. Be aware that brooder temperatures can drop significantly at night, so it’s essential to adjust the heat lamp accordingly to maintain a consistent temperature.
Look out for signs of overheating, such as panting, lethargy, or even collapse in your ducklings. Conversely, if you notice a sudden drop in temperature, make sure to increase the heat lamp’s intensity to prevent hypothermia. Remember, consistency is key when it comes to brooder temperature – small changes can have significant effects on your ducklings’ health and development. By staying vigilant and making adjustments as needed, you’ll be well on your way to raising happy and healthy ducklings.
Frequently Asked Questions
What’s the best way to monitor temperature fluctuations with multiple heat lamps in a large brooder?
Monitoring temperature can be challenging, especially when using multiple heat lamps. To ensure you’re maintaining the ideal temperature range, invest in a reliable digital thermometer with multiple probes. This will allow you to track temperature readings across different areas of your brooder and make adjustments as needed.
Can I use a radiant heat lamp for ducklings that are past the peeping stage?
Radiant heat lamps can be effective for young ducklings, but it’s best to transition to a more focused heat source like an infrared heat lamp once they’re no longer in the peeping stage. This will help prevent overheating and promote healthy development.
How often should I replace or clean my heat lamp bulbs?
Proper maintenance of your heat lamps is crucial for preventing overheating risks. We recommend replacing your heat lamp bulbs every 6-8 months, depending on usage, to ensure optimal performance and safety.
What’s the ideal wattage for a heat lamp when raising ducklings in a cold climate?
The ideal wattage will depend on several factors, including the size of your brooder and the ambient temperature. As a general rule, use 25-50 watts per square foot of brooding space to maintain the optimal temperature range.
Can I use multiple heat lamps at different temperatures for ducklings at various stages of development?
Using multiple heat lamps can help create a temperature gradient within your brooder. Yes, you can use different wattages and types of heat lamps to cater to specific developmental stages, but make sure to monitor temperature fluctuations closely to avoid overheating risks.