
Feeding your poultry a balanced diet is crucial for their health and productivity, but getting calcium intake just right can be a challenge. Many farmers struggle to ensure their birds are getting enough calcium without overdoing it, which can lead to waste and unnecessary expense. One effective solution is incorporating oyster shells into your free-choice feeding routine. By providing oyster shells alongside their regular feed, you can give your poultry the calcium they need to stay healthy while minimizing waste. In this article, we’ll explore the benefits of feeding oyster shell free choice, best practices for implementation, and tips for balancing calcium intake in your flock.
Benefits and Importance of Oyster Shells in Poultry Nutrition
Oyster shells are a crucial supplement for chickens, providing essential calcium to support strong eggshell production and overall health. Let’s dive into the benefits and importance of incorporating oyster shells into your flock’s diet.
Introduction to Oyster Shells
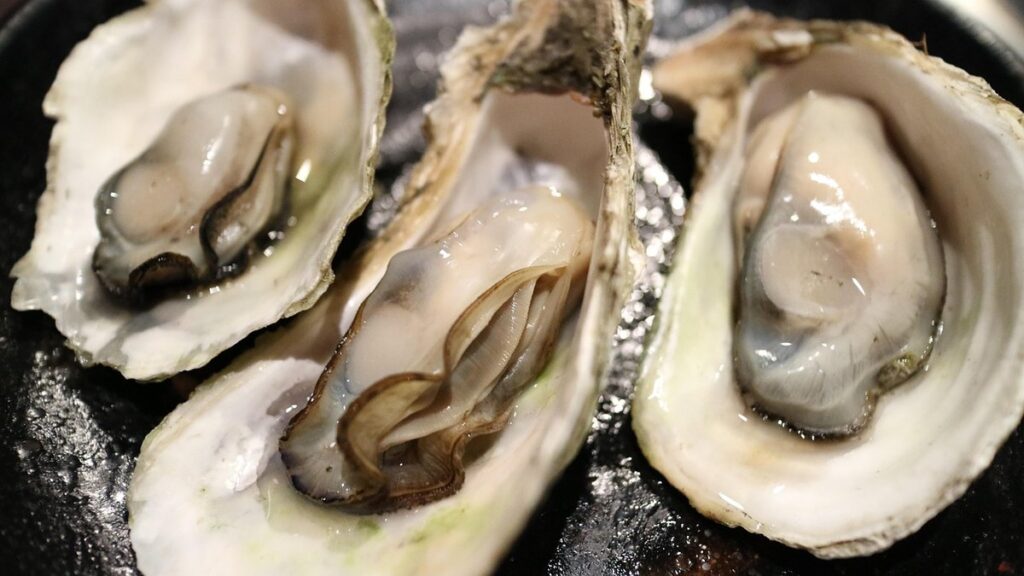
Oyster shells are a natural, nutrient-rich supplement that has been used for centuries to support the health and well-being of poultry. Originating from marine mollusks, oyster shells are harvested from oysters and then crushed or ground into a fine powder or small pieces. This process makes them easily digestible by birds, who can then absorb the essential nutrients they provide.
As we know, calcium is an essential component in poultry diets. It plays a critical role in maintaining strong eggshell quality, supporting bone growth, and promoting overall health in birds. Without adequate calcium, hens may experience weakened eggshells, reduced fertility rates, and other related issues. Oyster shells are an excellent source of calcium, containing up to 30-40% of the mineral by weight.
By incorporating oyster shells into your flock’s diet, you can ensure they receive a natural and reliable source of calcium. This is especially important for layers, who require higher levels of calcium to produce healthy eggs.
Calcium-Rich Feed Supplement Alternatives
While oyster shells are an excellent source of calcium for poultry, they’re not the only option. If you’re looking to provide a calcium-rich feed supplement alternative, consider limestone, crushed eggshells, and alfalfa meal.
Limestone is a popular choice for providing calcium to birds. It’s readily available and often less expensive than oyster shells. However, it can be more difficult for hens to digest due to its coarse texture. To make the most of limestone, mix it into your flock’s feed at a rate recommended by your veterinarian or poultry expert.
Crushed eggshells are another viable option. They’re easily obtained from your own kitchen and provide a fine, easily absorbed calcium source. Plus, they’re free! However, be mindful of potential contamination from bacteria like Salmonella. To minimize risk, clean and dry the crushed eggshells thoroughly before adding them to feed.
Alfalfa meal is a nutrient-rich alternative that offers more than just calcium. It’s an excellent source of protein, vitamins, and minerals for hens. A general rule of thumb is to use 10-20% alfalfa meal in your flock’s feed. This will provide the necessary calcium without overdoing it.
Incorporating any of these alternatives into your flock’s diet requires careful consideration. Monitor their health and adjust as needed. By doing so, you can ensure a balanced and healthy nutritional plan for your birds.
Implementing Free-Choice Oyster Shell Feeding
Now that you’ve decided to offer free-choice oyster shell feeding, let’s explore how to implement it successfully in your aquaculture operation. This section will cover essential considerations for a smooth transition.
Choosing the Right Type of Oyster Shells
When choosing oyster shells for free-choice feeding, you have several options to consider. The most common types are ground oyster shell and whole oyster shell.
Ground oyster shell is finely crushed into a powder-like consistency, making it easy to consume and digest. This type is suitable for young chickens, as they can easily peck at the powder. However, it may be more expensive than other options.
Whole oyster shells are less processed and retain their natural texture. They provide a good source of calcium for laying hens, but may pose a choking hazard if fed to chicks or young pullets. If you have a mixed-age flock, consider using whole oyster shells in a separate feeding area to prevent younger birds from accessing them.
Another option is oyster shell pellets, which are made by compressing crushed oyster shells into small, easily consumable pellets. These are convenient for on-the-go feeding and can be used in automated feeders or free-choice systems.
When selecting the right type of oyster shell, consider your flock’s age, breed, and nutritional requirements. For example, if you have a flock of heritage breeds or layers with high calcium needs, whole oyster shells may be the best choice.
Free-Choice Feeder Setup and Maintenance
Setting up free-choice feeders for oyster shells is relatively straightforward, but it does require some planning to ensure they function optimally. Begin by selecting a location that provides easy access for the animals and is protected from the elements. Consider placing feeders near water sources or feeding areas to encourage animals to visit and utilize them regularly.
When setting up free-choice feeders, remember that oysters are attracted to crushed oyster shells, so it’s essential to ensure an adequate supply is available at all times. A general rule of thumb is to provide 10-20% of the total area as shell feeding space. Regularly monitoring usage will help you determine if adjustments need to be made.
To prevent waste and encourage consistent access to oyster shells, consider implementing a few simple strategies. For example, position feeders at a height that allows animals to easily reach them without having to strain or stretch, which can lead to overeating and related health issues. Additionally, ensure the feeders are easy to clean and maintain to prevent contamination.
Nutritional Considerations for Effective Oyster Shell Use
When using oyster shell as a free-choice supplement, it’s crucial to understand how its nutritional profile affects your flock’s overall health and productivity. This section will explore key considerations for successful implementation.
Balancing Calcium Intake with Phosphorus Levels
When providing oyster shells free-choice to your flock, it’s essential to balance calcium intake with phosphorus levels in their feed. Calcium is crucial for strong eggshells and overall bone growth, but excessive consumption can lead to kidney issues. Phosphorus, on the other hand, is necessary for protein synthesis, nerve function, and muscle contraction.
Aim to provide a calcium-to-phosphorus (Ca:P) ratio of 1:1 to 2:1 in your layer feed. For example, if your feed contains 1% calcium, it should have around 0.5-1% phosphorus. You can achieve this balance by adjusting the amount of oyster shells offered or modifying the layer feed formulation.
To monitor and adjust the Ca:P ratio, track your flock’s performance and health. Look for signs of excessive calcium intake, such as kidney damage or eggshell disorders. Conversely, ensure your birds are getting enough phosphorus to avoid muscle weakness or other related issues. Monitor egg production, feed consumption, and overall health indicators like feather condition and behavior. Adjust the oyster shell feeding strategy accordingly, making sure to provide a balanced diet that supports optimal bone growth and kidney function.
Potential Interactions with Other Nutrients and Supplements
When feeding oyster shell free choice to your flock, it’s essential to consider potential interactions with other nutrients and supplements. One key interaction to be aware of is between calcium from oyster shells and vitamin D3. While both are crucial for strong bones and overall health, excessive intake can lead to hypercalcemia, a condition characterized by high levels of calcium in the blood.
To minimize this risk, ensure your flock has access to fresh, clean water at all times. This will help them absorb the calcium from oyster shells more efficiently and reduce the likelihood of vitamin D3 overdosing. Additionally, monitor your flock’s intake and adjust feeding schedules as needed to maintain optimal calcium levels.
Another potential interaction is between oyster shell-derived calcium and coccidiostats, commonly used in layer feed to control coccidiosis. While generally safe when administered according to manufacturer instructions, high doses of coccidiostats can decrease calcium absorption from oyster shells. To mitigate this, provide a balanced diet that includes adequate levels of other essential nutrients like phosphorus and vitamin D3.
Regular monitoring of your flock’s overall health, growth rate, and egg production will help you identify any potential issues related to nutrient interactions. By being aware of these interactions and taking proactive steps, you can ensure optimal nutrition for your birds while minimizing the risk of adverse effects.
Managing Oyster Shell Consumption and Wastage
When it comes to feeding oysters free choice, managing shell consumption and wastage is crucial for maintaining optimal water quality. Let’s explore some practical tips to minimize shell waste in your oyster farm.
Monitoring and Adjusting Free-Choice Feeding
Monitoring oyster shell consumption closely is essential to ensuring that your oysters receive just the right amount of this crucial resource. To do this effectively, you’ll need to track their intake over time and make adjustments as necessary.
Start by monitoring how much oyster shell each individual or group of oysters consumes within a 24-hour period. This can be done using a variety of methods, such as weighing the shells before and after the feeding period or observing the rate at which they’re being consumed. Keep in mind that factors like water temperature, salinity, and the presence of predators may influence consumption rates.
Be on the lookout for signs of overconsumption, including excessive calcium levels in the water or visible shell damage due to rapid growth. Conversely, underconsumption can be identified by slow growth rates or inadequate shell formation. Adjust feeding rates accordingly, taking into account these environmental factors and your oysters’ individual needs.
To optimize resource allocation, consider implementing a rotation system where different groups of oysters receive varying amounts of oyster shell based on their specific requirements. This approach allows you to ensure that each group receives the right amount while minimizing waste and promoting healthy growth.
Maintaining Cleanliness and Hygiene in Free-Choice Feeders
Maintaining cleanliness and hygiene in free-choice feeders is crucial to prevent disease transmission and ensure animal welfare. It’s easy for bacteria, viruses, and other pathogens to accumulate on feeders, especially when oysters are constantly interacting with them. A dirty feeder can lead to the spread of diseases like salmonellosis, which can be devastating for your oyster farm.
To maintain cleanliness, it’s essential to establish a regular cleaning schedule. This should include daily inspections, weekly deep cleanings, and monthly disinfections. For daily inspections, simply wipe down the feeders with a damp cloth to remove any debris or spills. For weekly deep cleanings, scrub the feeders with a mixture of water and vinegar, then rinse thoroughly.
Monthly disinfections can be done using a solution specifically designed for animal feeders. Always follow the manufacturer’s instructions and take necessary safety precautions when handling chemicals. It’s also essential to keep your oysters hydrated by providing fresh water at all times. By implementing these simple cleaning and maintenance practices, you’ll not only prevent disease transmission but also promote a healthy and thriving environment for your oysters to grow.
Best Practices for Transitioning to Oyster Shell Free Choice
When making the switch to oyster shell free choice, establishing a clear transition plan is crucial to ensure your flock’s health and well-being. This section will walk you through key considerations for a smooth and successful transition process.
Gradual Introduction and Monitoring
When introducing oyster shell free choice to your flock’s diet, it’s essential to do so gradually to prevent digestive upset. Start by offering a small amount of oyster shell alongside their regular grit and mineral supplements for 7-10 days. This allows them to become accustomed to the new source of calcium without overwhelming their system.
Monitor their response closely during this period, watching for signs of digestive issues such as diarrhea or lethargy. If you notice any adverse reactions, reduce the amount of oyster shell offered or slow down the introduction process further. Conversely, if they seem unaffected and are readily consuming the oyster shell, you can gradually increase the amount provided over time.
Be prepared to address common challenges during the transition period. Some birds may initially reject the new source of calcium due to unfamiliarity with its texture or taste. Simply offering it alongside their regular grit and minerals may encourage them to explore the oyster shell. In some cases, you may need to adjust the type of oyster shell being offered to better suit your flock’s preferences.
Overcoming Common Challenges and Obstacles
When transitioning to oyster shell free choice feeding, you may encounter some common challenges that can be frustrating and even lead to setbacks. One of the most significant issues is inconsistent consumption, where birds may not consume their required amount of calcium daily. This can happen due to various reasons such as inadequate introduction of new feeders or poor quality oyster shells.
To overcome this problem, it’s essential to monitor your flock closely during the transition period and make adjustments as needed. For instance, if you notice that some birds are eating more than others, consider separating them into smaller groups based on their age and sex to ensure each group gets enough calcium.
Another challenge is waste management, particularly with free-choice feeding where shells can pile up quickly. To minimize this problem, implement a regular cleaning schedule for the feeders and ensure they’re designed with easy access for birds to pick up loose shells. By addressing these common issues head-on, you can maintain a smooth transition process and enjoy all the benefits of oyster shell free choice feeding.
Conclusion and Future Directions
Now that we’ve explored the benefits of feeding oyster shell free choice, let’s discuss what it means for your flock’s long-term health and how to make it a sustainable practice.
Recap of Key Takeaways and Recommendations
In conclusion to our discussion on feeding oyster shell free-choice, let’s recap the key takeaways and recommendations for successful implementation.
One of the most important points we’ve emphasized is the need for a gradual transition to oyster shell free-choice. This involves introducing the new feed source in small increments (about 10-20% of their total diet) over several days or weeks to prevent digestive upset. We’ve also highlighted the importance of providing a high-quality, calcium-rich oyster shell supplement that meets your flock’s needs.
When it comes to monitoring and adjusting, remember to regularly inspect the free-choice feeders for signs of clogging or spoilage. Be prepared to make adjustments as needed to ensure optimal accessibility and prevent overconsumption. Regularly weigh your birds to gauge their progress and adjust the supplement accordingly. Additionally, keep an eye out for any changes in eggshell quality or overall health.
Lastly, be patient and give it time – transitioning to oyster shell free-choice can take some trial and error. But with persistence and proper implementation, you’ll be rewarded with healthier, more productive hens that produce stronger, more durable eggs.
Final Thoughts on Oyster Shell Free Choice Feeding
As you’ve been implementing oyster shell free choice feeding for your flock, it’s essential to continue monitoring their response and adjust your approach as needed. This flexible feeding strategy allows you to fine-tune the nutrition and calcium intake of your birds, promoting optimal health and welfare.
One key benefit of oyster shell free choice feeding is its adaptability. If you notice that some birds are not getting enough calcium, you can simply add more oyster shells or adjust their placement in the coop. Conversely, if you find that your flock is consuming too much calcium, you can reduce the amount available. This dynamic approach ensures that each bird gets exactly what they need.
Remember to keep a close eye on your birds’ egg production, shell quality, and overall health. Adjusting the oyster shell free choice feeding plan as needed will help you achieve optimal results. By monitoring their response and making adjustments, you’ll be able to optimize nutrition and animal welfare for your flock.
Frequently Asked Questions
How do I ensure my birds are getting enough calcium from oyster shells without overfeeding them?
It’s essential to start with a small amount (about 1-2% of their total feed intake) and gradually increase as needed based on eggshell quality, bird health, and other factors. Monitor your birds’ consumption closely and adjust accordingly.
Can I mix crushed oyster shells directly into their regular feed or is free-choice feeding only recommended?
While it’s technically possible to mix crushed oyster shells into their regular feed, this can lead to inconsistent intake and potential waste. Free-choice feeding allows your birds to take as much or as little oyster shell as they need, promoting optimal calcium intake.
How often should I clean and maintain my free-choice feeders to prevent contamination and ensure cleanliness?
Clean the feeders regularly (at least every 1-2 weeks) with soap and water, ensuring all surfaces are dry before refilling. Also, inspect the oyster shells for any mold or debris and replace them as needed.
Are there specific oyster shell sizes that work better for certain types of poultry or age groups?
Yes, smaller birds (chicks or young pullets) may prefer finer crushes, while larger breeds can handle coarser particles. However, it’s crucial to provide a consistent supply of oyster shells throughout the day and not just at meal times.
Can I use oyster shell supplements in conjunction with other calcium sources, such as crushed eggshells or dolomitic limestone?
Yes, but ensure you’re not over-supplementing your birds’ diet. Mixing different calcium sources can help achieve a balanced intake, but be aware of potential interactions and adjust accordingly based on your flock’s specific needs.