
Are you tired of manually opening and closing your chicken coop door every day? If so, you’re not alone! As any backyard chicken keeper knows, collecting eggs from an automated coop can be a real game-changer. Not only does it save time and effort, but it also helps keep predators out and ensures the health and safety of your flock. But building an automatic chicken coop door doesn’t have to break the bank or require extensive DIY skills. With the right hardware and some simple construction techniques, you can create a seamless egg collection experience for yourself and your birds. In this comprehensive guide, we’ll walk you through the benefits, hardware selection, construction, and safety considerations involved in building an automated chicken coop door that will make collecting eggs easier and more efficient than ever before.
Benefits and Advantages of Automatic Doors
Now that you have a working automatic chicken coop door, let’s explore the benefits of having such a feature, including enhanced convenience and improved animal care.
Improved Egg Collection Efficiency
Collecting eggs from your chicken coop can be a time-consuming task, especially if you have a large flock. Automatic doors for your chicken coop can significantly improve egg collection efficiency by streamlining the process and reducing labor. When eggs are collected regularly, not only do you increase productivity, but you also reduce the risk of breakage. Fresh eggs will remain undamaged and ready to use.
Regular egg collection also helps maintain a clean and healthy environment in your coop. As eggs accumulate on the floor, they can attract pests and create unsanitary conditions. Automatic doors ensure that eggs are collected promptly, keeping your coop tidy and minimizing the risk of disease transmission.
To implement automatic egg collection with your DIY door, consider installing a sensor that detects when the eggs are being laid in the nesting box. This will trigger the door to open and allow you to collect the eggs at a convenient time. By automating this process, you’ll save valuable time and effort while ensuring your chickens remain happy and healthy.
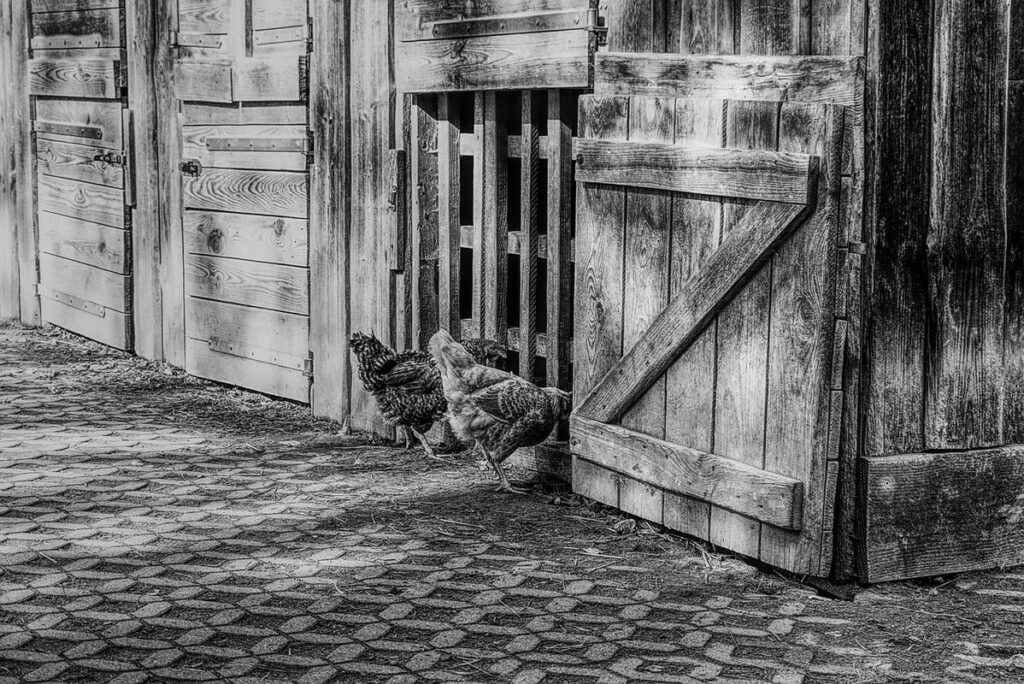
Enhanced Security and Predator Protection
When you’re raising chickens, security should be at the top of your priority list. One of the most significant benefits of automatic doors is enhanced security and predator protection for your flock. Predators such as raccoons, opossums, hawks, and foxes are always on the lookout for an easy meal, and they can wreak havoc on your coop if given the chance.
With an automatic door, you can prevent predators from accessing the coop during opening hours when your chickens are most vulnerable. This is especially important at dawn and dusk when many predators are most active. By automatically closing the door as soon as your chickens have finished foraging or roosting, you can significantly reduce the risk of predation.
In fact, a study found that automatic doors reduced predator access to coops by up to 90%. This not only protects your flock but also safeguards your livelihood as a chicken farmer. By choosing an automatic door system, you’ll have peace of mind knowing your chickens are safe and secure. Consider investing in a door with sensors or motion detectors to further enhance security and alert you to any potential threats.
Choosing the Right Hardware and Materials
Now that you’ve decided on your coop door design, it’s time to think about what hardware and materials will get the job done efficiently. Let’s explore some essential considerations for choosing the right components.
Selecting the Perfect Hinge Type
When it comes to selecting the perfect hinge type for your automated chicken coop door, there are several factors to consider. The size and weight of your door, as well as your personal preference, will all play a role in determining which type of hinge is best suited for your needs.
Let’s start with the most common types of hinges: spring-loaded hinges and friction hinges. Spring-loaded hinges are ideal for larger doors or those that are particularly heavy, as they provide extra support and can handle more weight. They’re also great for areas with high winds or extreme weather conditions, as they’ll help keep your door securely in place.
On the other hand, friction hinges are perfect for smaller doors or those with a lighter weight. They’re also a good option if you prefer a more traditional look or want to maintain a certain aesthetic appeal. Friction hinges work well in most climates and require less maintenance than spring-loaded hinges.
When choosing between these two types of hinges, consider the size and weight of your door, as well as the level of security you need. Spring-loaded hinges may be overkill for smaller doors, while friction hinges might not provide enough support for larger ones. Ultimately, it’s essential to select a hinge type that balances functionality with personal preference.
Deciding on Motor and Power Options
When it comes to choosing the right motor and power options for your DIY automatic chicken coop door, there are several factors to consider. One option is solar-powered motors, which can be a great choice if you want to reduce your energy costs and carbon footprint. These motors use solar panels to charge rechargeable batteries during the day, providing enough power to open and close your coop door.
However, it’s essential to calculate the wattage requirements of your motor and ensure that your solar panel setup can provide sufficient power. A typical 12V DC motor for a chicken coop door may require around 10-20 watts of power per operation. This means you’ll need at least a 5-watt solar panel to keep your batteries charged.
Another option is mains electricity, which can be more convenient and reliable but comes with higher upfront costs. You’ll also need to consider the safety features, such as ensuring that the door closes safely and doesn’t get stuck in case of power failure. Consider using a timer or sensor to automate your coop door and adjust it according to your chicken’s schedule.
Battery type is another important consideration. Deep cycle batteries are more suitable for automatic doors, as they can handle frequent charge/discharge cycles. Make sure to choose a battery with the right capacity (Ah) for your motor’s power requirements.
When selecting a motor and power option, calculate your energy costs and ensure that you’re getting value for money. Consider factors such as replacement costs, maintenance needs, and overall lifespan of the equipment. For example, if you opt for mains electricity, consider using an inverter to reduce energy consumption. It’s also crucial to choose a motor with a high efficiency rating (e.g., 90%) to minimize power losses.
Building the Automated System
Now that we’ve covered the basics of our DIY automatic chicken coop door, it’s time to build and automate the system. In this next step, we’ll guide you through assembling the motorized components.
Designing the Door Mechanism
When designing the door mechanism for your automated chicken coop, there are several key considerations to keep in mind. First and foremost, you’ll want to ensure that the door is properly aligned with its frame. This means making sure it’s centered, level, and plumb – any misalignment can lead to sticking or even damage to the door over time.
Next, you’ll need to think about spring tension. You don’t want the door to be too stiff, as this can cause issues with opening and closing. On the other hand, if the springs are too weak, the door may sag or droop – which can lead to gaps at the bottom of the coop. A good rule of thumb is to aim for a moderate spring tension, where the door feels smooth but still has some resistance.
In terms of sensor placement, it’s essential to choose a location that provides clear visibility into the coop area. This will help your automated system accurately detect when the chickens are present or absent. Consider placing sensors near the entrance or along the side of the coop – just be mindful of any potential obstructions or reflections that might interfere with their accuracy.
Integrating Sensors and Automation Components
When it comes to building an automated chicken coop door, integrating sensors and automation components is where the magic happens. This is where you can create a seamless experience for both you and your feathered friends.
Let’s start with sensors – these are the eyes and ears of your automated system. You have several types to choose from: light sensors, motion sensors, and even temperature and humidity sensors. Light sensors are perfect for automating doors based on daylight hours or sunset/sunrise times. Motion sensors, on the other hand, detect movement within a specific area, ideal for monitoring chicken activity.
To integrate these sensors with automation components like timers and microcontrollers, you’ll need to choose a suitable combination. For example, if you’re using an Arduino-based microcontroller, you can link it with a PIR motion sensor to automate door opening/closing based on chicken movement.
When selecting your sensors and automation components, consider factors such as power requirements, connectivity options (e.g., Wi-Fi or Bluetooth), and ease of integration. Researching online forums and DIY communities can help you find the perfect combination for your needs.
Troubleshooting Common Issues
If you’re experiencing trouble with your DIY automatic chicken coop door, don’t worry, we’ve got some helpful tips to get it working smoothly again. Let’s dive into common issues and solutions together!
Identifying Causes of Malfunction
When it comes to automated chicken coop doors, malfunctions can be frustrating and impact your flock’s well-being. Before diving into repairs, it’s essential to identify the root cause of the issue. Common problems that may arise with automated doors include:
Sensor malfunctions: Faulty sensors can prevent the door from opening or closing properly.
Motor failure: A worn-out motor can render the entire system useless.
Wire damage: Frayed wires can disrupt communication between components, causing the door to malfunction.
Power outages: Temporary power loss can cause the door to get stuck or not function at all.
To troubleshoot these issues, check for signs of wear and tear on sensors and motors. Make sure all connections are secure, and inspect wiring for any damage. If you suspect a power issue, verify that your system is properly connected to a reliable power source. Additionally, consider checking the door’s calibration settings to ensure they’re accurate.
Regular maintenance can also help prevent malfunctions from occurring in the first place. Regularly clean sensors, lubricate moving parts, and inspect wiring for signs of wear. By identifying and addressing these common issues early on, you’ll be better equipped to keep your automated chicken coop door running smoothly.
Repairing or Replacing Faulty Components
When you encounter faulty components in your DIY automatic chicken coop door, it’s essential to address the issue promptly. This not only ensures the system functions correctly but also maintains the health and safety of your flock.
Before starting repairs or replacements, take necessary safety precautions when working with electrical systems. Always unplug the power source, and if unsure about any aspect of the repair, consult a professional electrician. Wear protective gear such as gloves, safety glasses, and a mask to prevent accidental electrical shock or other injuries.
Common faulty components in automatic chicken coop doors include motors, sensors, and hinges. To replace these parts, carefully follow the manufacturer’s instructions and ensure proper alignment during reassembly. When repairing a motor, check for worn-out bearings, clean the brushes, and apply a thin layer of lubricant to prevent further damage.
In some cases, it may be more cost-effective to replace entire components rather than attempting repairs. Consider consulting online forums or chicken-keeping communities for guidance on troubleshooting specific issues with your coop door.
Advanced Features and Customization Options
Now that you have a basic automatic chicken coop door up and running, it’s time to dive into some exciting advanced features and customization options to take your project to the next level.
Adding Smart Home Integration
Adding smart home integration to your DIY automatic chicken coop door can take your backyard flock management to the next level. With popular voice assistants like Amazon Alexa and Google Assistant, you can control your coop’s doors with just a simple voice command. Imagine being able to say “Hey Alexa, let the chickens out” or “Google, close the coop door” from the comfort of your living room.
Not only does smart home integration provide convenience, but it also offers peace of mind. With remote monitoring capabilities, you can check on your flock’s well-being and ensure their safety even when you’re not at home. This feature is especially useful if you have a large property or multiple coops to manage.
To integrate your automatic chicken coop door with smart home systems, start by researching compatible devices and platforms. Popular options include IFTTT (If This Then That) and Philips Hue. These services allow you to create custom routines and triggers that automate tasks based on specific conditions, such as sunrise or sunset times. By combining these capabilities with your DIY automatic chicken coop door, you’ll be able to enjoy a more streamlined and stress-free flock management experience.
Incorporating Weather Monitoring and Adjustment
Incorporating weather monitoring into your automated chicken coop door system is a crucial step in ensuring the health and well-being of your flock. You can use temperature sensors to track the ambient temperature outside the coop, which will allow you to adjust the door operation accordingly.
For example, if it’s extremely hot outside (above 90°F), you’ll want to keep the door closed to prevent heat stress in your birds. Conversely, on cool days (below 40°F), opening the door for ventilation can help regulate their body temperature and maintain airflow inside the coop. Similarly, you can program the system to adjust its operation during precipitation events or high winds.
To incorporate weather monitoring into your automated chicken coop door system, consider using sensors that are compatible with your chosen automation platform. You’ll also need to set up schedules and rules for adjusting the door operation based on changing conditions. This might involve setting specific temperature thresholds, humidity levels, or other environmental factors that trigger adjustments to the door’s open/close schedule. By integrating weather monitoring into your system, you can create a more responsive and adaptable coop management strategy that prioritizes the needs of your flock.
Safety Considerations and Best Practices
When building a DIY automatic chicken coop door, it’s crucial to prioritize safety for both you and your feathered friends. This section outlines essential precautions and best practices to consider during installation and use.
Ensuring Door Alignment and Balance
Proper alignment and balance are crucial for the smooth operation of an automated chicken coop door. If not properly set up, the door may bind, jam, or even collapse, causing damage to the mechanism and potentially injuring yourself or the chickens.
To ensure proper alignment, make sure the door’s hinges are securely attached to both the frame and the door itself. Check that the screws are tightened evenly and that there is no play in the hinges. Next, align the door’s pivot point with the center of the hinge pins to achieve a smooth motion.
When adjusting the balance, consider the weight of the door and any obstructions it may encounter. A general rule of thumb is to ensure the door opens 1-2 inches before hitting its stop. Test the mechanism by opening and closing the door multiple times to check for binding or jamming issues. Make adjustments as needed to achieve a smooth, even motion.
Regular Maintenance and Inspection Schedule
To keep your DIY automatic chicken coop door running smoothly and safely, it’s essential to establish a regular maintenance and inspection schedule. Set aside time each week to perform basic checks on the system.
Start by inspecting the door’s hinges, rollers, and tracks for signs of wear or damage. Lubricate moving parts as needed, and clean any dirt or debris that may be accumulating. Next, check the sensor and motor for proper alignment and functionality. Make sure the sensors are clean and free from obstruction, which could interfere with the door’s opening and closing cycles.
Regularly inspect the electrical connections and ensure they’re secure and not damaged. Also, keep an eye on the battery life (if applicable) and replace it as recommended by the manufacturer. Don’t forget to check for any signs of rust or corrosion on metal components. By following this maintenance schedule, you’ll be able to identify potential issues before they become major problems, ensuring your flock stays safe and happy.
Conclusion and Final Tips
Now that you’ve successfully built your DIY automatic chicken coop door, it’s essential to remember that this project is just the beginning. To ensure your birds stay safe and healthy, make sure to regularly inspect and maintain the door’s mechanism. This includes checking for any signs of wear or damage on moving parts, lubricating hinges as needed, and ensuring proper alignment with the coop’s frame. Additionally, keep in mind that automatic doors require consistent energy supply, so invest in a reliable power source like a solar panel or battery backup to prevent malfunctions during power outages.
To further optimize your setup, consider implementing additional features such as automatic lighting, ventilation control, or predator-proofing measures. By doing so, you’ll create a more comprehensive and self-sustaining ecosystem for your flock’s well-being. Don’t be afraid to experiment and adapt these ideas to suit your specific needs and resources – happy building!
Frequently Asked Questions
How can I ensure my automatic chicken coop door is safe for my flock during power outages?
Make sure to choose a motor with a battery backup or install a solar panel to keep the system operational even when the main power source is down. This will prevent potential accidents and give your birds continued protection.
What are some common issues I might encounter while building an automated chicken coop door, and how can I troubleshoot them?
Look out for misaligned doors, faulty sensors, or incorrect motor settings. Check the wiring, ensure proper alignment, and test the system regularly to catch any issues early on.
Can I customize my automatic chicken coop door with smart home integration features?
Yes! Many automation systems are compatible with popular smart home platforms like Alexa or Google Home, allowing you to control your coop from anywhere using voice commands. This adds an extra layer of convenience and peace of mind.
How do I integrate sensors and automation components into my automated chicken coop door system?
Use a hub-based system that allows for seamless integration of various sensors and automation devices. Research compatible options like PIR motion sensors, light detectors, or weather monitoring systems to enhance your coop’s security and efficiency.
What are the best materials for building an automatic chicken coop door, considering durability and maintenance?
Opt for weather-resistant materials like aluminum, stainless steel, or durable plastics that can withstand outdoor conditions. Regularly inspect and maintain your coop to prevent wear and tear on these components.