
Are you planning to build a safe and cozy home for your feathered friends? Perhaps you’re an avid birdwatcher or a seasoned poultry owner looking for expert guidance on creating a nesting box. Whatever your reason, building a nesting box is a thoughtful way to provide a comfortable and secure space for birds to lay their eggs and raise their young.
But where do you start? With so many designs and plans available online, it can be overwhelming to choose the right one. That’s why we’ve put together this comprehensive guide, complete with free PDF plans, to help you build the perfect nesting box for your backyard or farm. Whether you’re a seasoned DIYer or a beginner, our expert advice will walk you through every step of the process, ensuring that your birds have the best possible home.
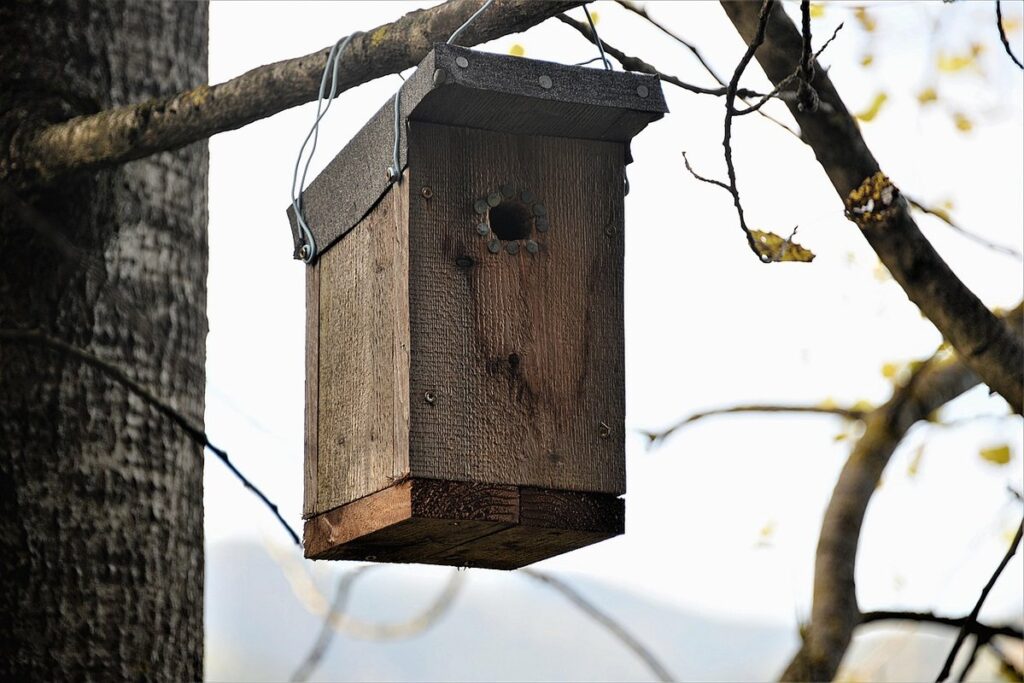
What You Need to Know About Nesting Boxes
Nesting boxes can be a crucial aspect of your backyard bird-watching experience, so let’s dive into the essential details you need to consider when choosing and installing nesting boxes.
Choosing the Right Size of Nesting Box
Choosing the right size of nesting box is crucial for the health and well-being of your birds. The dimensions, material, and capacity of the nesting box must be tailored to meet the specific needs of your bird species.
When selecting a nesting box, consider the type of bird you’re housing. Different species have unique requirements when it comes to nesting box size. For example, bluebirds require a box that’s about 6-8 inches deep and 6-7 inches wide, while robins prefer boxes that are around 8-10 inches deep and 8-9 inches wide.
To calculate the ideal size of your nesting box, consider the number of birds it will hold. A good rule of thumb is to provide one nesting box per four to five birds. You’ll also want to ensure the box has enough capacity for the birds to comfortably nest and lay eggs.
When choosing a material for your nesting box, opt for durable, weather-resistant options like cedar or recycled plastic. These materials will withstand harsh weather conditions and last longer than cheaper alternatives.
Basic Materials Needed for Building a Nesting Box
To build a nesting box, you’ll need some basic materials that are readily available at most hardware stores. Start with the frame of the nesting box, which is typically made from 1×6 or 1×8 lumber. You’ll also need some nails to assemble the pieces together – consider using galvanized or stainless steel nails for durability.
For the roof and walls of your nesting box, you can use plywood or oriented strand board (OSB). Plywood is a popular choice because it’s affordable and easy to work with, but OSB is an eco-friendly alternative that provides similar performance at a lower cost. Don’t forget to include some hinges for easy access and cleaning.
Other essential materials include roofing felt and shingles or asphalt roll roofing. These will help protect your nesting box from the elements, ensuring that the birds remain dry and cozy inside. If you’re looking for an eco-friendly option, consider using reclaimed or sustainably sourced wood instead of traditional lumber.
Design Considerations for Your Nesting Box Plan PDF
When creating your nesting box plan, it’s essential to consider the design details that will ensure a safe and comfortable space for your chickens. This includes crucial factors like size, ventilation, and accessibility.
Considerations for Different Bird Species
When designing a nesting box plan PDF, it’s essential to consider the unique needs of different bird species. Let’s take finches as an example. These birds require smaller entrance holes, typically around 2-3 inches in diameter, as they have relatively small bodies and heads.
On the other hand, robins need slightly larger entrance holes, about 4-5 inches in diameter, to accommodate their larger size. Bluebirds, however, prefer even larger entrance holes, usually between 1.5 and 2.5 inches in diameter.
The nesting cup depth is another crucial factor to consider. Finches, for instance, require a shallow nesting cup, around 6-8 inches deep, as they often build their nests on the floor of the box. Robins, by contrast, need a deeper nesting cup, typically around 12-14 inches deep.
Internal dimensions also vary among bird species. Bluebirds, for example, prefer boxes with internal dimensions of around 6x6x18 inches, while robins require boxes that are slightly larger, approximately 8x8x24 inches.
Important Features to Incorporate in Your Nesting Box Design
When designing your nesting box plan PDF, it’s essential to incorporate features that ensure the health and safety of your birds. One crucial aspect is ventilation – a well-ventilated nesting box helps maintain a stable temperature, reducing stress on the bird and preventing respiratory problems.
Proper drainage is another vital feature to consider. Water can accumulate in the box due to condensation or rain, so it’s essential to include features that allow excess water to escape. This could be achieved through the use of gaps between the nesting shelf and the walls or a slight incline in the floor.
To protect your birds from predators, you should incorporate robust predator protection features into your design. This can include features like hardware cloth surrounding the box, sturdy roofing, and secure latch mechanisms.
Additionally, consider incorporating easy cleaning and inspection doors to facilitate regular maintenance and health checks. These doors will allow you to inspect the nesting box without disturbing the birds, ensuring their safety and well-being.
Free PDF Nesting Box Plans for Various Designs
We’ve curated a selection of free PDF nesting box plans for you to download and use, covering various designs perfect for your backyard birds. Browse through our collection below!
Simple Birdhouse Designs Using Recycled Materials
If you’re looking to create a nesting box using recycled materials, there are plenty of simple designs that can be made with items you might have lying around. One great option is to repurpose old pallets. Pallet birdhouses are not only eco-friendly but also budget-friendly. You can find wooden pallets at most construction sites or online marketplaces.
To build a pallet nesting box, start by disassembling the pallet and sorting the planks by size. Use the largest pieces for the base and back of the box, then fill in with smaller planks for the sides and front. Attach the pieces together using screws or nails, making sure to leave enough space for the bird’s entrance.
Another option is to use old crates or boxes. Simply clean them up, add a roof made from a piece of plywood or an old umbrella, and you’ve got a cozy nesting box. You can also get creative with other materials like plastic containers, cardboard tubes, or even reclaimed wood from your own yard. Just be sure to provide adequate ventilation and drainage for the birds’ comfort.
Remember, the beauty of using recycled materials is that it’s all about repurposing what others might throw away. Get creative and have fun with it!
Advanced Nesting Box Plans with Unique Features
When it comes to building nesting boxes for birds, why settle for ordinary when you can have extraordinary? Advanced nesting box plans offer a wealth of unique features that not only provide an attractive and distinctive design but also cater to the specific needs of various bird species.
Consider, for instance, the elaborate rooflines found in some designs. These can serve as shelter from harsh weather conditions, such as heavy rain or scorching sun. They can also house ventilation systems that help regulate internal temperatures, ensuring a comfortable environment within the nesting box. Decorative trimmings are another feature to look out for, as they not only add visual appeal but also provide additional protection against predators.
To create your own unique design, start by considering the specific needs of the bird species you’re planning to house in the nesting box. Think about their preferred size, shape, and material preferences. Use this information to inform your design decisions and incorporate features that cater to these requirements. You can also experiment with different shapes and materials to create a one-of-a-kind nesting box that reflects your personality and style.
Step-by-Step Guide to Building a Nesting Box from Your PDF Plan
Let’s dive into the step-by-step guide where you’ll learn how to build your very own nesting box using our detailed PDF plan, one task at a time. You’re just a few steps away from creating a cozy home for your feathered friends!
Preparing the Site and Gathering Materials
Before starting construction on your nesting box, it’s essential to prepare the site and gather all necessary materials. Clear the area where you plan to build by removing any debris, branches, or other obstructions that could interfere with your project.
Next, take stock of the materials needed for the nesting box. Refer back to your PDF plan and make sure you have all the required lumber, screws, nails, and other hardware on hand. Double-check the dimensions and specifications listed in the plan to ensure accuracy. It’s also a good idea to lay out all the materials and tools within arm’s reach before starting work.
To measure and mark the wood accurately, use a tape measure or caliper to take precise measurements. Transfer these measurements to the wood using a pencil or marker, making sure to account for any adjustments needed due to the wood grain or other factors. Consider investing in a marking gauge for more precise markings.
When selecting materials, choose untreated lumber with a smooth surface finish. Avoid warped or damaged wood that could compromise the structure’s integrity.
Assembling and Finishing the Nesting Box
Now that you’ve cut out the pieces for your nesting box according to our previous step, it’s time to bring everything together. Begin by taking two of the side panels and attaching them to each other using screws. Make sure they’re flush with each other and evenly spaced. This will form the base of your nesting box.
Next, attach the front panel to one of the side panels you just joined together. Use a level to ensure it’s straight and securely fasten it in place. Repeat this process for the second side panel, making sure to align it perfectly with its counterpart.
Add roof supports by attaching them to the top of each side panel, spaced evenly apart. This will provide extra stability to your nesting box and prevent collapse. You can also attach any additional features you want at this stage, such as a perch or a tray for eggs.
Once all the main components are attached, it’s time to add some finishing touches. Sand down any rough edges or surfaces, then apply a coat of paint or stain to protect your nesting box from the elements and give it a nice finish.
Tips for Attracting Birds to Your New Nesting Box
To create a thriving nesting box, you’ll want to attract birds that will happily call it home. Let’s explore some simple tips for enticing feathered friends to your new box.
Selecting the Perfect Location for Your Birdhouse
When it comes to attracting birds to your new nesting box, selecting the perfect location is crucial. This means considering a few key factors that will ensure your birds have everything they need to thrive. First and foremost, think about sunlight exposure. Birds love basking in the warm sunshine, especially during breeding season, so choose a spot that receives direct sunlight for at least four hours a day.
But don’t forget about predator protection! Siting your nesting box in a safe location will help prevent predators like cats, raccoons, and snakes from getting to your birds. A good rule of thumb is to install the nesting box at least 10 feet off the ground and facing away from any nearby structures that might provide a hiding spot for predators.
Proximity to food sources is also essential. Install a bird feeder or two nearby, filled with a variety of seeds and fruits, to ensure your birds have access to a steady supply of food. This will not only attract more birds to your yard but also help them stay healthy and happy throughout the breeding season.
Providing Maintenance and Upkeep for Your Nesting Box
Regular cleaning and inspection of your nesting box is crucial to ensure its longevity and maintain a healthy environment for the birds. To start, set aside time each month to remove debris that may have accumulated inside the box. Use gloves and a soft-bristled brush to gently sweep away any twigs, leaves, or other materials. Be sure to check for any signs of damage, such as cracks or holes in the wood, and make repairs promptly if necessary.
In addition to regular cleaning, inspect the nesting box’s roof and walls for any gaps or openings that may be allowing predators to enter. Check the bedding materials, like wood shavings or straw, for moisture and replace them as needed. A dry, clean environment is essential for birds to build a safe and cozy nest. Remember to also inspect the entrance hole, ensuring it remains clear of debris and in good condition.
By following these simple steps, you’ll be able to provide your nesting box with the necessary maintenance and upkeep, giving the birds a happy and healthy home.
Troubleshooting Common Issues with Your PDF-Nesting Box Plan
Don’t worry if you’re running into issues with your nesting box plan – we’ve got you covered. This section will walk you through common problems and their easy-to-fix solutions.
Identifying Problems with Design or Materials
When building a nesting box using our PDF-nesting box plan, you may encounter some issues that hinder the assembly process. Identifying these problems early on can save you time and effort in the long run. Let’s discuss common problems related to design or materials that might pop up during construction.
One of the most common challenges is difficulty assembling the roof of your nesting box. This could be due to the shape of the roof being too complex for a beginner, or perhaps the angle is not suitable for easy assembly. If you’re experiencing this issue, try re-examining the design and see if there’s an easier alternative. Consider consulting online tutorials or videos that showcase different roofing methods.
Another common problem is issues with predator protection. This could be due to inadequate materials being used or a design flaw in the box’s configuration. You can prevent this by using sturdy materials such as cedar wood, which has natural resistance against predators like raccoons and squirrels. Moreover, consider adding features like roofs that slope away from any entrance points to deter climbing.
To identify potential problems before they become significant issues, take a close look at your nesting box plan’s design and material specifications. Consider factors like the angle of the roof, entrance size, and overall dimensions. Make sure these elements align with your local wildlife’s preferences and requirements.
If you’re struggling with predator protection or any other aspect of your nesting box construction, consult our online community for expert advice from experienced builders. They can offer valuable insights based on their experiences with similar challenges. Don’t hesitate to ask questions – it’s always better to clarify before proceeding with the build.
In some cases, problems might arise due to inaccurate measurements or improper cutting techniques. To avoid these issues, ensure you’re following our provided dimensions and measurement guidelines carefully. If you’re unsure about any aspect of the build, consider using a saw or other power tools specifically designed for precise cuts.
Ultimately, identifying potential problems in your nesting box plan will help you overcome common challenges associated with design or materials. By being proactive and taking necessary precautions, you’ll be able to build a safe and functional nesting box that attracts local wildlife and supports their well-being.
Conclusion: Enjoying the Fruits of Your Labor
Now that you’ve downloaded and printed out your custom nesting box plans PDF, it’s time to enjoy the fruits of your labor. As you watch the birds arrive at their new home, you’ll be filled with a sense of pride and accomplishment. But remember, the real reward is yet to come – seeing the next generation of birds thrive in their cozy boxes.
To get the most out of your nesting box plans, make sure to regularly inspect and maintain the boxes throughout the breeding season. This will ensure that any issues are caught early on, allowing you to provide a safe and healthy environment for the birds.
As the months pass and the birds raise their young, take a moment to appreciate the beauty and wonder of nature unfolding before your eyes. It’s moments like these that make all the hard work worthwhile – so be sure to sit back, relax, and enjoy the show!
Frequently Asked Questions
What if I’m not comfortable with DIY projects or don’t have experience building birdhouses?
If you’re new to DIY projects, start by reviewing the free PDF plans provided in this guide. Look for nesting box designs that are labeled as “beginner-friendly” and consider watching YouTube tutorials or online videos for guidance. You can also consult with a local hardware store expert or a fellow DIY enthusiast for advice.
Can I use recycled materials to build my own birdhouse?
Yes, using recycled materials is an excellent way to create eco-friendly nesting boxes! Consider repurposing old pallets, wooden crates, or even plastic containers as the base for your nesting box. Just make sure to clean and disinfect them thoroughly before assembly.
How do I ensure that my nesting box is predator-proof?
When building a nesting box, it’s essential to prioritize predator protection. Look for designs with features such as hardware cloth-covered entrances, roof overhangs, or built-in baffle systems to prevent predators from reaching the birds. You can also consider adding additional protection measures like installing the box at least 10 feet off the ground.
What if I’m unsure about which bird species are native to my area and which nesting box design is best for them?
To determine which bird species are native to your region, consult with a local wildlife organization or check online resources such as eBird. Then, review the nesting box designs provided in this guide and choose one that caters to the specific needs of those birds.
Can I modify an existing plan to suit my specific needs or preferences?
Yes! While it’s essential to follow basic design principles for nesting boxes, you can certainly modify a plan to fit your unique requirements. Consider consulting with experts in bird behavior or wildlife conservation to ensure that any modifications don’t compromise the safety and well-being of the birds.