
Are you a backyard poultry enthusiast looking to provide your beloved quails with a safe and efficient feeding system? Building a DIY quail feeder is a great way to promote healthy eating habits, reduce waste, and add a personal touch to your bird-friendly garden. With the right materials and design, you can create a custom feeder that suits your quails’ specific needs.
In this article, we’ll guide you through the process of building a DIY quail feeder from scratch, covering essential topics such as materials selection, design considerations, and installation tips. Our step-by-step approach ensures that even beginners can build a functional and effective quail feeder without breaking the bank or sacrificing style.
Choosing the Right Materials
When it comes to building a quail feeder, selecting the right materials is crucial for durability and functionality. Let’s discuss the essential components you’ll need to get started.
Essential Tools and Equipment Needed
When it comes to building a quail feeder DIY project, having the right tools and equipment is essential to ensure a successful outcome. First and foremost, you’ll need basic hand tools such as a tape measure, level, and utility knife for measuring, leveling, and cutting materials accurately.
A drill press or cordless drill will be necessary for drilling holes in the wood and driving screws securely. You may also want to have a jigsaw or circular saw handy for making curved cuts or cutting larger pieces of lumber. Additionally, sandpaper is essential for smoothing out any rough edges or surfaces.
In terms of specialized equipment, a miter saw can come in handy when making precise angled cuts. A set of clamps will help you hold your materials in place while gluing and assembling the feeder’s components. Safety goggles and a dust mask are also crucial to protecting yourself from potential hazards such as sawdust and debris.
Make sure to check that all your tools are in good working condition before starting your project, and consider investing in a toolset if you don’t already have one on hand.
Selecting Durable and Easy-to-Clean Materials
When it comes to building a quail feeder DIY project, selecting durable and easy-to-clean materials is crucial for its longevity and maintenance. You want the feeder to withstand harsh weather conditions, heavy use, and potential messes while also being effortless to clean.
For durability, consider using woods like cedar or redwood, which are naturally resistant to rot and insect damage. You can also opt for recycled plastic lumber (RPL), a sustainable and low-maintenance option that’s perfect for outdoor projects. Avoid using pressure-treated wood as it may contain chemicals that could harm your quails.
For easy cleaning, look for materials with smooth surfaces or textured finishes that allow food particles to easily slide off. A simple and effective design will also make cleaning a breeze. Some great options include PVC pipes or sheets of stainless steel. Remember to avoid using materials with small crevices or grooves where debris can accumulate and become stuck.
When selecting materials, prioritize those that are durable, water-resistant, and easy to clean. This will save you time and effort in the long run, ensuring your quail feeder remains functional and safe for your feathered friends.
Designing Your Quail Feeder
Now that you have a clear plan for your quail feeder, let’s get into the fun part: designing it! This section will walk you through creating a functional and safe feeding system for your birds.
Considering Quail Behavior and Preferences
When it comes to designing your quail feeder, understanding their behavior and preferences is crucial. Quails are social birds that thrive on interaction and a sense of security. They prefer feeding areas that provide shelter from the elements and potential predators. Consider placing your feeder near a wall or in a corner of the enclosure to give them a sense of protection.
Quails are also foragers, so they appreciate feeders with multiple levels and compartments. This allows them to scratch and search for food, which is essential for their physical and mental well-being. A good quail feeder should have at least two tiers, with one level containing fresh vegetables and fruits, and the other level holding grains and seeds.
When designing your feeder, also consider the quails’ visual preferences. They are attracted to bright colors and textures, so incorporate these elements into your design. Use a combination of mesh and solid panels to create a visually appealing and functional feeder that encourages healthy feeding habits in your quails.
Deciding on the Feeder’s Capacity and Layout
When deciding on the capacity of your quail feeder, it’s essential to consider the number of birds you’re raising and their individual needs. A good rule of thumb is to provide 1-2 square inches of feeding space per bird. This will help prevent overcrowding and reduce waste.
To determine the ideal capacity for your feeder, calculate the total amount of feed your quail will consume in a day. You can use online calculators or consult with experienced breeders to get an estimate. For example, if you’re raising 10 quail, you’ll need a feeder that holds at least 20-40 pounds of feed.
When designing the layout of your feeder, consider easy cleaning and maintenance. A sloping floor or inclined surface will help prevent waste from accumulating and make it easier to clean out the feeder. You can also add features like removable trays or compartments to simplify the process. Additionally, ensure that the feeder is accessible for you and your quail, with enough space for comfortable feeding and movement. This will promote happy and healthy birds.
Building Your Quail Feeder
Now that you’ve gathered your materials, it’s time to start building your quail feeder. Let’s get started on crafting a sturdy and efficient feeding system for your feathered friends!
Step-by-Step Instructions for Assembly
Now that you’ve cut and assembled all the necessary parts for your quail feeder, it’s time to bring everything together. Begin by placing the bottom panel onto a flat surface, ensuring it’s secure and won’t move around during assembly.
Next, attach the vertical supports to the bottom panel using the provided screws. Make sure they’re evenly spaced and aligned with the edges of the panel. This will provide stability for your feeder and keep it upright.
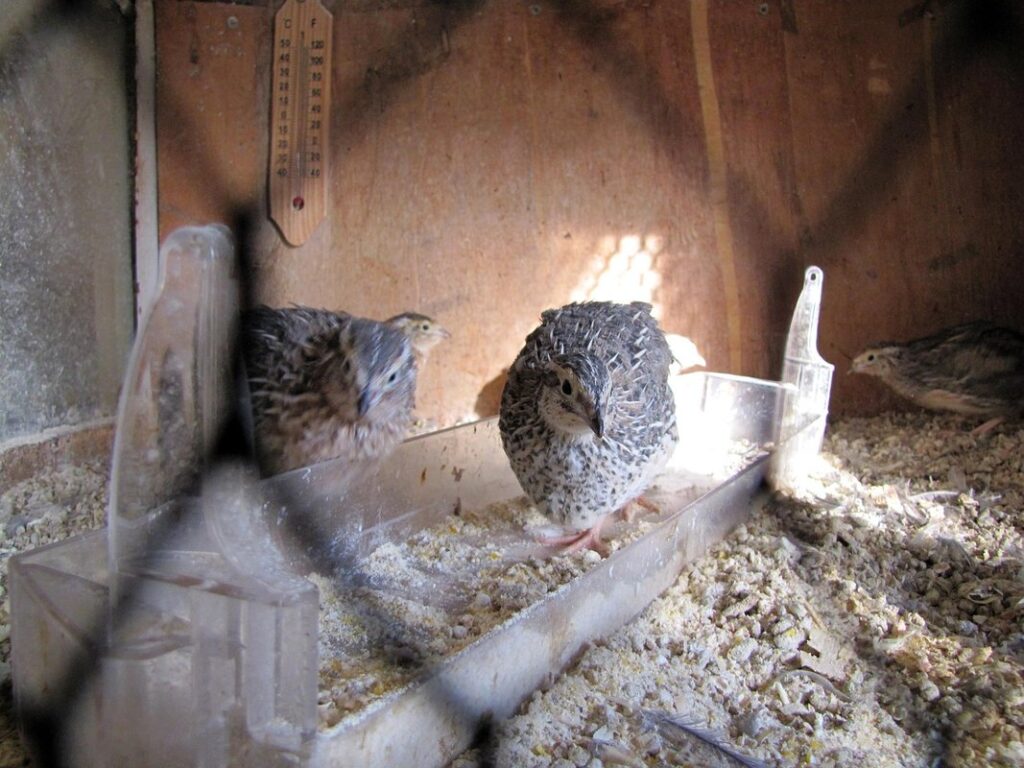
Move on to attaching the feeding troughs to the side panels. Use the screws provided in the kit to secure them firmly in place. Ensure the troughs are level and evenly spaced, allowing for easy access by your quails.
Finally, attach the roof panel to the top of the feeder using the screws provided. Make sure it’s securely fastened to prevent any leaks or damage from the elements. With these steps completed, your quail feeder is now ready for use. Double-check all connections and tighten any loose screws before filling with food.
Tips for Adding Hinges and Latches for Easy Maintenance
When designing your quail feeder, don’t forget to include hinges and latches that will make maintenance a breeze. You want to be able to easily clean the feeder without disturbing the quails, which can be stressful for them. By adding these features, you’ll not only save yourself time and effort but also ensure the health and well-being of your feathered friends.
To add hinges, attach them to the feeder’s sides or back, allowing you to swing it open for cleaning. Make sure they’re sturdy enough to hold the feeder’s weight, especially if it’s made from a heavy material like wood. For example, you can use 2-inch hinges with screws that can withstand up to 20 pounds of pressure.
For latches, choose ones that are easy to operate and won’t get in the way of the quails’ movements. Magnetic latches or simple clips are great options, as they require minimal effort to open and close. You can also consider adding a locking mechanism to prevent curious quails from opening the feeder during maintenance.
Installing and Using Your Quail Feeder
Now that you’ve built your quail feeder, let’s dive into installing it safely and effectively, as well as show you how to use it for happy and healthy birds.
Where to Place Your New Feeder in the Coop
When placing your new feeder in the coop, it’s essential to consider two critical factors: accessibility and predator protection. You want to make sure your quails can easily access their food while minimizing the risk of predators getting to them.
Ideally, position the feeder near a corner or against a wall, allowing your quails to feed comfortably without being too exposed. This will also help prevent overcrowding around the feeder, reducing competition and stress among your birds. Keep in mind that quails are naturally wary of open spaces, so it’s better to place the feeder in a more enclosed area.
In terms of predator protection, place the feeder at least 12-18 inches away from any nesting boxes or other areas where predators might lurk. You can also consider suspending the feeder from the ceiling using a sturdy chain or rope, making it harder for predators like snakes, raccoons, and weasels to access.
Remember, the key is to find a balance between accessibility and security. With a little experimentation, you’ll be able to place your quail feeder in an ideal spot that meets both of these requirements.
Tips for Filling and Cleaning the Feeder Regularly
When it comes to maintaining a healthy and thriving quail population, regular feeder cleaning is crucial. It’s essential to fill and clean the feeder frequently to prevent the buildup of bacteria, mold, and other contaminants that can harm your quails.
To ensure fresh food is always available, try to refill the feeder at least twice a day, especially during peak breeding seasons or when you have a large number of quails. Consider setting a reminder on your phone or calendar to maintain consistency.
Cleaning the feeder should be done daily, using warm soapy water and a soft-bristled brush to remove any debris or food residue. Rinse thoroughly with clean water before refilling it with fresh feed. For tougher messes, you can soak the feeder in a solution of 1 part white vinegar to 10 parts water for about an hour.
Additionally, check the feeder’s location regularly to ensure it’s not attracting pests or rodents. Keep the surrounding area clean and free from debris to prevent these issues. By following this simple maintenance routine, you’ll be providing your quails with a safe and healthy environment to thrive in.
Troubleshooting Common Issues with Your Quail Feeder
As you work on your quail feeder DIY project, you might encounter some hiccups along the way, and we’ve got tips to help you troubleshoot common issues that can pop up. Let’s address them together!
Identifying and Resolving Leaks or Water Damage
One of the most frustrating issues you may encounter with your quail feeder is leaks or water damage. This can be caused by a variety of factors such as improper assembly, low-quality materials, or even clogged drains.
First, let’s identify the common signs of a leaky feeder:
* Water droplets visible on the feeder or surrounding area
* Wet spots or stains around the feeder
* Quail showing signs of stress or discomfort due to water-logged conditions
If you suspect your quail feeder is leaking, it’s essential to act quickly. Here are some steps to follow:
* Check the joints and connections for any signs of wear or damage. Tighten loose screws or replace damaged parts as needed.
* Inspect the drainage system to ensure it’s functioning correctly. Clean out any debris or blockages that may be causing water to accumulate.
* If your feeder has a removable top or tray, inspect these areas for any signs of leakage.
By identifying and addressing leaks promptly, you can prevent further damage and maintain a healthy environment for your quail.
Addressing Problems with Quails Not Using the Feeder
If you’ve set up your quail feeder and it’s not being used by your feathered friends, don’t worry! This is a common issue many quail keepers face. There are several reasons why quails might be hesitant to use their new feeder, so let’s go over some potential causes.
One reason could be the location of the feeder. Quails are creatures of habit and prefer to forage in areas that provide them with cover and protection from predators. If your feeder is placed out in the open or too close to the coop, they might feel exposed and avoid using it. Try moving the feeder to a more secluded spot, such as behind a bush or under some trees.
Another reason could be the type of feed you’re offering. Quails are picky eaters and prefer their food to be easily accessible. If your feeder is not dispensing the feed properly or if the quails can’t reach it comfortably, they might give up using it altogether. Consider switching to a different type of feeder that’s designed specifically for quails, such as a hanging feeder or a tray feeder.
It’s also possible that the quails are simply not interested in using their new feeder because they’re too comfortable eating from the ground. Quails often prefer to scratch and peck at food on the ground rather than use a feeder. In this case, you might need to try some creative solutions to entice them to use the feeder. One idea is to sprinkle some of their favorite treats around the feeder to make it more appealing.
If none of these suggestions work, observe your quails’ behavior and see if there’s something else going on that’s causing them to avoid using the feeder. For example, are they being bullied by other birds or is there a predator lurking nearby? Once you’ve identified the issue, you can take steps to resolve it and get your quails back to using their feeder.
Conclusion: Enjoy Your DIY Quail Feeder!
Now that you’ve finished building your quail feeder, let’s go over a few final tips to ensure it remains safe and effective for your feathered friends.
Final Thoughts and Recommendations
As you’ve completed building your very own DIY quail feeder, take a moment to appreciate the sense of accomplishment and satisfaction that comes with creating something from scratch. You now have a functional and attractive feeder that will provide your feathered friends with a safe and healthy place to eat.
As we conclude this guide, let’s summarize some key takeaways:
• A well-designed quail feeder is essential for maintaining the health and well-being of your birds.
• Consider factors like durability, ease of cleaning, and accessibility when choosing materials or designing your feeder.
• Quail are social animals and appreciate being close to each other, so position your feeder in a spot that allows for communal eating.
Now, it’s time to think about continued improvement or customization. Here are some ideas to get you started:
• Experiment with different types of feeders, such as hopper-style or tray-style, to see which one works best for your quail.
• Consider adding a roof or cover to protect the feeder from the elements and predators.
• Think about incorporating features like perches, ladders, or bridges to create an entertaining and engaging environment for your birds.
If you’re feeling adventurous, why not try your hand at building a themed feeder? For example, you could create a rustic wooden feeder with a decorative roof or a colorful ceramic feeder shaped like a birdhouse. The possibilities are endless!
Remember, the most important thing is to have fun and be creative while building and maintaining your quail feeder. With a little practice and patience, you’ll become an expert DIYer in no time!
Frequently Asked Questions
Can I use recycled materials for the quail feeder?
You can repurpose old pallets, crates, or containers to create a unique and eco-friendly quail feeder. Just ensure that any reused materials are clean, dry, and free of potential health hazards. Consider adding a coat of waterproof sealant to protect the material from moisture.
How do I prevent water accumulation in the quail feeder?
To avoid creating an ideal breeding ground for bacteria and pests, ensure proper drainage by designing a slope or incline within the feeder’s tray. You can also add a slight curvature to the feeding trough to allow excess water to flow out easily.
What if my quails don’t take to using the new feeder?
If your quails are hesitant to use their new feeder, try offering their favorite foods in it first. Gradually introduce fresh food and clean water to make the transition smoother. Place the feeder near their current feeding area to minimize disruption and encourage exploration.
How often should I clean and refill the quail feeder?
Regular cleaning is crucial for maintaining hygiene and preventing disease transmission among your flock. Clean the feeder every 2-3 days, or after a storm if there’s been heavy rain. Fill it with fresh food and water at least twice daily to ensure a steady supply.
Can I make adjustments to the feeder design as needed?
Quail behavior can be unpredictable, so be prepared for changes in their feeding habits over time. If necessary, make adjustments to the feeder’s capacity or layout by adding or removing compartments, adjusting feeding trays, or even creating a separate food and water station.