
Are you looking for an eco-friendly way to manage your pet waste or create nutrient-rich soil for your garden? You’re in luck because deep litter method composting is here to revolutionize the way we think about waste management and soil creation. This innovative approach has been gaining popularity among gardening enthusiasts and environmentally conscious individuals alike, and it’s not hard to see why.
By using a simple setup and regular maintenance routine, you can turn your pet’s waste into a valuable resource that will improve the health of your soil and plants. In this article, we’ll take a closer look at the benefits and best practices of deep litter composting, from setting up your system to troubleshooting common issues. Whether you’re a seasoned gardener or just starting out, you’ll learn how to create nutrient-rich soil using this effective and sustainable method.
What is the Deep Litter Method?
So you’re curious about how deep litter method composting actually works? In this next part, we’ll dive into the basics of what it’s all about.
Brief History and Background
The deep litter method has its roots in ancient farming practices, where farmers used layers of organic materials to maintain soil health. This natural approach was essential for maintaining fertile soils and supporting healthy crops without the need for synthetic fertilizers.
In fact, some of the earliest known forms of composting date back to ancient civilizations such as Egypt and Greece, where people used animal manure and crop waste to enrich their soils. The concept of layering materials to create a nutrient-rich soil amendment has been passed down through generations, with different cultures adapting it to suit their specific needs.
This approach may seem old-fashioned, but its simplicity and effectiveness have made the deep litter method a popular choice among modern gardeners and small-scale farmers. By emulating ancient farming practices, we can tap into centuries of knowledge and experience to create healthier, more sustainable soils in our own backyards.
Key Principles and Benefits
The deep litter method is built on several key principles that work together to create a self-sustaining composting system. One of its primary benefits is the ability to reduce odors associated with traditional composting methods. By allowing for deeper layers of carbon-rich materials, such as straw or shredded newspaper, these odors are minimized.
Another crucial principle is maintaining an optimal carbon-to-nitrogen ratio (C:N ratio). This balance ensures that beneficial microorganisms have enough carbon-based materials to break down waste efficiently while minimizing the risk of anaerobic conditions and unpleasant odors. The ideal C:N ratio varies depending on the type of material being composted, but generally falls between 25:1 and 30:1.
The deep litter method also promotes beneficial microbial activity by providing a conducive environment for microorganisms to thrive. This is achieved through regular additions of fresh bedding materials, which introduce new microorganisms that help break down existing waste. By maintaining this balance and encouraging the growth of beneficial microbes, you can create a thriving compost ecosystem that reduces odors and produces rich, nutrient-dense soil amendments.
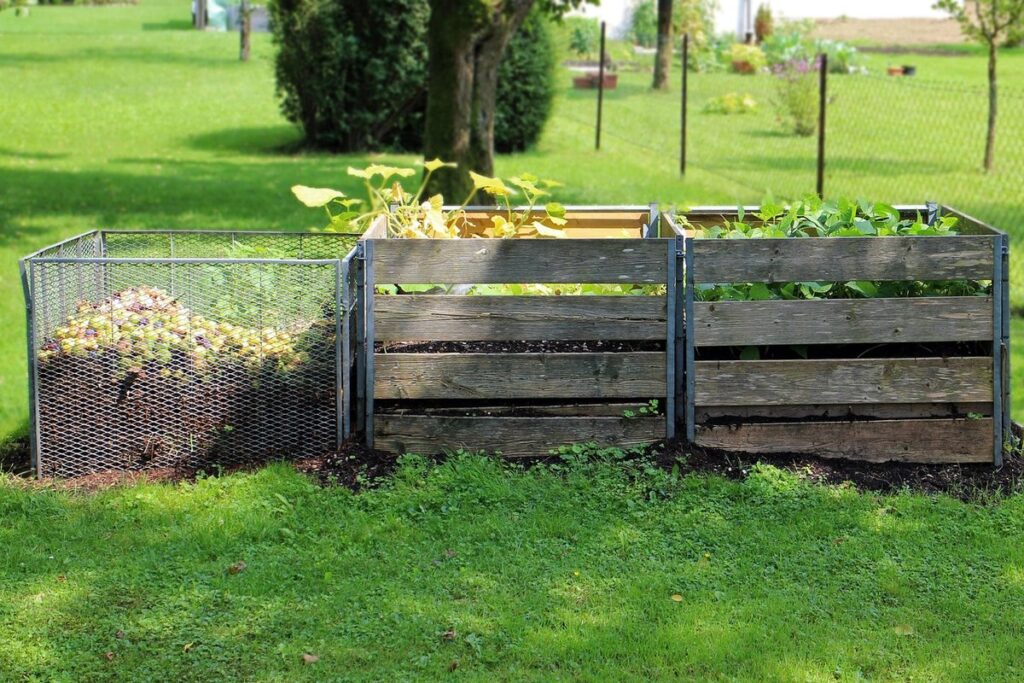
Setting Up a Deep Litter Composting System
To get started with deep litter composting, you’ll need to set up your system correctly by choosing the right materials and preparing the enclosure. This section will guide you through that process step-by-step.
Choosing the Right Location
When it comes to setting up a deep litter composting system, choosing the right location is crucial for its success. As you’re about to see, a well-ventilated area with easy access for maintenance can make all the difference.
First and foremost, ensure that the spot you’ve chosen receives sufficient sunlight. Most microorganisms thrive in temperatures between 40°F and 120°F (4°C and 49°C), so direct sunlight can be beneficial. However, if your climate is extremely hot or sunny, consider providing some shade to prevent overheating.
Another vital consideration is wind direction. You’ll want to position your composting area in a spot where prevailing winds won’t blow litter away from the pile. This will save you time and effort during maintenance.
It’s also essential to keep your deep litter system at least 10-15 feet away from any water sources, such as wells or septic systems, to prevent potential contamination. By considering these factors, you’ll be well on your way to creating a thriving composting environment that’s easy to maintain and beneficial for your garden.
Selecting Materials for Your Compost Pile
When it comes to selecting materials for your deep litter composting pile, you’ll want to focus on a mix of bedding materials, carbon-rich materials, and protein-rich materials. Bedding materials like straw and hay provide the bulk of your compost pile’s structure, helping to absorb moisture and odors. They also introduce air pockets into the pile, which is essential for healthy decomposition.
Carbon-rich materials like shredded newspaper and cardboard are also crucial in a deep litter composting system. These materials add bulk to the pile, help control odor, and provide nutrients as they break down. Aim to include a mix of 2/3 carbon-rich materials and 1/3 protein-rich materials in your pile.
Protein-rich materials like manure from herbivores (not carnivores) or blood meal are high in nitrogen content and will help speed up the decomposition process. However, be sure to add them sparingly as excessive amounts can lead to ammonia buildup and unpleasant odors.
Building the Initial Litter Layer
When building the initial litter layer, it’s essential to start with a base that will provide a solid foundation for the entire composting process. Begin by adding 4-6 inches of carbon-rich material, such as wood shavings or straw, to the bottom of the enclosure. This layer should make up about 20-30% of the total depth of your litter pile.
Next, add a 2-inch layer of bedding material like pine or fir needles. These materials are high in acidity and will help suppress pathogens and odors in the composting process. You can also use coconut coir or wheat straw as alternatives.
It’s crucial to avoid using too many paper products, such as newspaper or cardboard, at this stage. They may cause the pile to become too wet and lead to anaerobic conditions. Instead, save these materials for later addition when the composting process is well underway.
Remember to leave a 1-inch gap between each layer to allow for air circulation, which will help regulate moisture levels and prevent mold growth.
Maintaining a Healthy Compost Pile
To ensure your compost pile remains healthy and thriving, let’s dive into some essential tips for maintaining it. This includes monitoring temperature, moisture, and carbon-to-nitrogen ratios.
Adding New Materials to the Pile
As you continue to add to your deep litter method compost pile, it’s essential to maintain a balanced carbon-to-nitrogen ratio. To do this, layer new materials in a specific sequence: start with a 4-6 inch layer of brown materials like straw or shredded newspaper, followed by a 2-3 inch layer of green materials such as fresh grass clippings or food scraps. Repeat this process, alternating between brown and green layers.
It’s crucial to maintain adequate moisture levels in your compost pile. Aim for a mix that’s similar to a damp sponge – not too soggy, but also not dry and crumbly. Regularly check the pile’s moisture by inserting your hand into it; if it feels dry or too wet, adjust accordingly. Monitoring temperature is another vital aspect of maintaining a healthy compost pile.
Keep an eye on internal temperatures between 130°F to 140°F (54°C to 60°C), which indicates active decomposition and microbial activity. If the temperature rises above this range, it may be due to too many green materials or inadequate aeration. On the other hand, if the temperature drops below 100°F (38°C), it could indicate insufficient moisture levels.
Turning the Compost Pile
Turning your compost pile is an essential task that will not only speed up decomposition but also prevent odors and pests from taking over. The process of turning involves aerating the pile to introduce oxygen, which feeds the microorganisms responsible for breaking down organic matter.
As a general rule, you should turn your compost pile every 7-10 days during the active decomposition phase. However, this frequency may vary depending on climate, material type, and desired outcomes. In warm weather, you can turn the pile every 5-7 days to speed up decomposition. On the other hand, in cooler climates or during winter months, you may need to turn it less frequently, around every 10-14 days.
When turning your compost pile, use a pitchfork or shovel to gently loosen the material on one side and then flip it over. This will help to evenly distribute heat and moisture throughout the pile. Keep in mind that over-turning can be detrimental, as it can compact the materials and prevent oxygen from reaching them. Monitor your pile’s temperature, texture, and odor to determine when it’s ready for turning. With regular turning, you’ll have a rich, nutrient-dense compost to use on your garden in no time.
Monitoring Temperature and Odor
Monitoring temperature and odor is crucial to maintaining a healthy compost pile. A well-balanced pile will have a mix of “green” materials high in nitrogen (such as manure or grass clippings) and “brown” materials high in carbon (like dried leaves or shredded newspaper). As microorganisms break down these materials, heat is generated, causing the temperature to rise.
Typically, you’ll notice three distinct temperature stages: initial warm-up, peak, and cooling off. Aim for a maximum temperature of 160°F (71°C), as higher temperatures can kill beneficial microbes and create unpleasant odors. If it gets too hot, cover your pile with a tarp or let it sit for a day to allow the heat to dissipate.
To manage odor, ensure proper carbon-to-nitrogen ratios and maintain adequate airflow. This might involve turning the pile every few days to introduce oxygen and prevent anaerobic conditions that contribute to unpleasant smells. If you notice an overpowering stench, try adding more brown materials or aerating the pile further. Regular monitoring of temperature and odor will help you fine-tune your composting process and avoid potential issues.
Deep Litter Method vs. Other Composting Methods
When it comes to composting, you may be wondering what sets the deep litter method apart from other popular methods. In this section, we’ll explore the key differences and similarities.
Comparing with Traditional Composting Techniques
The deep litter method has gained popularity among chicken keepers and small-scale farmers due to its simplicity and efficiency. When compared to traditional composting methods like hot composting or worm composting, the deep litter method stands out for several reasons.
Hot composting, for instance, requires a controlled environment with precise temperature and carbon-to-nitrogen ratios. This can be challenging for beginners, especially those without extensive experience in composting. In contrast, the deep litter method relies on natural processes to break down waste, eliminating the need for elaborate setup or monitoring.
Worm composting, also known as vermicomposting, uses red wiggler worms to decompose organic matter. While this method is excellent for small-scale operations, it can be space-intensive and requires a separate bin for the worms. The deep litter method, on the other hand, utilizes the existing coop infrastructure, making it more practical for many backyard chicken keepers.
One key advantage of the deep litter method is its ability to produce rich compost without generating excessive heat or odors. This makes it an attractive option for those who live in areas with space constraints or want a low-maintenance solution.
Integrating Deep Litter with Other Systems (e.g., Bokashi, Vermicomposting)
One of the most exciting aspects of deep litter method composting is its potential to be combined with other composting approaches. By integrating different systems, you can create a more efficient and productive composting process that meets your specific needs.
For example, pairing deep litter with Bokashi composting allows for the simultaneous decomposition of organic materials in both dry (deep litter) and wet (Bokashi) conditions. This combination enables you to tackle a wider variety of waste streams, including food scraps and liquids, while maintaining a healthier environment for your animals.
Vermicomposting, or worm composting, is another system that can be integrated with deep litter method composting. By adding worms to the mix, you can accelerate decomposition rates and produce a nutrient-rich castings material perfect for fertilizing plants.
When combining different systems, it’s essential to consider factors such as space, materials flow, and microclimate management. However, with careful planning, these integrations can lead to significant improvements in composting efficiency, reduced odors, and increased biodiversity. By experimenting with various combinations, you can tailor your composting setup to suit your specific needs and create a thriving ecosystem on your property.
Troubleshooting Common Issues
Don’t worry if things don’t go as planned with your deep litter method composting pile – we’ve got you covered with some practical solutions to common problems. Let’s tackle those issues together!
Odors, Pests, and Other Challenges
One of the most common concerns with deep litter composting is managing odors. When not properly maintained, the mix can become too wet and start to smell like ammonia. This occurs when the carbon-rich materials (like straw or shredded newspaper) don’t balance out the nitrogen-rich inputs (such as manure or urine). To avoid this issue, it’s essential to maintain a 2:1 or 3:1 ratio of carbon to nitrogen.
To control pest infestations like rodents and ants, use physical barriers around the compost pile. Wire mesh or hardware cloth can keep these unwanted critters out. Additionally, you can try adding certain herbs (like mint or lemongrass) that repel pests naturally.
Another common problem is uneven decomposition, leading to clumps of unbroken carbon materials amidst a sea of broken-down nitrogen sources. Regular turning and aeration help prevent this issue by maintaining even moisture levels throughout the pile. Regular monitoring also ensures that there’s no excessive buildup of one component over another, keeping your compost balanced and odor-free.
Monitoring pH Levels and Nutrient Balance
Monitoring pH levels and nutrient balance is crucial to maintaining a healthy deep litter method composting system. Over time, the decomposition process can lead to fluctuations in pH levels, which can be detrimental to microorganisms and potentially harm your plants.
Aim for a pH range of 6.0-7.5, as this will allow for optimal microbial activity. To check pH levels, you can use pH test strips or a pH meter. It’s essential to monitor pH regularly, especially during the initial stages of decomposition, when pH levels tend to be more unstable.
Maintaining a balanced nutrient supply is equally important. Aim to achieve a carbon-to-nitrogen (C:N) ratio between 20:1 and 30:1. You can add nitrogen-rich materials like chicken manure or urine, while balancing it with carbon-rich materials like straw or coconut coir.
Regular monitoring will also help you identify potential issues early on. For instance, if the pH drops too low, it may be due to an overabundance of nitrogen-rich materials. Adjusting your ratios and adding buffering agents like wood ash can help stabilize the system. By keeping a close eye on these parameters, you’ll be able to fine-tune your composting system for optimal results.
Measuring Success: Evaluating the Deep Litter Method’s Effectiveness
Now that you’ve set up your deep litter method, it’s time to evaluate its effectiveness. We’ll explore how to accurately measure success and determine whether this approach is right for you.
Assessing Compost Quality and Yield
Evaluating compost quality is crucial to ensuring that your deep litter method is effective. A well-composted pile will have a rich, earthy aroma and appear as dark brown or black material with an even consistency. To assess the nutrient content of your compost, you can conduct tests for nitrogen, phosphorus, and potassium (NPK). These nutrients are essential for plant growth, so understanding their levels in your compost is vital.
To determine NPK levels, you can use a soil testing kit or send a sample to a lab for analysis. Moisture content is also important; ideal compost should have a moisture level between 40-60%. If it’s too dry, add water; if it’s too wet, turn the pile to aerate.
Regular visual inspections will help you identify potential issues before they become major problems. Look for signs of overheating, mold, or pests, which can indicate that your compost is not breaking down properly. Regularly monitoring these factors will help you fine-tune your process and produce high-quality compost.
Case Studies and Examples of Successful Implementation
Let’s take a closer look at some real-world case studies that demonstrate the effectiveness of the deep litter method. A study conducted by the University of Connecticut found that a layer farm using the deep litter method saw a 30% reduction in ammonia emissions and a significant decrease in odors. This is a crucial aspect to consider, especially for small-scale farmers who may be concerned about regulatory compliance.
Another example comes from a dairy farm in Vermont that implemented the deep litter method on its milking parlor floor. The result? A marked reduction in pathogens and bacteria, leading to improved cow health and increased milk production. By managing the litter properly, the farmer was able to reduce the need for antimicrobial treatments by 50%.
What’s more, a study published in the Journal of Sustainable Agriculture found that the deep litter method can significantly reduce greenhouse gas emissions compared to traditional manure management systems.
Advanced Techniques for Deep Litter Composting
Now that you’re comfortable with the basics of deep litter composting, it’s time to take your skills to the next level and learn advanced techniques to optimize your system. Let’s dive into some expert tips for maximum efficiency.
Using Cover Materials to Enhance Decomposition
When it comes to deep litter composting, using cover materials is an often-overlooked aspect that can make a significant difference in the overall process. Cover materials like straw or hay serve as a protective layer between your compost pile and the environment. One of the primary benefits is moisture regulation – these materials help absorb excess liquid, preventing soggy conditions that can harbor pests and odors.
Beyond moisture control, cover materials also suppress weeds by blocking light and preventing seed germination. This reduces competition for resources within the compost pile and prevents unwanted growth from taking over your space.
In addition to their functional benefits, cover materials promote beneficial microbial activity. As microorganisms break down organic matter, they create a hospitable environment that fosters healthy decomposition. By incorporating cover materials into your deep litter composting routine, you can create an optimal balance between moisture retention and microbial activity – ultimately leading to rich, nutrient-dense compost for your garden.
Introducing Beneficial Microorganisms (e.g., Mycorrhizal Fungi)
Beneficial microorganisms play a vital role in the deep litter composting process. One of the most beneficial types is Mycorrhizal fungi, which form symbiotic relationships with plant roots. These fungi help to increase nutrient uptake and water absorption for plants, leading to healthier and more resilient growth.
To introduce Mycorrhizal fungi into your deep litter compost pile, you can add a small amount of mycorrhizal inoculum (around 1-2% of the total material) to the pile. This can be done at the beginning or during the process. The fungi will then colonize the root systems of plants as they grow.
Some benefits of using Mycorrhizal fungi include improved soil structure, increased plant growth, and enhanced resistance to pests and diseases. You can also use other beneficial microorganisms such as Trichoderma harzianum, which has been shown to improve plant health and reduce the need for fertilizers.
When introducing beneficial microorganisms, it’s essential to maintain a balance of “C” (carbon) and “N” (nitrogen) in your compost pile. This can be achieved by adding a mix of materials high in carbon (e.g., straw or shredded newspaper) and those high in nitrogen (e.g., fresh grass clippings or chicken manure).
Frequently Asked Questions
Can I use the deep litter method for human waste composting?
Yes, but it’s essential to note that human waste composting requires additional considerations due to pathogen and disease risks. If you choose to use the deep litter method for human waste, ensure proper safety measures are taken, such as using a dedicated area, implementing strict hygiene protocols, and monitoring temperature to eliminate pathogens.
How do I know if my compost pile is too dry or too wet?
Monitoring the compost pile’s moisture levels is crucial. A well-balanced compost pile should have a consistency similar to a damp sponge. If it feels too dry, add more water; if it’s too wet, allow it to aerate and dry out slightly.
Can I mix different types of bedding materials in my deep litter composting system?
Yes, but be cautious when combining materials with varying carbon-to-nitrogen ratios. Aim for a balanced mix of “brown” (carbon-rich) materials like straw or wood shavings and “green” (nitrogen-rich) materials like pet waste or food scraps.
How often should I turn my compost pile to maintain optimal decomposition?
Regular turning helps ensure even decomposition, but the frequency depends on factors like temperature, moisture, and material type. Aim for at least one turnover every 7-10 days during active decomposition phases and more frequently if you notice reduced odor and carbon breakdown.
Can I use beneficial microorganisms (like mycorrhizal fungi) with the deep litter method?
Yes, introducing beneficial microorganisms can enhance decomposition rates and soil health. Research specific strains suitable for your climate and composting needs, and follow proper application guidelines to avoid contamination or unwanted effects on plant growth.