
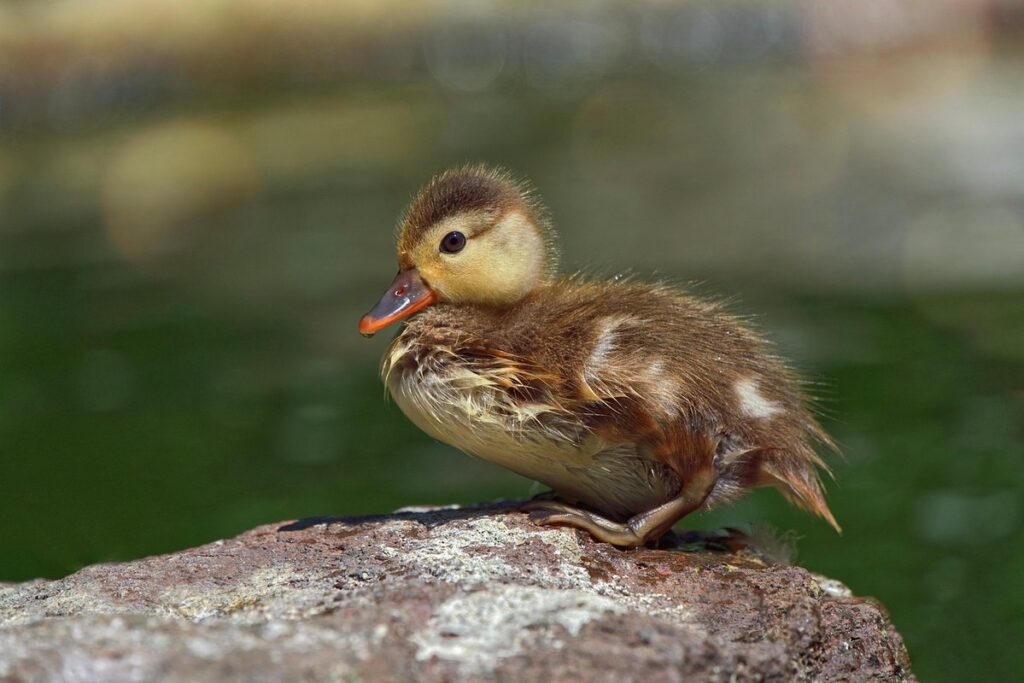
Are you preparing to welcome a batch of adorable ducklings into your flock? If so, learning how to safely brood them is essential for their health and survival. One popular method used by many backyard farmers is heat plates – a low-cost, energy-efficient alternative to traditional heat lamps. However, setting up and maintaining a heat plate system can be intimidating if you’re new to duck breeding.
Don’t worry; with this article, we’ll take the guesswork out of brooding ducklings using heat plates. We’ll cover everything from basic setup and maintenance tips to troubleshooting common issues that may arise. By the end of this guide, you’ll be confident in your ability to provide a warm, safe environment for your feathered friends to thrive. From selecting the right equipment to monitoring temperature and humidity levels, we’ve got you covered.
Benefits and Basics
Let’s get down to business: what are the benefits of using a heat plate for brooding ducklings, and how do you ensure they stay safe and happy?
Understanding Heat Plates for Brooding
When it comes to brooding ducklings, one of the most effective and efficient ways to provide them with a safe and comfortable environment is by using heat plates. These specialized devices are designed specifically for this purpose and offer several key features that set them apart from other heating methods.
First and foremost, heat plates work by providing a precise temperature control that can be adjusted according to your needs. This is particularly important when it comes to brooding ducklings, as their ideal incubation temperature ranges between 98°F to 100°F (36°C to 38°C). By using a heat plate, you can maintain this optimal temperature with ease and ensure that your ducklings develop properly.
In addition to temperature control, many modern heat plates also come equipped with features such as automatic shut-off, overheat protection, and built-in thermostats. These advanced safety features give you peace of mind while ensuring the well-being of your precious brood. With a little practice and patience, using a heat plate can become second nature to even the most novice duck breeder.
Choosing the Right Heat Plate
When it comes to choosing the right heat plate for brooding ducklings, there are several key factors to consider. First and foremost is size – you’ll want a plate that’s large enough to accommodate all of your ducklings comfortably, but not so big that it consumes too much energy.
Consider a plate with adjustable temperature settings, which will allow you to customize the heat output for your specific needs. Some materials, like ceramic or stone, are more durable and easier to clean than others, while metal plates can be prone to rust if not properly maintained.
Power consumption is also an important consideration – look for plates that use low-wattage heating elements to minimize energy costs. A good rule of thumb is to choose a plate with a power rating of 25-50 watts per square foot of brooding area. For example, if you’re brooding a dozen ducklings in an area measuring 2×3 feet, look for a heat plate that’s around 30-40 watts.
Ultimately, the right heat plate will depend on your specific needs and circumstances – be sure to research and compare different options before making a decision.
Setting Up Your Heat Plate
Before you start using your heat plate, make sure it’s set up correctly to provide a safe and consistent temperature for your ducklings. Proper installation is crucial to prevent overheating and ensure their well-being.
Preparing the Brooder
Before introducing your ducklings to their new home, it’s essential to prepare the brooder for optimal health and comfort. Start by placing the heat plate at a safe distance from the walls of the brooder to prevent overheating and fire hazards. Aim for about 6-8 inches between the heat plate and any adjacent surfaces.
Next, add a comfortable layer of bedding material such as wood shavings or straw to maintain a clean environment and regulate temperature. Ensure the bedding is deep enough (around 2-3 inches) to allow the ducklings to easily move around without coming into direct contact with the cold surface.
Also, arrange the brooder’s layout to create a comfortable environment for your ducklings. You can divide the space using partitions or dividers to provide separate areas for eating, drinking, and resting. Make sure there’s enough room for all the ducklings to move freely without overcrowding. This will also help in monitoring their health and behavior.
Consider adding a thermometer and hygrometer to monitor temperature and humidity levels within the brooder. Aim for temperatures between 90-100°F (32-38°C) during the first few days after hatching, gradually decreasing it by 5-10°F (3-6°C) every day until they’re around four weeks old.
Maintaining a Safe Temperature
Monitoring temperature fluctuations is crucial when using a heat plate for brooding ducklings. A safe temperature range for duckling development is between 90°F and 95°F (32°C to 35°C). To ensure this range, you’ll need to monitor the temperature closely during the first few days after hatching.
Check the temperature at least three times a day, using an accurate thermometer, to identify any fluctuations. If the temperature drops below 90°F or rises above 95°F, make adjustments as needed. For example, if it’s too cold, move the heat plate closer to the ducklings. Conversely, if it’s too hot, increase the distance between the heat source and the ducklings.
It’s also essential to understand that duckling growth rates can vary depending on factors like breed, age, and individual development. Be prepared for temperature adjustments as your ducklings grow and mature.
Health Considerations
When using a heat plate for brooding ducklings, it’s essential to consider several health factors that can impact your birds’ well-being and development. Let’s discuss some key considerations to keep in mind.
Monitoring Duckling Health
As you monitor your ducklings’ health under the warmth of your heat plate, it’s essential to stay vigilant for signs of stress or illness. These little balls of fluff are growing rapidly and can be prone to health issues if not provided with proper care.
Keep a close eye on their droppings, which should be well-formed and dark in color. If you notice any changes in consistency, frequency, or color, it could indicate an underlying problem. For instance, pale yellow droppings may signify a vitamin deficiency, while diarrhea can be a sign of bacterial infection.
Regularly check for signs of stress, such as labored breathing, lethargy, or loss of appetite. Monitor their temperature, which should range between 90°F and 95°F (32°C to 35°C). If you suspect an issue, consult with your veterinarian promptly to prevent the spread of disease among your flock.
By staying attentive to these early warning signs, you’ll be better equipped to address any health concerns before they escalate into serious problems.
Common Health Issues with Heat Plates
When using heat plates for brooding ducklings, it’s essential to be aware of the potential health risks associated with their use. One common issue is skin irritation and burns caused by direct contact with the hot plate. This can lead to discomfort, infection, and even long-term damage to your ducklings’ skin.
Another risk is respiratory problems due to inhaling dust or debris from the heat plate. Regular cleaning and maintenance are crucial in preventing this issue. You should also ensure that the area around the heat plate is clear of any flammable materials, as well as provide adequate ventilation to prevent the buildup of hot air.
To mitigate these risks, make sure to follow the manufacturer’s guidelines for proper use and maintenance. This includes regularly cleaning the heat plate with a damp cloth, inspecting it for damage or wear, and replacing it if necessary. By taking these precautions, you can minimize the potential health risks associated with using heat plates for brooding ducklings.
Tips for Successful Brooding
Now that you’ve set up your heat plate, it’s time to focus on keeping your ducklings warm and safe until they’re ready to venture out. In this next part, we’ll cover some valuable tips for successful brooding.
Creating a Comfortable Environment
When it comes to creating a comfortable environment for your ducklings, ventilation and humidity levels are crucial factors to consider. As you’re using a heat plate, it’s essential to ensure that the air is circulating properly to prevent overheating and moisture buildup.
Start by placing the heat plate in an area with good airflow, such as near a window or under a vent. This will help circulate warm air throughout the brooder and prevent hot spots from forming. You can also use fans to gently blow air across the ducklings, keeping them cool and comfortable.
Maintaining humidity levels is just as important as ventilation. A general rule of thumb is to keep the humidity level between 30-50%. If it gets too low, your ducklings may develop respiratory issues or dry skin. To monitor humidity levels, you can use a hygrometer. If it drops below 30%, consider misting the brooder with water or using a humidifier.
By paying attention to ventilation and humidity levels, you’ll create a comfortable environment for your ducklings to grow and thrive.
Handling Emergencies
When it comes to brooding ducklings with a heat plate, emergencies can and will arise. A power outage or malfunctioning heat plate can be particularly distressing, as the health and safety of your ducklings depend on maintaining a stable temperature.
To prepare for such situations, make sure you have a backup plan in place. Invest in a portable generator to provide alternative heat during power outages, or consider installing a gas-powered heat source. Regularly inspect your heat plate for any signs of wear or malfunction, and replace it promptly if necessary.
In the event of an emergency, stay calm and act swiftly. Quickly transfer your ducklings to their brooder’s insulation, such as a box filled with soft bedding, to maintain their body temperature. If possible, relocate them to a warmer location until you can restore heat.
It’s also essential to monitor your ducklings’ behavior closely during emergencies. If they appear stressed or hypothermic, seek immediate veterinary attention. By being prepared and knowing how to respond, you’ll be able to keep your ducklings safe and healthy even in the face of unexpected setbacks.
Advanced Brooding Techniques
Now that you’ve mastered the basics of brooding ducklings, it’s time to take your skills to the next level by learning advanced techniques for maintaining a stable heat environment. This section will delve into expert methods for optimizing heat plate placement and temperature control.
Using Multiple Heat Plates
When it comes to brooding ducklings with heat plates, using multiple heat plates can be a game-changer. By placing two or more heat plates strategically within the brooder, you can achieve optimal temperature distribution and minimize hot spots.
This technique is especially useful for larger brooders or those with irregular shapes. By dividing the heat source into smaller areas, you can create a more even temperature gradient that caters to the needs of ducklings at different distances from the heat plates.
To implement this technique effectively, start by placing one heat plate in a corner of the brooder and another in an opposite corner. This will allow for a balanced heat distribution across the entire area. Make sure to position the heat plates in a way that allows you to easily monitor and adjust the temperature as needed.
Some key considerations when using multiple heat plates include ensuring that they are not too close together, which can create hot spots, and positioning them at an optimal height to allow for good air circulation. By doing so, you’ll be able to provide your ducklings with a safe and comfortable environment that promotes healthy growth and development.
Integrating Other Brooding Systems
When you’ve got a heat plate up and running, it’s easy to think that’s all you need for successful duckling brooding. But integrating other systems can take your operation to the next level of efficiency and flexibility.
Consider pairing your heat plate with nesting boxes, which provide a safe space for ducklings to roost and escape from the heat when needed. This setup allows you to offer both a constant warmth source and a way for the young birds to regulate their own temperature. For example, if it’s particularly chilly outside or if the brooder is too small, the ducklings can retreat to the nesting box to conserve energy.
Another option is radiant heaters, which can be placed strategically around the brooder to provide targeted heat without overheating areas. By combining these systems with your heat plate, you create a multi-layered warming system that ensures all ducklings have access to warmth, regardless of their position in the brooder. This setup also allows for greater flexibility in terms of temperature control and can be especially beneficial during periods of extreme cold or when caring for large flocks.
Troubleshooting Common Issues
Sometimes things don’t go as planned when brooding ducklings on a heat plate, and common issues can arise. This is where our troubleshooting guide comes in to help you resolve them quickly.
Identifying and Resolving Temperature Fluctuations
Temperature fluctuations can be a significant concern when brooding ducklings with a heat plate. These issues can arise due to improper setup, malfunctioning equipment, or inadequate monitoring. Duckling mortality often occurs within the first week of life, and temperature-related problems are among the most common causes.
Some symptoms of temperature fluctuations include lethargic behavior, refusal to eat, and huddling in the corners of their brooder. In extreme cases, ducklings may even exhibit frostbite on their legs and feet. Causes can range from a malfunctioning thermostat to an insufficient number of heat sources or an improperly insulated brooder.
To resolve temperature fluctuations, it’s essential to identify the root cause. Check your thermometer for accuracy and ensure that the heat plate is functioning correctly. Consider adding supplemental heat sources, such as a heat lamp, to provide a backup in case the main source fails. Regularly monitoring temperatures and humidity levels can also help prevent issues before they arise. Keep in mind that ducklings under 5 days old require a temperature range of around 90-95°F (32-35°C), while those over 10 days old need temperatures closer to 80-85°F (27-29°C).
Addressing Heat Plate Malfunctions
When using a heat plate to brood ducklings, it’s not uncommon for malfunctions to occur. In fact, a faulty heat source can be detrimental to the health and development of your young ducks. Identifying the issue is often easier than you think, but knowing what to do next can be tricky.
To start troubleshooting, check if the heat plate is properly plugged in and that there are no tripped circuit breakers or blown fuses. Also, verify that the temperature setting is correct for ducklings (typically around 90-95°F). Next, inspect the heat plate itself for any visible damage, such as cracks or burn marks.
Common issues with heat plates include faulty thermostats, worn-out heating elements, and incorrect wiring. If you suspect a thermostat issue, try replacing it with a new one. In cases where the heating element is worn out, consider swapping it out for a new one. Incorrect wiring can be resolved by consulting your unit’s manual or seeking advice from an electrician.
Regular maintenance, such as cleaning the heat plate and checking for dust buildup, can also help prevent malfunctions. By following these steps and being mindful of potential issues, you can ensure that your ducklings stay warm and healthy.
Frequently Asked Questions
How often should I clean my heat plate to prevent bacterial growth?
Clean your heat plate every week by scrubbing it with soap and warm water, then rinsing thoroughly. This will help prevent the buildup of bacteria that can harm your ducklings. Make sure to dry the plate completely before placing it back in the brooder.
What’s the ideal temperature range for my ducklings during different stages of development?
The ideal temperature ranges for ducklings at different ages are: 90-95°F (32-35°C) for the first week, 80-85°F (27-29°C) for weeks 2-3, and 70-75°F (21-24°C) for weeks 4-5. Be sure to adjust your heat plate’s temperature accordingly.
Can I use a heat plate with multiple ducklings from different breeds?
Yes. Heat plates are designed to accommodate various breeds and sizes of ducklings. However, ensure that the heat plate is large enough for the total number of ducklings and allows for proper air circulation.
How can I monitor humidity levels in my brooder to prevent respiratory issues?
Use a hygrometer to measure the humidity level in your brooder. Aim for a range of 40-60% relative humidity to keep your ducklings healthy. You can adjust the heat plate’s temperature or add more ventilation as needed.
What’s the best way to handle an emergency, such as a power outage during brooding?
In case of a power outage, have a backup plan in place, such as a portable generator or a battery-powered heat source. This will ensure your ducklings stay warm and safe until the power is restored.