
Are you tired of dealing with smelly chicken coop waste and wondering how to turn it into something useful? As a backyard chicken keeper, you’re likely no stranger to the challenges of managing manure. But did you know that composting chicken manure can not only reduce odors and pests but also create a nutrient-rich fertilizer for your garden? It’s a game-changer for anyone looking to maximize their small space or simply reduce waste. In this comprehensive guide, we’ll walk you through the process of composting chicken manure, covering topics from setting up the perfect compost pile to maintaining its quality and using it in your garden. Whether you’re a seasoned homesteader or just starting out with backyard chickens, this article will show you how to turn a problem into a valuable resource.
Benefits of Manure Composting
So, you’re wondering what’s so great about manure composting? Let’s dive into the benefits that make it a fantastic way to reduce waste and create nutrient-rich fertilizer for your garden.
Reduced Odor and Pests
One of the most significant advantages of manure composting is its ability to minimize odors and pest infestations. When chicken manure is left to sit, it can quickly become a source of unpleasant smells and unwanted pests. This can be overwhelming for backyard chicken keepers, making it difficult to maintain a clean and healthy environment.
However, by incorporating manure composting into your routine, you can significantly reduce these issues. Composting breaks down the organic matter in the manure, neutralizing its odor-causing properties and rendering it less appealing to pests. As a result, you’ll enjoy a fresher-smelling coop and fewer unwanted visitors like rodents or flies.
To make the most of this benefit, be sure to follow proper composting techniques, such as maintaining adequate carbon-to-nitrogen ratios and ensuring sufficient aeration. This will allow your manure to break down efficiently and minimize any unpleasant odors or pest attractants. With regular maintenance and attention to detail, you can create a more pleasant and healthy environment for both your chickens and yourself.
Nutrient-Rich Fertilizer
Using manure compost as a nutrient-rich fertilizer offers numerous benefits for your plants and soil health. When added to the soil, it releases essential nutrients such as nitrogen, phosphorus, and potassium that support healthy plant growth. Composting chicken manure is especially beneficial due to its high nitrogen content.
The nutrient-rich fertilizer also improves soil structure by increasing water retention capacity and aeration. This results in better root development, increased yields, and improved overall crop quality. Furthermore, using composted manure reduces the need for synthetic fertilizers, which can harm soil health and the environment.
To make the most of your composted chicken manure as fertilizer, mix it into the soil at a rate of 10-20% by volume. You can also blend it with other compost materials or use it as a top dressing for seedlings and young plants. Keep in mind that fresh, uncomposted manure may burn plant roots due to its high ammonia content. Always ensure your compost is fully matured before applying it to your garden beds.
By incorporating this nutrient-rich fertilizer into your gardening routine, you’ll be creating a healthier, more sustainable environment for your plants to thrive in.
Setting Up a Manure Composting System
Before you start collecting and processing your chickens’ manure, it’s essential to set up a system that will make composting efficient and hygienic. In this section, we’ll walk through the key considerations for setting up a successful manure composting system.
Choosing the Right Location
When setting up a manure composting system for your chickens, choosing the right location is crucial. You’ll want to select an area that receives adequate sunlight, which will help speed up the composting process and kill off pathogens.
Consider the wind direction, too – you don’t want any unpleasant odors drifting towards your home or neighbors. Ideally, position your composting system downwind of your chicken coop to minimize potential issues.
Accessibility is another key factor. Make sure the location allows for easy access with a wheelbarrow or shovel, so you can regularly turn and monitor the compost pile.
A good rule of thumb is to site your composting system at least 10-15 feet away from any water sources, as excess moisture can hinder the composting process. Also, avoid areas where children or pets might accidentally disturb the pile.
Remember, a well-placed composting system will not only benefit your chickens’ health but also create valuable nutrient-rich fertilizer for your garden.
Selecting the Right Materials
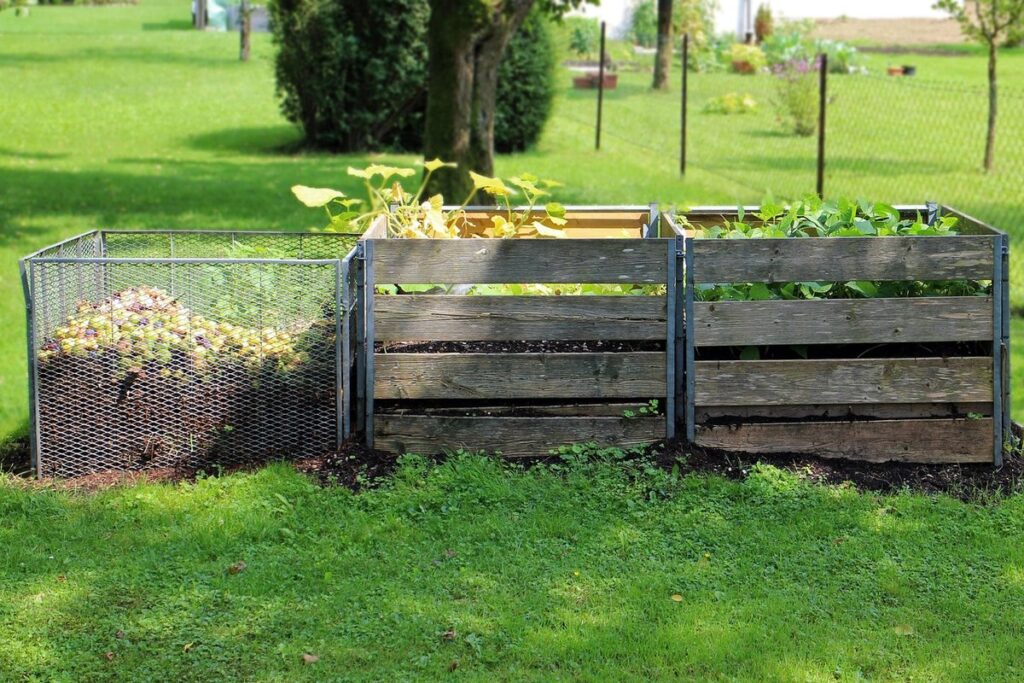
When it comes to selecting the right materials for your manure composting system, you have several options to consider. You can choose from a variety of commercial solutions, such as plastic or metal bins specifically designed for composting, or opt for DIY alternatives like wooden pallets or repurposed containers.
Consider the size and capacity of the bin, as well as its durability and ease of cleaning. For example, a 4×4 foot wooden frame with chicken wire mesh can provide ample space for a small flock’s manure to break down, while also allowing for air circulation and easy access.
Another option is to repurpose old containers like bins or tubs, which can be placed in a shaded area to prevent overheating. Just ensure the container has adequate ventilation holes to allow for airflow and odour control. You can also use materials that are readily available on your farm, such as straw bales or hay stacks, to create a makeshift composting system.
It’s essential to choose materials that will withstand exposure to moisture and manure decomposition. Avoid using containers with sharp edges or points that could cause injury. Ensure the bin is placed in an area with adequate drainage and sunlight for optimal composting results.
Understanding the Composting Process
Now that you know why composting manure is a good idea, let’s dive into the basics of how it works and what you need to create your own compost pile. We’ll break down each step of the process.
Stages of Decomposition
As you begin your manure composting journey with chickens, it’s essential to understand the various stages of decomposition that occur throughout the process. The initial stage is setup and preparation, where you’ll create a designated area for composting, collect materials, and assemble the necessary infrastructure.
Next comes the “hot” phase, characterized by high microbial activity and rapid breakdown of organic matter. This is when the bulk of decomposition occurs, with carbon-rich manure breaking down into nutrient-dense humus. During this stage, you’ll need to monitor temperature, moisture, and aeration levels to ensure optimal conditions.
As the process advances, the mixture will undergo the “cool” phase, marked by reduced microbial activity and slower decomposition rates. This is when pathogens are eliminated, and beneficial microorganisms multiply, producing a finished compost product.
The final stage involves curing and maturation, where the compost is left to settle and stabilize for several weeks or months before use in your garden or landscape. Proper monitoring and management throughout these stages will result in high-quality compost that replenishes soil fertility and supports healthy plant growth.
Temperature Control
Monitoring and managing temperature is crucial when it comes to composting chicken manure. The ideal temperature for composting ranges between 130°F and 140°F (54°C to 60°C), which is hot enough to kill off pathogens but not so hot that it burns the carbon-rich materials.
To monitor temperatures, you can use a compost thermometer, which is a simple and accurate tool. Insert the probe into the pile at different depths, usually every 2-3 inches, and take readings over several days. This will give you an idea of the temperature profile within your compost pile.
When it comes to managing temperatures, it’s essential to maintain a balance between moisture levels and oxygen flow. Aim for a mix of “green” materials (high in nitrogen) like manure and “brown” materials (high in carbon) like bedding or straw. Regular turning of the pile will also help regulate temperatures by introducing air and speeding up the decomposition process.
As a general rule, if your temperature exceeds 160°F (71°C), it’s likely that there are too many green materials, so add more brown materials to balance out the mix.
Managing Manure Quantity and Quality
When it comes to raising chickens for eggs, managing manure quantity and quality can be a challenge. Let’s dive into practical tips for balancing your flock’s output with efficient composting methods.
Handling Wet or Dry Manure
When it comes to managing manure from chickens, you’ll inevitably encounter varying amounts of wet and dry manure. This can be a challenge, especially if you’re new to composting. The key is finding ways to balance moisture levels so that the manure breaks down efficiently.
Start by assessing your coop’s ventilation system. If it’s inadequate, this can lead to excess moisture in the manure. Improve airflow by adding vents or adjusting the position of existing ones. You can also increase the litter depth, which absorbs excess water. Aim for a mix of dry bedding materials like straw or hay with deeper piles of absorbent materials.
To balance wet and dry manure, separate them into different composting areas. For wet manure, add dry bedding materials to absorb moisture. Conversely, spread dry manure over the top layer to help it break down. Monitor moisture levels closely, as an imbalance can hinder the composting process. Check for optimal conditions: 50-60% moisture content and aeration. With these strategies in place, you’ll be able to manage both wet and dry manure effectively, creating high-quality compost for your garden.
Maintaining a Healthy Carbon-to-Nitrogen Ratio
Maintaining a healthy carbon-to-nitrogen (C:N) ratio is crucial when it comes to manure composting. This balance affects the rate of decomposition, odors, and overall quality of the final compost product. When there’s too much nitrogen in the mix – typically due to excessive chicken droppings – the pile can become too wet and smelly. On the other hand, a C:N imbalance with too little nitrogen can lead to slow decomposition rates.
As a general rule, it’s recommended that for every 1 part of manure, you add 2-3 parts of “carbon-rich” materials like wood chips, straw, or shredded newspaper. This can be achieved by adding a layer of these materials on top of the chicken droppings before mixing them together. Aim to maintain a C:N ratio between 25:1 and 30:1 for optimal decomposition.
Regular monitoring of your compost pile is key. Check its moisture levels, temperature, and odors regularly. If you notice it becoming too wet or smelly, adjust the carbon-to-nitrogen balance accordingly by adding more carbon-rich materials. By striking this delicate balance, you’ll be well on your way to producing high-quality compost for your garden, while minimizing odors and environmental impact.
Adding Bulking Agents and Aeration
Now that you’ve added your manure mix, it’s time to think about adding some extra ingredients to help everything break down evenly. Let’s explore how bulking agents and aeration can speed up the composting process.
Benefits of Bulking Agents
When adding bulking agents to your manure composting process for chickens, you’re not just providing a necessary nutrient boost – you’re also creating an environment that fosters healthy decomposition. Bulking agents like straw or sawdust play a crucial role in improving air circulation within the pile.
As these materials break down, they help create spaces for oxygen and carbon dioxide to exchange freely. This process accelerates the decomposition of chicken manure, reducing odors and pathogens while also minimizing the risk of anaerobic conditions.
Incorporating bulking agents into your composting routine can be as simple as adding 10-20% of a dry material like straw or sawdust to each new layer of chicken manure. As the pile ages, these materials will break down alongside the manure, leaving behind a rich nutrient-dense compost.
Some popular bulking agent options for chicken manure composting include:
* Straw
* Sawdust
* Shredded newspaper
* Peat moss
When choosing a bulking agent, be mindful of its carbon-to-nitrogen ratio and ensure it complements the chicken manure. For optimal results, aim to maintain a C:N balance between 20:1 and 30:1 in your compost pile.
Tips for Maintaining Adequate Aeration
Maintaining adequate aeration is crucial to prevent anaerobic conditions that can lead to unpleasant odors and health risks. To ensure your compost pile has enough oxygen, make turning and mixing a regular habit. Aim to turn the pile every 7-10 days, depending on its size and moisture levels.
As you mix, use a pitchfork or shovel to gently break up any clumps and distribute materials evenly. This will help speed up decomposition and prevent matting. If you notice your compost is becoming too compacted, try adding more bulking agents like straw or shredded newspaper to improve airflow.
Another tip is to create aeration channels within the pile by placing small gaps between materials as you add them. You can also use wooden sticks or other objects to create air pockets, allowing oxygen to penetrate deeper into the pile. By incorporating these simple practices into your composting routine, you’ll be able to maintain optimal aeration and ensure your manure compost is healthy and thriving. Regular monitoring of temperature and moisture levels will also help you identify when turning is necessary.
Troubleshooting Common Issues
As you start composting manure from your chickens, you’ll inevitably encounter some bumps along the way. This section will help you troubleshoot common issues and get back on track.
Odors, Pests, and Other Problems
As you begin manure composting for your chickens, you may encounter some common issues that can be challenging to address. One of the primary concerns is odors. Manure composting produces a strong and pungent smell due to the anaerobic decomposition process. To mitigate this issue, ensure you have adequate ventilation in your compost pile or bin. You can also add bulking agents like straw or coconut coir to improve airflow.
Another common problem is pests. Flies, rodents, and other unwanted visitors may be attracted to the nutrient-rich manure. To prevent infestations, maintain a clean and dry environment around your composting area. Cover the pile with a tarp or mesh to keep pests out. Also, turn the compost regularly to avoid creating anaerobic conditions that can harbor pests.
Inadequate decomposition is another issue you may face. This can be caused by inadequate moisture, lack of oxygen, or too much carbon in the mix. To promote decomposition, ensure your pile has a mix of 2/3 “brown” materials (dried leaves, straw) and 1/3 “green” materials (manure, food scraps). Maintain a consistent moisture level, and turn the compost regularly to aerate it.
Solutions for Common Challenges
If you’re experiencing common challenges with manure composting chickens, don’t worry – we’ve got solutions for you. Perhaps you’re noticing that the compost pile is too dry and not breaking down as quickly as you’d like.
In this case, try adding more brown materials like dried leaves or shredded newspaper to balance out the moisture levels in your compost pile. This will help create a carbon-rich environment that promotes decomposition. On the other hand, if your compost is too wet and stinky, it’s likely due to an imbalance of green materials like chicken droppings.
To address this issue, ensure you’re adding enough brown materials to absorb excess moisture. You can also consider incorporating bulking agents like straw or shredded coconut husk to help absorb liquids and speed up the decomposition process.
Another common challenge is dealing with pests in your compost pile, such as rodents or flies. To prevent these unwanted visitors, keep your compost pile covered with a lid or tarp and ensure it’s located in an area away from direct sunlight and potential food sources. Regularly turning your compost can also help reduce pest populations by exposing them to oxygen and making the environment less hospitable for pests.
If you notice mold or fungus growing on your compost, this could be a sign that it’s too wet or has an imbalance of carbon-rich materials. To resolve this issue, allow the compost pile to aerate for a few days, then add more brown materials to balance out the moisture levels.
Frequently Asked Questions
How do I know if my compost pile is too wet or dry?
Concise answer: Monitor the compost’s moisture levels by sticking your hand into it up to the wrist. If you feel water, it’s too wet. If it feels dry and crumbly, add more water. The ideal mix should be like a damp sponge.
Can I use manure from other animals in my compost pile?
Answer: No. Chicken manure has unique characteristics that make it ideal for composting. Other animal manures may not break down as quickly or produce the same nutrient-rich results. Stick with chicken manure for optimal benefits.
How often should I turn and aerate my compost pile?
Answer: Every 7-10 days, depending on your specific setup and climate. Turning and aeration are crucial for maintaining oxygen flow and preventing anaerobic conditions that can lead to odors and pests.
What’s the best way to handle excess manure during heavy laying seasons?
Answer: Consider investing in a separate composting container or bin specifically designed for handling large quantities of chicken manure. This will help keep your main coop clean and prevent overwhelming your compost pile.
How long does it take for composted manure to be ready for use as fertilizer?
Answer: Compost is typically ready in 3-6 months, depending on factors like temperature, moisture, and carbon-to-nitrogen ratio. Check the compost regularly by sticking your hand into it and feeling for heat (a sign of decomposition).