
Composting chicken manure is a great way to reduce waste, create nutrient-rich fertilizer for your garden, and minimize odors in your backyard. But did you know there are two popular methods: hot composting and cold composting? Hot composting involves actively managing the process to achieve high temperatures, while cold composting relies on natural decomposition over time. Both methods have their benefits and drawbacks, and choosing the right one for your needs can make all the difference. In this article, we’ll explore the ins and outs of hot and cold composting chicken manure, including tips on setting up a hot compost bin, maintaining temperature control, and building a cold compost pile. By the end of it, you’ll know which method produces higher-quality compost and be well-equipped to start your own composting project.
Benefits and Drawbacks of Composting Chicken Manure
Composting chicken manure has its perks, but also some drawbacks to consider when deciding between hot and cold composting methods. Let’s weigh the pros and cons together.
Introduction to Composting
Composting chicken manure is an excellent approach to managing waste and creating nutrient-rich fertilizer for your garden. It’s a sustainable way to reduce your environmental footprint while providing your plants with the essential nutrients they need to thrive.
To start composting, you’ll first need to understand what makes it tick. Composting is essentially a natural process where microorganisms like bacteria and fungi break down organic matter into a nutrient-rich soil amendment. This process occurs in the absence of oxygen, which allows for efficient decomposition and minimizes odors.
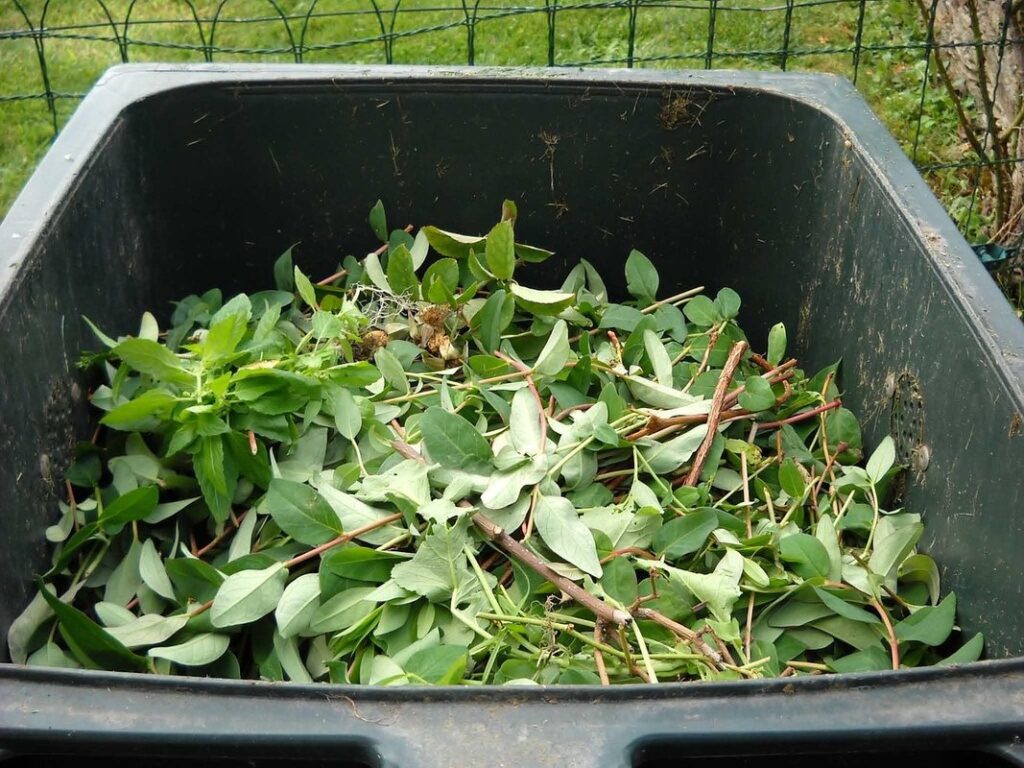
Key to successful composting is maintaining the right balance between carbon-rich “brown” materials (dried leaves, straw) and nitrogen-rich “green” materials (chicken manure, grass clippings). Aim for a mix of 2/3 brown materials and 1/3 green materials. Regular mixing and monitoring pH levels will also ensure your compost is healthy and balanced.
By composting chicken manure hot or cold, you’ll not only reduce waste but also create an excellent fertilizer for your garden. In the next section, we’ll dive into the debate: which method is better – hot or cold composting?
Types of Compost Piles
Composting chicken manure can be done using various methods, each with its unique characteristics. One of the most common types is hot composting, which involves actively managing the pile’s temperature and carbon-to-nitrogen ratio to speed up decomposition. This method requires regular turning and monitoring of the pile’s moisture levels. Hot composting can reduce pathogens and weed seeds, making it ideal for gardeners who want a high-quality fertilizer.
Cold composting, on the other hand, is a low-maintenance approach that relies on natural processes. The chicken manure is simply added to a designated area or bin, where it decomposes slowly over time. This method takes longer than hot composting but requires less effort and can be more beneficial for soil structure and microorganisms.
Another type of compost pile is the worm composting method, also known as vermicomposting. In this approach, worms break down the chicken manure into a nutrient-rich fertilizer. Worm composting is ideal for small-scale operations or indoor composting due to its compact size and minimal odor production.
Regular monitoring of temperature, moisture levels, and carbon-to-nitrogen ratio are crucial for successful hot composting. This involves checking the pile’s temperature daily and turning it when necessary to maintain optimal conditions.
Hot Composting Chicken Manure: The Pros and Cons
Let’s weigh the benefits of hot composting chicken manure, a faster method that breaks down waste quickly, against its potential drawbacks. But is it worth the risks?
Setting Up a Hot Compost Bin
Setting up a hot compost bin requires careful consideration to ensure optimal decomposition. Begin by selecting a location with good airflow and proximity to a water source. Chicken manure can be a nutrient-rich addition to your compost pile, but it’s essential to balance its high nitrogen levels with carbon-rich materials like shredded newspaper or coconut coir.
Choose a hot compost bin that is designed for efficient decomposition, typically 3-4 feet wide and 2-3 feet deep. Fill the bin about one-third full of brown materials (dried leaves, straw, or shredded paper), followed by a layer of chicken manure. Repeat this pattern until the bin is almost full, leaving space for additional materials as the pile decomposes.
As you add layers, ensure adequate moisture and mix the contents gently to prevent matting. Aerate the pile regularly to promote oxygen flow, which will accelerate decomposition and kill pathogens. With proper setup and maintenance, your hot compost bin will be a thriving ecosystem that produces nutrient-rich compost in a fraction of the time it would take with cold composting methods.
Temperature Control in Hot Composting
Temperature control is crucial in hot composting chicken manure to ensure that pathogens are killed and the decomposition process occurs efficiently. To monitor temperature, use a compost thermometer to check the pile’s internal temperature at various depths. The ideal temperature range for hot composting is between 130°F and 140°F (54°C to 60°C), but it can reach as high as 160°F (71°C) in some cases.
To maintain this temperature, add bulking agents like straw or shredded newspaper to the pile. These materials help absorb excess moisture, preventing the growth of anaerobic bacteria that can lead to unpleasant odors and reduce temperatures. Turning the pile regularly is also essential, as it ensures oxygen is circulated throughout the pile and helps maintain the desired temperature.
Aim to turn your hot composting pile every 2-3 days, especially during the initial stages when the temperature is rising rapidly. This regular turning will also help you monitor progress, make adjustments to the mix of materials, and ensure that the decomposition process remains healthy and efficient.
Cold Composting Chicken Manure: The Slow but Steady Approach
For those willing to wait a little longer, cold composting chicken manure is a slower yet effective method that requires minimal maintenance and effort. Let’s dive into this gentle approach to creating nutrient-rich fertilizer.
Building a Cold Compost Pile
Building a cold compost pile is a straightforward process that requires patience and attention to detail. To get started, collect a mix of “green” materials rich in nitrogen, such as chicken manure, grass clippings, or vegetable scraps, and “brown” materials high in carbon, like shredded newspaper, cardboard, or straw. Aim for a ratio of 2/3 brown materials to 1/3 green materials.
Begin by creating a base layer of about 4-6 inches of brown material, followed by a layer of green materials, such as chicken manure, and then another layer of brown materials on top. Repeat this process until you reach the desired height for your pile, typically around 3-4 feet tall. As you add layers, maintain the carbon-to-nitrogen ratio to ensure slow decomposition.
Water the pile lightly after each addition, but avoid overwatering, which can lead to anaerobic conditions and unpleasant odors. Finally, cover the top layer with a sheet of burlap or a similar material to retain moisture and suppress weeds. With proper construction and maintenance, your cold compost pile will begin breaking down the chicken manure in 2-3 months, producing rich, nutrient-dense compost for your garden.
Advantages of Cold Composting
Cold composting offers several advantages that make it an attractive option for those looking to turn chicken manure into a nutrient-rich fertilizer. One of the most significant benefits is reduced labor: unlike hot composting, which requires frequent turning and monitoring of temperatures, cold composting allows you to simply layer your materials and let nature take its course.
As a result, you’ll experience minimal odors associated with the breakdown process – a welcome relief for those who have dealt with the pungent smells of hot composting. Additionally, since cold composting doesn’t require temperature control, you won’t need to worry about creating an optimal environment for microbial activity.
This approach also allows for a more flexible timeline: whereas hot composting typically takes several weeks to months to complete, cold composting can take anywhere from six months to two years or more. This slower pace gives microorganisms ample time to break down the manure into a stable, usable form – making it perfect for those who don’t have the space or resources to devote to hot composting.
Comparing Hot and Cold Composting Methods
Now that we’ve explored the benefits of each method, it’s time to dive into a side-by-side comparison of hot and cold composting chicken manure. Let’s see how they stack up.
Compost Quality Comparison
When it comes to composting chicken manure, one of the key considerations is the quality of the finished product. Hot and cold composting methods produce different types of compost, each with its own unique characteristics.
Compost produced through hot composting tends to have a higher nutrient content than its cold-composted counterpart. This is because the high temperatures involved in hot composting (typically between 130°F and 140°F) break down the organic matter more efficiently, releasing a wider range of nutrients. For example, hot composted chicken manure has been shown to contain up to 30% more nitrogen than cold composted material.
On the other hand, cold composting produces a more stable product with a slower release of nutrients. While this may be beneficial for plants that require a steady supply of nutrients over time, it’s not ideal for crops that need a rapid influx of nutrients. To achieve optimal results with either method, it’s essential to monitor temperature, carbon-to-nitrogen ratios, and moisture levels to ensure the composting process is balanced and efficient.
A study published in the Journal of Environmental Science found that hot composted chicken manure had significantly higher levels of phosphorus and potassium than cold composted material. However, the cold composted product had a more favorable C:N ratio, which can help prevent nutrient loss over time.
Time and Labor Considerations
When it comes to composting chicken manure, understanding the time and labor requirements is crucial for making an informed decision between hot and cold methods. Both approaches have their pros and cons, but here’s a breakdown of what you can expect.
Hot composting involves setting up a controlled environment with adequate carbon-to-nitrogen ratios, moisture levels, and oxygen circulation. This requires regular monitoring and maintenance to ensure the optimal conditions are met. You’ll need to turn the pile every few days to aerate it, which can be physically demanding and time-consuming. However, hot composting typically takes 1-3 weeks to produce finished compost.
In contrast, cold composting is a more passive approach that doesn’t require regular maintenance or turning. It’s often considered a low-maintenance option, but the decomposition process is slower, taking several months to complete. You’ll need to plan ahead and set aside space for the pile, which can be an issue in small gardens or urban areas.
To minimize labor and time, consider setting up a cold composting system with a large bin or designated area. This will allow you to add materials gradually over time, reducing the need for frequent turning and maintenance. For hot composting, focus on creating an efficient setup that minimizes physical demands and maximizes decomposition rates.
Tips and Tricks for Successful Composting
Now that you’ve decided on a composting method, let’s get into some practical tips to help you turn your chicken manure into nutrient-rich gold.
Troubleshooting Common Issues
When composting chicken manure, it’s not uncommon to encounter some common issues that can hinder the process. One of the most frequent complaints is about odors. If you notice a strong smell emanating from your compost pile, don’t worry – it’s likely due to the high nitrogen content in the manure. To minimize odor, turn the pile regularly, ensuring oxygen reaches all areas and facilitates decomposition.
Another issue that may arise is pests. Rodents, flies, and other critters might be attracted to the nutrient-rich manure. To deter them, cover the compost pile with a wire mesh or hardware cloth, keeping animals out while still allowing airflow.
Poor decomposition can also occur if the carbon-to-nitrogen ratio isn’t balanced. Aim for a mix of 2/3 “brown” materials (dried leaves, straw) and 1/3 “green” materials (chicken manure). Regularly monitor the pile’s moisture levels to avoid over-saturation, which can lead to anaerobic conditions.
If you notice any of these issues, don’t panic – simply adjust your composting strategy accordingly. Remember, every compost pile is different, and it may take some trial and error to find what works best for you.
Maintaining Optimal Conditions
Maintaining optimal conditions is crucial for both hot and cold composting methods to ensure efficient decomposition of chicken manure. Monitoring moisture levels is essential, as an ideal mix should be like a damp sponge – not soggy nor dry. Aim for 40-60% moisture content for hot composting, while cold composting can tolerate slightly drier conditions.
To achieve the perfect balance, regularly check your pile’s carbon-to-nitrogen (C:N) ratio. A C:N ratio of 25:1 is ideal for hot composting, but you can use a mix of 2/3 brown materials (high in carbon) and 1/3 green materials (rich in nitrogen). For cold composting, aim for a higher C:N ratio of around 40:1. Turn the pile every few days to introduce oxygen, speed up decomposition, and prevent anaerobic conditions.
As a general rule of thumb, turn your hot compost pile when it’s about 2-3 feet high, while cold compost piles can be left untouched for several months. Regularly inspect the pile’s temperature – ideally, it should reach between 130°F to 140°F (54°C to 60°C) during active decomposition in hot composting.
Conclusion: Choosing the Right Composting Method
Now that you’ve weighed the pros and cons of hot and cold composting, it’s time to choose the method that best suits your needs and lifestyle. Let’s summarize the key takeaways to help you make an informed decision.
Final Thoughts on Hot vs Cold Composting
When deciding which composting method is right for you, it’s essential to weigh the benefits and drawbacks of both hot and cold composting. By understanding the advantages and limitations of each approach, you’ll be better equipped to make an informed decision that suits your needs and circumstances.
Hot composting, as we’ve discussed throughout this article, involves actively managing temperature, moisture, and carbon-to-nitrogen ratios to create a nutrient-rich compost in a relatively short period. The benefits of hot composting are clear: it’s efficient, producing high-quality compost in a matter of weeks rather than months or even years. However, this method also requires more effort, as you’ll need to regularly turn the pile, monitor temperature and moisture levels, and balance the carbon-to-nitrogen ratio.
On the other hand, cold composting is a more low-maintenance approach that allows materials to break down naturally over time. This method is often preferred by those with limited space or who don’t have the time or resources to regularly tend to their compost pile. While it may take longer to produce compost, cold composting can be an excellent option for small-scale operations or when dealing with limited amounts of chicken manure.
Ultimately, the choice between hot and cold composting comes down to your specific needs, resources, and priorities. If you’re looking for a quick turnaround on high-quality compost and are willing to invest time and effort into managing your pile, hot composting may be the way to go. However, if you prefer a more hands-off approach or have limited space or resources, cold composting is certainly worth considering. By understanding the benefits and drawbacks of each method, you’ll be better equipped to choose the right composting approach for your chicken manure needs.
Frequently Asked Questions
Can I compost chicken manure with other types of waste, or should it be done separately?
You can compost chicken manure with other types of waste, such as vegetable scraps, leaves, and grass clippings. In fact, a mix of “green” (nitrogen-rich) materials like chicken manure and “brown” (carbon-rich) materials like straw or shredded newspaper is ideal for hot and cold composting. Just be sure to maintain the right balance between nitrogen and carbon sources.
How often should I turn my compost pile to ensure optimal decomposition?
Turning your compost pile, also known as aerating it, helps speed up decomposition by introducing oxygen and distributing heat evenly throughout the pile. Aim to turn your hot compost bin every 7-10 days during the active phase (when temperatures reach 130°F – 140°F), while cold compost piles can be turned less frequently, about once a month.
Can I use a tarp or plastic bag to contain odors when composting chicken manure?
While tarps and plastic bags might seem like convenient solutions for odor control, they’re not recommended. These materials can trap moisture, heat, and odors inside the pile, creating anaerobic conditions that foster pathogens and unpleasant smells. Instead, opt for a well-ventilated compost bin or enclosure to keep odors under control.
How long will it take to see results from my composting efforts?
The time it takes to achieve high-quality compost varies depending on the method, climate, and initial material quality. Hot composting typically produces finished compost within 1-3 months, while cold composting can take anywhere from 6-12 months or longer. Be patient and monitor your progress by checking temperature, moisture levels, and carbon-to-nitrogen ratios.
Can I use compost tea as a fertilizer for my plants, or is it only suitable for soil amendments?
Yes, you can use compost tea as a fertilizer for your plants! Compost tea is a liquid solution made by steeping finished compost in water. It’s rich in beneficial microbes that promote healthy plant growth and development. You can apply compost tea directly to the roots of plants, foliar spray it onto leaves, or mix it with water as a soil drench.