
As a chicken keeper, you know that providing your girls with a safe and comfortable place to lay their eggs is crucial for their health and happiness. But did you know that an ideal chick nesting box can make all the difference? A well-designed and built nesting box not only encourages your hens to lay more frequently but also helps reduce stress and prevent pecking order issues.
In this comprehensive guide, we’ll walk you through the essential factors to consider when designing and building a perfect chick nesting box. From choosing the right location and ventilation system to selecting durable materials and maintenance tips, we’ve got you covered. Whether you’re a seasoned backyard chicken keeper or just starting out, our expert advice will help you create an egg-laying haven that your hens will love.
Choosing the Right Location for Your Chick Nesting Box
When choosing the location for your chick nesting box, consider the safety and accessibility of your flock, as well as easy cleaning and maintenance. Think strategically about where to place it in your backyard coop or garden.
Factors to Consider When Selecting a Location
When selecting a location for your chick nesting box, safety and security should be top of mind. Predators such as raccoons, foxes, and hawks are drawn to the sounds and smells of chickens, so choosing a spot that offers protection from these threats is crucial.
Consider the layout of your property when deciding where to place the nesting box. Ideally, it should be at least 10 feet away from any predators’ common entry points, such as bushes or trees. You can also install a roof over the nesting box or use predator-proof materials like hardware cloth to deter intruders.
Accessibility is another important factor. Place the nesting box in an area that’s easy for your chickens to access, but not so close to their feeding and watering stations that they get distracted from laying eggs. A good rule of thumb is to position it within 5-10 feet of these areas, allowing your hens to easily move back and forth between the nesting box and food and water sources.
Proximity to food and water sources should also be considered. Chickens prefer to lay eggs near their daily routines, so placing the nesting box close to their feeding and watering stations can encourage consistent egg production.
Ensuring Proper Ventilation in the Nesting Area
Proper ventilation is crucial in the nesting area to ensure the health and comfort of your chickens. A well-ventilated nest box helps prevent ammonia buildup from droppings, reduces moisture that can lead to fungal growth, and minimizes the risk of respiratory problems. When planning the location for your chick nesting box, consider placing it near a window or using a ventilated wall section to provide natural airflow.
To maximize ventilation, position the nesting box at least 6-8 inches off the floor to allow for air circulation underneath. You can also install a small fan or vent to enhance airflow. Just ensure that any fans are safely secured and won’t pose a risk to your chickens. For added protection against drafts, use a door or window with a grille or mesh to filter the air.
When choosing a location for your nesting box, consider the direction of prevailing winds in your area. Placing it near a north-facing wall can help reduce heat buildup during summer months and keep the nest box cooler. Conversely, a south-facing wall may be more suitable for colder climates. Always balance ventilation with protection from harsh weather conditions to create a safe and comfortable environment for your chickens.
Considerations for Integration with Existing Coop Design
When integrating a nesting box into an existing coop design, it’s essential to consider the space constraints and aesthetic appeal. Start by assessing the available area within your coop and determine if there’s enough room for the nesting box without compromising the chickens’ movement or comfort.
To maximize space efficiency, consider installing the nesting box in a corner or against a wall, ensuring it doesn’t obstruct the chickens’ access to feeders and waterers. If your coop has limited floor space, you can install a hanging nesting box that swings away from the coop, freeing up valuable floor real estate.
Aesthetically, choose a nesting box design that complements your existing coop style, whether it’s modern, rustic, or DIY-inspired. Consider factors like color scheme, material, and size to ensure the nesting box blends seamlessly with its surroundings. You can also repurpose materials from your coop to create a cohesive look.
When deciding on a location within your coop, consider the chickens’ natural behavior and preferences. Many prefer a quiet, dark spot away from drafts and direct sunlight. By thoughtfully integrating the nesting box into your existing coop design, you’ll create a harmonious and functional space for your feathered friends to lay their eggs in peace.
Designing the Chick Nesting Box: Size, Shape, and Materials
When designing a chick nesting box, consider size, shape, and materials carefully to create a safe and comfortable space for your chickens to lay eggs. The right design will make all the difference in their health and happiness.
Standard Dimensions and Specifications for Chick Nesting Boxes
When it comes to building a chick nesting box, standard dimensions and specifications are crucial for providing a safe and comfortable space for your hens. The size of the box will depend on the breed and number of hens you plan to keep. For small breeds like Leghorns or Bantams, a box measuring 12 inches wide x 18 inches deep x 24 inches tall is sufficient. However, for larger breeds like Orpingtons or Plymouth Rocks, you’ll need a box that’s at least 18 inches wide x 24 inches deep x 30 inches tall.
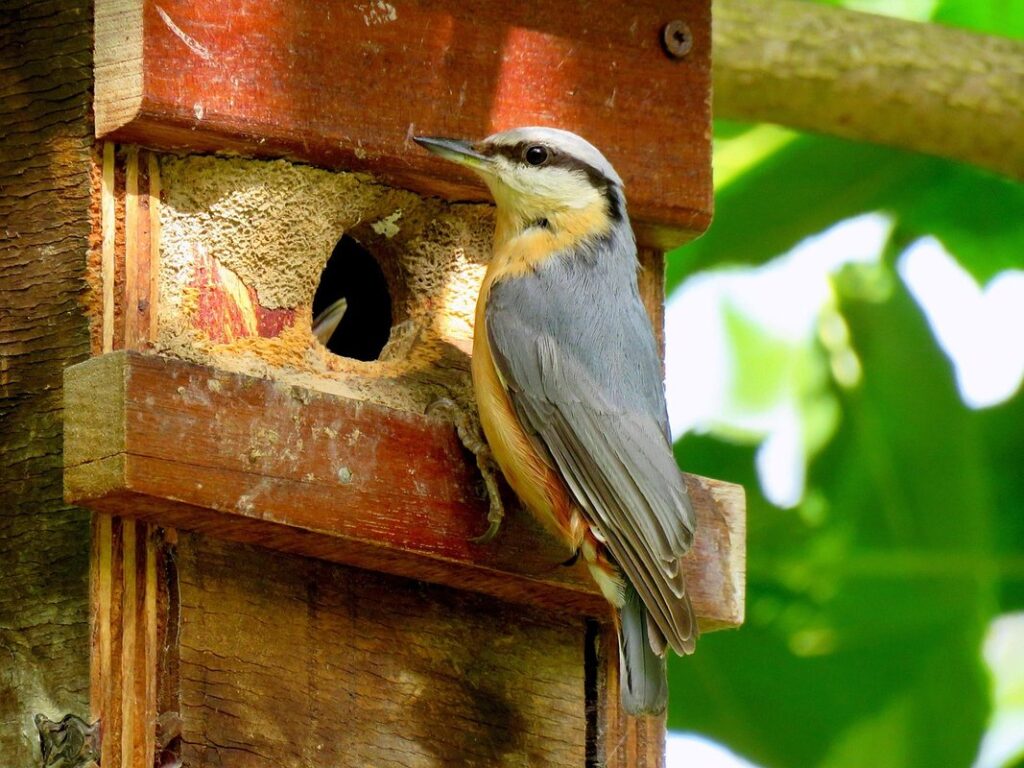
It’s also essential to consider the entrance and exit points of the box. A good rule of thumb is to have an entrance hole that’s about 6-8 inches in diameter. This will allow your hens to easily enter and exit the box without feeling cramped or exposed.
In addition to size, you should also pay attention to the overall design of the box. For example, you may want to include a perch or roosting bar for your hens to land on when entering or exiting the box. This will help prevent any injuries or accidents.
When choosing materials for your chick nesting box, make sure they’re durable and easy to clean. A good option is to use untreated wood or plastic. Avoid using any materials that may harbor bacteria or attract pests, as this can lead to health issues for your hens.
Choosing the Right Materials for Your Nesting Box
When choosing materials for your chick nesting box, durability is one of the most crucial considerations. You want the box to withstand harsh weather conditions, frequent use, and potential tampering by curious animals. For this reason, it’s best to opt for durable materials such as cedar, pine, or reclaimed wood. These types of wood are not only resistant to rot and insect damage but also have a natural resistance to pests and predators.
Ease of cleaning is another essential factor to consider when selecting materials. You want the nesting box to be easy to clean and maintain, especially during brooding season when eggs may be dropped frequently. Look for materials that are easy to disassemble or have removable parts, such as roofs or walls, which can be taken off for thorough cleaning.
In addition to durability and ease of cleaning, it’s also important to consider the nesting box’s resistance to pests and predators. For this reason, it’s best to use non-toxic materials that won’t harm your chickens if they ingest them accidentally. You may also want to consider adding a wire mesh or hardware cloth around the nesting box to prevent rodents from entering and damaging the structure.
When selecting materials for your nesting box, remember to choose those that are sturdy enough to withstand wind, rain, and other harsh weather conditions. Avoid using pressure-treated wood, as it can leach chemicals into the soil and potentially harm your chickens. Consider reusing old pallets or crates to create a unique and eco-friendly nesting box design.
Some popular materials for building chick nesting boxes include reclaimed wood, plastic lumber, and bamboo. These materials are durable, low-maintenance, and environmentally friendly. However, it’s essential to research the specific characteristics of each material before making your final decision.
Incorporating Perches and Other Amenities into the Design
Incorporating perches and other amenities into the design of the nesting box is crucial for the comfort and well-being of your chickens. Perches provide a place for hens to roost at night, which helps them feel secure and reduces stress. You can install multiple perches inside the nesting box or outside it, but make sure they’re sturdy enough to support the weight of your birds.
In addition to perches, consider adding other amenities such as egg-laying trays or nesting platforms. These features allow hens to lay their eggs in a clean and comfortable environment. For example, an egg-laying tray can be made from plastic or wood and should have a slight incline to prevent eggs from rolling out.
When designing the nesting box with perches and other amenities, keep the following tips in mind:
* Install perches at least 12 inches apart to prevent overcrowding.
* Place the perches outside the nesting box if possible, as hens prefer to roost away from their nesting site.
* Use a non-slip material on the egg-laying tray or nesting platform to prevent hens from slipping and falling.
Building the Chick Nesting Box: Step-by-Step Instructions
To build a safe and cozy chick nesting box, follow these essential steps to create a haven for your chicks’ early development. This section will guide you through each stage of construction.
Preparing the Site and Gathering Materials
Before you begin building your chick nesting box, it’s essential to prepare the site where it will be placed and gather all the necessary materials. Start by selecting a location for the nesting box that is safe and easily accessible. Consider placing it near the coop or run to make monitoring and collecting eggs easier.
When choosing a spot, ensure it’s level and well-drained to prevent water accumulation and rotting of the box. Make sure the area is also protected from strong winds, predators, and harsh weather conditions. You can use a spirit level or a laser level to ensure the ground is even and flat.
Next, gather all the necessary materials for building your chick nesting box. A list should include wood (2x4s, 2x6s, or similar) for the frame and shelves, wire mesh or hardware cloth for ventilation, roofing material (asphalt shingles or corrugated metal), a waterproof glue, nails or screws, and any decorative trim you want to add. Consider reusing materials from old pallets or salvaging lumber to make your project more eco-friendly and cost-effective.
Framing and Assembling the Nesting Box Structure
When it comes to assembling the nesting box structure, precision is key. Start by framing the base and walls of the nesting box using 2×4 lumber. Ensure that all corners are square and the frame is level to prevent any structural issues down the line.
Next, install the roof of the nesting box, making sure it’s securely attached to the top of the frame with screws or nails. You can opt for a simple gable roof or a more complex design, such as a hip roof, depending on your skill level and desired aesthetic.
Door placement is crucial in a chick nesting box. Typically, you’ll want to position the door at an angle to allow easy access for cleaning and maintenance. Attach the door using hinges and a latch, ensuring that it’s secure but also accessible for the chickens.
Remember to leave enough space between the roof and the walls for ventilation and easy egg collection. This will not only keep your chickens happy and healthy but also make egg retrieval a breeze.
Adding Finishing Touches: Insulation, Coating, and Final Assembly
Now that you’ve built the main structure of the chick nesting box, it’s time to add some essential finishing touches. Insulation is crucial to maintain a comfortable temperature range for your hens, especially during extreme weather conditions. You can use materials like foam board insulation or even recycled denim insulation. Cut them to fit snugly around the walls and floor of the nesting box.
Next, consider applying a durable coating to protect the nesting box from moisture and wear. A water-resistant paint or varnish will help extend its lifespan. Apply at least two coats, allowing the first coat to dry completely before adding the second layer. This will ensure a smooth, even finish.
Finally, assemble all the components together. Make sure everything is securely attached with screws, nails, or bolts. Double-check that the roof and walls are properly aligned and sealed to prevent any drafts or gaps. With these finishing touches in place, your chick nesting box is now ready for its feathered occupants!
Nesting Box Maintenance and Upkeep
To keep your chicks happy and healthy, it’s essential to regularly clean and inspect their nesting box, ensuring a safe and welcoming space for them to lay eggs.
Cleaning and Disinfecting the Nesting Box
Regular cleaning and disinfecting of the nesting box is crucial to maintaining a healthy environment for your chickens. A dirty nesting box can harbor bacteria, mites, and other diseases that can spread quickly among the flock. To keep your chickens safe and happy, it’s essential to establish a regular cleaning schedule.
We recommend cleaning the nesting box at least once a week, more often if you have a large flock or during peak laying season. Start by removing any soiled bedding material, such as straw or wood shavings, and dispose of it properly. Next, scrub the entire nesting box with a mild detergent and warm water to remove any dirt or stains. Rinse thoroughly and let it dry before refilling with fresh bedding material.
For disinfecting, use a solution of 1 part white vinegar to 9 parts water. Dip a clean cloth into the solution, wring it out thoroughly, and wipe down all surfaces of the nesting box, including any perches or roosts. This will help kill any bacteria or viruses that may be present. Always rinse the cloth frequently to prevent the spread of contamination.
Remember to wear gloves when cleaning to prevent transferring bacteria from your hands to the nesting box. By following these simple steps and maintaining a regular cleaning schedule, you’ll keep your chickens healthy and happy.
Monitoring Egg Production and Detecting Potential Issues
Regular monitoring of egg production is crucial to ensure the health and happiness of your chickens. Start by observing the number of eggs laid daily and note any changes over time. A slight decrease may indicate a potential issue with the nesting box, such as cracks or leaks in the structure.
Keep an eye out for signs of stress or discomfort, like excessive feather pecking or nesting material scattered around the coop. These behaviors can be indicative of problems with the nesting box’s design, ventilation, or cleanliness.
Check the nesting box regularly for any damage, including cracks in the walls or floor, and ensure that it is well-maintained to prevent moisture buildup. Inspect the nesting material daily, replacing it as needed, and clean the nesting box thoroughly at least once a week.
Remember, early detection of potential issues can prevent stress on your chickens and maintain egg production.
Addressing Common Pests and Predators in Chick Nesting Boxes
One of the most significant challenges facing backyard chicken keepers is the presence of pests and predators in their chick nesting boxes. These unwanted visitors can cause stress to the birds, damage to the coop, and even lead to the loss of eggs or chicks. To address these issues, it’s essential to identify common pests and predators that target chick nesting boxes.
Some common pests include rodents, such as mice and rats, which can squeeze through tiny openings in the box, while others like snakes, weasels, and raccoons are attracted to eggs and chicks. Predators like hawks, owls, and cats can also pose a threat if they have access to the nesting area.
To prevent infestations, make sure your chick nesting box is well-sealed with hardware cloth or chicken wire, and that any gaps or openings are securely closed. Add a roof overhang or a predator guard around the box to further deter unwanted visitors. Regularly clean out debris and droppings from the nesting area to discourage pests.
To identify potential infestations early on, inspect your chick nesting box regularly for signs of damage, droppings, or eggs missing.
Tips for Transitioning Chicks into a New Nesting Box
When moving your chicks to a new nesting box, it’s essential to make the transition smooth and stress-free for them. This section will provide valuable tips on how to achieve a seamless integration into their new home.
Acclimating Chicks to the New Environment
When introducing chicks to their new environment, it’s essential to acclimate them gradually to prevent stress and ensure a smooth transition. Start by placing the chicks in a separate enclosure adjacent to the nesting box, allowing them to become familiar with its sights, sounds, and smells.
Begin by opening the door of the nesting box for short periods, allowing the chicks to explore at their own pace. This will help them adjust to the box’s layout, size, and any specific features you’ve incorporated, such as perches or roosts.
As the chicks become more comfortable, start placing treats or food items within the nesting box to encourage them to enter voluntarily. This not only helps with acclimation but also trains them to associate the nesting box with a source of sustenance.
Remember that every chick is different, and some may require more time than others to adjust. Be patient and observe your birds’ behavior to determine when they’re ready for full integration into their new home. By taking these steps, you can help minimize stress and ensure a happy, healthy flock.
Ensuring a Smooth Transition for Established Flocks
Transferring an established flock to a new nesting box can be challenging due to their familiarity with the old setup and existing pecking order. To minimize disruption, it’s essential to introduce the flock to the new nesting box gradually.
Begin by placing the nesting boxes in their new location but make them accessible only for feeding and watering initially. This allows hens to become familiar with the new space without having to compete for resources.
Once the flock is comfortable with the general area, start adding nesting material, such as straw or hay, and encourage exploration of the nesting boxes themselves. Be prepared for some initial resistance and establish a clear dominance hierarchy early on by ensuring the most dominant hens have priority access to the nesting boxes.
Keep an eye out for stress indicators like excessive feather pecking, vocalization, or lethargy. These signs may necessitate further adjustments to the flock’s transition pace.
Addressing Potential Issues Post-Transition
As you transition your chicks into their new nesting box, it’s essential to be aware of potential issues that may arise. Some hens might experience stress due to the change in environment, which can lead to reduced egg production or even pecking order problems within the flock. Aggression among hens is another common issue that can occur during this transition period.
To mitigate these risks, ensure a smooth introduction by gradually introducing your chicks to their new nesting box over a few days. You can start by allowing them to explore the adjacent area before leading them into the nesting box itself. Make sure there’s adequate space within the box for all hens to comfortably nest without feeling crowded or competing with each other.
Monitor your flock closely during this transition, and be prepared to intervene if you notice any signs of stress or aggression. Remove any aggressive birds from the group if necessary, and provide separate housing to prevent further conflict. With patience and proper management, your flock should adapt quickly to their new nesting box, leading to a harmonious and productive coop environment.
FAQs: Common Questions and Concerns About Chick Nesting Boxes
If you’re building a chick nesting box, chances are you’ve got some questions – we’ve got answers! Below, we’ll address common concerns and queries about nest boxes.
Frequently Asked Questions about Building and Maintaining Chick Nesting Boxes
When building and maintaining chick nesting boxes, it’s common to have questions about their design and upkeep. One frequently asked question is: “How often should I clean the nesting box?” The answer is that it depends on the number of hens you have. A good rule of thumb is to clean the box at least once a week during peak egg-laying seasons.
Another concern many backyard chicken keepers have is how to prevent ammonia buildup in the nesting box. To avoid this, make sure your boxes are well-ventilated and consider adding a small cup or tray under the nesting platform to catch droppings. This will help contain messes and reduce odors.
It’s also essential to check for signs of damage or wear on the nesting box regularly. Inspect the wooden structure for cracks or splits, and repair them promptly to prevent pests from getting inside. By taking these simple steps, you can ensure your chick nesting boxes remain safe, clean, and functional for years to come.
If you notice a drop in egg production or an increase in stress among your hens, it may be due to an unsanitary nesting box. Regular cleaning and maintenance are crucial to maintaining the health and happiness of your flock.
Troubleshooting Common Problems with Chick Nesting Boxes
When issues arise with your chick nesting box, it’s essential to address them promptly to prevent stress and potential health problems for your flock. One common issue is cracks or leaks in the structure, which can be caused by various factors such as weather conditions, wear and tear, or poor construction.
To troubleshoot this problem, inspect the nest thoroughly for any signs of damage or weakness. Check if the roof is sagging, if there are gaps between the roof and walls, or if the walls themselves have cracks. If you find a crack or leak, assess its severity to determine the best course of action. For minor issues, you can apply waterproof sealant or caulk to patch up the damage.
However, if the problem is more extensive, such as a sagging roof or significant structural weakness, consider replacing the affected parts entirely. It’s also crucial to identify and address the root cause of the issue to prevent future problems. For instance, if you notice that your nesting box is leaking due to a poorly designed slope, redesign the roof with a steeper pitch to ensure water runs off efficiently.
Regular maintenance, such as cleaning and inspecting the nest regularly, can also help prevent issues before they arise. Make it a habit to check your nesting box at least once a week during peak breeding seasons to catch any potential problems early on.
Conclusion: Building a Successful Chick Nesting Box
Now that you’ve built and set up your chick nesting box, it’s time to summarize what makes for a truly successful design. You’ll find some final key takeaways here to perfect your project.
Recap of Key Takeaways
When building a chick nesting box, it’s essential to remember that proper design, construction, and maintenance are crucial for a successful and healthy brood. A well-planned nesting box can make all the difference in ensuring your chickens stay safe, happy, and productive.
Here are some key takeaways from our guide:
* A minimum of 3-4 square feet of space per 3-4 hens is necessary to prevent overcrowding.
* The nesting box should be placed at a comfortable height for easy access, typically around 2-3 feet off the ground.
* A depth of at least 12 inches and a width of 12-18 inches are recommended to accommodate most breeds comfortably.
* Ventilation, lighting, and predator protection must be carefully considered during construction.
* Regular cleaning and maintenance will help prevent disease and keep your flock healthy.
By following these guidelines, you’ll be well on your way to creating a safe, efficient, and enjoyable nesting box for your chickens. Remember to observe your birds’ preferences and make adjustments as needed to ensure their happiness and productivity.
Encouragement to Share Expertise and Experience
We hope that by now you’ve gained valuable insights into designing and building a chick nesting box that meets your flock’s needs. As experts in this field, we want to encourage you to share your own expertise and experience with others who may benefit from it.
Have you experimented with unique materials or designs? Perhaps you’ve developed a system for maintaining the box that has improved egg-laying rates or reduced stress on your chickens. Whatever your story may be, we invite you to contribute to our community by sharing your knowledge.
Your firsthand experiences and creative solutions can make a significant impact on others who are just starting their journey with chick nesting boxes. By sharing, you’ll not only help others but also continue to refine your own skills as a chicken keeper. Consider writing a guest post or joining our online forum to connect with fellow enthusiasts and exchange ideas.
Remember, the collective knowledge of this community is what makes it so valuable. So don’t be shy – take pride in your accomplishments and inspire others by sharing your expertise!
Frequently Asked Questions
Can I use a pre-made nesting box or should I build one from scratch?
You can consider using a pre-made nesting box, especially if you’re short on time or not skilled with DIY projects. However, building one from scratch allows for customization and better fit to your flock’s needs. Research local regulations regarding coop construction before making a decision.
How often should I clean the nesting box, and what disinfectants are safe to use?
Cleaning the nesting box regularly is crucial for maintaining hygiene and preventing health issues. Clean it every 7-10 days, using pet-safe disinfectants like vinegar or bleach solutions (1 part bleach to 10 parts water). Always rinse thoroughly to prevent residue buildup.
What if I have a large flock – can I just add multiple nesting boxes or should I build a bigger coop?
While adding more nesting boxes is an option, it may not be the best solution for a large flock. Consider building a bigger coop with more space and compartments, ensuring adequate ventilation and easy access for cleaning.
Can I use reclaimed wood or recycled materials to build my chick nesting box, and are there any environmental benefits?
Using reclaimed or recycled materials can reduce waste and have environmental benefits, but ensure the materials meet safety standards (e.g., no treated wood). Consider local availability and regulations regarding repurposed materials in coop construction.
What if I notice a decline in egg production after introducing a new nesting box – are there any potential issues to consider?
A decrease in egg production can be caused by various factors, including stress from the new environment. Monitor your flock’s behavior and adjust the nesting box design or location as needed. Consider adding perches, roosting bars, or other amenities to improve their comfort and reduce stress.