
Are you about to embark on the exciting journey of raising your own ducks, but unsure how to ensure successful hatches? Duck egg hatch assistance is a crucial step in the process, and with the right knowledge, you can increase your chances of healthy new ducklings. Incubation basics, temperature control, and stress management are all vital components that can make or break the success of your hatch.
In this ultimate guide, we’ll walk you through everything you need to know about duck egg hatch assistance. We’ll cover the essential incubation requirements, provide expert tips on maintaining a stable temperature, and share proven strategies for managing stress in both eggs and ducklings. Whether you’re a seasoned breeder or just starting out, our comprehensive guide will give you the confidence to successfully raise your own happy and healthy ducks.
Understanding Duck Egg Incubation Basics
To hatch duck eggs successfully, it’s essential to grasp the fundamentals of incubation, including temperature control and humidity levels. This section will walk you through these critical basics step-by-step.
The Importance of Humidity in Duck Egg Incubation
Maintaining optimal humidity levels is crucial during duck egg incubation. It’s not just about creating a cozy environment for the eggs; it plays a significant role in preventing embryo malformations and ensuring healthy development.
A temperature-controlled incubator can provide some level of humidity control, but manual adjustments are still necessary to achieve the ideal range. For most waterfowl species, this falls between 45-55% relative humidity (RH). However, it’s essential to note that temperature also affects humidity levels – for every degree of temperature increase, RH decreases by about 3%.
Monitoring and adjusting humidity levels regularly can make a huge difference in hatch success rates. A hygrometer should be placed in the incubation area to track RH levels accurately. It’s also crucial to ensure good air circulation within the incubator to prevent the buildup of CO2, which can lead to respiratory issues for both the eggs and the developing embryos.
A 5-10% deviation from optimal humidity levels can significantly impact hatch rates. For instance, research shows that duck eggs incubated at RH levels below 40% experienced a notable decline in hatching percentages compared to those within the recommended range.
Choosing the Right Temperature for Your Duck Eggs
When it comes to incubating duck eggs, getting the temperature just right is crucial for successful hatching. The ideal temperature range for duck eggs is between 99°F (37°C) and 100°F (38°C), with a slight drop in temperature at the end of the incubation period.
To achieve this precise temperature control, you’ll need to set up your incubator correctly. First, ensure that your incubator has a thermostat or temperature control system that can maintain a consistent temperature within 0.5-1°F (0.3-0.6°C). You may also want to consider investing in a digital thermometer to monitor the temperature closely.
In addition to having the right equipment, it’s essential to maintain proper ventilation and humidity levels in your incubator. A general rule of thumb is to aim for 50-60% relative humidity during incubation. This will help prevent moisture buildup and ensure that your eggs develop properly.
If you’re new to duck egg incubation, start with a more conservative temperature setting and gradually adjust as needed. Remember, it’s better to err on the side of caution when it comes to temperature control.
Understanding Flock Temperament and Its Impact on Incubation
When it comes to incubating duck eggs, understanding flock temperament is crucial for success. Different breeds and flock temperaments can significantly impact incubation rates, making some easier to hatch than others. For small-scale or backyard operations, selecting breeds that are suitable for these conditions can make a world of difference.
Some breeds, like Khaki Campbells and Golden 300 Hybrid, are known for their high fertility rates and ease of hatching. These temperaments make them ideal for beginners or those with limited experience in incubation. On the other hand, breeds like Muscovy ducks tend to have lower fertility rates, making them more challenging to hatch.
When selecting a breed for small-scale operations, look for characteristics such as high fertility, robustness, and ease of hatching. Consider factors like egg size, shell quality, and embryonic development when choosing the right breed for your operation. By understanding flock temperament and selecting suitable breeds, you can increase your chances of successful incubation and enjoy a more rewarding experience with duck egg hatching.
Preparing the Broody Hen or Incubator for Duck Egg Hatch Assistance
Before you can provide assistance to duck eggs, you’ll need to ensure your broody hen or incubator is ready for this special task. This section will walk you through crucial preparations for a successful hatch.
Setting Up a Safe and Healthy Environment
When setting up a safe and healthy environment for duck egg hatch assistance, it’s essential to consider both the needs of the broody hen and the incubator. The right equipment and supplies can make all the difference in ensuring a successful hatching process.
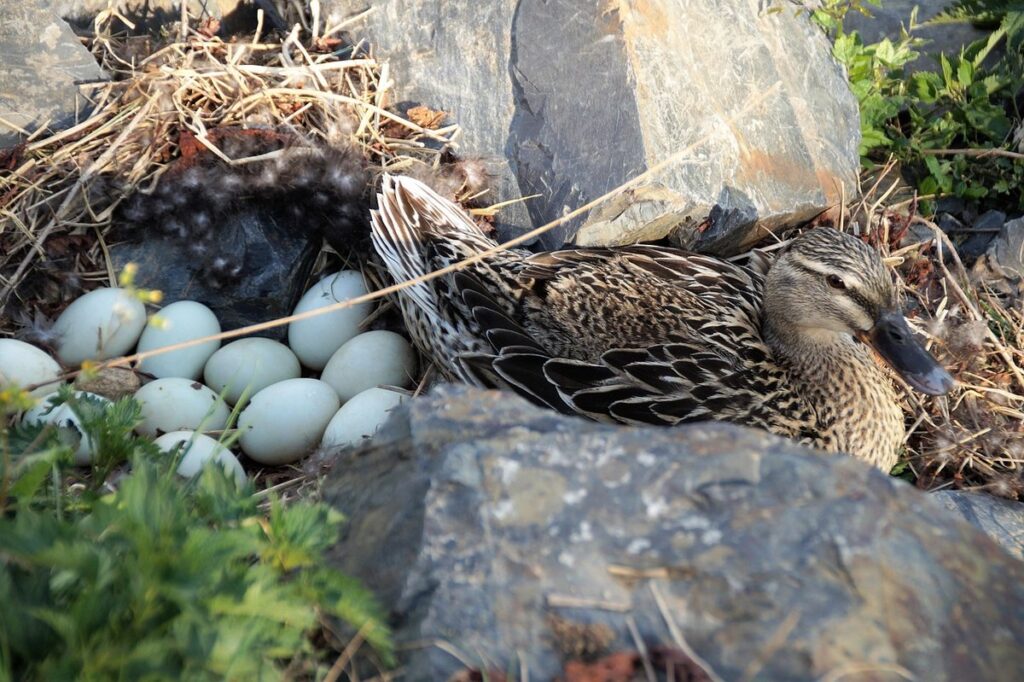
Firstly, ensure that your broody hen has a clean and spacious nesting box with adequate ventilation. This will help prevent ammonia buildup and maintain optimal temperatures for the eggs. A temperature range of 99-100°F (37-38°C) is ideal for duck egg incubation.
For an incubator setup, it’s crucial to use a model specifically designed for waterfowl or large bird species. These models typically have a larger capacity and can maintain consistent temperatures and humidity levels. You’ll also need a hygrometer and thermometer to monitor the environment and make any necessary adjustments.
In addition to the equipment, you’ll need to source duck eggs from a reputable supplier or hatchery. Handling the eggs gently and storing them in a carton with the pointed end facing upwards can help prevent breakage and maintain humidity levels. By following these guidelines, you’ll be well on your way to creating a safe and healthy environment for duck egg hatch assistance.
Creating an Emergency Plan for Unexpected Issues During Incubation
As you’re providing crucial care to help duck eggs hatch, it’s essential to have a plan in place for unexpected issues that may arise during incubation. Power outages and equipment failures can be catastrophic for developing embryos, but with a well-thought-out emergency plan, you’ll be prepared to act swiftly and minimize potential damage.
Some common issues include temperature fluctuations, which can occur due to power outages or faulty heating units. In such cases, it’s crucial to maintain the correct temperature as soon as possible to prevent embryo death. This might involve using backup generators or relocating eggs to a nearby incubator with a reliable heating system. Another potential issue is humidity control; if the incubator’s humidistat fails, you’ll need to manually monitor and adjust the humidity levels regularly.
To mitigate these risks, it’s advisable to invest in a reliable incubation equipment with built-in backup systems or redundant components. Regularly check your equipment for any signs of wear or malfunction, and have a backup plan in place, such as knowing where to acquire spare parts or having a trusted supplier on standby. By anticipating potential issues and taking proactive steps, you’ll be better equipped to handle unexpected events during incubation.
Managing Stress and Emotions During the Hatch Process
As you await the hatching of your precious duck eggs, it’s essential to learn how to manage stress and emotions that come with waiting for life to emerge. This section will guide you through those anxious moments.
Strategies for Reducing Stress on the Mother Hen
When caring for duck eggs and their mother hens during the hatch process, it’s easy to overlook the hen’s own emotional well-being. However, a stressed-out mother hen can lead to problems with the health of both her and her ducklings. To prevent this, there are several strategies you can implement to reduce stress on your mother hen.
For one, make sure she has access to fresh water at all times. Dehydration can exacerbate feelings of anxiety in hens, so ensure that their water source is clean and easily accessible. A nutritious diet also plays a significant role in maintaining the hen’s overall health and reducing stress levels. Feed her a balanced diet rich in essential vitamins and minerals.
Provide your mother hen with plenty of space to roam around, including nesting boxes where she can retreat if needed. The ability to control her environment is crucial for her mental well-being. Finally, minimize handling or disturbance during this time as excessive noise and disruption can cause undue stress on the hen.
Recognizing and Responding to Signs of Distress in Newly Hatched Ducks
As you carefully observe the newly hatched ducklings, it’s essential to recognize and respond promptly to signs of distress. Common indicators include lethargy, labored breathing, or reluctance to move. If you notice any unusual behavior or symptoms, take immediate action to ensure their well-being.
Observe for wetness around the eyes or nostrils, which can indicate respiratory issues. Check for any visible injuries, such as torn flippers or cuts on the beak. Be aware of any reluctance to feed or drink, as this may be a sign of dehydration or inadequate nutrition.
If you suspect distress, provide a calm environment and ensure adequate ventilation in the brooder. Increase humidity levels by misting with warm water to help the ducklings regulate their body temperature. Gently offer a shallow dish of warm water for drinking, as ducklings can quickly become exhausted if they’re struggling to access water. In severe cases, consult a veterinarian or experienced breeder for guidance on providing the necessary care and treatment.
Supporting Your Flock After the Hatch
Once you’ve successfully hatched your duck eggs, it’s essential to provide proper care and attention to help your newly hatched ducklings thrive. This section will walk you through the steps for supporting their growth and development.
Providing Adequate Nutrition for New Ducklings
Providing adequate nutrition for new ducklings is crucial during their first few weeks of life. Ducklings have high energy demands due to rapid growth and development, requiring a diet rich in protein, vitamins, and minerals. A starter feed specifically formulated for young waterfowl should be introduced within the first 24 hours after hatching.
When choosing a starter feed, look for a product containing at least 18% protein to support muscle growth and development. Avoid using duckling pellets or chick starter as these may not provide enough fat-soluble vitamins essential for new ducklings.
Ensure fresh water is always available, as ducklings need it to stay hydrated. It’s also crucial to maintain proper ventilation in the brooder to prevent ammonia buildup from droppings.
Begin supplementing with vegetables and fruits when ducklings are around 1-2 weeks old, offering leafy greens like kale or spinach. Introduce small amounts of whole grains like oats or barley at 3-4 weeks old. Remember to provide a shallow dish for feeding and a separate container for water to prevent messes.
Ensuring Proper Hygiene and Sanitation Practices
Maintaining a clean environment is crucial for new ducklings to thrive. After the hatch, your brooder can quickly become a breeding ground for disease if not properly cleaned and disinfected. Bacteria, viruses, and fungi can spread rapidly among vulnerable ducklings, leading to respiratory problems, pasty butts, and even death.
To prevent this, make cleaning and disinfecting a regular part of your daily routine. Remove any soiled bedding, wash the brooder thoroughly with hot water and mild detergent, and let it dry completely before refilling with fresh bedding. Disinfect all surfaces, including feeding and watering equipment, using a solution of 1 part white vinegar to 9 parts water.
Additionally, ensure proper ventilation in your brooder by providing adequate airflow and keeping the area free from drafts. This will help prevent moisture buildup, which can contribute to disease transmission. By following these simple steps, you’ll create a clean and healthy environment for your new ducklings to grow and develop strong immune systems. Regular cleaning and disinfecting will also make caring for your flock much easier in the long run.
Troubleshooting Common Issues During the Hatch Process
If you’re experiencing problems during the duck egg hatch process, we’ve got you covered with solutions to common issues that can delay or prevent successful hatching. Let’s troubleshoot together!
Addressing Failure to Hatch or Low Fertility Rates
Failure to hatch or low fertility rates can be disheartening for even the most experienced duck keepers. It’s essential to identify the underlying causes of these issues and take corrective action to improve the chances of successful hatching.
Common causes of failure to hatch or low fertility rates include poor breeding, inadequate egg care, stress, nutrition deficiencies, and health issues in the duck population. For instance, a lack of vitamin D3 or calcium can lead to weakened eggshells and lower fertility rates. Similarly, stress caused by overcrowding, noise, or changes in environment can suppress reproductive cycles.
To address these issues, it’s crucial to provide optimal breeding conditions, including a balanced diet rich in essential nutrients, adequate space for movement, and proper lighting. Regular health checks, vaccinations, and parasite control can also help maintain the overall well-being of the duck flock. If you suspect poor egg care or storage as a contributing factor, ensure eggs are kept clean, dry, and refrigerated at 55-60°F (13-15°C) to prevent bacterial contamination.
Keep accurate records of your breeding program, including fertility rates, hatching percentages, and any challenges faced. This will enable you to pinpoint specific areas for improvement and make informed decisions about your flock’s management. By addressing these common causes and implementing corrective measures, you can significantly enhance the chances of successful hatching and improve overall reproductive health in your duck population.
Managing Mortality and Disease Prevention Strategies
When new ducklings hatch, it’s not uncommon for mortality rates to be high due to various factors. One of the main causes is the transfer of bacteria from the broody hen to her newly hatched ducklings through the egg membranes. This can lead to the spread of diseases such as coryza and pasteurella.
To prevent disease outbreaks, maintain good hygiene practices in your hatchery. Ensure all equipment and surfaces are cleaned regularly with a disinfectant solution. Keep the brooding area well-ventilated to reduce moisture buildup, which can foster bacterial growth.
Monitor your ducklings closely for signs of illness, such as labored breathing or discharge around the beak or eyes. Isolate any affected birds immediately and seek veterinary advice if necessary. Provide a balanced diet rich in nutrients to support their immune system. Consider adding probiotics to their feed to promote gut health.
Regularly inspect your flock’s overall health by checking for signs of respiratory issues, wet droppings, or lethargy. Implement biosecurity measures such as separating new arrivals from the existing flock and quarantining them for a few days before introduction.
Conclusion: Tips for Future Success With Your Flock
Now that you’ve navigated the challenging process of assisting duck egg hatching, it’s time to think ahead and prepare for future success with your flock. Here are some expert tips to keep in mind.
Recap of Key Takeaways From the Article
As you complete this comprehensive guide to duck egg hatch assistance, take a moment to reflect on the key takeaways that will support your flock through this critical process. By now, you should have a solid understanding of the steps involved in ensuring a successful hatch, from preparing your eggs for incubation to assisting with the actual hatching process.
One of the most crucial takeaways is the importance of proper egg handling and storage. Make sure to handle eggs gently to avoid cracking or damage, and store them in a clean, dry environment at room temperature until incubation begins. This will help maintain the health and viability of the developing embryos.
Another critical aspect is understanding the signs of successful hatching, such as pipping (the process by which the duckling breaks through its eggshell), and knowing how to intervene if complications arise. Regular monitoring of your eggs during the incubation period can help you identify potential issues early on, allowing for timely intervention and minimizing the risk of loss.
Additionally, having a plan in place for emergency situations is essential. This might include having a backup incubator or knowing what steps to take if an unexpected power outage occurs. By being prepared, you’ll be better equipped to handle any challenges that may arise during this delicate process.
Lastly, remember that every flock is unique, and what works for one group of ducks may not work for another. Be prepared to adapt your approach as needed, and don’t hesitate to seek advice from experienced breeders or veterinarians if you encounter any issues. By applying these key takeaways and staying vigilant throughout the hatch process, you’ll be well on your way to successfully raising a healthy and thriving flock of ducklings.
Frequently Asked Questions
What’s the ideal duration for incubation before candling my duck eggs?
Candling your duck eggs is crucial during the incubation process. Generally, it’s recommended to candle at around 7-10 days of incubation. This allows you to inspect the embryo development and detect any potential issues early on. Keep in mind that duck eggs typically take a bit longer than chicken eggs to hatch, so be prepared for this extra time.
How do I handle sudden changes in temperature or humidity during incubation?
Temperature fluctuations can significantly impact your duck egg hatch assistance efforts. In case of an unexpected change, it’s essential to adjust the incubator settings accordingly. Aim to make gradual adjustments (1-2°F or 0.5-1°C) every few hours to prevent shocking the embryos.
Can I use a thermometer with a probe to monitor internal temperature accurately?
Yes, using a thermometer with a probe is an excellent way to ensure accurate temperature readings during incubation. This type of thermometer allows for precise control over the internal temperature, which is crucial for successful duck egg hatching. Just be sure to position it correctly in the incubator.
What’s the best way to manage stress on both mother hen and newly hatched ducklings?
Reducing stress on both your mother hen and new ducklings is vital during the incubation process. Ensure a safe, clean, and comfortable environment for all birds involved. Provide adequate nutrition, sufficient space, and plenty of fresh water to minimize stress factors.
How often should I clean my incubator and accessories to prevent bacterial growth?
Cleaning your incubator regularly is crucial for maintaining optimal conditions for duck egg hatching. Aim to clean the incubator every 7-10 days, or as needed. Use a solution specifically designed for pet equipment to prevent bacterial growth and maintain hygiene standards.