
Are you ready to welcome adorable ducklings into your life? Incubating duck eggs can be a fascinating and rewarding experience, but it requires careful planning and attention to detail. With so many factors at play, from breed selection to post-hatch care, it’s easy to get overwhelmed. That’s why we’ve put together this comprehensive guide to help you successfully incubate your precious ducklings.
In the following pages, we’ll cover everything from choosing the right duck breed for your climate and needs, to ensuring the perfect egg quality and incubation environment setup. We’ll delve into the importance of fertilization, turning, and monitoring, as well as common challenges that may arise during this process. You’ll also learn how to provide optimal post-hatch care and set up a long-term breeding program for your feathered friends. Whether you’re an experienced poultry keeper or just starting out, our guide has got you covered.
Choosing the Right Breeds and Eggs
When it comes to incubating ducklings, choosing the right breed and eggs is crucial for success. This section will walk you through the process of selecting a suitable breed and egg quality to ensure healthy duckling development.
Factors to Consider When Selecting a Duck Breed for Beginners
When selecting a duck breed for beginners, it’s essential to consider several key factors. For backyard breeding, temperament is a crucial aspect to consider. Some popular breeds known for their friendly and docile nature include Khaki Campbells, Golden 300 Hybrid, and Silver Appleyard. These breeds are perfect for families with children or those who want a low-maintenance duck-keeping experience.
Egg-laying capacity is another vital consideration. If you’re looking to harvest eggs regularly, breeds like Khaki Campbells (280 eggs/year) and Golden 300 Hybrid (200 eggs/year) are great options. However, if you prefer smaller eggs or have limited space, breeds like Silver Appleyard (180 eggs/year) might be a better fit.
Hardiness is also a critical factor to consider. Duck breeds that can thrive in varying temperatures and weather conditions make them ideal for beginners. For example, the Khaki Campbell breed is known for its resilience in extreme temperatures, while the Golden 300 Hybrid excels in temperate climates.
Ultimately, the right breed will depend on your specific needs, climate, and available space. Researching each breed’s characteristics can help you make an informed decision and set yourself up for success in backyard duck breeding.
Understanding Egg Quality and Fertility
When it comes to selecting eggs for incubation, understanding egg quality and fertility is crucial for successful hatching. A good-quality egg should have a sturdy shell that can withstand the rigors of shipping and handling. Look for eggs with shells that are at least 1/8 inch thick, as these will be more likely to support the development of the embryo.
In addition to shell thickness, consider the color and cleanliness of the egg. A clean, unblemished egg is a good sign of healthy reproductive function in the parent duck. A brown or greenish tint to the eggshell can indicate a higher fertility rate, although this is not always the case.
Fertility is perhaps the most critical factor in successful incubation. Only eggs with viable embryos will hatch successfully. Factors such as age and nutrition of the parent duck, as well as environmental conditions during breeding, all impact fertility. To increase your chances of hatching healthy ducklings, choose eggs from reputable breeders who prioritize reproductive health.
When evaluating egg quality and fertility, remember that even small imperfections can make a big difference in hatch rates. With attention to these details, you’ll be more likely to achieve the successful incubation results you’re looking for.
Preparing the Breeder Duck and Eggs for Incubation
Before you start incubating your duck eggs, make sure to carefully prepare the breeder duck by ensuring it’s healthy and laying strong eggs. This is crucial for a successful hatching process.
Health Checks and Quarantine Procedures
When it comes to successfully incubating ducklings, ensuring that the breeder ducks are healthy and free from diseases is crucial. Before breeding season begins, perform a series of essential health checks on your breeder ducks to prevent potential issues.
Start by examining their overall physical condition, checking for any signs of injury, illness, or parasites. Look for changes in appetite, droppings, or behavior, which can indicate underlying problems. Next, ensure that all vaccinations are up-to-date, including those against common duck diseases like avian influenza and duck plague.
It’s also vital to implement parasite control measures, such as providing clean water and feed, maintaining a clean environment, and treating any identified parasites promptly. A well-managed flock will have lower parasite loads, reducing the risk of disease transmission.
To further minimize this risk, quarantine all new breeder ducks before introducing them to your existing flock. This involves isolating them for a minimum of 30 days, providing separate housing and care, and monitoring their health closely during this time. By following these precautions, you can significantly reduce the chances of disease transmission and create an environment conducive to successful duckling incubation.
Egg Collection and Cleaning Techniques
When collecting eggs from the nesting box, it’s essential to do so gently and carefully to prevent damage. Start by ensuring you have a clean collection container with egg cartons or a specialized duck egg tray. Gently lift each egg out of the nesting box, taking note of any potential cracks or abnormalities.
Wash your hands thoroughly before handling eggs to prevent introducing bacteria. Collect the eggs in a way that prevents them from rolling around and potentially cracking. It’s recommended to collect eggs frequently, ideally twice a day, to minimize breakage.
Maintain cleanliness throughout the process by washing the collection container and egg tray regularly with soap and warm water. Dry them thoroughly before using again to prevent bacterial growth. Handle the eggs as little as possible, but if you must, do so gently, keeping your hands under the egg’s equator to support its weight.
Keep a dedicated egg collection area where you can lay out collected eggs in their cartons, undisturbed until they are ready for incubation or storage. This helps prevent unnecessary handling and reduces stress on the eggs.
Setting Up a Suitable Incubation Environment
Creating a suitable incubation environment is crucial for successful duckling hatching, so let’s dive into the essential factors to consider and set up. This includes temperature control, humidity levels, and proper ventilation.
Essential Equipment for Successful Incubation
To successfully incubate ducklings, you’ll need to invest in some essential equipment. At the top of this list is a reliable incubator specifically designed for poultry, such as an automatic turner and egg tray. This device will maintain precise temperature control within the range of 99°F to 100°F (37°C to 38°C), ensuring the optimal conditions for embryonic development.
In addition to the incubator, you’ll also need a hygrometer to monitor humidity levels between 50% and 60%. Too little moisture can hinder proper development, while excessive humidity can lead to mold growth. A thermometer is also crucial for tracking temperature fluctuations.
Don’t forget about proper ventilation and air circulation within the incubation chamber – this will prevent the buildup of carbon dioxide and ammonia from fertilized eggs or guano. Aim for a flow rate of at least 100 cubic feet per minute (CFM) to ensure fresh air exchange. Lastly, consider investing in an egg turning mechanism or manually rotating your eggs every few hours to prevent the formation of blood vessels on the developing duckling’s beak and head.
Creating an Optimal Temperature and Humidity Profile
Maintaining an optimal temperature and humidity level is crucial for successful duckling incubation. The ideal range for both parameters is between 99°F (37°C) and 100°F (38°C) for temperature, and relative humidity should be kept between 50% and 60%. To achieve this, you’ll need a reliable thermometer and hygrometer to monitor the conditions in your incubator.
If the temperature or humidity levels start to deviate from the ideal range, make adjustments as needed. For instance, if the temperature is too high, try reducing it by a degree or two every hour until you reach the desired level. Conversely, if the temperature drops, increase it gradually. Similarly, if the humidity is too low or high, use a humidifier or dehumidifier to adjust the levels accordingly.
It’s also essential to note that ducklings can tolerate some fluctuations in temperature and humidity during incubation. However, frequent and extreme changes can be detrimental to their development. Therefore, it’s crucial to make adjustments carefully and monitor the conditions closely to ensure optimal growth and development of your ducklings.
Fertilization, Turning, and Monitoring
Now that you’ve set up your incubator and are waiting for eggs to hatch, let’s dive into the crucial steps of fertilization, turning, and monitoring. Proper technique is key at this stage.
The Importance of Fertilization in Incubation Success
When it comes to successful duckling incubation, fertilization plays a critical role in ensuring healthy embryo development. Without proper fertilization, eggs may not develop properly, leading to low hatch rates and unhealthy ducklings.
In natural mating, male and female ducks mate, allowing the male’s sperm to fertilize the female’s egg yolk. This process typically occurs around 24-48 hours before laying, giving the sperm enough time to fertilize the egg as it forms in the oviduct. However, natural mating can be unpredictable, and factors like timing, breed, and individual duck health can affect fertility.
Artificial insemination (AI) is a more controlled method of fertilization, where a veterinarian or experienced breeder collects and stores sperm from a male duck. This sperm is then used to fertilize the egg yolk in an oviduct simulator. AI offers greater control over timing, allowing breeders to select high-quality sperm and increase fertility rates.
To ensure successful fertilization, it’s essential to work with reputable suppliers or veterinarians experienced in duck breeding. Regular health checks on both the male and female ducks can also help identify potential fertility issues before they become a problem.
Automatic Turners vs. Manual Turning Methods
When it comes to turning eggs during incubation, you’ll need to decide between using an automatic turner or sticking with manual methods. While both approaches have their advantages and disadvantages, understanding the key considerations will help you make an informed decision for your duckling incubation setup.
Automatic turners are a popular choice among hobbyists and commercial breeders alike due to their ease of use and ability to rotate eggs at regular intervals without human intervention. These devices can be programmed to turn eggs as frequently as 10-15 times per hour, ensuring consistent rotation throughout the day. However, they do come with a higher upfront cost (typically between $50-$100) and may require additional space in your incubation area.
Manual turning methods, on the other hand, offer a more cost-effective solution but demand regular attention from you or an assistant to turn eggs at set intervals (usually 3-5 times per day). While this approach can be time-consuming, it allows for complete control over the egg rotation process and doesn’t require any additional equipment.
Consider your specific needs, available space, and budget when deciding between automatic turners and manual turning methods. If you’re short on time or have a large number of eggs to incubate, an automatic turner might be the way to go. However, if you prefer a more hands-on approach or are on a tight budget, manual turning can still produce excellent results with proper care and attention.
Common Incubation Challenges and Troubleshooting
As you navigate the world of duckling incubation, it’s inevitable that unexpected issues will arise. This section will walk you through common challenges and their simple solutions to get your eggs back on track.
Recognizing Signs of Embryonic Development Issues
As an incubator owner, it’s crucial to be aware of potential signs that indicate embryonic development issues. These can manifest as delayed or failed development, which may seem alarming but can often be addressed if caught early.
Some common symptoms to watch out for include a decrease in pip activity (the process by which the chick breaks through the shell), reduced embryo movement, and failure to pip within 24-48 hours of incubation. You may also notice that some eggs are not developing uniformly, with one side or another appearing less developed than the others.
To identify the root cause, monitor your temperature settings closely, as deviations from the ideal range can be detrimental to embryonic development. Ensure proper humidity levels, too – ideally between 50-60% relative humidity – as fluctuations can lead to issues such as drying out or bacterial contamination.
Addressing Temperature Fluctuations and Equipment Failure
Temperature fluctuations within an incubator can be detrimental to developing ducklings. It’s essential to maintain a stable temperature range of 99°F to 100°F (37°C to 38°C) during the first 24 days, and slightly higher temperatures after that. To mitigate temperature fluctuations, it’s crucial to monitor the incubator’s temperature frequently using a thermometer.
You can also install a temperature controller or a thermostat to regulate the temperature within a narrow range. Some incubators come with built-in temperature control systems, so be sure to explore these features before making a purchase.
In case of equipment failure, such as a power outage or loss of heat, respond promptly by transferring the eggs to a backup incubator or a warm location, like a towel-lined box wrapped in insulation. It’s also essential to have a plan in place for emergency situations, including having spare parts and a maintenance schedule for your incubation equipment.
Remember that ducklings can be more resilient than you think, but it’s crucial to address any issues promptly to ensure their optimal development.
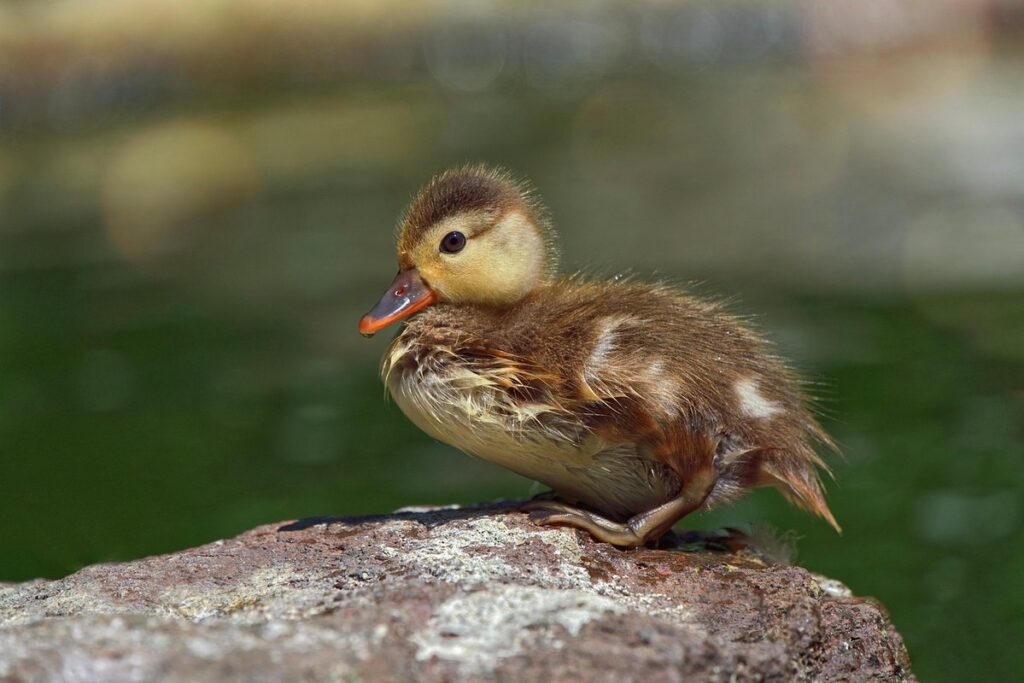
Post-Hatch Care for Ducklings
Now that your duckling has hatched, it’s essential to provide proper care and attention to ensure they grow strong and healthy. In this next step, we’ll guide you through post-hatch care essentials.
Initial Support and Brooding
The first few days after hatching are crucial for ducklings. It’s essential to create a stable brooder environment that mimics their natural habitat as closely as possible. This means maintaining a warm temperature, around 90-95°F (32-35°C), and ensuring proper ventilation.
Adequate ventilation is vital to prevent the buildup of ammonia from droppings. You can use a ventilation fan or open windows to provide airflow. However, be cautious not to create drafts that might chill the ducklings. Aim for a gentle breeze to keep them comfortable.
In terms of nutrition, provide a starter feed specifically formulated for young waterfowl. This will ensure they get the necessary protein and nutrients for growth. A good quality starter feed should contain around 20-22% protein. You can also supplement with crushed oyster shells or grit to support their digestive health. Make sure fresh water is always available, and change it frequently to prevent bacterial growth.
Remember, a stable environment, proper ventilation, and nutritious food will help your ducklings thrive in the first few days after hatching.
Transitioning Ducklings to a Grower Diet
As ducklings grow and develop, their nutritional needs change rapidly. Around 3-4 weeks of age, they’ll be ready to transition from starter feed to a grower diet. This is an essential step in ensuring they receive the right balance of nutrients for optimal growth.
To determine if your ducklings are ready for grower feed, monitor their weight and growth rate closely. A general rule of thumb is to look for a weight gain of at least 10-15% per week. If you notice a significant increase in appetite or energy levels, it may be time to switch feeds.
When transitioning to grower feed, follow these steps:
* Gradually introduce the new feed over 3-5 days to prevent digestive upset.
* Start by mixing 25% grower feed with 75% starter feed on day one, then increase the proportion of grower feed each subsequent day.
* Monitor your ducklings’ response and adjust the feeding schedule as needed.
By following these guidelines, you’ll be able to ensure a smooth transition to grower feed and support your ducklings’ continued growth and development.
Tips for Successful Long-Term Breeding and Rearing
When it comes to long-term breeding and rearing of ducks, there are several key factors to consider. First and foremost, ensure that your duck flock is healthy and free from disease. Regular vaccination and health checks will help prevent the spread of illness and keep your birds thriving. Additionally, provide a well-balanced diet that meets their nutritional needs, including a mix of grains, fruits, and vegetables.
Proper housing is also essential for successful long-term breeding and rearing. Provide adequate space and shelter to protect your ducks from harsh weather conditions and predators. A safe and clean environment will help reduce stress on the birds and promote overall health.
Frequently Asked Questions
How often should I turn the eggs during incubation?
Turning the eggs regularly is crucial for healthy development. Aim to turn them 2-3 times an hour, but make sure not to over-turn as this can cause more harm than good. A general rule of thumb is to turn the eggs every 4 hours, especially during the first week.
What are some common signs of embryonic development issues?
Keep a close eye out for any unusual behaviors or physical changes in your ducklings after hatching. Some common signs of developmental issues include lethargy, poor feather growth, and uneven leg development. If you notice any of these symptoms, consult with a veterinarian experienced in poultry care.
Can I incubate duck eggs in a makeshift setup at home?
Yes, but it’s essential to ensure your setup provides the optimal temperature and humidity conditions for healthy incubation. Invest in a reliable thermometer and hygrometer to monitor the environment, and make sure you have a backup plan in case of equipment failure.
How can I transition my ducklings from brooding to a grower diet?
Gradually introduce the grower feed by mixing it with their initial support food over a period of 7-10 days. Monitor their weight gain and adjust the feeding schedule as needed. Make sure to provide fresh water at all times, and consider implementing a vaccination program for your flock.
What are some essential tips for maintaining a long-term breeding program?
Maintaining a healthy breeding stock requires attention to detail and regular health checks. Regularly monitor egg quality, ensure proper sanitation procedures, and implement a robust quarantine protocol to prevent disease outbreaks. Keep accurate records of egg production, fertility rates, and hatch success rates to refine your breeding strategy over time.