
Are you new to raising quails or looking to improve your chances of successful hatching? Understanding the intricacies of quail brooding time is crucial for any backyard breeder. As it turns out, this delicate period plays a significant role in determining the health and growth of your quail chicks. But don’t worry – we’ve got you covered! In this comprehensive guide, we’ll delve into the world of embryonic development, covering everything from fertilization to hatching. You’ll also learn the basics of incubation, including temperature control and humidity levels. Plus, we’ll discuss essential equipment for successful growth and health. Whether you’re a seasoned quail keeper or just starting out, this article will equip you with the knowledge you need to give your quails the best possible start in life.
Understanding Quail Development Stages
To successfully manage quail brooding time, it’s crucial to understand their development stages and how to care for them during each phase of growth. Let’s break down these critical milestones together.
Quail Embryonic Development
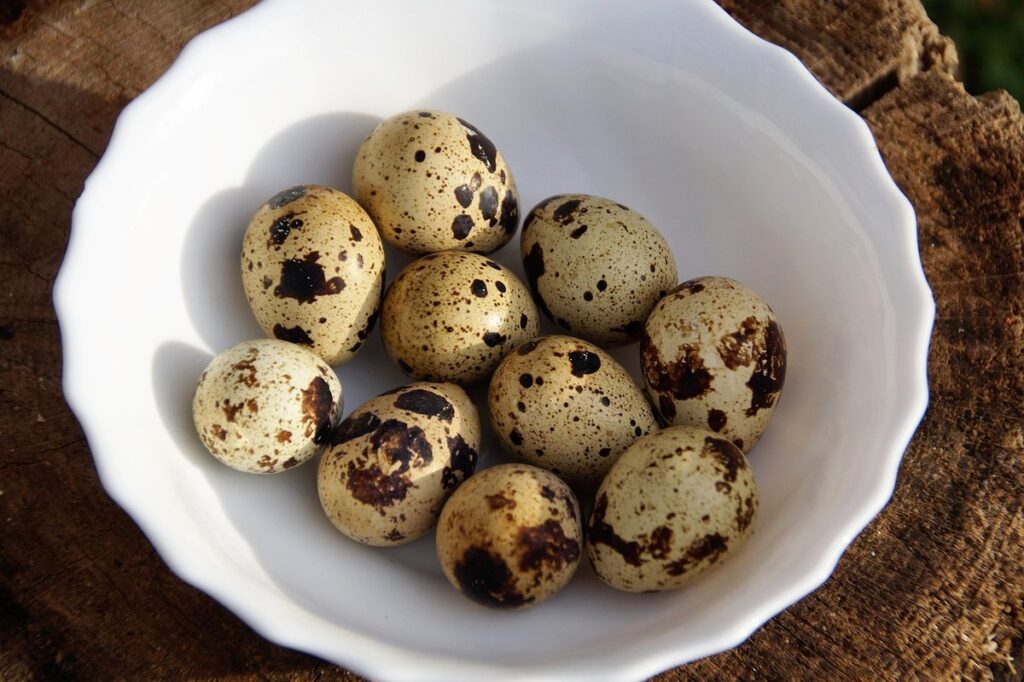
When it comes to quail brooding time, understanding embryonic development is crucial for successful hatching. The process begins with fertilization, where a male’s sperm unites with the female’s egg yolk to form a zygote. This occurs in the oviduct, a muscular tube that transports eggs from the ovary to the vent.
Over the next 24-26 hours, the zygote undergoes cleavage, dividing into a cluster of cells called blastomeres. By day three, these cells have formed a solid ball called a morula. The morula then enters a period of rapid growth, called cavitation, where fluid-filled spaces form within the embryo.
Critical periods in quail embryonic development include days 4-6, when organogenesis begins, and day 10, when the chick’s eyes and beak start to develop. At around 16-17 days, the embryo is fully formed and ready for hatching. Understanding these milestones will help you gauge the progress of your developing quail eggs, ensuring you’re providing optimal care during this critical period. Monitor egg temperature and humidity closely to support healthy development.
Incubation Period Basics
When it comes to raising quails from eggs, understanding the incubation period basics is crucial for success. The first step in successful brooding is creating an optimal environment for egg development. This includes maintaining a precise temperature and humidity level.
The ideal temperature range for incubating quail eggs is between 99°F (37°C) and 100°F (38°C). Most modern incubators come with built-in thermometers, making it easy to monitor the temperature. Humidity levels should be kept between 50-60% during the first week of incubation. After that, humidity can be reduced slightly.
Another essential aspect is turning the eggs regularly to ensure even development. Quail eggs are typically turned every 6 hours or 12 times in a 24-hour period. This is crucial for proper embryonic growth and prevents the egg from developing unevenly. By understanding these basic requirements, you’ll be well on your way to successfully incubating quail eggs and raising healthy chicks.
Setting Up a Suitable Brooder Environment
Creating a suitable brooder environment is crucial for your quail’s health and well-being, so let’s dive into the essential setup steps to get it right. This section will guide you through the process.
Choosing the Right Brooder Size
When it comes to choosing the right brooder size for your quail flock, one of the most critical factors to consider is ensuring that you have enough space for them to comfortably grow and develop. A good rule of thumb is to provide at least 2-3 square inches of floor space per bird, with some breeders recommending up to 4 square inches.
To give you a better idea, let’s say you’re raising Japanese quail, which are a popular choice among backyard farmers. For every 10 birds, you’ll need a minimum brooder size of around 20-24 square feet (about 2×3 feet). This may seem like a lot, but trust us, it’s essential for preventing overcrowding and related health issues.
Consider the quail’s life stages: as they grow from chicks to adults, their needs change significantly. A larger brooder will give you flexibility to accommodate your birds’ growth without having to worry about upgrading or splitting them too soon. In our next section, we’ll discuss how to maintain a clean and safe environment within your chosen brooder size.
Essential Equipment for Successful Brooding
When setting up a suitable brooder environment for quails, having the right equipment is crucial for their growth and development. Start by investing in a reliable heat source, such as a heat lamp or ceramic heat emitter, to maintain a consistent temperature between 90-100°F (32-38°C) during the first week after hatching.
Proper ventilation is also vital to prevent ammonia buildup from droppings and maintain air quality. Install a brooder fan that can be adjusted to regulate airflow, ensuring the quails have access to fresh oxygen at all times. A feeding system that allows for easy access to food and water is another must-have. Consider using a trough feeder or a feeding pan with built-in water reservoirs to reduce waste and keep the area clean.
Other essential equipment includes a brooder with adequate space (about 1-2 square feet per quail) and a nesting box for egg-laying adults. Avoid overcrowding, as it can lead to stress, disease, and reduced productivity.
Location Considerations for Optimal Growth
When setting up a quail brooder environment, location considerations play a crucial role in ensuring optimal growth. The temperature, humidity, and light exposure in different locations can significantly impact the health and development of your quails.
For instance, direct sunlight can cause overheating, which may lead to respiratory problems or even death in young quails. In areas with high temperatures, it’s essential to provide shade, ventilation, and adequate cooling systems to maintain a comfortable temperature between 60°F to 70°F (15°C to 21°C).
Conversely, locations with low light exposure can slow down the growth rate of quails. A well-ventilated area with natural or artificial lighting can promote optimal growth. It’s also crucial to consider the humidity levels in your location. High humidity can lead to respiratory issues and reduce air quality.
When choosing a brooding location, look for areas that are at least 3-4 feet away from walls to allow for good airflow. Also, ensure that the area is protected from drafts and extreme temperatures. By considering these factors, you can create an optimal environment that promotes healthy growth and development in your quails.
Managing Temperature and Humidity Levels
To ensure a healthy environment for your quail chicks, you’ll need to carefully manage temperature and humidity levels in their brooding area. This involves striking a delicate balance between conditions that promote growth and prevent disease.
Importance of Correct Temperature Regulation
Achieving precise temperature control is crucial during the different developmental stages of quail growth. As they mature from chicks to adults, their thermal requirements change significantly.
Between 0-4 weeks, quails need a consistent temperature range of around 95-100°F (35-38°C) to stimulate healthy growth and development. As they grow older, the temperature can be gradually reduced by 5-10°F (3-6°C) every week until it reaches 70-80°F (21-27°C) for adult quails.
It’s also essential to consider the quail species when setting temperatures. Some breeds, such as Japanese Quails, have specific requirements that differ from others like California or Button Quails.
To ensure optimal growth, it’s vital to use a thermometer and hygrometer in the brooding area to monitor temperature and humidity levels accurately. Maintaining precise temperature control will not only enhance quail growth but also reduce mortality rates and improve overall health. Make sure to research specific temperature requirements for your breed of choice to provide the best environment for your quails.
Maintaining Ideal Humidity Levels
Maintaining ideal humidity levels is crucial to ensure a healthy and thriving quail flock during the brooding period. Quails require a humid environment to prevent respiratory issues and promote proper digestion. Aim for a relative humidity level between 40-60% throughout the day.
To maintain this range, you can use a spray bottle to mist the enclosure lightly every few hours. Avoid over-saturating the area, as this can lead to mold growth and other health problems. Monitor temperature and humidity levels closely using a thermometer and hygrometer.
It’s also essential to ensure proper ventilation in your quail brooder. Ensure that the enclosure is well-ventilated to prevent moisture buildup. A good rule of thumb is to provide 1 square foot of space per bird. This will help maintain optimal humidity levels while preventing ammonia buildup from waste.
If you notice any signs of respiratory distress, such as labored breathing or coughing, it may be a sign that the humidity level is too low. Conversely, if your quails are lethargic and have wet droppings, it could indicate high humidity levels. Adjust the misting schedule accordingly to maintain the ideal range.
Managing Temperature Fluctuations
When it comes to managing temperature fluctuations during quail brooding time, it’s essential to be prepared for external factors that can affect the stable environment of your young birds. Extreme weather conditions like heatwaves or cold snaps can quickly throw off the delicate balance necessary for proper growth and development.
To mitigate these risks, consider investing in a reliable heating or cooling system specifically designed for quail brooding. These systems can help maintain a consistent temperature range between 90°F to 95°F (32°C to 35°C), which is ideal for quails.
Another strategy is to create a sheltered area for your quail enclosure. This could be as simple as adding a canopy or awning to block direct sunlight during hot periods, or using a cold frame or greenhouse to trap warmth and light during winter months.
Regular monitoring of temperature levels is also crucial, allowing you to make adjustments before any fluctuations become detrimental to your birds’ health.
Nutritional Requirements for Quail Growth
Quail nutritional requirements are crucial during growth, and providing the right balance of protein, calcium, and other essential nutrients is vital to their development. Let’s explore what your quails need to thrive!
Understanding Commercial Quail Feed Formulas
When selecting commercial quail feed, it’s essential to understand the nutritional content and formulas used. A well-balanced diet is crucial for optimal growth and health in young birds.
Commercial quail feeds are formulated to meet specific nutritional requirements based on age, breed, and production goals. These formulas typically include a mix of energy sources (carbohydrates and proteins), vitamins, and minerals. The primary energy source in commercial quail feed is usually corn or other grains, supplemented with protein sources such as soybean meal or fishmeal.
A typical 16% protein grower feed may contain the following percentages of nutrients: 16% crude protein, 8% moisture, 5% ash, and 2.5% calcium. For brooder birds, it’s recommended to choose a starter or grower feed with an age-specific formulation. Ensure that the feed meets your quail breed’s specific requirements.
When selecting commercial feed, look for products from reputable manufacturers that follow established nutritional standards. Reading labels carefully will help you make informed decisions about providing the best possible nutrition for your quails during brooding time.
Adding Supplements to Enhance Growth
When it comes to quail brooding time, providing a balanced diet is crucial for optimal growth. However, sometimes even with a well-planned feed, quails may benefit from additional supplements to enhance their growth and overall health.
Vitamins are essential for quail growth, particularly vitamins A, D3, E, and B complex. Vitamin deficiencies can lead to issues such as stunted growth, weakened immune systems, and poor egg production. Include vitamin-rich supplements like calcium and phosphorus in your quail’s feed to support strong bone development.
Minerals play a vital role in regulating various bodily functions, including energy metabolism and enzyme activity. Key minerals for quails include zinc, iron, and manganese, which are critical for immune function, protein synthesis, and digestion. To boost mineral intake, you can add supplements like oyster shell or rock phosphate to your feed.
Probiotics support gut health by promoting the growth of beneficial bacteria in the digestive system. This leads to improved nutrient absorption and a stronger immune system. Include probiotic-rich foods like fermented vegetables or supplement with commercial probiotics to give your quails an extra boost.
Tips for Providing Fresh Water and Hydration
When it comes to quail growth, ensuring they have access to fresh water and hydration is crucial for their health and development. Dehydration can lead to reduced egg production, increased mortality rates, and even death.
Quails need about 10-15% of their body weight in water daily. For example, a 50g quail would require approximately 5-7.5ml of water per day. Provide your quails with a shallow dish that’s heavy enough to prevent it from tipping over, making it easier for them to drink.
Change the water frequently to maintain cleanliness and prevent bacterial growth. Also, consider using a waterer with a narrow opening to prevent droppings from contaminating the water source. Monitor your quails’ drinking habits closely, especially in hot environments or during breeding periods when their water intake may increase.
By providing adequate fresh water and hydration, you’ll be taking an essential step towards ensuring the health and well-being of your quails throughout their brooding time.
Monitoring Health and Handling Common Issues
Now that you’ve successfully incubated your quail eggs, it’s essential to monitor their health closely and know how to handle any common issues that may arise during this critical brooding period. Regular checks will ensure a healthy start for your new arrivals.
Identifying Signs of Disease or Illness
As you monitor your quails’ health during brooding time, it’s essential to be aware of common signs and symptoms that may indicate a disease or illness. Keep an eye out for changes in behavior, appetite, or physical condition.
Changes in droppings can be a significant indicator of health issues. For example, abnormal colors, odors, or consistency can signal problems such as coccidiosis, a common parasite issue in young quails. Monitor the color and texture of your quails’ droppings to catch any anomalies early on. Additionally, watch for changes in egg production, as a decrease in eggs or unusual egg quality may indicate nutritional deficiencies or reproductive issues.
Be vigilant for signs of stress or discomfort, such as labored breathing, lethargy, or loss of appetite. Check your quails regularly for any visible injuries or abnormalities, such as swelling, discharge, or lesions. If you notice any of these symptoms, separate the affected bird from the rest of the flock immediately and consult a veterinarian for guidance on treatment and care.
Keep accurate records of your quails’ health, including feeding schedules, vaccinations, and any treatments administered. Regular monitoring and prompt intervention can help prevent minor issues from becoming major problems. By staying proactive and attentive to your quails’ needs, you’ll be better equipped to identify potential health concerns before they escalate into more severe problems.
Strategies for Preventing Disease Outbreaks
When it comes to quail brooding time, disease outbreaks can be a major concern. To prevent this from happening, it’s essential to implement strategies that promote cleanliness, vaccination protocols, and biosecurity measures. Here are some practical tips to help you safeguard your quails:
Firstly, maintain impeccable cleanliness in the brooder by regularly disinfecting surfaces, changing bedding, and ensuring adequate ventilation. This will reduce the risk of bacterial and viral infections. For example, a study on broiler chicken farms showed that implementing strict cleaning protocols resulted in a significant reduction in disease incidence.
Develop a vaccination schedule for your quails, working closely with a veterinarian to determine the best approach. Vaccination can be especially crucial during peak breeding seasons when stress levels are high.
Implementing robust biosecurity measures is also vital. This includes quarantining new birds, monitoring visitors and employees, and controlling pest populations. By following these strategies, you’ll be well-equipped to prevent disease outbreaks and ensure a healthy quail population.
Troubleshooting Common Brooding Problems
As you monitor your quails’ health and behavior during brooding time, you may encounter some common problems that can affect their growth and development. Don’t worry, we’ve got you covered! Here are some troubleshooting tips to help you address these issues:
Loss of Appetite: If your quails suddenly stop eating or show a loss of appetite, check if the food is stale, moldy, or unpalatable. Replace the food with fresh and nutritious feed, and ensure access to clean water at all times.
Wet Droppings: If you notice wet droppings in the brooder, it may be due to cold temperatures. Ensure the brooder temperature is above 90°F (32°C), and consider using a heat lamp or infrared heat source to maintain a consistent temperature.
Bleeding and Feather Loss: Check if your quails are pecking each other, which can lead to bleeding and feather loss. Keep an eye on their behavior, and separate any aggressive birds to prevent further harm. Provide adequate space and enrichment activities to minimize stress and aggression.
Pile-ups and Congestion: If you notice quails piling up or congestion in the brooder, it may be due to overcrowding. Ensure there’s enough space for each bird (about 1-2 square feet per quail) to move around comfortably.
Conclusion: Maximizing Quail Productivity through Proper Brooding Practices
Now that you’ve made it through this comprehensive guide on quail brooding time, it’s time to recap and take action. To maximize quail productivity, it’s essential to provide them with a safe and healthy environment from the get-go. This means carefully monitoring temperature, humidity, and lighting levels to ensure optimal conditions for growth and development. By doing so, you’ll be setting your quails up for success and giving yourself the best chance at raising healthy, thriving birds. Don’t underestimate the importance of proper brooding practices – it’s a crucial investment in your flock’s well-being and ultimately, your own success as a quail breeder or owner. By implementing these best practices, you’ll be on your way to enjoying a bountiful harvest of eggs and a happy, healthy quail community.
Frequently Asked Questions
What are some common mistakes to avoid when managing quail brooding time?
When introducing heat sources, ensure they’re secure and cannot tip over. Also, maintain a consistent temperature gradient within the brooder, allowing chicks to regulate their own temperature needs.
How often should I monitor humidity levels during the incubation period?
Monitor humidity levels daily, aiming for 50-60% relative humidity during the first week. Adjust as necessary based on weather conditions and your quail’s specific needs.
What are some signs that my quails may be experiencing stress due to temperature fluctuations?
Watch for changes in behavior, such as pacing or aggression. Also, monitor their health by inspecting droppings, appetite, and overall condition. If you notice any deviations from normal, adjust the brooder environment accordingly.
Can I use a humidifier or dehumidifier instead of misting the brooder manually?
Yes, using a humidifier can be an effective alternative to manual misting. However, ensure it’s designed for quail habitats and doesn’t create excessive moisture buildup. Regularly inspect your setup to avoid over-humidification.
How long after hatching should I expect my quails to start showing signs of growth and development?
Typically, quails will begin exhibiting visible growth around 2-3 weeks post-hatch. Monitor their weight gain, feather development, and overall health to ensure they’re thriving in the brooder environment.