
Are you curious about the magical process of chicken incubation? If so, you’re in the right place. As an avid backyard chicken keeper or aspiring homesteader, understanding how long it takes for eggs to hatch is crucial for successfully raising healthy chicks. But did you know that not all hens are created equal when it comes to fertility and broodiness? Some breeds are naturally better suited to incubating eggs than others. In this article, we’ll delve into the fascinating world of chicken incubation, covering topics such as egg fertility, broodiness, and post-hatch care. We’ll also explore what affects hatching time and how you can ensure a successful hatch rate with your own backyard chickens. By the end of this guide, you’ll be equipped with the knowledge to raise happy and healthy chicks.
Understanding Chicken Reproduction
To understand how long it takes a hen to hatch eggs, you need to grasp the basics of chicken reproduction and the incubation process that makes it all possible.
The Role of Broodiness in Incubation
As you delve into the world of chicken reproduction, it’s essential to understand the role of broodiness in incubation. Broodiness is a natural behavior exhibited by hens where they prepare themselves for motherhood by stopping egg-laying and focusing on raising their chicks. This remarkable instinct triggers when a hen becomes aware that her eggs are fertile or when she sees other chicks being raised.
During broodiness, a hen’s body undergoes significant changes, including reduced energy expenditure, increased nesting behavior, and a more attentive attitude towards the eggs. This period can last anywhere from 18 to 26 days, depending on factors like breed, age, and individual temperament.
As an important aspect of incubation, broodiness plays a crucial role in ensuring successful hatching. Hens will fiercely protect their eggs, regulating temperature and humidity levels within the nest. When a hen goes broody, it’s essential to allow her to complete this process without interference. This allows her to take care of her eggs naturally, providing the best possible chance for healthy chicks to hatch.
If you’re trying to breed hens or are involved in backyard chicken keeping, understanding broodiness is vital for achieving successful incubation and rearing healthy chicks.
Factors Affecting Egg Fertility
The fertility of an egg is influenced by several factors that can either enhance or hinder its ability to hatch. When it comes to chicken reproduction, a hen’s age plays a significant role in determining the fertility of her eggs. Hens are most fertile between 1 and 3 years of age, after which their fertility gradually declines. This is because older hens tend to have more health issues and may not lay eggs as frequently.
Nutrition also has a direct impact on egg fertility. A balanced diet rich in essential nutrients such as calcium, protein, and vitamins ensures that the hen’s reproductive system functions optimally. Lack of these nutrients can lead to decreased fertility, making it difficult for the egg to hatch. Regular health checks and vaccinations are also crucial in maintaining the overall health status of the flock, which directly affects the fertility of their eggs.
Eggshell quality is another factor that contributes to fertility. A strong, intact shell is essential for protecting the developing embryo inside the egg. If the shell is weak or cracked, it may compromise the chances of successful hatching. As a result, breeders often prioritize selecting hens with robust eggshells and regular maintenance practices.
Incubation Periods: How Long Does it Take?
Let’s get into the specifics of incubation periods, and we’ll cover exactly how long it takes for a hen to hatch eggs successfully.
Stages of Embryonic Development
As you wait for your eggs to hatch, understanding the stages of embryonic development can help you anticipate what’s happening inside that incubator. The journey from fertilized egg to chick is a remarkable process that unfolds over several critical phases.
Cleavage, the first stage, begins around 24-48 hours after fertilization. During this time, the embryo undergoes rapid cell division, but the cells don’t yet have distinct shapes or functions. Morula, the second stage, occurs between 3-5 days post-fertilization, where the embryo’s cells compact into a tightly packed cluster.
As you approach the midpoint of your incubation period (around 6-7 days), the embryo enters the blastula stage. Here, a fluid-filled cavity forms within the cell mass, preparing for gastrulation – the next crucial phase. By day 14-15, the germ layers have formed: ectoderm, mesoderm, and endoderm. These layers will eventually differentiate into various tissues and organs that give rise to your chick.
Keep in mind these stages are critical markers for monitoring embryonic development during incubation. By recognizing the signs of each phase, you can gauge the overall health and progress of your developing chicks.
Factors Influencing Hatch Rate and Time
Factors such as temperature, humidity, and turning frequency can significantly impact hatch rates. A consistent temperature between 99°F to 100°F (37°C to 38°C) is crucial for successful hatching. If the temperature fluctuates, it can cause the embryo to develop at an irregular pace, leading to poor hatch rates.
Humidity levels also play a critical role in incubation. Aim for a relative humidity of 50-60% during the first week and maintain it between 40-60% until hatching. Failing to do so can result in desiccated or under-developed embryos.
Turning frequency is another factor that cannot be overlooked. Gently turning eggs 3-5 times a day helps prevent sticking and promotes even development. Aim for consistent handling throughout the incubation period, as sudden changes can cause stress on the embryo.
Maintaining consistency and monitoring the incubation environment closely can greatly impact hatch rates. Regular checks on temperature, humidity, and egg position are essential to ensure optimal conditions for hatching.
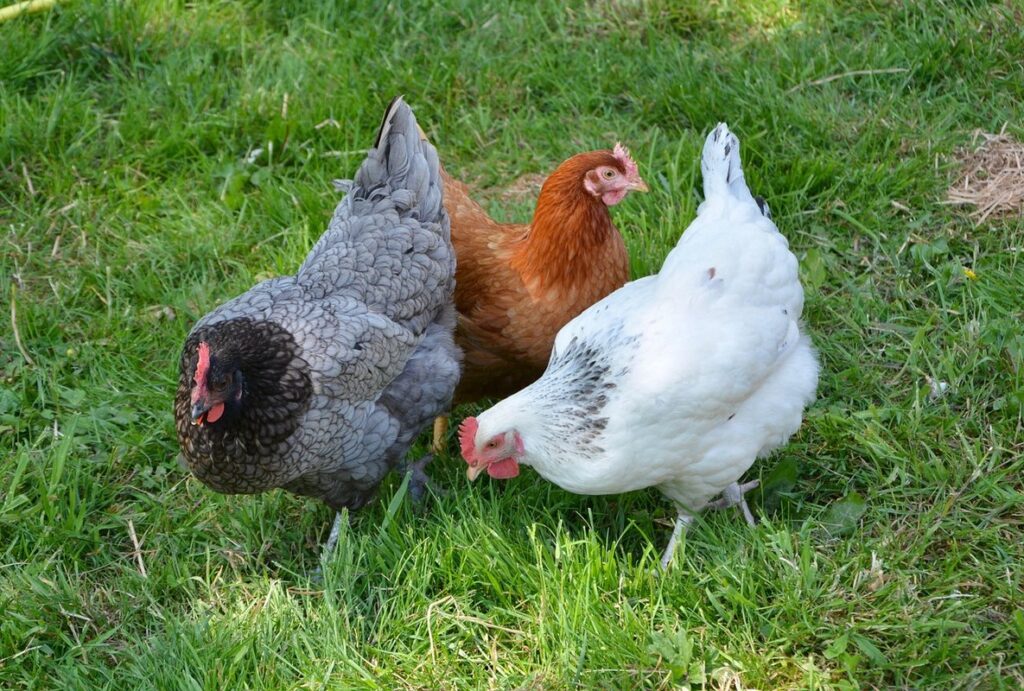
Breeds and Temperaments: How They Affect Hatching
When it comes to hatching eggs, understanding a hen’s breed and temperament is crucial for predicting incubation success. Different breeds have varying abilities when it comes to producing healthy chicks.
Cold-Blooded vs Warm-Blooded Breeds
When it comes to hatching eggs, breed temperament plays a crucial role. Two main categories of breeds are cold-blooded and warm-blooded. Cold-blooded breeds, such as the Muscovy duck, require external heat sources to regulate their temperature, whereas warm-blooded breeds, like Leghorns, can maintain their own body heat.
Cold-blooded breeds often take longer to hatch due to their slower metabolism. For example, a Muscovy duck egg may need 35-40 days of incubation compared to the standard 28 days for warm-blooded breeds. This is because cold-blooded birds don’t have the same level of internal temperature regulation as warm-blooded ones.
When working with cold-blooded breeds, it’s essential to provide a consistent and adequate heat source. A heat lamp or ceramic heat emitter can help maintain a temperature between 90-100°F (32-38°C) in the incubator. This ensures that the embryo develops at an optimal rate.
In contrast, warm-blooded breeds are more adaptable and require less external assistance. Leghorns, for instance, can thrive with minimal heat sources, making them ideal for backyard hens. Understanding your breed’s unique needs is vital when determining incubation time.
The Role of Temperament in Incubation Success
A hen’s temperament plays a significant role in her ability to incubate eggs successfully. Some breeds are naturally more inclined to go broody, which is a state where they sit on their eggs continuously, regulating temperature and humidity to facilitate hatching.
Broody hens typically exhibit distinct characteristics, such as increased aggression when defending their nest, intense devotion to their eggs, and a tendency to ignore other activities like foraging or socializing. These traits are essential for successful incubation, as the hen must remain vigilant and committed to her nesting duties.
If you’re planning to breed or raise chickens, it’s crucial to recognize and encourage broodiness in your flock. Some breeds, such as Orpingtons, Brahma, and Cochin, are more likely to go broody than others. By choosing the right breed and creating an environment that fosters broodiness, you can increase the chances of successful incubation.
For example, providing a safe and quiet nesting box, maintaining optimal temperature and humidity levels, and offering a balanced diet can all contribute to a hen’s ability to successfully incubate eggs.
Managing Your Hatching Process
Now that you know how long it takes a hen to hatch eggs, let’s dive into the practical aspects of managing your hatching process for optimal results.
Preparing for Incubation: Setting Up the Brooder
Before placing your fertile eggs under a broody hen or into an incubator, it’s essential to set up a suitable brooding environment. A well-designed brooder will help ensure the health and survival of your chicks.
Start by selecting a safe location for the brooder, away from drafts, predators, and other hazards. Make sure it has good ventilation to prevent ammonia buildup from the bedding material. The ideal temperature range for a brooder is between 90°F (32°C) and 95°F (35°C), with a slight drop as the chicks grow.
Maintain a humidity level of around 50-60% by misting the brooder with water daily. You can also use a hygrometer to monitor the humidity levels accurately. Ensure that the brooder has adequate lighting, providing at least 24 hours of low-intensity light per day.
Keep in mind that different breeds have varying temperature requirements. For example, some heat-loving breeds may require temperatures as high as 98°F (36°C) during the first week. Always research specific breed requirements to ensure optimal conditions for your chicks.
Monitoring Progress: Checking Embryonic Development
Monitoring embryonic development is crucial during the incubation process. You’ll want to check on the eggs regularly, usually around day 7-10, using a method called candling. This involves shining a bright light through the egg to observe the developing embryo. Look for the following signs of successful incubation: the yolk sac’s attachment to the shell, the growth of veins and arteries, and the development of feathers or beaks.
If you don’t have a candling tool, you can also use a flashlight or lamp to inspect the eggs. Hold the light close to the large end of the egg and observe for about 10 seconds. A healthy embryo will appear as a small, dark shape moving within the egg. Be cautious not to get too close, as this could cause the embryo to move away from the shell.
Another method for monitoring embryonic development is using an incubation thermometer to track temperature fluctuations. This helps ensure that your eggs are staying at a consistent temperature, which is vital for successful hatching.
As you monitor the eggs, keep in mind that some may not develop as expected. In such cases, it’s essential to remove them from the incubator to prevent any potential health risks to the other eggs. Regularly checking on the eggs will give you a better understanding of their development and help you identify any issues early on.
Troubleshooting Common Issues
If you’re experiencing problems with hatching eggs, don’t worry – we’ve got some common issues covered to help you identify and resolve the problem. Let’s troubleshoot together!
Causes of Delayed or Failed Hatching
If you’re experiencing delayed or failed hatching, it’s essential to identify the underlying cause and address it promptly. One common issue is temperature fluctuations in the incubator. If the temperature deviates from 99-100°F (37-38°C), it can affect embryonic development. To prevent this, ensure your incubator has a stable thermostat and regular temperature checks.
Humidity levels are also crucial for hatching success. Inadequate humidity can cause the embryo to dry out, leading to delayed or failed hatching. Maintain the recommended humidity level of 50-60% by using a water pan or misting system. Monitor your incubator’s humidity gauge regularly to make adjustments as needed.
Other factors contributing to delayed or failed hatching include poor egg quality, inadequate turning, and contamination. Regularly inspect eggs for cracks, dirt, or other visible damage before placing them in the incubator. Ensure you’re turning the eggs 3-5 times daily to prevent developing embryo complications.
Additionally, maintain a clean environment within the incubator to prevent bacterial growth. Clean the incubator regularly with a mild detergent and water solution. Disinfect any equipment used for egg handling or incubation to reduce contamination risks.
Maintaining a Healthy Flock: Preventative Measures
Maintaining a healthy flock is crucial during incubation, as it directly affects the success of hatching eggs. A robust immune system will significantly increase the chances of healthy chicks. Establish a vaccination schedule for your flock to protect against common diseases like Newcastle disease and avian influenza.
Regular parasite control measures should also be in place to prevent internal and external parasites from weakening the birds’ health. This can include regular deworming, monitoring fecal droppings, and ensuring a clean living environment.
Sanitation practices are equally important. Ensure that coops and runs are well-ventilated and kept spotless. Remove soiled bedding regularly and disinfect feeding and watering areas. This will not only promote the overall health of your flock but also reduce stress levels, making them more resilient to potential infections.
Additionally, ensure access to clean water and a balanced diet for optimal egg production and chick development. By maintaining a healthy flock through preventative measures, you’ll be well-prepared for the hatching process, minimizing potential complications.
Post-Hatch Care: Raising Chicks Successfully
Once you’ve successfully hatched eggs, it’s time to focus on raising healthy and happy chicks – a crucial phase that requires careful attention to their needs.
Immediate Needs After Hatching
The first few days after hatching are crucial for the well-being and survival of your chicks. As soon as they pip (start to break out of their shells), it’s essential to provide a safe and nurturing environment.
Temperature regulation is vital, especially during this critical phase. The ideal temperature range for newly hatched chicks is around 90-95°F (32-35°C). You can achieve this by using a heat source such as a heat lamp or a heat mat specifically designed for brooding. Make sure the chick’s area is draft-free and maintained at a constant temperature.
Nutritionally, young chicks require a starter feed that contains around 18-20% protein to support their growth and development. Provide fresh water and food in shallow dishes to prevent drowning.
Ensure adequate shelter by providing a secure, escape-proof enclosure with soft bedding such as wood shavings or straw. It’s also crucial to monitor your chicks closely for any signs of illness or distress.
The First Few Weeks: Establishing a Strong Foundation
When you first bring home those adorable little chicks, it’s essential to establish a strong foundation for their health and well-being. In the first few weeks, you’ll need to focus on several critical areas: vaccination schedules, parasite control, and proper nutrition.
Vaccination schedules are crucial during this period, as young chicks are vulnerable to diseases. Consult with a veterinarian or experienced breeder to determine the best vaccination schedule for your flock. Typically, vaccinations will be administered at one to two weeks of age, but it’s essential to follow a specific protocol to ensure the chicks’ immune systems can handle the new pathogens.
Parasite control is also vital during this period, as internal parasites like mites and lice can quickly spread through the flock. Regularly clean and disinfect the brooder, and use a medicated feed or supplements specifically designed to combat parasites. A general rule of thumb is to treat for internal parasites at 10-14 days old, followed by a repeat treatment in about two weeks.
Nutrition plays a significant role in the early stages of chick development. Ensure you’re providing a starter feed that’s rich in protein (20% or higher) and balanced with essential vitamins and minerals. Offer fresh water at all times, and maintain a clean feeding area to prevent contamination.
Frequently Asked Questions
What factors should I consider when choosing a breed for high hatch rates?
When selecting breeds, prioritize those known for their broodiness and fertility. Research specific characteristics like egg-laying frequency, temperament, and body type to ensure they suit your needs. Consider breeds with strong maternal instincts, as they tend to make better mothers.
How do I know if my hen is truly broody or just resting?
A genuinely broody hen will exhibit intense nesting behavior, refusing to leave the nest even when hungry or thirsty. She may also display aggressive behavior towards other hens and humans trying to intervene. If your hen shows these signs, it’s likely she’s entered a state of full-blown broodiness.
Can I still hatch eggs in a cold environment?
While some breeds can tolerate cooler temperatures, most require a consistent temperature range between 99°F and 100°F (37°C – 38°C) for optimal incubation. If you’re hatching in a cold area, consider using heat lamps or other warming devices to maintain the ideal temperature.
What are some common mistakes beginners make when managing their hatch process?
Newbies often struggle with maintaining consistent temperatures, failing to monitor egg development, and neglecting proper sanitation and hygiene practices. Regularly check your incubator’s temperature and humidity levels, keep accurate records of egg development, and ensure your brooder is clean and well-ventilated.
Can I use a combination of breeds to increase my hatch rate?
While it might seem counterintuitive, breeding for specific traits can lead to improved fertility and hatch rates. However, introducing multiple breeds into your flock requires careful consideration to avoid disrupting the social dynamics and creating potential health issues. Research the compatibility of breeds before making any decisions.