
Are you a seasoned backyard breeder or just starting to raise quails? One crucial skill to master is quail egg candling, which is essential for successful incubation and breeding. Candling allows you to observe the development of your quail eggs, giving you valuable insights into their health and viability. However, this process can be intimidating if you’re new to it.
Don’t worry; our comprehensive guide has got you covered! In this article, we’ll walk you through the essential steps of quail egg candling, from choosing the right equipment to observing embryo development. You’ll learn how to properly hold the candle, position the egg, and identify key signs of healthy or unhealthy development. By mastering these techniques, you’ll be able to improve your chances of successful incubation and take your breeding program to the next level.
Understanding Quail Eggs and Candling
Understanding quail eggs and candling requires grasping their unique characteristics and what to look for when using a candling tool, which we’ll break down here. Let’s dive into the specifics of these essential details.
What are Quail Eggs?
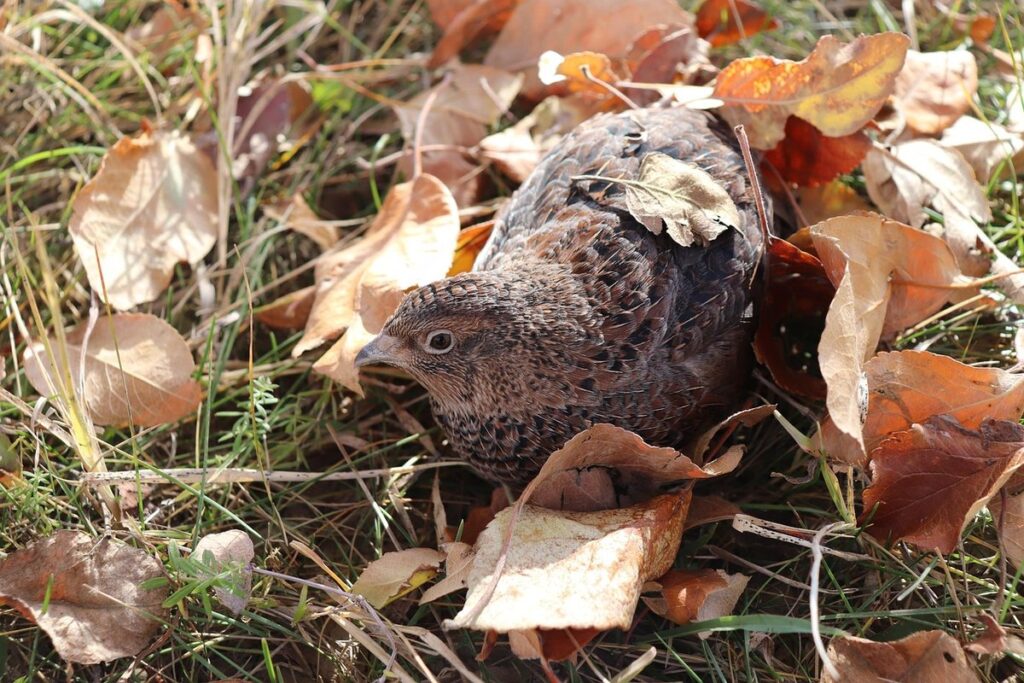
Quail eggs are a popular alternative to traditional chicken eggs, prized for their unique characteristics and benefits. These small, delicate eggs are laid by quails, typically measuring between 1-2 inches (2.5-5 cm) in length and weighing around 0.25 ounces (7 grams). Quail eggs have a more rounded shape compared to the oval shape of chicken eggs.
One of the most noticeable differences between quail eggs and chicken eggs is their size. While a large chicken egg can weigh up to 2 ounces, quail eggs are significantly smaller. Another difference lies in the shell’s thickness; quail eggshells are thinner and more fragile than those of chicken eggs.
In terms of appearance, quail eggs often have a bluish or greenish tint due to the presence of pigments in the shell. The yolk is also relatively large compared to the white, making up about 60% of the egg’s total volume. This unique composition contributes to the rich flavor and higher nutritional value of quail eggs.
When it comes to candling, understanding the differences between quail eggs and chicken eggs can be crucial in identifying potential issues or anomalies during the incubation process.
Importance of Candling
Candling is an indispensable step in both incubation and breeding processes for quails. This crucial process allows you to assess various aspects of the egg, including its fertility, quality, and embryo development. By doing so, it empowers you with valuable information that can significantly impact your chances of successfully hatching healthy chicks.
One key benefit of candling is determining fertility. Through this method, you can identify whether an egg contains a developing embryo or not. This is particularly vital in breeding programs where selecting fertile eggs is essential for achieving desired traits and improving overall quail populations. Candling also helps evaluate egg quality by revealing any cracks or damage that may compromise the safety of the embryo inside.
Moreover, candling enables you to observe embryonic development stages from day 3 to day 14. This allows you to track progress, identify potential issues early on, and make informed decisions about which eggs are more likely to hatch successfully. With regular candling sessions, you can refine your incubation techniques and breeding strategies for even better results in the future.
Preparing for Quail Egg Candling
Before you begin candling your quail eggs, it’s essential to prepare everything you need for a successful and safe process. This includes cleaning your workspace and equipment thoroughly.
Setting Up Your Candler
To set up your candler for quail egg candling, you’ll need some essential equipment and materials. First and foremost, you’ll require a reliable light source – this can be either a traditional candle flame or an LED light specifically designed for candling.
A dark room or box is also crucial to create the optimal environment for viewing the developing embryos inside the eggs. This will allow you to see any abnormalities in the embryo’s development more clearly. You can purchase or make your own light-tight box, such as a shoebox or similar container with cardboard covering all holes and openings.
On a surface to work on, it’s best to have a stable and smooth area where you can place the eggs for candling. This might be a table, desk, or even a countertop in your home office. Ensure the surface is clean and free of any debris that could interfere with your observations during the candling process.
Cleaning and Handling Eggs
When it comes to quail egg candling, proper cleaning and handling of eggs is crucial for accurate results. If the eggs are dirty or damaged, it can lead to inaccurate readings and potentially harm the developing embryo.
Before candling, make sure to gently wash your hands with soap and water to prevent any dirt or oils from affecting the reading. Then, carefully collect the quail eggs from the nesting box or incubator tray. Hold each egg by the large end, making sure your fingers don’t touch the pointed end where the embryo is developing.
To avoid cracking the eggs, handle them in a cupped palm, with the egg resting in the depression of your hand. If you need to transport multiple eggs, use a paper towel or soft cloth to wrap each one individually, making sure not to squeeze or press too hard on the eggs. This will prevent any potential damage and ensure that the eggs remain undisturbed until candling.
Quail Egg Candling Techniques
Now that you’re familiar with the basics of quail egg candling, let’s dive into some essential techniques to help you accurately check on your developing eggs. We’ll cover methods for optimal viewing and interpretation results.
Basic Candling Procedure
When you’re ready to candling an egg, follow these basic steps:
First, position the quail egg under the light source. You’ll want a dim red light, as direct white light can be too intense for the embryo and may even cause damage. Hold the egg so that it’s centered in the light beam, making sure not to tilt or rotate the egg excessively.
Next, adjust the brightness of the light source until you get a clear view inside the egg. The ideal setting will depend on your specific candling equipment and the type of quail eggs you’re working with. As a general rule, start with low intensity and gradually increase the brightness as needed. You may find that a slightly dimmed setting is sufficient to observe the embryo without causing unnecessary strain.
As you adjust the light, take note of any movements or patterns within the egg. If you’re new to candling, it’s not uncommon for eggs to appear dark or featureless at first glance. Be patient and continue observing until you can make out the tiny heartbeats or discern other signs of embryonic development.
Identifying Different Embryo Stages
As you begin candling your quail eggs, it’s essential to understand the different stages of embryonic development that can be observed. From day 3 to hatching, you’ll notice significant changes in the embryo’s appearance.
On day 3, the embryo is a small white spot surrounded by a dark ring. This indicates the formation of the primitive streak, a critical stage in organogenesis. If the spot appears small or irregularly shaped, it may be an indicator of poor embryonic development.
By day 5-6, you’ll notice the embryo has grown and become more defined. The heartbeats should be visible as a dark line moving up and down. A healthy heartbeat is usually around 100-110 beats per minute. If the heartbeat appears weak or irregular, it may indicate an issue with embryonic development.
As candling progresses, you’ll see further development of the embryo’s internal organs, including the formation of the eyes, beak, and limbs. Around day 10-12, the embryo will start to move freely within the eggshell, and by day 14-16, the beak and legs should be visible. A well-developed, active chick is a good sign that hatching is imminent.
Interpreting Candling Results
Now that you’ve successfully candled your quail eggs, it’s time to interpret what those results mean for your breeding program. We’ll break down how to accurately determine embryo health and viability.
Fertile vs. Infertile Eggs
When interpreting candling results, it’s essential to understand the differences between fertile and infertile eggs. Fertile eggs will typically display a more defined and active embryo development compared to infertile ones.
A fertile egg will show signs of embryonic growth around 4-6 days after incubation. You’ll notice a swirling or whirling motion within the yolk, which is usually accompanied by a slight increase in brightness. This activity can appear as a tiny whirlpool-like pattern that’s often surrounded by a halo of light.
Infertile eggs, on the other hand, will typically show no signs of life. The contents will remain static and dark, with little to no visibility through the shell. It’s also common for infertile eggs to have blood spots or an irregular shape, which can indicate damage during the laying process.
When examining candling results, look for these distinct characteristics: a developing embryo, swirling motion within the yolk, increased brightness, and a more pronounced pattern of development. By paying attention to these signs, you’ll be able to accurately distinguish between fertile and infertile eggs, allowing you to make informed decisions about your quail breeding program.
Identifying Health Issues
When interpreting candling results, it’s essential to recognize common health issues that can affect quail eggs. Double-yolkers, for instance, are a relatively normal occurrence where two yolks have formed in the same egg. However, this can lead to complications during incubation and may not allow the embryo to develop properly.
During candling, an irregular or misshapen yolk sac can indicate problems with nutrient transfer from the yolk sac to the embryo. This might be a sign of poor nutrition or other factors affecting egg quality. Similarly, if you notice the embryo is not in its usual position near the air cell, it could be a cause for concern.
In cases where you observe any unusual signs during candling, it’s crucial to handle them with care and attention to detail. Make a note of the issue, and separate the affected eggs from the rest. Continue monitoring their development closely over the next few days, as some issues may not become apparent until later stages. By being vigilant and taking prompt action when necessary, you can reduce the risk of losing valuable birds.
Troubleshooting and Common Mistakes
If you’re facing issues during quail egg candling, don’t worry – we’ve got you covered. This section addresses common problems and mistakes to ensure a smooth process.
Misconceptions about Candling
One common misconception about quail egg candling is that it’s an art rather than a science. Many people believe that successful candling requires intuition and guesswork, but nothing could be further from the truth. In reality, accurate results are heavily dependent on proper technique, equipment, and regular practice.
Candling involves shining a bright light through the quail egg to observe the developing embryo. However, this simple process can quickly become complicated if you’re not aware of the variables at play. For instance, it’s essential to use a high-quality candling lamp with adjustable brightness, as low-intensity lights can distort or obscure embryo details.
Another misconception is that candling is an infrequent task. In reality, it’s crucial to candle quail eggs regularly, ideally 3-4 times a week, to accurately track embryonic development and identify potential issues early on. Regular practice also helps you develop a keen eye for spotting subtle signs of health and development. By combining proper equipment with consistent practice, you’ll significantly improve your chances of accurate results and successfully incubate healthy quail eggs.
Maintaining Quality Control
Maintaining quality control during candling is crucial to ensure accurate results and healthy chicks. A clean and calibrated equipment is essential for clear visibility of the embryo’s development. Start by regularly washing the candling light with soap and water, paying extra attention to the lens and any removable parts.
It’s also vital to calibrate your candling light according to the manufacturer’s instructions. This involves adjusting the intensity and focus to achieve optimal illumination. A calibrated light will provide clear images of the embryo, making it easier to identify potential issues.
To prevent contamination, always handle eggs gently and store them in a clean environment before candling. Regularly disinfect your hands, workspace, and equipment to minimize the risk of introducing bacteria or other external factors that could affect the outcome.
By maintaining quality control through regular cleaning and calibration, you’ll be able to make informed decisions about each egg’s development and potential hatch rate. Remember to always follow proper sanitation procedures and take necessary precautions when handling eggs to ensure accurate results and healthy chicks.
Advanced Quail Egg Candling Techniques
Now that you’re familiar with the basics, let’s dive into more advanced techniques for candling quail eggs, taking your skills to the next level. You’ll learn expert methods to identify abnormalities and sexing with ease.
Enhanced Light Sources and Equipment
When it comes to advanced quail egg candling techniques, having the right equipment can make all the difference. One of the most significant upgrades you can make is switching to specialized LED lights designed specifically for candling eggs.
These high-tech lights are brighter and more energy-efficient than traditional incandescent bulbs, producing a clearer image of your quail’s embryo development. Some popular options include handheld LED light sources with adjustable brightness settings and high-intensity lamps that fit securely into a candling device.
The benefits of using advanced light sources for quail egg candling are numerous. For one, they provide a more detailed view of the embryo’s internal development, allowing you to identify potential issues earlier on. Additionally, these lights often come with built-in magnification features or adjustable focus settings, making it easier to examine your eggs.
However, keep in mind that while advanced light sources can be incredibly useful, they may not be necessary for beginners or casual egg candlers.
Precision Candling Methods
When it comes to advanced quail egg candling techniques, precision is key. That’s why we’re excited to introduce you to some cutting-edge methods that offer more accurate readings than traditional candling. One of the most effective ways to achieve precision candling is by using a camera with a microscope attachment. This setup allows for a closer look at the embryo’s development without having to handle the egg excessively.
Smartphone apps are another innovative way to enhance your candling experience. Some apps, such as Hatcher or Candling App, have features specifically designed for quail egg candling. These apps often include calibration tools, automatic focus adjustment, and even temperature monitoring – all of which can improve the accuracy of your readings.
When using either a camera with a microscope attachment or a smartphone app, it’s essential to follow proper lighting conditions. A dimly lit room or the use of a dark background can help minimize glare and ensure clear visibility of the embryo’s development. By incorporating these precision candling methods into your routine, you’ll be able to obtain more accurate readings and make informed decisions about your quail egg hatching process.
Conclusion and Future Considerations
Now that you’ve mastered the quail egg candling process, let’s talk about next steps and how to build on your newfound knowledge for future breeding endeavors.
Recap of Key Takeaways
To successfully candled quail eggs, it’s crucial to recall the key takeaways from this comprehensive guide. The importance of using a high-quality candle light source and maintaining a consistent temperature cannot be overstated. A good quality candle light will help you spot the embryo’s development without causing any harm or stress to the egg.
You should also remember that the candling technique itself plays a significant role in determining successful quail egg candling results. This includes rotating the egg gently, using a dim red light source, and carefully examining the egg for signs of fertility or infertility. It’s essential to be patient and take your time when performing the candling process.
By following these key points, you’ll be well-equipped to successfully identify fertile quail eggs and make informed breeding decisions. Remember, proper technique and equipment are critical to achieving successful results with quail egg candling.
Ongoing Research and Development
As we conclude our comprehensive quail egg candling guide, it’s essential to acknowledge that this field is constantly evolving. Ongoing research and development are pushing the boundaries of what’s possible with candling technology. In fact, advancements in LED lighting and sensor systems have improved accuracy and reliability.
Researchers continue to explore innovative ways to optimize candling processes for different breeds and incubation conditions. This includes refining algorithms to account for variations in egg shape, size, and yolk position. Some studies even investigate the use of machine learning models to improve prediction rates.
As a quail breeder or enthusiast, you can contribute to this growth by sharing your own experiences and insights. By collaborating with experts, you’ll help bridge the gap between practice and research. Share your observations on what works best for your flock, including the most effective candling schedules, lighting configurations, and troubleshooting techniques.
By joining forces, we can accelerate progress in quail egg candling, ultimately leading to better hatch rates, healthier chicks, and more successful breeding programs. So don’t be shy – share your stories, ask questions, and engage with our community to take the quail egg candling guide to new heights!
Frequently Asked Questions
Can I use a regular household candle for quail egg candling?
Yes, but it’s not recommended due to the soft light and potential heat damage to the eggs. Invest in a specialized quail egg candler or a bright LED flashlight with a red filter for optimal results.
How often should I check on my incubating quail eggs through candling?
It’s essential to candle your eggs every 7-10 days during the incubation period to monitor their progress and detect any potential issues. This allows you to make informed decisions about egg handling and embryo development.
What if I’m not sure whether a particular embryo stage is healthy or not?
Consult your breeding program records and compare them with established embryo development stages. If you’re still unsure, consult with experienced breeders or conduct further research to ensure accuracy in your assessment.
Can I use quail egg candling for sexing quail eggs?
While candling can reveal embryo development stages, it’s not recommended for determining the sex of quails. This requires specialized techniques and equipment that go beyond basic candling.
What are some common mistakes beginners make when using a quail egg candler?
Some common errors include holding the candler too close to the egg, which can cause damage or heat buildup. Others include incorrect positioning of the egg under the light source or misinterpreting embryo development stages.