
If you’re a home cook or chef looking to take your culinary skills to the next level, mastering the art of aging chicken is an essential technique to know. But why age chicken in the first place? By doing so, you’ll unlock perfectly tender and juicy meats with a depth of flavor that’s hard to achieve through other methods. In this guide, we’ll cover everything from the key factors to consider when aging chicken to tried-and-true techniques for getting it just right. We’ll also delve into crucial safety precautions to ensure your aged chicken is not only delicious but safe to eat. Whether you’re a seasoned pro or just starting out, our comprehensive guide will have you aging like a pro in no time.
Understanding Chicken Aging
When it comes to aging chicken meat, understanding its natural aging process is crucial for achieving perfectly tender results. Let’s dive into how chicken ages and what factors influence its tenderness.
What is Chicken Aging?
Chicken aging is a process that involves allowing raw meat to sit for a certain period before cooking. This allows the natural enzymes within the meat to break down the proteins and connective tissues, resulting in more tender and flavorful results. The benefits of chicken aging are numerous – it enhances the juiciness and texture of the meat, making it more palatable and visually appealing.
The key to successful chicken aging lies in understanding the importance of time and temperature control. If left unattended for too long or exposed to improper temperatures, the meat can spoil or become over-aged, leading to an unpleasant taste and texture. However, when done correctly, the results are well worth the extra effort.
In general, it’s recommended to age chicken for at least 24-48 hours in a controlled environment with precise temperature monitoring (between 32°F and 38°F). This allows for optimal enzyme activity without compromising food safety.
Factors Influencing Aging Time
The optimal aging time for chicken is influenced by several factors that can significantly impact the tenderness and flavor of the final product. When it comes to breed, some chickens are naturally more prone to aging well than others. For instance, heritage breeds like Leghorns or Cornish Cross tend to hold their moisture better during the aging process, resulting in a more tender final product.
On the other hand, feed can also play a crucial role in determining the optimal aging time. Chickens that have been fed a high-protein diet may age faster than those on a standard commercial feed. Storage conditions, such as temperature and humidity, can also impact the aging process. A consistent refrigerator temperature between 32°F to 38°F (0°C to 3°C) is ideal for slowing down bacterial growth.
It’s essential to note that sex can also influence aging time. Whole chickens typically age faster than chicken breasts or thighs due to their higher moisture content. As a general rule, whole chickens should be aged for 2-5 days, while chicken parts may require only 1-3 days.
The Science Behind Aging
When you age chicken meat, several biochemical changes occur that contribute to its tenderness and flavor. One of the primary changes is protein breakdown. As the meat ages, enzymes break down the proteins into smaller peptides, making them more tender and easier to chew. This process also allows for better moisture retention, which can result in a juicier final product.
Another significant change during aging is moisture loss. As the meat loses its initial water content, it becomes more concentrated, allowing flavors to penetrate deeper. However, if aging exceeds 7-10 days, excessive moisture loss can occur, leading to tough, dry meat.
Tenderness development is also closely tied to the aging process. The breakdown of connective tissue and collagen fibers allows for easier cutting and chewing. During this time, the meat’s natural enzymes work to break down these fibers, creating a more tender finish product. The ideal aging duration will depend on factors such as temperature, humidity, and the cut of meat itself.
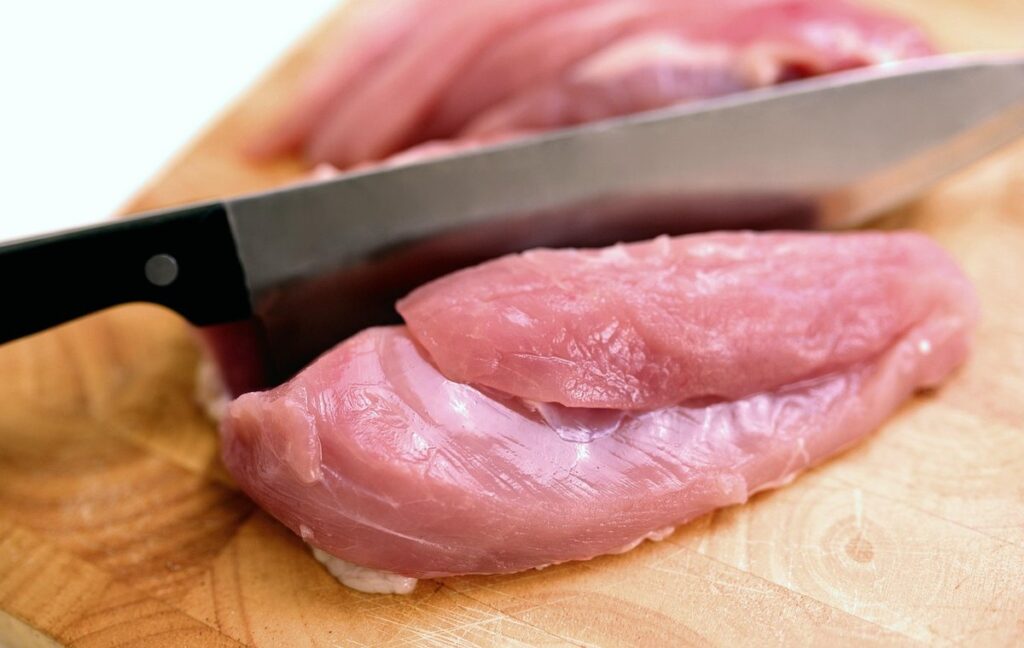
Choosing the Right Cut
When it comes to aging chicken meat, selecting the right cut is crucial for achieving tenderness. Let’s break down the most suitable cuts for optimal results.
Identifying Suitable Cuts for Aging
When it comes to aging chicken meat, not all cuts are created equal. Some will respond better to this process than others, resulting in perfectly tender and flavorful results. Let’s take a closer look at the most popular chicken cuts suitable for aging.
Legs, also known as drumsticks or thighs, are an excellent choice for aging due to their high fat content. As they break down, the connective tissues become gelatinous, adding moisture and tenderness to each bite. Thigh meat is particularly well-suited, with its higher concentration of fatty acids contributing to a more complex flavor profile.
Wings, on the other hand, are a great option for those who want to experiment with different aging times. Their compact size allows for precise control over the aging process, while their relatively low fat content ensures they won’t become too soft or mushy. Breasts, although leaner than legs and thighs, can still benefit from aging if done correctly.
Ground meat is another option worth exploring. By breaking down the connective tissues, you’ll create a more even texture and enhanced flavor in your final product. Just be mindful of over-processing, as this can result in an unpleasantly dense or tough consistency.
When selecting cuts for aging, remember to choose those with a higher fat content for better results. This will not only contribute to a juicier end product but also add depth and richness to the overall flavor profile.
The Role of Fat in Aging
When it comes to aging chicken meat, fat plays a crucial role in determining its tenderness and overall quality. As the fat breaks down during the aging process, it releases enzymes that help to tenderize the surrounding muscle tissue.
In general, it’s recommended to aim for an optimal fat percentage per cut, which varies depending on the type of dish you’re planning to use it for. For example, a chicken breast with too little fat may become dry and overcooked if cooked without proper care. On the other hand, a piece with excessive fat can be overpowering.
Typically, chicken cuts with 10-20% fat content are ideal for aging. This allows for just the right amount of tenderization while maintaining juiciness. Cuts like chicken thighs or legs often have more fat than breasts and tend to benefit from longer aging periods.
When selecting chicken cuts for aging, keep an eye out for pieces with visible marbling – this indicates a higher fat content, which will contribute to enhanced flavor and texture during the aging process.
Cooking Methods for Aged Chicken
When it comes to cooking aged chicken, you’ll want to use methods that not only enhance its tenderness but also bring out its natural flavors. Let’s explore some of the best cooking techniques for achieving perfectly tender aged chicken.
Grilling is an excellent way to cook aged chicken, especially when done with a nice char on the outside. The high heat caramelizes the exterior, locking in juices and adding a smoky flavor that complements the rich taste of aged meat. To achieve this, simply season your chicken as desired, grill over medium-high heat for 5-7 minutes per side, or until it reaches an internal temperature of 165°F.
Roasting is another great option, perfect for showcasing the tenderness and depth of flavor in aged chicken. Rub the chicken with a mixture of olive oil, herbs, and spices before placing it in a preheated oven at 425°F (220°C) for about 30-40 minutes per pound. This method allows the meat to cook slowly and evenly, resulting in tender, fall-off-the-bone flesh.
Braising is an excellent technique when working with tougher cuts of aged chicken. Cook the chicken low and slow in liquid such as stock or wine on the stovetop or oven, which helps to break down connective tissues and infuse flavors into the meat. Simply brown the chicken in a skillet before transferring it to your braising liquid and cooking until tender.
Pan-frying is a great option for smaller cuts of aged chicken, like breasts or tenders. Heat a skillet with some oil over medium heat, then add your seasoned chicken. Cook until golden brown on both sides and cooked through – about 5-7 minutes per side. This method helps retain moisture and adds a nice crust to the outside.
When pan-frying, be sure to use a thermometer to ensure the internal temperature of the meat reaches 165°F (74°C) to avoid foodborne illness. These cooking methods will help you unlock the full potential of your aged chicken, resulting in tender, juicy, and flavorful meals that are sure to impress.
Storage and Handling Considerations
When it comes to aging chicken meat, proper storage and handling are crucial for achieving optimal tenderness and safety. Let’s take a closer look at some essential considerations to keep in mind.
Proper Storage Conditions
When it comes to aging chicken meat, proper storage conditions are crucial for maintaining optimal tenderness and flavor. To ensure that your aged chicken meets its full potential, you’ll want to pay attention to three key factors: temperature, humidity levels, and packaging materials.
Temperature is the most critical aspect of storing aged chicken. Aim for a consistent refrigerator temperature between 34°F (1°C) and 38°F (3°C). Avoid storing your aged chicken near warm appliances or in direct sunlight, as these conditions can cause bacterial growth and spoilage. For example, if you’re aging chicken breast, store it in the coldest part of your refrigerator to prevent unwanted bacterial activity.
Humidity levels also play a vital role in maintaining optimal aging conditions. Store your chicken in a container with a humidity control or wrap it tightly in plastic wrap to maintain an environment with 50-60% relative humidity. This will slow down moisture loss, preventing the meat from becoming too dry and tough.
When it comes to packaging materials, choose containers that allow for airflow while keeping contaminants out. Glass or food-grade plastic containers are excellent options. Avoid using metal containers, as they can react with the acidity in the chicken and impart off-flavors.
Minimizing Cross-Contamination
When storing and handling aged chicken meat, it’s crucial to take steps to prevent cross-contamination of bacteria. This is particularly important when working with raw poultry, as it can harbor pathogens like Salmonella and Campylobacter. To minimize the risk of contamination, always handle and store the meat in a clean environment.
Start by designating a specific area for aging chicken, free from any other foods or contaminants. Cover your workspace with paper towels or a clean tablecloth to catch any potential spills. Wear gloves when handling the meat to prevent direct contact between your hands and the product.
When storing aged chicken, keep it refrigerated at 38°F (3°C) or below to slow bacterial growth. Use sealed containers or zip-top bags to prevent moisture from accumulating and creating an ideal environment for bacteria. Label each container with its contents and date to ensure you use the oldest meat first. Regularly check your storage area for any signs of spoilage, and discard any meat that shows visible signs of decay.
Monitoring Aging Progress
Monitoring the aging process is crucial to ensure that your chicken meat reaches its optimal tenderness and flavor. To do this effectively, you’ll need to establish a regular inspection schedule. Set aside time each day or every other day to check on the aging process, taking note of any changes in texture, color, or smell.
Keep accurate records of these inspections, including dates, times, and observations. This will help you track the aging progress over time and identify any potential issues early on. For example, if you notice a sudden increase in moisture levels or an off smell, it may be indicative of bacterial growth, requiring immediate attention.
Record-keeping also allows you to monitor temperature fluctuations, which can impact the aging process. Aim for a consistent refrigerator temperature between 34°F and 39°F (1°C and 4°C). By staying on top of these factors through regular inspections and record-keeping, you’ll be able to adjust your aging strategy as needed, ultimately resulting in perfectly tender and flavorful chicken meat.
Safety Precautions and Regulations
When handling and aging chicken meat, it’s crucial to follow proper safety precautions and regulations to avoid contamination and ensure a healthy product. This includes guidelines for food storage and handling temperatures.
Food Safety Guidelines for Home Cooks
When handling aged chicken, it’s essential to follow proper food safety guidelines to avoid contamination and ensure a safe dining experience. Always thaw frozen aged chicken in the refrigerator or cold water, never at room temperature. If you’re short on time, consider thawing in cold water, changing the water every 30 minutes.
When cooking your aged chicken, make sure it reaches an internal temperature of at least 165°F (74°C) to ensure food safety. Use a meat thermometer to check for doneness, and avoid overcrowding your pan as this can lead to uneven cooking temperatures.
Proper storage is also crucial when handling aged chicken. Store raw poultry in sealed containers on the bottom shelf of your refrigerator to prevent cross-contamination with other foods. Cooked chicken should be refrigerated at 40°F (4°C) or below within two hours of cooking, and consumed within three to four days. When reheating cooked chicken, make sure it reaches an internal temperature of 165°F (74°C).
Compliance with Local Regulations
When it comes to aging chicken meat at home, understanding and complying with local regulations is crucial. Laws regarding food handling and storage can vary significantly from state to state, even within the same country. As an enthusiastic poultry enthusiast, you might be surprised to learn that some states have specific guidelines on temperature control, labeling, and even storage duration for aged meats.
For instance, in the United States, the Food Safety Modernization Act (FSMA) regulates the handling of raw meat, including chicken. You’ll need to familiarize yourself with your state’s regulations regarding food safety. For example, California requires that all aged meats be stored at a temperature below 40°F (4°C), while Oregon specifies that aged poultry must be labeled with the date it was received.
To ensure compliance, research local laws and regulations before embarking on your aging journey. Keep accurate records of storage temperatures, dates, and any labeling required by law. This will not only help you avoid potential penalties but also guarantee that your aged chicken meets safety standards.
Advanced Aging Techniques
Now that we’ve explored the basics of aging chicken meat, let’s dive into more advanced techniques for achieving perfectly tender and flavorful results. We’ll cover expert methods for enhancing your meat’s natural quality.
Dry-Aging vs. Wet-Aging: Choosing the Right Method
When it comes to aging chicken meat, you have two primary techniques to choose from: dry-aging and wet-aging. While both methods can produce tender and flavorful results, they differ significantly in terms of their benefits, drawbacks, and ideal applications.
Dry-aging involves allowing the natural enzymes within the meat to break down the proteins and fats over time, concentrating flavors and tenderness. This method is ideal for smaller cuts of chicken, such as breasts or thighs, where a concentrated flavor profile can enhance the overall taste experience. However, dry-aging requires precise temperature and humidity control, which can be challenging in home environments.
Wet-aging, on the other hand, involves vacuum-sealing the meat in its own juices to prevent drying out and promote even aging. This method is better suited for larger cuts of chicken, such as whole birds or legs, where moisture retention is crucial. Wet-aging also reduces the risk of contamination and allows for more flexible storage conditions.
Ultimately, choosing between dry-aging and wet-aging comes down to your personal preferences, available equipment, and specific cooking goals. For a tender and flavorful result, consider experimenting with both methods to find what works best for you.
Implementing Vacuum Packing for Enhanced Aging
When it comes to aging chicken meat, maintaining optimal conditions is crucial for developing that perfect tender texture. One of the most effective ways to achieve this is through vacuum packing. By removing oxygen from the packaging and eliminating any potential sources of contamination, you create an environment where the meat can break down naturally, resulting in a more complex flavor profile and improved tenderness.
Vacuum packing also prevents moisture loss, which can occur when air comes into contact with the meat. This helps to preserve the natural juices and keeps the meat moist during the aging process. As a result, you’ll be left with a chicken that’s not only tender but also packed with flavor.
In addition to maintaining optimal conditions, vacuum packing also prevents contamination from bacteria and other microorganisms. By removing air pockets and moisture, you create an environment that’s hostile to bacterial growth, ensuring that your aging process is safe and controlled. This is especially important when dealing with raw meat, as even a small amount of contamination can have serious consequences.
When implementing vacuum packing for enhanced aging, make sure to follow proper procedures: use high-quality packaging materials, ensure the pack is airtight, and store it in a consistent environment (between 32°F – 39°F) to maintain optimal conditions.
Conclusion
In conclusion, aging chicken meat is an art that requires patience, attention to detail, and a willingness to experiment. By following the guidelines outlined in this guide, you’ll be well on your way to achieving perfectly tender and flavorful chicken dishes. Remember, the key to successful aging lies in understanding the unique characteristics of each type of chicken and adapting your approach accordingly. Don’t be afraid to try new techniques or adjust aging times based on your personal preferences. Whether you’re a seasoned chef or an enthusiastic home cook, mastering the art of aging chicken meat will elevate your culinary creations to new heights. With practice and persistence, you’ll develop a deep appreciation for this simple yet transformative process.
Frequently Asked Questions
Can I age chicken at home without professional equipment?
You can age chicken at home, but it’s crucial to maintain a consistent temperature between 34°F and 39°F (1°C and 4°C) to prevent bacterial growth. You’ll need a temperature-controlled environment or a suitable fridge with precise temperature control. Always prioritize food safety when experimenting with aging techniques.
How do I know if my aged chicken is safe to cook?
To ensure your aged chicken is safe, monitor its temperature regularly during the aging process. Use a meat thermometer to check for bacterial growth and maintain temperatures below 40°F (4°C). Also, follow proper storage and handling guidelines to minimize cross-contamination.
What are some common mistakes beginners make when aging chicken?
Beginners often overestimate or underestimate the aging time required for optimal results. Be aware of the factors influencing aging time, such as cut size, fat content, and temperature control. Additionally, don’t skip crucial steps like regular monitoring and maintaining precise storage conditions to prevent spoilage.
Can I age any type of chicken cut?
Not all chicken cuts are suitable for aging. Optimal results come from choosing cuts with a higher fat content, like thighs or wings. These cuts allow the natural enzymes to break down connective tissues more effectively, resulting in tender and juicy meat. Avoid overcooking aged chicken to preserve its natural tenderness.
How do I store aged chicken safely before cooking?
When storing aged chicken, prioritize maintaining precise temperature control (below 40°F/4°C) and humidity levels to prevent bacterial growth. Use airtight containers or vacuum-seal the meat to minimize cross-contamination risks. Label the storage containers with the date of aging and contents for easy tracking.
What are some signs that my aged chicken has gone bad?
Regularly inspect your aged chicken for any signs of spoilage, such as off odors, slimy texture, or visible mold growth. Monitor its temperature regularly to catch any deviations from the desired range (34°F-39°F/1°C-4°C). If you notice any unusual changes during monitoring, discard the meat immediately and reassess your aging process.
Can I age chicken in a regular household fridge?
You can age chicken in a regular household fridge if it maintains precise temperature control. Ensure that the storage area is clean, dry, and protected from direct sunlight to prevent bacterial growth. Always follow proper food safety guidelines to minimize risks when experimenting with aging techniques at home.