
Are you tired of breaking your back or digging into your pockets every time you need to feed your flock? Building a DIY chicken feeder is an easy and cost-effective solution that can save you both money and hassle. Not only will it make feeding time more convenient, but it’ll also help keep your chickens healthy by minimizing contamination and spoilage.
With our comprehensive guide, we’ll walk you through the process of designing and building your very own chicken feeder from scratch. We’ll cover all the essential details, including materials, troubleshooting common issues, and tips for keeping your flock happy and well-fed. By following these DIY chicken feeder plans, you’ll be able to create a customized feeding solution that suits your backyard chickens‘ needs perfectly, all while ensuring their health and happiness remains top priority.
Choosing the Right Materials and Location
When building a DIY chicken feeder, choosing the right materials is crucial to ensure durability and longevity. Selecting the perfect location for your feeder also plays a significant role in maintaining a clean feeding area.
Understanding Chicken Feed Requirements
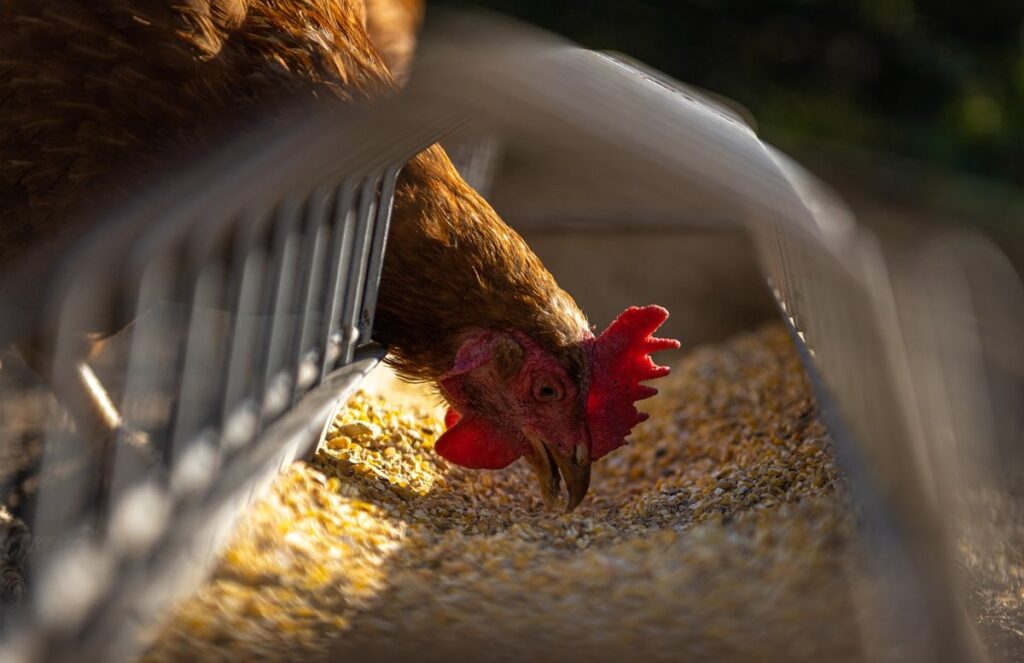
When it comes to building a DIY chicken feeder, understanding the nutritional needs of your flock is crucial. Chickens require a balanced diet that includes protein, calcium, and other essential nutrients to stay healthy and productive.
Aim to provide your chickens with 16-18% protein content in their feed, which can come from sources like grains, seeds, and insects. Calcium is also vital for strong eggshell production, so ensure you’re offering a calcium-rich supplement or incorporating crushed oyster shells into their diet. Vitamins A, D3, and E are also essential for immune function and overall health.
To ensure your chickens get the right balance of nutrients, research the specific dietary needs of your breed and age group. For example, laying hens require more calcium than young pullets or broilers. You can also consider consulting with a veterinarian or poultry expert to determine the best feed strategy for your flock. By providing adequate nutrition, you’ll not only keep your chickens healthy but also support their egg-laying potential.
Selecting the Perfect Location for Your Feeder
When building your own chicken feeder, selecting the perfect location is crucial to ensure the health and safety of your flock. Accessibility is a key factor to consider; you’ll want to place the feeder in an area that’s easy for both you and your chickens to access, but also out of reach from predators like raccoons, opossums, or hawks.
Weather resistance is another vital consideration. Avoid placing the feeder under trees with overhanging branches that could drop debris or create a mess. Similarly, steer clear of low-lying areas where water may collect and cause the feed to become soggy or moldy. A covered area or a spot with good airflow can help keep the feed dry and protected from the elements.
Predator protection is also essential. Place the feeder at least 10 feet away from any potential entry points, such as windows, doors, or vents. Consider adding a roof or a fence around the feeding area to prevent predators from accessing it. By carefully choosing the location for your chicken feeder, you’ll be able to keep your flock safe and healthy while also making maintenance easier for yourself.
Designing Your Chicken Feeder: Tips and Tricks
Now that you’ve gathered your materials, it’s time to think creatively about designing your chicken feeder. Let’s dive into some practical tips for creating a functional and efficient feeding system for your flock.
Simple vs. Complex Designs
When it comes to designing your chicken feeder, you’ll likely come across two main types: simple and complex designs. While a complex design may seem more impressive, it’s essential to weigh the pros and cons before making a decision.
Simple designs are great for small flocks or those with limited space. They’re often easy to build and require minimal materials, making them a cost-effective option. For instance, a simple feeder made from a plastic container or a wooden box can be an effective solution for a few chickens. However, as your flock grows, you may find that these designs become impractical due to the increased competition for food.
On the other hand, complex designs offer more features and flexibility but can be overwhelming for beginners. They often include multiple compartments, adjustable feeding trays, and even automated systems. While they’re ideal for large flocks or those with unique space constraints, they require more materials, expertise, and maintenance. Consider your flock’s size, growth rate, and your available space before deciding on a design.
It’s worth noting that you can also create a hybrid feeder by combining simple and complex elements to suit your specific needs. This approach allows for flexibility and adaptability as your flock grows or your feeding requirements change.
Incorporating Features for Easy Maintenance
When designing your chicken feeder, it’s essential to consider maintenance as an integral part of its functionality. A well-maintained feeder ensures a healthy and thriving flock, saving you time and effort in the long run.
To make maintenance easier, incorporate removable parts into your design. For instance, you can add a removable tray or dish at the bottom of the feeder that allows for effortless cleaning. This feature not only prevents waste from accumulating but also enables you to inspect the feeder’s interior regularly.
Durability is another crucial aspect to consider. Use materials that can withstand harsh weather conditions and frequent use by your chickens. A sturdy feeder will require less maintenance overall, as it won’t be prone to damage or wear and tear.
Easy cleaning is also vital for maintaining a clean and hygienic environment for your birds. Incorporate features like angled surfaces or sloping designs that prevent waste from accumulating in one area. This simple yet effective design choice makes it easier for you to scoop out food residue and keep the feeder spotless.
Building Your Chicken Feeder: Step-by-Step Instructions
Now that you have your materials and a solid plan, let’s get started on building your chicken feeder! We’ll walk through each step of construction together.
Gathering Materials and Tools
To start building your chicken feeder, you’ll need to gather the right materials and tools. For this project, we recommend using durable and weather-resistant materials that can withstand outdoor conditions. Here’s a comprehensive list of what you’ll need:
* 2″ x 4″ lumber for the frame (8-10 pieces)
* Plywood or oriented strand board (OSB) for the feeding tray (1 sheet, 1/2″ thick)
* Chicken wire or hardware cloth to cover the feeder
* Hinges and latches for easy access and secure closure
* Screws and nails for assembly
* Waterproof glue and sealant to protect against moisture
In addition to these materials, you’ll need some basic tools:
* Circular saw or hand saw for cutting lumber
* Drill press or handheld drill for screwing and drilling holes
* Hammer for tapping screws into place
* Tape measure and square for ensuring accurate measurements and framing
* Safety glasses and a dust mask when working with power tools
Assembling the Frame and Adding Feed Containers
Now that you’ve built the base and sides of your chicken feeder, it’s time to assemble the frame and add the feed containers. This is a crucial step, as it will determine the overall functionality and durability of your feeder.
Begin by attaching the pre-drilled holes on the side panels to the frame using screws or nails. Make sure they are evenly spaced and securely fastened. Next, attach the top panel to the sides, ensuring it’s flush with the edges. You can use a level to ensure everything is straight and even.
For feed containers, you’ll need two to three pieces, depending on your feeder design. Attach them to the frame using brackets or clips, making sure they’re at a comfortable height for your chickens to access. Consider adding a lip around the edge of each container to prevent spillage and make cleanup easier.
Remember to secure all parts firmly in place to avoid any damage or accidents. With these components assembled, you’ll have a sturdy and efficient feeder that will keep your chickens fed and happy.
DIY Chicken Feeder Plans: Examples and Inspiration
Looking for some inspiration to build your dream chicken feeder? Here are some creative examples of DIY chicken feeder plans that you can draw from.
Unique Designs for Small Flocks
If you’re raising a small flock of chickens, you know that every inch counts when it comes to space and efficiency. That’s why we’ve curated some unique DIY chicken feeder plans specifically designed for small flocks or those with limited space constraints.
For example, the “Mini Muncher” plan is perfect for tiny backyards or coop setups. This design uses a hanging system, allowing you to maximize vertical space while keeping your flock’s feed off the ground and protected from pests. You can build this feeder using reclaimed wood, adding a rustic touch to your yard.
Another great option is the “Pegboard Planter Feeder,” which combines a chicken feeder with a planter box. This design not only saves space but also adds some greenery to your coop area. Simply attach the feeder to a pegboard and hang it from a wall or beam, making it easy to refill and clean.
When building these unique feeders, consider using materials like plastic tubs, old pallets, or even repurposed containers. Not only will you be reducing waste, but you’ll also create a one-of-a-kind feeder that suits your flock’s needs and complements your backyard aesthetic.
Large-Scale Feeder Designs
If you’re managing a larger flock of chickens, you’ll want to consider building a feeder that can accommodate their needs. A large-scale feeder design is essential for ensuring all birds have access to food and minimizing competition. When designing a feeder for bigger flocks, consider the following key elements:
* Increased capacity: Aim for a feeder that can hold at least 2-3 times more feed than what your flock consumes in one day.
* Easy accessibility: Design the feeder with multiple feeding ports or compartments to allow all birds to eat comfortably without feeling crowded.
* Durability: Use robust materials and sturdy construction to withstand heavy usage and harsh weather conditions.
For instance, a simple yet effective large-scale feeder design can be created using wooden planks or pallets. You’ll want to ensure the feeder’s surface area is sufficient for your flock size. For example, if you have 20-25 birds, aim for a feeder that offers around 2 square feet of feeding space per bird.
When building a large-scale feeder, it’s essential to balance feed capacity with accessibility and durability. By doing so, you’ll create a reliable and efficient feeder system for your flock.
Troubleshooting Common Issues with Your Chicken Feeder
Sometimes, your DIY chicken feeder might not work as expected, and that’s okay – we’ve got you covered. We’ll walk you through common issues and how to fix them in this troubleshooting guide.
Overcoming Predation and Rodent Problems
As you work on building your own chicken feeder, it’s essential to consider ways to prevent predators and rodents from accessing the feed. These pesky critters can cause significant damage to your feeder and even harm your chickens. To protect your investment and ensure a healthy flock, follow these tips.
First, secure storage is key. Keep your feeder in a fenced area or enclosure that prevents unwanted visitors from reaching it. You can also use wire mesh or hardware cloth to cover any openings around the feeder. Make sure to bury the mesh 12 inches underground to prevent burrowing animals from digging underneath.
For deterrence, consider using predator-repellent granules or sprays containing hot peppers, garlic, or other unpleasant smells for animals. Place these around the perimeter of the feeder and in surrounding areas where predators may approach. You can also use bright lights or motion-activated cameras to scare off nocturnal visitors.
Some homeowners have reported success with using natural deterrents like castor oil or predator urine (yes, you read that right!) to keep pests at bay. Experiment with different methods to find what works best for your flock and environment.
Fixing Leaks and Water Damage
Leaky feeders can be a real headache, especially when it’s raining outside and you’re worried about water pooling at the base of your coop. First, inspect the feeder for any visible signs of leaks, such as droplets or mineral deposits on the surface. Next, check the feeder’s design – if it has small gaps or holes, try to seal them with some waterproof glue.
Another common issue is water damage from condensation. This can be caused by poor ventilation in your coop, leading to a buildup of moisture that seeps into your feeder. To prevent this, make sure your coop is well-ventilated and consider adding a small fan to speed up air circulation.
To fix leaks and water damage, you’ll need to locate the source and seal it properly. If the leak is coming from a joint or seam, apply some silicone sealant to create a watertight seal. If the issue persists, try using a waterproof coating on your feeder’s surface to protect it from future damage.
For long-term solutions, consider upgrading to a more water-resistant feeder design or using materials like stainless steel or plastic that are less prone to rust and moisture damage.
Additional Tips and Considerations for Your DIY Chicken Feeder
Now that you’ve built your DIY chicken feeder, it’s essential to consider a few extra details to keep it running smoothly and maintain healthy flock habits.
Ensuring Feed Hygiene and Freshness
When it comes to maintaining the health and well-being of your backyard chickens, providing fresh and clean feed is crucial. However, feed can quickly become contaminated with bacteria, mold, and other pathogens if not stored properly. To prevent spoilage and ensure overall cleanliness of the feeder, there are several key steps you can take.
Firstly, it’s essential to choose a feeder that allows for easy cleaning and maintenance. Consider using a feeder with removable parts or one made from durable materials like plastic or metal. These designs make it simple to clean out debris and replace worn-out components.
Regularly inspecting the feed for signs of spoilage is also vital. Check for mold, slime, or an off smell, which can indicate that the feed has gone bad. If you notice any of these issues, immediately remove the affected feed and dispose of it properly.
To keep your feeder fresh and clean, store it in a well-ventilated area to prevent moisture buildup. Also, ensure that the feeder is positioned at least 3-4 feet away from your coop door to avoid attracting pests.
Integrating Your Feeder with Coop Design
When designing your coop, integrating your DIY chicken feeder seamlessly is crucial for maintaining cleanliness and reducing waste. A well-designed feeder should complement the overall aesthetic of the coop while ensuring easy access for your chickens.
Consider a wall-mounted feeder that tucks away neatly when not in use, freeing up floor space within the coop. This design also helps keep feed off the ground, minimizing the risk of spills and messes. Some coops incorporate a built-in feeding system with multiple compartments, allowing you to separate different types of food or treats.
For example, a spacious coop designed by Backyard Chickens features a sliding feeder panel that allows owners to easily refill feed without disturbing their birds. Similarly, a smaller coop design from The Spruce shows how a compact feeder can be mounted on the side wall, keeping feed organized and within easy reach.
When designing your coop and feeder, remember to prioritize accessibility for both you and your chickens. This will help ensure a smooth feeding experience and contribute to a happy, healthy flock.
Frequently Asked Questions
How do I determine the ideal capacity for my DIY chicken feeder?
The capacity of your feeder depends on the size of your flock and their eating habits. A general rule of thumb is to provide about 1/4 pound of feed per bird per day. Consider a larger feeder if you have multiple birds or a smaller one for smaller flocks.
Can I use recycled materials for building my DIY chicken feeder?
Yes, using recycled materials can be an eco-friendly and cost-effective approach. However, ensure the materials are clean and free from contaminants to avoid affecting your flock’s health. Consider repurposing old plastic containers, wood scraps, or metal parts.
How often should I clean and maintain my DIY chicken feeder?
Regular cleaning is essential to prevent spoilage and contamination. Clean your feeder at least once a week, or more frequently if necessary, depending on the size of your flock and feed consumption. Use a gentle detergent and rinse thoroughly with clean water.
What are some common issues to watch out for when building my DIY chicken feeder?
Watch for leaks, rodent infestations, and moisture buildup, which can lead to mold and spoilage. Regularly inspect your feeder for signs of wear and tear, and address any issues promptly to maintain a healthy feeding environment.
Can I integrate my DIY chicken feeder with existing coop design or architecture?
Yes, incorporating your feeder into the overall design of your coop can enhance functionality and aesthetics. Consider factors like accessibility, ventilation, and predator protection when integrating your feeder with your coop’s design features.