
The first week with your new chicks is an exciting but crucial time. It sets the stage for their health, growth, and overall well-being. As you welcome these tiny balls of fluff into your home or coop, it’s essential to get everything just right from the start. Proper housing, nutrition, and hygiene are vital components in raising healthy chicks during this critical first week. In this article, we’ll dive into the best practices for chick care, covering topics such as providing adequate ventilation and temperature control in their housing, offering a balanced diet that meets their nutritional needs, and maintaining top-notch health and hygiene standards to prevent disease. By following these expert tips, you can ensure your chicks get off to a strong start and thrive throughout their growth cycle.
Introduction to Raising Healthy Chicks
As a new backyard chicken owner, you’re probably eager to learn how to raise healthy chicks from the very start. This is where their foundation for a strong and thriving life begins.
Importance of Proper Care in the First Week
The first week of life is critical for new chicks, and proper care during this period sets the stage for their overall health and well-being. Chicks are most vulnerable to disease and environmental stressors during the initial 24-48 hours after hatching. Inadequate care can lead to issues such as stunted growth, weakened immune systems, and increased susceptibility to common poultry diseases.
Providing a safe and nurturing environment is essential for new chicks. This includes maintaining proper temperature, providing adequate light, ensuring access to clean water and food, and minimizing stress. A chick’s natural instinct is to hide from predators, so offering plenty of hiding places within the brooder can help alleviate anxiety and promote relaxation.
Some practical tips include checking on chicks frequently during the first week, monitoring their growth rate, and adjusting temperature settings accordingly. It’s also crucial to maintain a clean environment by removing droppings daily and disinfecting surfaces regularly. By paying close attention to these factors, you’ll be well on your way to raising healthy, robust chicks that are better equipped to thrive in the long term.
What to Expect from Your New Chicks
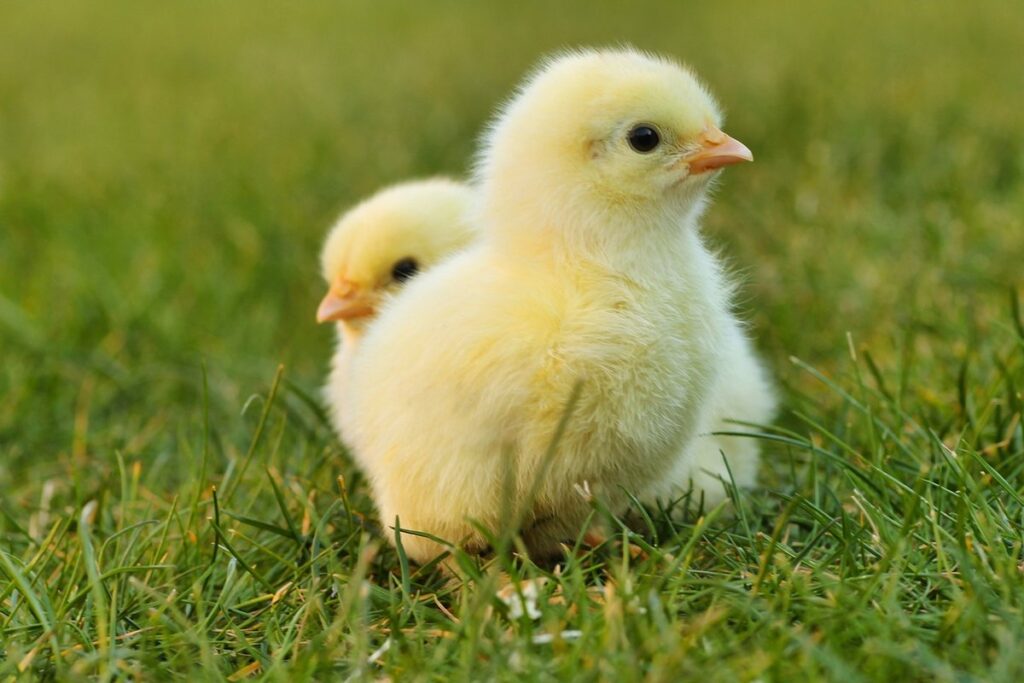
As you welcome your new chicks into their brooder, it’s essential to be aware of the typical behavior, habits, and physical changes they’ll undergo during their first week. Chicks are fragile and vulnerable at this stage, so observing their development closely will help you identify any potential issues early on.
During the first 24-48 hours, your chicks may appear listless or lethargic due to the stress of hatching and being removed from their mother’s warmth. They’ll start to grow feathers, and their beaks will begin to produce the sharp edges that they need for pecking and scratching. Their eyes will also start to take on a more vibrant color as the iris develops.
As your chicks’ energy levels increase, you can expect them to become more active and exploratory. They’ll start to move around the brooder, exercising their wings and legs, and may begin to engage in playful behaviors like chasing or tumbling. Be prepared for some mess, as they may start to scratch at the bedding and peck at the food and water dishes.
By day three or four, your chicks will have undergone significant physical changes, including the growth of soft down and the hardening of their beaks. They’ll also begin to establish a hierarchy within the flock, so it’s essential to monitor them closely for any signs of aggression or bullying. By being aware of these developmental milestones, you can tailor your care routine to meet their unique needs and ensure a smooth transition into this critical first week.
Housing and Environment Setup
When bringing home your adorable chicks for the first time, setting up a comfortable housing environment is crucial to their health and happiness. This includes creating a safe space for them to roost and exercise in.
Providing a Safe and Comfortable Space
When it comes to creating a safe and comfortable space for your chicks during their first week of life, ventilation, temperature control, and humidity management are top priorities. Adequate ventilation is crucial to prevent the buildup of ammonia from droppings, which can be toxic to young chicks. Ensure that your brooder or incubator has proper airflow by leaving enough space between each chick (about 1-2 square feet) and providing a mesh or screen cover to allow for air circulation.
Temperature control is also vital during this critical period. Chicks need a warm environment, but overheating can be just as deadly as hypothermia. Maintain the ideal temperature range of 90-95°F (32-35°C) in the first week, gradually reducing it by 5°F (3°C) every few days until you reach around 70-75°F (21-24°C). Monitor your thermometer closely and adjust the heating source as needed.
Humidity levels should also be managed carefully. A relative humidity of 50-60% is ideal for young chicks, preventing dehydration and promoting healthy skin development. You can achieve this by placing a damp cloth or sponge near the heat source to maintain a humid microclimate. Remember, it’s essential to strike a balance between keeping your chicks warm and dry – an overhumid environment can lead to respiratory issues.
Essential Equipment for Chicks’ First Week
When it comes to setting up the perfect environment for your chicks’ first week, having the right equipment is crucial. You’ll want to ensure that you have all the necessary items to keep them safe, happy, and healthy.
First and foremost, you’ll need food and water containers specifically designed for young chickens. These should be easy to clean and accessible at all times. A good rule of thumb is to provide one gallon of water per chick per day, so if you’re raising 10 chicks, you’ll want a container that holds at least 10 gallons.
You’ll also need a high-quality bedding material like wood shavings or pine pellets to keep the brooder dry and comfortable for your chicks. Avoid using newspapers or magazines as they can cause respiratory problems. A good depth of bedding is around 2-3 inches, which will allow for easy cleaning and prevent messes.
Heat sources are also essential in the first week. You’ll want a heat lamp or ceramic heat emitter to maintain a consistent temperature between 90-100°F (32-38°C) during the first few days. This will ensure your chicks stay warm and cozy as they adjust to their new surroundings.
Nutrition and Hydration
When it comes to raising healthy chicks, proper nutrition and hydration are crucial during their first week of life. Here’s how to ensure your baby birds get the nutrients they need.
Choosing the Right Feed for Your Chicks
Choosing the right feed for your chicks is crucial during their first week of life. It’s essential to provide them with a nutrient-rich starter feed that promotes healthy growth and development.
There are several types of chick starter feeds available, including medicated and non-medicated options. Medicated feeds contain antibiotics or other medications that help protect against diseases common in young chicks, such as coccidiosis. However, if you’re raising chicks on pasture or using alternative methods to prevent disease, a non-medicated feed may be a better choice.
When introducing new foods to your chicks, it’s essential to do so gradually. Start by offering them a small amount of starter feed in a separate dish from their water. As they grow and become more accustomed to eating solid food, you can begin to introduce other foods, such as scratch grains or fruits and vegetables. Remember to always provide fresh water and feed at room temperature.
A good rule of thumb is to offer 20-25% protein starter feed for the first week, gradually decreasing the protein content to 18-20% by the end of the second week.
Watering Your Chicks: Tips and Tricks
Water is essential for your chicks’ growth and development, especially during their first week. It’s crucial to provide them with fresh water at all times, as dehydration can be a significant threat. Ensure you place the waterer in an easily accessible location where your chicks won’t have to walk on dirty litter or compete with each other.
Monitor the water level frequently and refill it as needed. A good rule of thumb is to check the water level every hour during the first week, especially if you’re raising a large batch of chicks. You should also clean the waterer daily by scrubbing it with soap and warm water to prevent bacterial growth.
Keep an eye out for signs of dehydration in your chicks, such as dry, crumbly droppings or a decrease in egg production (if you have laying hens). If you notice any of these symptoms, increase the water intake by providing multiple sources or using a different type of waterer. Consider using a nipple waterer, which encourages the chicks to drink more regularly and reduces waste.
Remember, it’s always better to err on the side of caution when it comes to watering your chicks, as dehydration can be fatal if left unchecked.
Health and Hygiene
To ensure a healthy start, we’ll cover essential tips on maintaining clean and hygienic conditions for your chicks’ living space. Proper hygiene practices are crucial during this critical first week of chick care.
Monitoring Chicks’ Health During the First Week
The first week of a chick’s life is crucial for its development and health. As a responsible chicken owner, it’s essential to monitor their health closely during this period to catch any potential issues early on. Common health problems that may arise during the first week include respiratory infections, pasty feet, and dehydration.
Pasty feet are a common issue in young chicks, caused by their inability to rid themselves of wet droppings. If you notice your chick’s feet are stuck together or showing signs of moisture, gently separate them and apply a small amount of vaseline or petroleum jelly to help loosen the droppings. Dehydration can also be a concern if your chicks aren’t getting enough water, so ensure their feeder is always filled and easily accessible.
Watch for early warning signs such as labored breathing, coughing, or lethargy, which can indicate respiratory infections. Keep an eye on your chick’s behavior, appetite, and stool quality to catch any potential issues before they become serious problems. If you’re unsure about a chick’s health or notice any of these symptoms, consult with a veterinarian experienced in poultry care for professional advice.
Maintaining a Clean Environment for Healthy Chicks
Maintaining a clean environment is crucial for preventing disease spread among newly hatched chicks. In the first week of life, their immune system is still developing, making them more susceptible to infections. Regular cleaning, disinfecting, and waste management are essential practices that must be followed to keep your chicks healthy.
Disinfect all surfaces with a solution of 1 part bleach to 9 parts water daily. Pay particular attention to areas where the chicks come into contact with their droppings or litter, as these can harbor bacteria and viruses. Use a dust mask when cleaning with chemicals to avoid inhaling fumes.
Remove soiled bedding promptly, ideally once a day, to prevent ammonia buildup from accumulating in high concentrations. Replace it with fresh, dry bedding that is at least 2-3 inches deep to allow your chicks to easily absorb moisture and reduce the risk of respiratory problems.
Regularly inspect your brooder for signs of contamination or neglect, and address any issues promptly to prevent disease outbreaks. Keep an eye out for moldy feed, dirty waterers, and wet areas that can foster bacterial growth.
Behavioral Guidance
Now that you’ve got your chicks settled into their new home, it’s time to focus on their behavior and learn how to encourage healthy habits from day one. In this next part of chick care, we’ll explore behavioral guidance basics.
Handling Your Chicks Safely During the First Week
The first week with your new chicks is an exciting time, but it’s also crucial to handle them safely to avoid stressing them out. During this critical period, chicks are most vulnerable to injury and illness, making gentle handling essential. To minimize the risk of stress, always wash your hands thoroughly before handling your chicks.
When picking up your chicks, make sure to support their body and wings gently but firmly. Avoid lifting them by their legs or tails, as this can cause injury. Hold one chick at a time, and never hold too many chicks together in your arms, as this can lead to overcrowding and stress. If you need to handle multiple chicks, use separate containers or carriers to prevent congestion.
Keep an eye on the temperature when handling your chicks, ensuring it’s not too hot or cold for them. Aim for a room temperature between 70°F to 80°F (21°C to 27°C) to keep them comfortable and relaxed. By following these simple guidelines, you’ll be able to handle your chicks safely during this first week, setting the stage for a happy and healthy flock.
Encouraging Natural Behavior in New Chicks
When introducing new chicks to their environment, it’s essential to encourage natural behavior while minimizing stress. One way to do this is by providing opportunities for dust bathing. Chickens naturally engage in dust bathing to clean and regulate their body temperature. To replicate this behavior, place a shallow dish of clean sand or a dedicated dust bath area near the nesting box.
Regular exercise is also crucial for new chicks, as it helps them develop strong legs and prevent leg problems later on. Provide ample space for your chicks to roam and engage in physical activity by setting up a chick-proofed enclosure or “chick zone.” Make sure the area is free from hazards, such as electrical cords or toxic substances.
To promote exercise and reduce stress, you can also try placing toys or interactive objects that challenge your chicks’ natural foraging behavior. Avoid over-handling your chicks, as this can cause undue stress and lead to behavioral problems later on. Instead, spend time observing their natural behaviors and providing a stimulating environment that encourages exploration and activity.
Troubleshooting Common Issues
If you’re experiencing any issues with your chicks, don’t worry – we’ve got you covered. In this next part of our care guide, we’ll tackle common problems and provide solutions to get your flock thriving again.
Identifying and Addressing Potential Problems
As you settle into chick care mode, it’s essential to be vigilant about potential problems that can arise during the first week. Respiratory issues are a common concern when introducing chicks to their new environment. Keep an eye out for signs of distress such as labored breathing, wheezing, or sneezing. Ensure good ventilation in your brooder and provide a temperature range between 90-95°F (32-35°C) to prevent stress on the chicks’ respiratory systems.
Monitor the brooder closely for any signs of fire or heat-related issues. Use a thermometer to ensure the temperature doesn’t exceed recommended levels, and keep flammable materials away from the area. In case of an emergency, have a fire extinguisher nearby and know how to use it. Keep your waterers and feeders clean and well-maintained to prevent bacterial growth.
It’s also crucial to recognize the signs of poor chick health, such as lethargy, ruffled feathers, or changes in appetite. Consult with a veterinarian if you suspect any issues. Regularly inspect your chicks for any visible injuries or infections and maintain proper hygiene practices to prevent disease transmission.
Seeking Professional Help When Necessary
It’s not uncommon for new chick owners to encounter difficulties caring for their birds during the first week. Whether it’s a sudden drop in water temperature, an unexpected health issue, or simply feeling overwhelmed by the demands of caring for new life, knowing when to seek professional help is crucial.
If you’re experiencing any unusual behavior, such as labored breathing, lethargy, or discharge around the eyes or beak, don’t hesitate to consult a veterinarian with experience in poultry care. A professional can quickly assess your chicks’ health and provide guidance on treatment if needed. Be aware that some common issues can escalate rapidly, so prompt attention is essential.
For example, respiratory infections can spread quickly through flocks, while nutritional deficiencies may lead to stunted growth or developmental problems. By consulting a veterinarian or poultry expert at the first sign of trouble, you can ensure your chicks receive the care they need to thrive.
Frequently Asked Questions
What if I’m concerned my chicks are getting too hot or cold in their housing?
Monitor the temperature closely, ensuring it stays between 90-100°F (32-38°C) for the first week. Use a thermometer to check the temperature at brooder level, and provide adequate ventilation by opening windows or using fans.
How often should I clean the chick’s waterer and food dish during the first week?
Clean the chick’s waterer and food dish daily to prevent bacterial growth and ensure fresh water is always available. This will also help maintain a healthy environment and prevent diseases.
What if some of my chicks appear lethargic or reluctant to eat after a few days?
If you notice lethargy or refusal to eat, it may indicate an underlying issue such as respiratory problems or inadequate nutrition. Check for signs of illness and adjust their diet accordingly. Provide a balanced feed that meets their nutritional needs, and ensure they have access to fresh water.
Can I move my chicks from the brooder to the coop too quickly?
Avoid moving your chicks to the coop too soon, as this can cause stress and increase the risk of disease. Wait until they are at least 4-5 weeks old, or when they show clear signs of being ready for the coop environment.
How do I handle the first molting cycle in my chicks?
Don’t worry if you see feathers falling out during the first few weeks – it’s a normal process. Keep their environment clean and provide adequate nutrition to support healthy growth and feather development.