
As a backyard duck enthusiast, you’re probably excited to see your precious eggs start to hatch. But incubating duck eggs can be intimidating if you don’t have the right tools and knowledge. A crucial part of successful hatching is monitoring temperature, humidity, and fertility – but how do you keep track of all these vital signs? That’s where a duck egg hatching chart comes in handy. This simple yet essential tool helps you stay on top of incubation progress, ensuring your eggs receive the perfect conditions for healthy development. In this article, we’ll guide you through creating a reliable duck egg hatching chart and provide expert advice on temperature, humidity, and fertility monitoring to give you the best chance at successful incubation.
Understanding Duck Egg Hatching Basics
Before you start tracking duck egg hatching, it’s essential to understand the basics of what happens inside the egg during incubation and development. We’ll break down these critical stages in this section.
Types of Duck Eggs
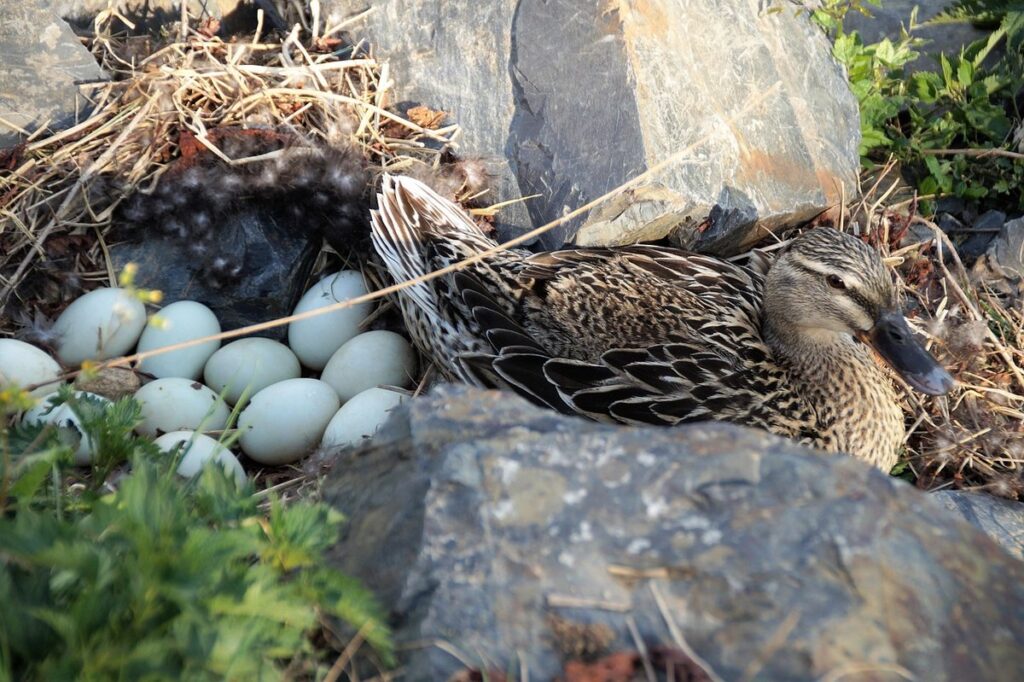
When it comes to duck eggs, you’ll find that they come in various shapes and sizes, each with its own unique characteristics. One of the most noticeable differences is size, ranging from small quackers weighing around 40 grams to large Khaki Campbells reaching up to 80 grams or more.
Shell thickness also varies significantly among breeds. Some duck eggs have a thicker shell, making them more resistant to breakage during shipping and handling. For instance, Muscovy ducks are known for their robust shells, which can withstand the rigors of transportation. On the other hand, some breeds like the Wood Duck have thinner shells that require extra care when collecting and storing eggs.
The shape of duck eggs is another distinguishing feature. Some breeds produce elongated eggs, while others lay more rounded ones. The Rouen duck, for example, lays long, oval-shaped eggs that are prized by bakers for their large size and rich flavor.
When it comes to choosing the right breed for your egg-laying needs, consider factors such as climate, available space, and desired egg production level. Different breeds thrive in various environments and may require specific care and handling. Researching the unique characteristics of each breed will help you make an informed decision when selecting duck eggs for hatching.
Factors Influencing Incubation
When incubating duck eggs, several factors can significantly influence hatching success. Temperature is perhaps one of the most critical elements to control. A consistent temperature between 99°F and 100°F (37°C to 38°C) is essential for proper embryonic development. If temperatures fluctuate, it can lead to delayed or failed hatchings.
Humidity levels also play a crucial role in maintaining a healthy incubation environment. The ideal humidity level is between 50% and 60%. This helps keep the eggs moist and prevents them from drying out. However, excessive humidity can cause mold growth and bacterial contamination.
Proper egg handling is another essential factor to consider. Duck eggs are delicate and prone to damage. Gently place the eggs in the incubator or turn them carefully by hand. Avoid sudden movements or jarring, which can cause cracks and affect hatching success. It’s also vital to monitor the eggs regularly for signs of spoilage or cracking.
By paying attention to these factors and taking necessary precautions, you can increase your chances of successful duck egg hatchings.
Importance of Proper Handling
When it comes to hatching duck eggs, proper handling is crucial for ensuring successful incubation and a healthy hatch. It’s essential to understand that duck eggs are more sensitive than chicken eggs and require gentle care from the moment they’re collected to when they emerge from the incubator.
Firstly, improper handling can lead to cracks in the eggshell, which not only affects the embryo but also provides an entry point for bacteria. This can result in contamination and a failed hatch or even death of the duckling. Secondly, gentle handling helps prevent temperature fluctuations, which are critical during the incubation period. Temperature changes can shock the embryo, leading to poor development and reduced chances of survival.
To handle duck eggs correctly, it’s recommended that you hold them by the large end, rather than the pointed end. This helps prevent any pressure on the embryo, which is located near the pointed end. Additionally, ensure your hands are clean and dry before handling the eggs to prevent bacterial transfer.
Creating a Duck Egg Hatching Chart
Now that you have a basic understanding of duck egg development, it’s time to create your own hatching chart to track progress. This will help you anticipate and prepare for each stage of the incubation process.
Choosing the Right Temperature
When it comes to creating a duck egg hatching chart, understanding temperature requirements is crucial for successful incubation. Duck eggs have specific temperature needs during different stages of development, and failing to meet these demands can lead to poor hatch rates or even embryo death.
During the first 7-10 days of incubation, known as the “cool phase,” the ideal temperature range is between 99°F (37°C) and 100°F (38°C). This allows for embryonic development without over-heating. After day 11, the egg enters the “warm phase” where the temperature should be maintained at a consistent 100.5°F (38°C).
It’s essential to note that small variations in temperature can have significant effects on embryo growth and viability. For example, research has shown that a 1% decrease in hatch rate occurs for every 0.5°F (0.3°C) drop below the optimal temperature.
To ensure accurate temperature control, use an incubator specifically designed for duck eggs or a reliable thermometer to monitor temperatures closely. Keep in mind that even minor fluctuations can impact hatch rates. Monitor your chart regularly and make adjustments as needed to guarantee optimal conditions for successful hatching.
Humidity Levels for Optimal Hatch
Maintaining optimal humidity levels is crucial for a healthy hatch. Too much or too little moisture can lead to embryo death, slow development, and other complications. Aim for a relative humidity (RH) of 45-60% during the first few days after incubation starts.
As eggs absorb water, their weight increases. Monitor the egg’s weight daily by recording the initial and final weights. This will help you gauge moisture levels. You can use an egg weight calculator or a simple spreadsheet to track changes.
In the first week, maintain a slightly higher RH (55-60%) to prevent dehydration. As development accelerates around day 12, reduce humidity to 45-50% to avoid over-moisture accumulation. Keep in mind that some duck breeds have specific needs; for example, Muscovy ducks require a lower RH due to their larger egg size.
Aiming for an optimal balance is key – too high and eggs may absorb excess moisture, while too low can cause dehydration. Monitor temperature fluctuations as well, ensuring the incubator maintains a consistent range (around 99°F). A thermometer and hygrometer will help you track both conditions accurately.
Monitoring Fertility and Embryonic Development
Monitoring fertility and embryonic development is crucial to determine the health and viability of your duck eggs. One essential tool for this purpose is candling, which involves shining a bright light through the eggshell to observe the embryo’s development. This can be done using a desk lamp or a specialized candle, with the goal of detecting any potential issues, such as blood spots or mold growth.
Graphing is another useful method for tracking embryonic development over time. By creating a chart to record the days and observations, you can visualize the progress of your duck eggs and identify patterns or irregularities that may indicate problems. This helps you make informed decisions about which eggs are worth incubating further.
It’s essential to note that candling should only be done from day 7-14 of incubation, as before this period, it’s difficult to detect any significant development. You can observe the air sac and embryo’s movement, but be careful not to over-hand the eggs, which can cause breakage.
Calculating Incubation Time
To calculate incubation time, you’ll need to determine the correct number of days for your duck eggs based on breed and temperature. This simple formula will help ensure a healthy hatch.
Understanding the Concept of “Critical Periods”
When it comes to incubating duck eggs, understanding the concept of “critical periods” is crucial for ensuring successful hatching. These critical periods are specific stages in embryonic development where the embryo undergoes rapid growth and differentiation. Two key examples of critical periods in duck egg incubation are gastulation and differentiation.
Gastulation occurs between days 5-6 of incubation, during which the embryo undergoes a significant transformation from a compact, spherical shape to a more complex structure with distinct body parts. At this stage, the embryo begins to move its head and shoulders, preparing for external development. It’s essential to maintain precise temperature control during gastulation, as even slight fluctuations can impact the embryo’s growth and differentiation.
Differentiation occurs between days 7-8 of incubation, where the embryo’s major body systems begin to take shape. This is a critical period for the development of feathers, beak, and internal organs. Again, maintaining optimal temperature conditions is crucial during this stage, as it affects the proper formation of these essential structures.
By understanding these critical periods, you can better monitor your duck eggs’ progress and make informed decisions about temperature control and incubation techniques to ensure successful hatching.
Calculating Incubation Time Based on Egg Size
Calculating incubation time based on egg size can be a bit tricky, but with a few simple steps, you’ll be able to determine the exact number of days needed for your duck eggs to hatch. First, it’s essential to know that the standard incubation period for duck eggs is around 28 days. However, this can vary depending on several factors, including egg size.
To calculate the incubation time based on egg size, you need to measure the weight of the egg in grams or ounces. A general rule of thumb is to add one day to the standard incubation period for every gram over 75g. For example, if your duck egg weighs around 90g, you would add two days to the standard 28-day period, making it 30 days.
Let’s use a few examples to illustrate this concept: a small Muscovy duck egg weighing about 65g will require only 28 days of incubation, while a larger Khaki Campbell duck egg weighing around 95g will need 31 days. By considering the size of your eggs, you can ensure that you’re giving them the best chance to hatch successfully.
Considering Breed-Specific Differences
When calculating incubation time for duck eggs, it’s essential to consider breed-specific differences. Different breeds of ducks have varying incubation periods, ranging from 28 to 32 days. Some breeds, like the Khaki Campbell, typically hatch after 28 days, while others, such as the Muscovy, may take up to 32 days.
To adjust your chart accordingly, research the specific breed you’re hatching and note its average incubation period. For example, if you’re hatching Pekin ducks, which usually take 29-30 days to hatch, you’ll want to set your chart for this range. Keep in mind that individual eggs may vary within a breed, so it’s crucial to monitor temperature fluctuations and adjust as necessary.
When working with multiple breeds or unknown parents, it’s better to err on the side of caution and start at the longer end of the incubation period. This will ensure you don’t miss the optimal hatching window for any individual egg.
Interpreting Hatching Chart Results
Now that you’ve got your duck egg hatching chart, it’s time to understand what those numbers and symbols mean. We’ll break down how to interpret the results for successful incubation.
Identifying Patterns and Anomalies
When analyzing hatching chart results, it’s essential to identify patterns and anomalies that may impact the hatch rate. Unusual temperature fluctuations or humidity spikes can significantly affect egg development, making it crucial to recognize these issues.
To identify patterns, start by looking for consistent trends in the data. For instance, if the chart shows a steady decline in incubation temperatures over several days, this could indicate an issue with the heating system. Conversely, a sudden spike in temperature may suggest a malfunctioning thermostat or incorrect settings.
Anomalies can be more challenging to detect but are equally important to address. Look for unusual dips or spikes in humidity levels, as these can lead to embryonic development issues. For example, if the chart shows an abrupt drop in relative humidity (RH) on day 10, this may cause desiccation and impact hatchability.
Regularly monitoring the hatching chart allows you to catch potential problems before they become critical. By comparing expected patterns with actual data, you can make informed decisions about adjusting incubation conditions to ensure optimal results. Remember, early detection is key to minimizing losses and optimizing your duck egg hatching success rate.
Adjusting the Chart for Future Incubations
When you’ve successfully hatched eggs with the help of your duck egg hatching chart, it’s essential to use that data to fine-tune your approach for future incubations. This is where adjusting the chart comes into play.
Start by tracking and recording specific factors like temperature, humidity, and turning frequency. Analyze these variables against the success rate of your previous hatchings. If you notice a particular temperature range or turning schedule leading to consistently better results, incorporate that into your adjusted chart.
For instance, if your chart shows that 98-100°F (36-38°C) yielded the best hatching rates in the past but this incubation cycle had an unusually high mortality rate at those temperatures, it’s time to adjust. Perhaps you should try a slightly lower temperature range or incorporate a different turning schedule.
Use this historical data to make informed decisions and optimize your chart for future duck egg hatchings. This will not only save you time but also increase the likelihood of successful hatching outcomes. Remember, experience is key in refining your approach – so take advantage of past successes (and failures) to inform your future actions.
Common Mistakes and Solutions
When interpreting hatching chart results, many people make common mistakes that can lead to confusion and inaccurate conclusions. One of the most significant errors is not understanding the chart’s basis on embryonic development stages rather than incubation time.
For instance, some charts may show that 50% of eggs hatch after 28 days, but what this really means is that 50% of eggs reach a specific developmental stage at 28 days. However, since duck embryos typically take around 30-32 days to fully develop and pip, this can create confusion.
Another mistake people make is not considering individual duck breeds’ incubation periods. For example, Muscovy ducks have an incubation period of about 28 days, while Khaki Campbells take approximately 35 days. Failing to account for these differences can lead to incorrect expectations and disappointments.
To improve your interpretation skills, familiarize yourself with the chart’s specific data points and understand how they relate to embryonic development stages.
Troubleshooting Duck Egg Hatching Issues
If you’re experiencing issues with your duck eggs hatching, don’t worry – we’ve got you covered. This section will walk you through common problems and their solutions to ensure a successful hatch.
Identifying and Addressing Temperature Fluctuations
Temperature fluctuations can be a significant concern when trying to hatch duck eggs successfully. One of the most critical factors for hatching is maintaining a stable temperature, as even small variations can impact embryonic development and ultimately affect the chances of successful incubation.
A common issue many breeders face is keeping the incubator at a consistent temperature. The ideal temperature range for hatching duck eggs is between 99°F (37°C) and 100°F (38°C), with slight variations depending on the specific breed being hatched. It’s essential to avoid sudden drops or increases in temperature, as this can cause stress to the developing embryo.
To address temperature fluctuations, it’s crucial to maintain a stable environment within the incubator. This involves monitoring the temperature closely and making adjustments as necessary. Some breeders also recommend using thermostatically controlled heating elements or insulating materials to help regulate temperature fluctuations. By taking proactive steps to manage temperature variations, you can significantly improve your chances of successful hatching.
Humidity-Related Issues and Solutions
High humidity levels are crucial for successful duck egg hatching. However, excessively high or fluctuating humidity can lead to mold or fungal growth inside the incubator. This issue may cause embryo deaths, reduced fertility rates, and even contaminate the entire batch of eggs.
To address this problem, it’s essential to monitor your incubator’s temperature and humidity levels closely. Aim for a relative humidity (RH) range of 45-55% during the first 24 days of incubation, with slight variations allowed at other stages. Ensure that your thermometer and hygrometer are accurate and calibrated correctly.
You should also maintain excellent ventilation within your incubator by using proper airflow systems or ensuring adequate space between eggs for air circulation. Regularly clean and disinfect all surfaces and equipment to minimize the risk of fungal growth. Furthermore, avoid overcrowding your incubator, as this can lead to poor air quality and create conditions conducive to mold development.
To prevent humidity-related issues, inspect your eggs regularly for any signs of cracking or damage that could compromise their integrity during incubation.
Common Embryonic Development Abnormalities
During embryonic development, duck eggs can encounter various abnormalities that may affect hatching success. One of the most common issues is incomplete or delayed yolk sac resorption, which can lead to an oversized yolk sac and potentially hinder the chick’s growth.
Another problem is embryonic edema, a condition characterized by excessive fluid accumulation in the embryo, causing it to swell abnormally. This can be due to various factors such as genetic predisposition, temperature fluctuations, or bacterial infections.
In addition, some duck breeds are more prone to certain abnormalities due to their genetic makeup. For example, Muscovy ducks may experience a higher incidence of embryonic developmental issues related to their unique egg shape and size.
If you suspect an issue during hatching, monitor the egg’s development closely. Check for any unusual swelling or fluid accumulation within the embryo. Regularly rotate the eggs to prevent temperature fluctuations from exacerbating the problem.
To minimize risks, maintain a consistent incubation environment with precise temperature control (37.5°C) and humidity levels (50-60%).
Conclusion
Now that you’ve reached the end of our comprehensive guide, it’s time to summarize the key takeaways and reflect on your journey to understanding duck egg hatching charts.
Recap of Key Takeaways
In this comprehensive guide to duck egg hatching charts, we’ve covered a wealth of information to help you navigate the process with confidence. Let’s recap some of the key takeaways to ensure you’re well-equipped for success.
A fundamental understanding of incubation temperature and humidity is crucial for healthy hatching. We discussed the ideal temperatures for different stages of development, from 99°F to 100°F, and emphasized the importance of maintaining precise temperature control. You also learned about the optimal levels of humidity, which range from 50-60% during incubation.
We explored various types of duck egg hatching charts, including digital and analog options, and highlighted their benefits and drawbacks. For instance, digital charts often provide real-time data and customizable settings, whereas analog charts offer a more traditional and reliable approach. Additionally, we delved into the significance of candling, a process that involves shining light through the eggs to monitor development.
To ensure successful hatching, it’s essential to maintain accurate record-keeping and monitoring. We provided tips on how to track temperature, humidity, and egg turning to guarantee optimal conditions for your ducklings’ growth. By applying these key takeaways, you’ll be well-prepared to create a conducive environment for healthy hatching and raise happy, thriving ducks.
Final Tips for Successful Hatching
As you’ve made it through this comprehensive guide on creating a duck egg hatching chart, you’re now ready to put your knowledge into action. Remember that successful hatching requires more than just a well-planned chart – it demands attention to detail and a commitment to providing the best possible environment for those precious eggs.
To ensure a stable and clean incubation environment, make sure your incubator is properly sanitized after each use. A dirty incubator can be a breeding ground for bacteria and other microorganisms that can harm your ducklings. You should also maintain a consistent temperature range of 99-100°F (37-38°C) to promote healthy development.
Monitor the humidity levels closely, ensuring they remain between 50-60%. This will help prevent dehydration in the eggs. Regularly check the egg turning mechanism to ensure it’s functioning correctly and adjust as needed. By following these best practices and staying vigilant throughout the hatching process, you’ll be well on your way to successfully raising healthy ducklings from your eggs.
Frequently Asked Questions
What should I do if my duck egg hatching chart shows an irregular temperature pattern during incubation?
If you notice an irregular temperature pattern on your chart, investigate the cause immediately. It could be due to a malfunctioning thermometer or issues with the incubator’s temperature control system. Verify that the temperature is within the optimal range (99-100°F) and adjust the settings if necessary. Regularly monitoring the temperature will help prevent damage to the developing embryo.
How can I ensure my duck egg hatching chart accurately tracks fertility and embryonic development?
To guarantee accurate tracking, use a high-quality hatching chart specifically designed for duck eggs. Ensure you’re using the correct markers or symbols to indicate fertility and developmental stages. Regularly review your chart to identify any potential issues or deviations from normal development patterns.
Can I reuse my existing incubator or do I need a specialized one for duck egg hatching?
While it’s possible to reuse an existing incubator, consider investing in a dedicated unit specifically designed for duck eggs. These units often come with adjustable temperature and humidity controls that can be tailored to meet the unique needs of duck embryos.
How should I handle duck eggs during shipping or transportation to prevent breakage?
To minimize breakage, wrap eggs individually in paper towels or bubble wrap and place them in a secure container filled with packing materials like foam peanuts or crumpled paper. Maintain a consistent temperature (around 70-75°F) during transport and avoid extreme handling or sudden changes in temperature.
What steps can I take to troubleshoot common incubation issues, such as temperature fluctuations or humidity-related problems?
Common incubation issues can be resolved by identifying the root cause of the problem. Regularly inspect your equipment for proper function, maintain a clean environment, and ensure that all settings (temperature, humidity) are within optimal ranges. If an issue persists, consult online resources or experienced breeders to find solutions tailored to specific scenarios.