
If you’re an aspiring backyard farmer or simply a curious bird enthusiast, you’ve probably wondered: how long does it take for a duck egg to hatch? The answer is more complex than you might think. Incubation time varies depending on several factors, including breed-specific traits and external conditions like temperature control. A stable environment is crucial for successful incubation, but even with the best care, factors like humidity and air quality can impact hatching time. In this article, we’ll delve into the intricacies of duck egg incubation, covering temperature control, breed-specific times, and external factors that affect hatching time. By the end, you’ll be equipped with expert tips for a successful incubation process, ensuring your precious duck eggs hatch healthily.
Understanding Duck Egg Incubation Basics
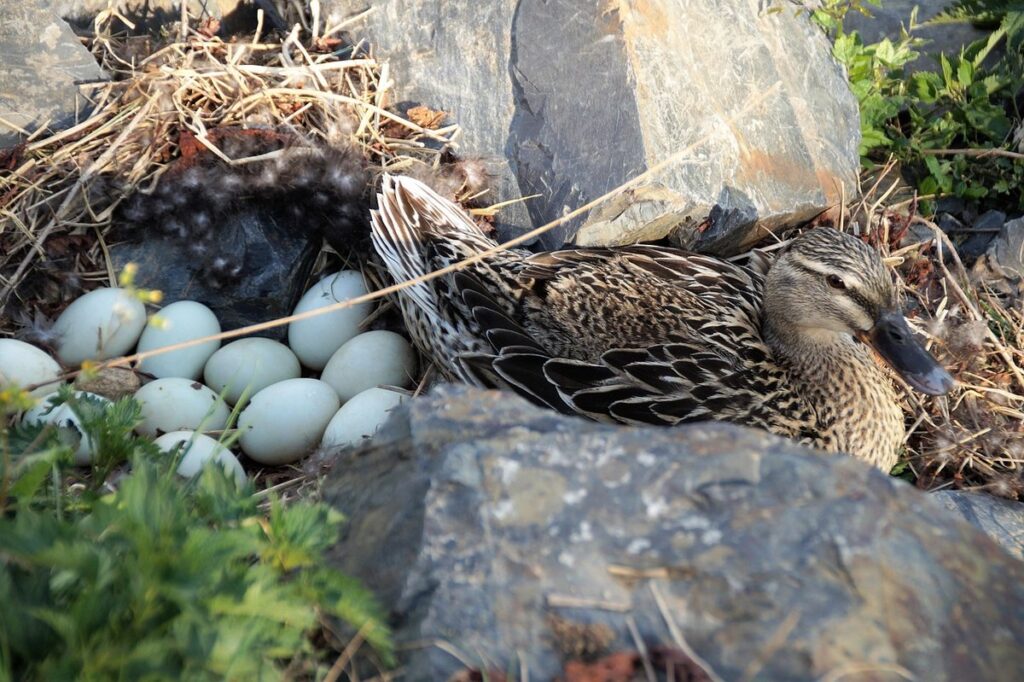
Let’s dive into the basics of duck egg incubation, which is essential for determining how long it takes a duck egg to hatch. We’ll cover the critical factors involved in successful hatching.
Importance of Temperature Control in Incubation
When it comes to incubating duck eggs, temperature control is a crucial factor that can make all the difference between a successful hatch and a failed attempt. The ideal temperature range for duck egg incubation is between 99°F (37°C) and 100°F (38°C), with a slight drop in temperature at night. Maintaining this consistent temperature is essential for proper embryo development, as it affects the rate of growth and the overall health of the chick.
If the temperature is too high or too low, it can lead to issues such as slow growth, stunted development, or even death of the embryo. In fact, a study on duck egg incubation showed that an increase in temperature by just 1°F (0.5°C) can result in a significant decrease in hatchability rates.
To ensure successful duck egg incubation, it’s essential to use a good-quality incubator with precise temperature control. You should also monitor the temperature regularly and make adjustments as needed to maintain the ideal range. This will give your duck eggs the best chance of hatching successfully.
Factors Affecting Incubation Time
The length of time it takes for a duck egg to hatch can vary significantly depending on several key factors. One of the most influential factors is the breed of duck. Some breeds, such as Muscovy ducks, tend to have longer incubation periods, typically ranging from 28 to 32 days, while other breeds like Khaki Campbells may take around 24-26 days.
The size of the egg also plays a crucial role in determining hatch time. Larger eggs usually require a slightly longer incubation period than smaller ones. On average, duck eggs weighing over 140 grams tend to hatch after approximately 28-30 days, while those under 120 grams may hatch within 24-26 days.
Environmental conditions, such as temperature and humidity, can also impact the length of incubation. A consistent temperature between 99°F and 100°F (37°C to 38°C) is ideal for optimal hatching. If the temperature fluctuates or falls below 98°F (36°C), it may slow down or even stop the development process altogether. Additionally, maintaining proper humidity levels is also essential to prevent desiccation of the embryo.
Keep in mind that these are general guidelines, and actual hatch times can vary depending on individual circumstances. If you’re trying to incubate duck eggs at home, make sure to monitor temperature and humidity closely to ensure optimal conditions for hatching.
The Process of Embryonic Development
Let’s take a closer look at the process of embryonic development, which is crucial for understanding how long it takes for a duck egg to hatch into a adorable baby duck.
Day 1-3: Cleavage and Morula Formation
On day one, the fertilization process occurs when the male’s sperm meets the egg, and the resulting zygote begins to divide. This initial stage is crucial for setting the course of embryonic development. As the cells start to multiply, they form a cluster called a morula, which resembles a tiny ball of cells.
Around day two or three, the morula undergoes a significant transformation, becoming a blastocyst. The blastocyst consists of an inner cell mass and a trophoblast layer, which eventually forms the embryo’s placenta and membranes. This stage is essential for implantation into the yolk sac, providing vital nutrients to sustain growth.
During this period, factors like temperature, humidity, and egg quality significantly impact embryonic development. Incubation time can be influenced by these variables, as a duck egg needs optimal conditions to progress through each developmental stage efficiently. For instance, a slightly higher or lower temperature might slow down or speed up the process, affecting the overall hatching time.
It’s essential for breeders and enthusiasts to provide an ideal environment during incubation, ensuring the embryo receives necessary support throughout its development stages.
Day 4-7: Blastulation and Gastrulation
As we continue to explore the fascinating process of embryonic development within a duck egg, let’s dive into the next critical stages: blastulation and gastrulation. These two events are crucial for the embryo’s normal development.
Blastulation marks the beginning of a significant transformation, where the embryo starts to take shape. The blastocyst, which is now about 3-4 days old, begins to organize itself into distinct layers – the inner cell mass (ICM) and the trophoblast. The ICM will eventually give rise to the fetus, while the trophoblast develops into the placenta.
During gastrulation, the embryo undergoes a dramatic reorganization, as cells begin to migrate to specific areas of the blastocyst. This process is guided by complex genetic signals that ensure the proper formation of tissues and organs. The three primary germ layers – ectoderm, mesoderm, and endoderm – start to take shape, setting the stage for future development.
Keep in mind that these stages are just as crucial for a duck embryo as they are for any other bird or mammal. A slight deviation during this period can impact the final outcome of the hatching process. We’ll explore more on the significance of these stages and their direct relation to egg incubation time later on in our journey of understanding the life cycle of a duck egg.
Factors Influencing Incubation Time in Duck Eggs
So, you’re wondering what factors can affect how long it takes for a duck egg to hatch? Temperature, humidity, and genetics all play a role.
Breed-Specific Incubation Times
When it comes to duck breeds, each has its unique incubation time due to genetic differences. This means that a Muscovy duck egg won’t hatch at the same rate as a Pekin duck egg. For instance, Muscovy ducks take around 35 days to incubate their eggs, while Pekins typically require about 28-30 days.
Some other notable breeds include Khaki Campbells, which incubate for approximately 29-31 days, and Wood Ducks, which take around 33-35 days. These variations are crucial for breeders to note, as improper incubation can lead to decreased hatch rates or even failed fertilization.
To ensure the best possible hatch rate, it’s essential to research specific breed requirements. Some breeds may require slightly longer or shorter incubation times, and failing to account for these differences can result in subpar results. If you’re new to duck breeding, it’s a good idea to start with a popular breed like Pekin or Khaki Campbell and adjust your techniques as needed based on the specific needs of your flock.
Egg Size and Weight Considerations
When it comes to incubating duck eggs, one crucial factor that can significantly impact hatching time is the size and weight of the egg. A general rule of thumb is that larger duck eggs require longer incubation times than smaller ones.
On average, a large duck egg weighs around 120-150 grams, while a small egg weighs approximately 70-90 grams. Research has shown that for every gram increase in egg weight, the incubation time can be extended by about 0.1-0.2 days. This means that a larger egg may require an additional day or two of incubation compared to a smaller one.
Proper management is essential to ensure optimal results. To accurately estimate hatching time for your duck eggs, you’ll need to determine their weight and adjust the incubation period accordingly. A good starting point is to aim for 28 days for small eggs (70-90 grams) and 30-32 days for larger eggs (120-150 grams). Keep in mind that these are general guidelines and actual hatching times may vary depending on various factors, including egg quality, incubator conditions, and breed specifics.
The Effects of External Factors on Incubation Time
When it comes to incubating duck eggs, many external factors can impact how long they take to hatch, and understanding these variables is crucial for successful hatching. Let’s explore what affects incubation time.
Temperature Extremes: Impact on Embryonic Development
When it comes to incubation time, temperature extremes can have a significant impact on embryonic development. High temperatures above 100°F (38°C) can cause the embryo to develop too quickly, leading to birth defects and reduced viability. Conversely, low temperatures below 90°F (32°C) can slow down development, prolonging incubation time and increasing the risk of mortality.
For example, a study on duck embryos found that exposure to temperatures above 104°F (40°C) resulted in 30% mortality rates. On the other hand, temperatures between 98°F (36°C) and 100°F (38°C) led to successful hatching in most cases. To mitigate these effects, it’s essential to maintain a consistent temperature within the optimal range of 99°F to 101°F (37°C to 39°C).
To ensure your duck eggs develop properly, keep them away from direct sunlight and heat sources. Use a reliable incubator or create a stable environment with a thermometer and heating pad to regulate the temperature. Regular monitoring is crucial to avoid any potential issues during incubation.
Humidity Levels and Ventilation in Incubation
Maintaining optimal humidity levels and proper ventilation is crucial during incubation to ensure the health and well-being of developing ducklings. The ideal humidity range for duck eggs is between 45% and 55%, with a slight increase to around 60% towards the end of the incubation period.
Proper ventilation is also vital, as it helps to remove carbon dioxide and excess moisture from the incubator, preventing condensation on the eggs’ surfaces. This can be achieved through regular cleaning, ensuring adequate air circulation within the incubator, and monitoring temperature levels. A good rule of thumb is to maintain a 10-15% increase in temperature above the recommended level for proper ventilation.
To gauge humidity levels accurately, you can use an accurate hygrometer, which will give you readings between 0 and 100%. Regularly checking these levels and making adjustments as necessary will help prevent issues such as cracked eggs or weak ducklings. Remember to keep your incubator clean to maintain optimal conditions for a healthy hatch.
Monitoring and Recording Incubation Progress
Now that you’ve set up your incubator, it’s time to monitor and record the progress of your duck egg as it develops and prepares for hatching. This is crucial for predicting when exactly the baby duck will emerge.
Importance of Regular Checks and Record-Keeping
Regular checks and record-keeping are crucial during incubation to ensure healthy hatching. You can’t afford to miss even a single day’s data as it may cause the eggs to dry out or become contaminated. Start by tracking temperature, which should be maintained between 99°F (37°C) and 100°F (38°C). Humidity is equally important and should be kept around 50-60%. You can purchase an incubation thermometer and hygrometer for accurate readings.
Make a habit of checking the eggs twice a day to ensure they’re developing correctly. Rotate them gently to prevent one side from getting too warm or cold. Also, keep track of any candling done (when you hold an egg up to light to observe embryo development) as it can help identify potential issues early on.
Keep a separate logbook for each incubation batch and include information like temperature readings, humidity levels, candling observations, and any other notable events. This will make it easier to track progress and spot any problems before they become critical.
Recognizing Signs of Imminent Hatching
As you approach the end of incubation, it’s essential to be aware of visual cues indicating imminent hatching. Around 24-48 hours before hatching, ducklings will start showing increased movement inside the egg. You may notice them stirring, bumping into the shell walls, or even jumping up and down.
One of the most significant signs is pip attempts. Pipping is when the duckling starts to break through the shell with its beak. This usually begins around 24 hours before hatching. Look for tiny cracks on the surface of the egg; these are a clear indication that your duckling is preparing to emerge. Beak protrusion is another critical sign, where you can see the tip of the beak poking out of one end of the shell.
Keep in mind that every duckling develops at its own pace, so it’s not uncommon for some to pip before others. If you notice these visual cues, make sure to provide a safe and stable environment for your ducklings as they prepare to hatch. This will ensure a smooth transition from egg to brooder.
Tips for Successful Duck Egg Incubation
To ensure a healthy hatch, it’s essential to provide optimal conditions and follow some crucial tips during duck egg incubation. Here are some expert-approved guidelines to get you started.
Best Practices for Optimal Incubation Conditions
As you’ve learned throughout this guide, maintaining optimal incubation conditions is crucial for successful duck egg hatching. Let’s recap the importance of temperature, humidity, and ventilation.
Temperature plays a significant role in embryo development, with most duck breeds requiring an ideal temperature range between 99°F to 100°F (37°C to 38°C). Maintaining a consistent temperature throughout the incubation period is essential. To ensure this, you can use an accurate thermometer or a digital egg incubator with built-in temperature control.
Humidity also requires careful monitoring, typically ranging from 50% to 60%. A sudden drop in humidity can cause embryo failure or even death. Ensure proper ventilation by allowing for air exchange between the incubation chamber and the external environment. This helps prevent stagnation of CO2 and moisture buildup.
Remember to monitor temperature and humidity levels regularly, making adjustments as necessary to maintain optimal conditions. Proper incubation will give your duck eggs the best chance at successful hatching, reducing stress on both you and the developing embryo.
Common Mistakes to Avoid in Incubation
When incubating duck eggs, it’s easy to make mistakes that can lead to unsuccessful hatchings or delayed hatching times. One of the most common errors is setting the temperature too high or too low. This can be caused by a faulty thermometer or incorrect temperature settings on the incubator.
Ideally, the temperature should range between 99-100°F (37-38°C) for the first 24 days and then increase to 101-102°F (39-40°C) for the remaining days. A sudden drop in temperature can also cause issues, so it’s essential to ensure that your incubator has a reliable temperature control system.
Another common mistake is not providing enough humidity or failing to maintain proper ventilation. The ideal relative humidity level for duck eggs is between 50-60%. Without sufficient moisture, the egg may dry out and cause problems during hatching.
To correct these issues, make sure to calibrate your thermometer regularly and use a reliable temperature control system. Also, ensure that your incubator has a built-in humidistat or a separate humidity control unit to maintain the optimal relative humidity level. Regularly check on the eggs and provide additional ventilation if necessary. By avoiding these common mistakes, you’ll increase your chances of successful hatching and happy, healthy ducklings.
Frequently Asked Questions
How can I ensure my incubation setup is providing the optimal temperature range for duck egg incubation?
Maintaining a consistent temperature between 99°F (37°C) and 100°F (38°C) is crucial. Invest in an accurate thermometer, such as a digital thermometer with high accuracy, to monitor your incubator’s temperature. Regularly check the temperature readings to ensure it stays within this optimal range.
Can external factors like humidity and air quality significantly impact my duck egg incubation success?
Yes. Factors like humidity levels and ventilation can affect the hatching process. Maintain proper ventilation in your incubator to prevent moisture buildup, which can lead to mold growth or other issues. Monitor humidity levels between 50-60% for optimal results.
How do I recognize signs of imminent hatching, and what should I expect during this stage?
Recognize signs like pip formation (small holes in the shell), cessation of pipping, and visible beak activity. During this period, it’s essential to monitor your eggs closely, maintaining a stable temperature and humidity environment.
Can breed-specific incubation times vary significantly, or will most duck breeds have similar hatching times?
While general guidelines for incubation time exist (28 days for most duck breeds), individual breeds may exhibit variations due to factors like genetic predispositions. Research the specific incubation needs of your duck breed to ensure optimal results.
What should I do if my incubator’s temperature drops or spikes, and how can I prevent these issues in the future?
If the temperature fluctuates, act quickly to restore the optimal range. Regularly inspect and maintain your incubator to prevent issues like faulty thermostats or incorrect setup. Keep a record of temperature fluctuations to identify potential problems early on.