
Chicken lice and mites can be a frustrating problem for any backyard chicken keeper. These pesky parasites can cause stress, discomfort, and even health issues for your flock. But don’t worry, getting rid of them is entirely possible with the right treatment and prevention strategies in place. In this comprehensive guide, we’ll walk you through the causes, symptoms, and long-term management of chicken lice and mites, as well as provide effective treatment options to ensure a healthy and happy coop.
We’ll cover everything from identifying the signs of an infestation to implementing prevention measures that will keep these unwanted critters at bay. Whether you’re a seasoned backyard farmer or just starting out, this article is packed with practical advice and expert tips to help you tackle chicken lice and mite infestations once and for all.
Understanding Chicken Lice and Mites
Let’s dive into the world of poultry pests, starting with a fundamental understanding of chicken lice and mites: what they are, how they infest, and why it’s essential to address them.
What are Chicken Lice and Mites?
Chicken lice and mites are two common external parasites that can infest chickens. These tiny creatures feed on the feathers, skin, and blood of their hosts, causing discomfort and potentially leading to health issues.
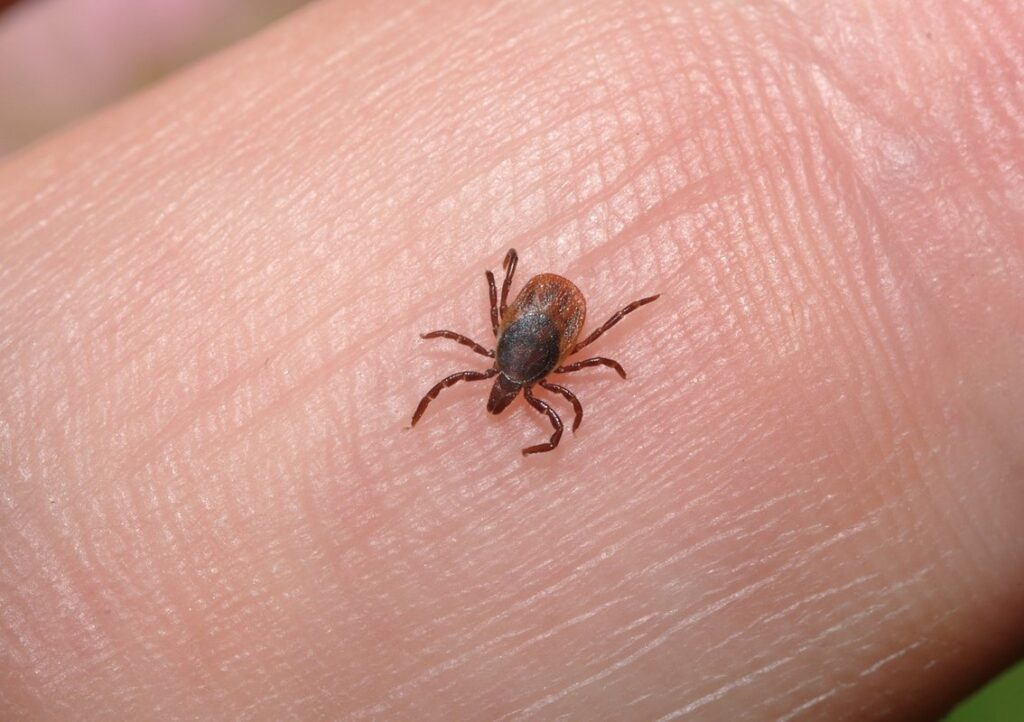
Let’s start with chicken lice (Goniocotes gallinae). They’re wingless insects that have a flat, oval body, usually 1-2 millimeters in length. Female lice lay eggs on the chicken’s feathers or skin, which hatch after about five days into nymphs. These young lice go through four molts before reaching adulthood and are capable of laying their own eggs.
On the other hand, mites (Acari) have eight legs and a more elongated body shape than lice. They’re also much smaller, typically measuring 0.1-0.2 millimeters in length. Mites feed on the chicken’s skin, blood, or feathers, and their life cycle is shorter than that of lice. Adult mites lay eggs on the host’s skin, which hatch into six-legged larvae after a few days.
When left unchecked, both lice and mites can cause anemia, stress, and even secondary infections in chickens. It’s essential to recognize the signs of infestation early on to prevent further complications.
Symptoms of Infestation
When you suspect that your chickens are infested with lice or mites, it’s essential to look out for common symptoms. These can be subtle at first but will become more apparent as the infestation worsens.
One of the most noticeable signs is excessive scratching. You’ll see your chickens frantically pecking at their feathers, trying to get rid of the pesky parasites. This behavior can lead to stress, anxiety, and even injury to the birds’ skin. Keep an eye out for areas with intense scratching activity – this could be a sign that lice or mites are present.
Another common symptom is feather loss. Mites and lice feed on your chickens’ blood, causing them to lose their feathers rapidly. You may notice bald spots or patches of missing feathers around the bird’s neck, back, or tail area. In severe cases, this can lead to reduced egg production in laying hens.
If you suspect an infestation, monitor your birds for these symptoms and take prompt action.
Causes of Chicken Lice and Mite Infestations
Chicken lice and mites can infest your flock due to poor ventilation, overcrowding, and inadequate cleaning, as well as direct contact with an already-infested coop. Understanding these causes is key to preventing future infestations.
Risk Factors for Infestation
When it comes to preventing chicken lice and mite infestations, understanding the risk factors is crucial. One of the main contributors to an infestation is poor coop hygiene. This can be due to a lack of regular cleaning or failing to remove soiled bedding material promptly. A dirty coop creates an ideal environment for pests to thrive.
Inadequate ventilation in your chicken coop is another significant risk factor. When air doesn’t circulate properly, it allows moisture and ammonia buildup, creating a perfect breeding ground for mites. This can lead to severe respiratory issues for both humans and birds if not addressed promptly.
Regular checks are essential to identifying any potential problems early on. Schedule regular inspections of your coop and make it a habit to inspect your chickens’ plumage regularly as well. Be sure to examine the nesting boxes, roosting areas, and under floor mats where lice and mites often hide.
How Chickens Get Infested
Chickens can get infested with lice and mites through various means, making it essential to understand the causes of these infestations. One common way chickens become infected is by direct contact with an already infested bird. If you introduce a new chicken to your flock without proper acclimation or quarantine, there’s a high likelihood that the newcomer will bring unwanted guests along.
Another way chickens get infested is through exposure to contaminated environments. This can happen if you’re not maintaining a clean coop and run area. Lice and mites thrive in dirty conditions, so if your chicken’s living space isn’t regularly cleaned and disinfected, they’ll be more susceptible to these pests.
To prevent the spread of lice and mites, make sure to quarantine new chickens before introducing them to your flock, and thoroughly clean and disinfect their coop and run area on a regular basis. Also, inspect your birds regularly for signs of infestation, such as excessive preening or scratching, and take prompt action if you notice any issues.
Prevention Strategies
To keep those pesky critters at bay, it’s crucial to learn effective prevention strategies that can help minimize the risk of infestation and ensure a healthier flock. Here are some valuable tips to get you started.
Keeping Your Coop Clean and Sanitized
Maintaining a clean and sanitized coop environment is crucial in preventing infestations of chicken lice and mites. Regular cleaning schedules are essential to keep the coop free from debris, dust, and dirt that can attract these unwanted visitors. Aim to clean the coop at least once a week, paying attention to areas around nesting boxes, roosts, and feeders.
Effective waste management practices also play a significant role in keeping your coop clean. Remove soiled bedding material regularly and replace it with fresh, dry bedding such as straw or pine shavings. Avoid using wet or damp materials that can harbor bacteria and create an ideal environment for lice and mites to thrive.
Additionally, consider implementing a deep cleaning schedule every 2-3 months to thoroughly disinfect the coop. This involves scrubbing all surfaces with a solution of 1 part white vinegar to 9 parts water, paying particular attention to areas around the roosts and nesting boxes where droppings are most concentrated. By prioritizing cleanliness and sanitation in your coop, you can significantly reduce the risk of lice and mite infestations, creating a healthier environment for your chickens.
Monitoring for Infestations
Regular checking and monitoring are crucial to detect infestations early on. Set aside time each week to inspect your flock thoroughly. Start by visually examining their feathers, looking for signs of lice or mites such as eggs, live insects, or dark specks that indicate feeding activity.
During these inspections, also observe your chickens’ behavior. Changes in appetite, lethargy, or excessive preening may be indicative of an infestation. Pay attention to any unusual scratching or rubbing against surfaces, which can be a sign of discomfort caused by parasites.
To monitor for changes in behavior, keep a close eye on your flock’s overall health and alertness. A healthy chicken is active and curious, whereas one with lice or mites may appear lethargic or withdrawn. If you notice any unusual behavior or suspect an infestation, consult with a veterinarian experienced in poultry care to confirm the presence of parasites.
Conduct regular checks on your chickens’ living quarters as well, looking for signs of eggs, feces, or molting patterns that could indicate an infestation. This proactive approach will allow you to catch potential problems before they become severe and difficult to manage.
Treatment Options
Now that we’ve discussed prevention and identification, let’s talk about effective ways to get rid of chicken lice and mites for good. We’ll explore various treatment options in this section.
Medications and Treatments
When it comes to getting rid of chicken lice and mites, medications and treatments are often necessary to ensure complete eradication. Topical applications are a popular choice for treating chicken infestations. Ivermectin and permethrin sprays or shampoos can be applied directly to the birds’ feathers, paying particular attention to areas where the parasites tend to congregate. These products typically work quickly, but it’s essential to follow the product instructions carefully to avoid any adverse effects.
Powdered treatments are another option for tackling chicken lice and mites. Diatomaceous earth (DE) is a popular choice as it dehydrates the pests, causing them to die. Sprinkle DE powder on your chickens’ bedding, feed, or even directly onto their feathers for maximum effectiveness. When using powders, ensure proper ventilation in the coop to prevent inhalation risks.
Feed additives can also be used to get rid of chicken lice and mites. Certain products containing sulfur or rotenone can be added to your flock’s feed, but always consult with a veterinarian before introducing any new supplements to their diet. These additives often take longer to work than topical treatments, so patience is essential.
Remember that medication and treatment choices should be made in consultation with a veterinarian to ensure the health and well-being of your chickens. Always follow product instructions carefully, and consider combining multiple treatment methods for optimal results.
Natural Remedies and Home Treatments
When it comes to getting rid of chicken lice and mites naturally, there are several effective remedies you can try at home. One popular option is diatomaceous earth, a powdery substance made from the fossilized remains of tiny aquatic organisms. This natural powder works by dehydrating the lice and mites, causing them to die off quickly. Sprinkle it liberally on your chicken’s feathers, paying particular attention to areas around the neck and under the wings.
Another option is apple cider vinegar, which can be added to your chicken’s drinking water or used as a spray to help repel lice and mites. Mix one part vinegar with four parts water in a spray bottle, and spritz it on your chicken’s feathers several times a day. Essential oils such as tea tree oil, lavender oil, and eucalyptus oil can also be effective at repelling these pests. Add a few drops to your chicken’s bathwater or sprinkle some on their feathers after bathing.
It’s essential to note that while these remedies can help alleviate symptoms, they may not completely eliminate the infestation. Always work with a veterinarian to determine the best course of treatment for your flock.
Managing Infestations
Now that you’ve identified a lice or mite infestation, it’s time to take action and prevent further discomfort for your birds. This next step will walk you through effective methods of managing the problem.
Isolating Affected Birds
When you suspect that your flock has been infested with chicken lice and mites, it’s essential to take immediate action. However, simply treating the affected birds might not be enough to eliminate the problem completely. To prevent further spread of the infestation and allow for effective treatment, isolating the affected birds is crucial.
To start, identify the birds that are showing symptoms such as excessive scratching, feather loss, or restlessness. Once you’ve isolated these birds, clean and disinfect their living quarters thoroughly with a solution of one part white vinegar to nine parts water. This will help kill any remaining lice and mites on surfaces.
Isolate the affected birds in a separate coop or area, away from the rest of the flock. Provide them with fresh food, water, and bedding that has been disinfected. Monitor their condition closely and treat them promptly if you notice any improvement. This will help prevent re-infestation and ensure that your entire flock is healthy again. Regularly inspecting your birds and cleaning their living quarters will also help maintain a lice- and mite-free environment.
Re-Treatment and Follow-Up Care
Getting rid of chicken lice and mites requires more than just one treatment. It’s essential to monitor for signs of recurrence and take repeated treatments as needed to ensure the infestation is fully cleared. After the initial treatment, keep a close eye on your flock for any new symptoms, such as excessive scratching or fluffing.
During this time, it’s crucial to perform regular checks on your birds’ bodies, especially around their necks, backs, and bellies, where lice and mites tend to congregate. Check the comb, wings, and vent areas daily, looking for signs of new infestation, such as tiny moving specks or red spots.
If you notice any of these symptoms, it’s time to re-treat your flock. Repeat the treatment as directed on the product label, taking care to follow all safety precautions and application guidelines carefully. Remember that each type of treatment may have different requirements for retreatment, so be sure to read and follow the instructions carefully.
Keep in mind that prevention is key. Regularly inspecting your birds and taking prompt action if you notice any signs of infestation can help prevent re-infestation from occurring in the first place.
Long-Term Prevention
Now that you’ve tackled the immediate infestation, let’s focus on preventing future outbreaks by creating a healthy environment for your flock to thrive. Here, we’ll discuss essential steps.
Regular Health Checks
Regular health checks are crucial for identifying potential issues early on with your chickens. As their caregiver, it’s essential to keep a close eye on them and monitor for changes in behavior or physical condition. This may seem simple, but it can be the difference between treating a minor issue before it becomes something more severe.
Pay attention to any unusual behavior, such as increased scratching, lethargy, or excessive dust bathing. These could be indicative of underlying health problems that need addressing. Also, keep an eye on changes in their physical condition, like weight loss or gain, droopy wings, or matted feathers. If you notice anything out of the ordinary, consult with a veterinarian experienced in poultry care to rule out any serious issues.
Regular checks can also help prevent lice and mites infestations by catching potential problems early on. For example, if your chickens are consistently pecking at their own feathers or showing signs of irritation, it could be a sign that they’re dealing with an external parasite issue. By staying vigilant and conducting regular health checks, you can minimize the risk of pest infestations and ensure the overall well-being of your flock.
Continuous Coop Maintenance
Maintaining cleanliness and hygiene within the coop is essential for preventing future infestations of chicken lice and mites. This doesn’t mean stopping at just a quick clean every now and then; it requires ongoing effort to keep your coop free from debris, dust, and other substances that can attract pests.
A thorough understanding of the coop’s layout and design will help identify areas where dirt and grime tend to accumulate. These are typically around nesting boxes, roosts, and feeding troughs – places where birds congregate regularly. Regularly disinfecting these areas using a solution of water and white vinegar can significantly reduce the likelihood of infestation.
Daily tasks should include removing soiled bedding material, cleaning food and water containers, and dusting surfaces with a dry cloth. It’s also crucial to maintain good air circulation within the coop by ensuring adequate ventilation – this helps eliminate moisture that mites thrive in.
A well-planned maintenance routine is necessary for long-term prevention. Allocate specific tasks to each day of the week or month, such as cleaning out manure on Tuesdays and dusting surfaces on Fridays. This structured approach will help prevent infestations from occurring in the first place.
Frequently Asked Questions
How Long Does it Take to See Results After Treating Chicken Lice and Mites?
Treatment for chicken lice and mites requires patience, as you may not see immediate results. It can take several weeks to fully eliminate the infestation, especially if left untreated or if preventative measures were inadequate. Monitor your flock closely during this period and adjust treatment plans accordingly.
Can I Use Natural Remedies Alone to Get Rid of Chicken Lice and Mites?
While natural remedies like diatomaceous earth, essential oils, and herbal treatments can be effective against chicken lice and mites, they might not always be enough. In severe cases or persistent infestations, it’s recommended to use a combination of natural and chemical treatments for optimal results.
How Often Should I Monitor My Flock for Signs of Infestation?
Regular monitoring is crucial in preventing and managing chicken lice and mite infestations. Check your flock daily for symptoms like excessive scratching, comboloring, or unusual molting patterns. If you notice any suspicious signs, immediately isolate the affected bird and begin treatment.
Can Chicken Lice and Mites Transfer to Humans?
While unlikely, it is possible for chicken lice and mites to infest humans, especially those handling chickens frequently. Keep your coop clean, wear protective clothing when handling birds, and wash hands thoroughly after interactions with the flock to minimize this risk.
What If My Flock Continues to Get Infested Despite Treatment?
If repeated treatments fail to resolve the issue or if you notice a persistent pattern of infestations, it may be due to underlying coop hygiene issues, inadequate ventilation, or undiagnosed health problems. Conduct regular coop maintenance and consult with a veterinarian to determine the root cause and implement corrective measures.