
Are you tired of manually feeding your chickens every day? Do you wish you had more free time to focus on other aspects of your backyard poultry-keeping experience? Well, you’re in luck because building a DIY automatic chicken feeder is easier than ever. Not only will it save you time and energy, but it’s also a cost-effective solution that can be tailored to meet the specific needs of your flock. In this comprehensive guide, we’ll walk you through the benefits of an automatic chicken feeder, explore different types to choose from, and provide step-by-step assembly instructions so you can get started right away. Whether you’re a seasoned poultry keeper or just starting out, our guide will show you how to create a efficient and reliable automatic chicken feeder that will simplify your daily routine and give you more time to enjoy the rewards of raising chickens.
Benefits and Advantages of Automated Feeders
Automated feeders offer a range of benefits, from reduced labor to improved chicken health, which we’ll explore in more detail below. Let’s take a look at how automated feeders can simplify your life as a backyard chicken owner.
Reduces Labor Costs and Time
As you consider automating your chicken feeder, one of the most significant benefits is the reduction in labor costs and time. Gone are the days of waking up every morning to refill feeders, only to have them emptied again by the afternoon.
With an automated feeder, you can save a substantial amount of time that was previously spent on manual feeding. This extra time can be redirected towards more important aspects of chicken care, such as cleaning coops, monitoring health, and even working on other homesteading projects.
Automated feeders also minimize labor costs associated with frequent feed refills. No more worrying about purchasing and storing large quantities of feed, or the cost of fuel for multiple trips to the supplier. By automating this process, you can significantly reduce your expenses and allocate resources more efficiently.
To give you a better idea of just how much time and money you can save, consider that an average backyard flock requires 3-4 pounds of feed per day. With an automated feeder, you can easily keep track of consumption and make adjustments as needed, ensuring your birds always have access to fresh food without the need for constant human intervention.
Ensures Consistent Feeding Schedules
Maintaining a consistent feeding schedule is crucial for the health and well-being of your chickens. A regular routine helps prevent overeating and ensures that each bird gets its fair share of food. However, manually distributing feeders can be time-consuming and prone to errors.
Automated chicken feeders come in handy here, as they allow you to set a consistent feeding schedule. This means that your birds will receive the same amount of food at the same time every day, regardless of whether you’re home or not. For instance, you can program an automated feeder to dispense a specific amount of feed twice a day.
Having a consistent feeding schedule also helps in managing egg production. Chickens are creatures of habit and tend to follow a routine. By providing them with a regular supply of food, you can encourage them to lay eggs at the same time every day. This makes it easier for you to collect eggs and ensures that your birds stay healthy.
By investing in an automated feeder, you’ll be able to create a consistent feeding schedule without much effort or hassle.
Improves Chicken Health and Productivity
When you introduce automated feeders into your backyard chicken-keeping setup, one of the most significant benefits is improved chicken health and productivity. Automated feeders eliminate the stress of competition for food, a common problem when multiple birds are vying for access to the same feeder. By providing each bird with its own feeding schedule and portion, you can significantly reduce stress levels in your flock.
Improved nutrition is another key advantage of automated feeders. With an automated system, you can ensure that each bird receives the right amount of food at the right time, every day. This is especially beneficial for young or growing birds, as well as older hens who may require more frequent feeding to maintain their health and vitality. By providing a steady supply of fresh, nutritious feed, you’ll be able to keep your birds healthy and thriving.
By making these simple adjustments, you can significantly boost the overall health and productivity of your flock. For example, studies have shown that automated feeding systems can reduce mortality rates in chickens by up to 20% compared to traditional feeding methods. By investing in an automated feeder, you’ll be giving your birds the best possible chance at a long, happy, and healthy life.
Choosing the Right Automatic Chicken Feeder
When selecting a DIY automatic chicken feeder, it’s crucial to consider factors such as your flock size and feeding schedule to ensure you choose the right one for your needs. Let’s dive into these essential considerations together!
Types of Automated Feeders Available
When it comes to automating your chicken’s feeding process, there are several types of feeders available. Let’s explore some of the most popular options.
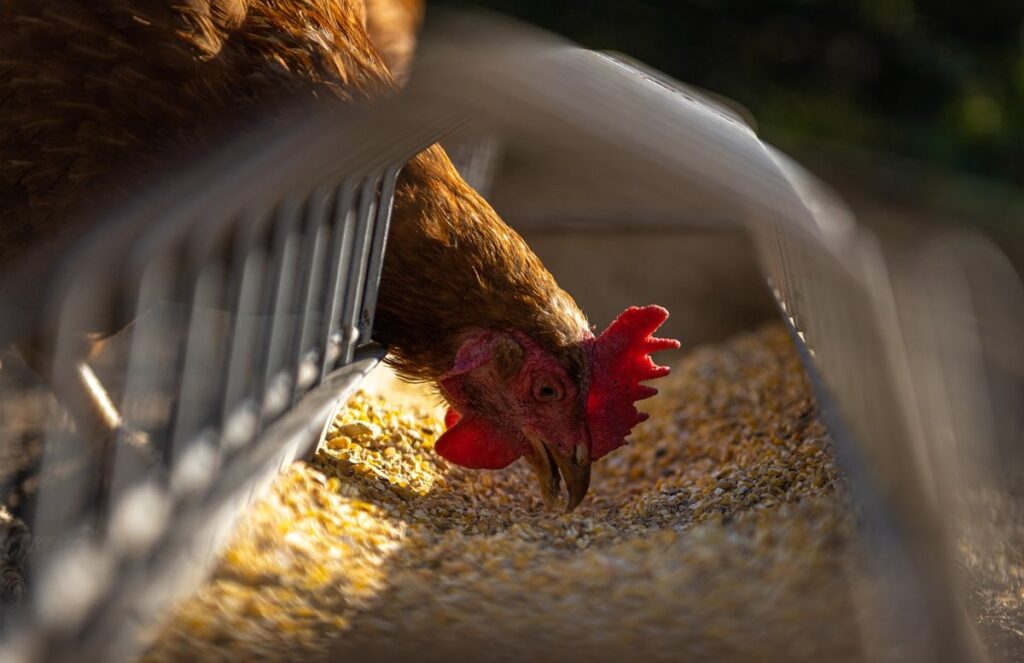
Gravity-fed automated feeders use a simple yet effective approach. These feeders rely on gravity to dispense feed as needed. A hopper stores the feed, and when the chickens eat from it, the feed level drops, triggering the dispenser to refill the tray. This type of feeder is great for small flocks and works well in areas with stable temperatures.
Motorized automated feeders take a more high-tech approach. These feeders use electric motors to dispense feed at set intervals or when triggered by sensors. They often come equipped with features like timers, remote monitoring, and adjustable feeding schedules. However, they require electricity and can be more expensive than gravity-fed options.
Sensor-activated automated feeders are the most advanced type of feeder available. These feeders use sensors to detect when a chicken is approaching or eating from the feeder. When activated, the sensor triggers the dispenser to release feed. This type of feeder ensures that your chickens always have access to fresh food and can be programmed for specific feeding schedules.
For small backyard flocks, gravity-fed automated feeders are often the most practical choice due to their simplicity and low maintenance requirements. However, if you’re looking for a more high-tech solution or need to monitor your flock remotely, motorized or sensor-activated feeders may be a better fit.
Considerations for Small vs. Large Flocks
When it comes to choosing an automatic chicken feeder for your flock, one important consideration is the size of your operation. Whether you have a small backyard flock of 5-10 chickens or a large commercial farm with hundreds of birds, the right feeder can make all the difference.
For small flocks (less than 20 birds), space and budget are often major concerns. A compact automatic feeder that’s easy to install and doesn’t require a lot of floor space is ideal. Look for models that have adjustable feeding ports and can be set to feed at specific times of day. This will help prevent waste and ensure your chickens get the right amount of food.
On the other hand, large flocks (20+ birds) require more robust feeders that can handle high volumes of food. You’ll want a feeder with multiple feeding stations or ports to reduce congestion and competition among birds. Also, consider a feeder with advanced features like automated cleaning systems and monitoring capabilities to ensure your flock’s health and productivity.
Consider the behavior of your chickens too – some breeds are prone to foraging and may require more space to move around while eating.
Key Features to Look for in an Automatic Feeder
When selecting an automatic chicken feeder, there are several key features to look for to ensure it meets your flock’s needs. First and foremost, consider the capacity of the feeder. How many birds do you have? A feeder with a larger capacity can be more cost-effective in the long run, but if it’s too big, it may not fit in your coop or be prone to spoilage.
Next, think about the type of feed your chickens require. Some automatic feeders are designed specifically for layer feed, while others are better suited for starter feed or scratch grains. Make sure the feeder you choose can accommodate the feed type your birds need.
Additionally, durability is a crucial factor in choosing an automatic chicken feeder. Look for one made from high-quality materials that can withstand the elements and heavy use. You don’t want to have to replace the feeder frequently, which can be expensive and time-consuming.
When evaluating these features, also consider factors such as ease of filling, cleaning, and maintenance. A feeder with a simple design and easy-to-use mechanisms will save you time and effort in the long run.
Building Your Own DIY Automatic Chicken Feeder
Now that you have a solid understanding of the design and materials needed, let’s dive into building your very own DIY automatic chicken feeder. We’ll cover the step-by-step process in detail.
Materials Needed for a Basic Feeder
To build a basic automatic chicken feeder, you’ll need to gather the right materials. Start with the core components that will handle food distribution and motorization. For this purpose, PVC pipes are an excellent choice due to their durability, affordability, and ease of modification.
You’ll require approximately 10-15 feet of 1-inch PVC pipe for the main structure, as well as smaller sections for branches and connections. These can be sourced from a local hardware store or online retailer.
Next, you need a motor that will power the feeder’s operations. A low-voltage DC motor (around $20-$30) is suitable for small-scale projects like this one. Make sure to select a motor with adjustable speed control to accommodate varying quantities of feed.
Sensors are another crucial component in an automatic chicken feeder. You can opt for either a photoelectric sensor or an ultrasonic sensor, each priced between $10-$25 depending on the brand and model. These sensors will detect when food levels are low and trigger the motor to dispense more feed.
Lastly, you’ll need some electrical components like wires, switches, and power sources. A 9-volt battery pack (around $5-$10) should suffice for powering the feeder.
Step-by-Step Instructions for Assembly
To assemble your DIY automatic chicken feeder, start by carefully unpacking all the components and laying them out on a flat surface. Make sure you have all the necessary tools and hardware, including a screwdriver, drill, and wire strippers.
Begin by attaching the hopper to the main body of the feeder using the provided screws. Ensure it is securely fastened with a minimum of 1/4 inch of clearance from the top. Next, connect the sensor wires to the Arduino board according to the diagram, taking note of polarity.
Measure and cut the PVC pipes to the correct length for the feeding tubes, leaving a small gap at the end for easy cleaning. Attach the tubes to the feeder’s outlets using pipe fittings and glue. Finally, power up your feeder and test its functionality by manually dispensing feed through the tubes. Monitor the system for 24 hours to ensure it is working correctly and make any necessary adjustments. Regularly inspect the feeder’s components for wear and tear, making replacements as needed to maintain optimal performance.
Tips for Customizing Your Feeder
One of the greatest advantages of building your own DIY automatic chicken feeder is the ability to customize it to suit your specific needs and preferences. Whether you’re looking for a more efficient feeding system or want to accommodate different feed types, there are several ways to tailor your feeder to meet your requirements.
Consider adding a timer to your feeder to ensure that your chickens receive their meals at set times each day. This can be particularly useful if you have a busy schedule and may not always be able to attend to your flock’s needs on time. You can use an electronic or mechanical timer, depending on your preference and the complexity of your design.
You can also experiment with different feed types, such as using a combination of pellets and grains, or adding supplements like oyster shells for egg production. To accommodate these variations, you may need to adjust the feeder’s capacity or add separate compartments for each type of feed.
Troubleshooting Common Issues with Automatic Feeders
We’ve all been there: stuck with a malfunctioning automatic chicken feeder, wondering what’s gone wrong. In this section, we’ll tackle common issues and offer troubleshooting solutions to get your feeder back up and running smoothly.
Identifying and Resolving Blockages and Clogs
Common blockages and clogs can arise from several sources. For one, debris such as twigs and leaves can accumulate within the feeder’s mechanism. Moreover, grain particles may become jammed, especially if the feed is damp or moist.
To prevent these blockages, it’s crucial to regularly inspect your feeder for any signs of clogging. Check the hopper for any debris accumulation and ensure that the feeding ports are clear of obstructions. Cleaning the feeder with a soft brush and mild detergent can help maintain its functionality.
In case you encounter a clog, turn off power supply to the feeder before attempting to resolve the issue. You may need to remove any blockages by hand or use a screwdriver to gently dislodge stuck particles. For instance, if grains are jammed in the feeding ports, try soaking them with water for a few minutes to loosen their grip.
Regular maintenance and prompt troubleshooting can help minimize downtime and ensure your chickens’ continued access to food.
Addressing Feeder Calibration and Settings
Calibrating and setting up an automated feeder is crucial to ensure that your chickens receive the right amount of food at the right time. However, many DIY automatic chicken feeders face issues due to incorrect calibration or settings. To address these problems, it’s essential to understand how different chicken behaviors and environmental factors affect feeding patterns.
For instance, some breeds are naturally more active during certain times of the day, which can impact their eating habits. If your feeder is set up for a breed that tends to eat less in the morning, you may need to adjust the calibration to account for this behavior. Similarly, environmental factors like temperature and humidity can also influence feeding patterns.
To troubleshoot issues related to feeder calibration, start by monitoring your chickens’ eating habits and adjusting the settings accordingly. You can do this by tracking their food intake over a period of time or observing their behavior during meal times. Make adjustments gradually and monitor the results to ensure that your feeder is providing the right amount of food for your flock. By taking these steps, you can optimize your automated feeder’s performance and provide the best possible care for your chickens.
Maintenance and Cleaning Schedule
Regular maintenance and cleaning are crucial to ensure the optimal performance and longevity of your automatic chicken feeder. To keep it running smoothly, we recommend setting aside some time each week for a quick clean and check-up.
Here’s a suggested schedule:
* Every Sunday evening: Remove any leftover feed from the hopper, empty the waste container, and give the feeder a quick wipe-down with a damp cloth.
* Every two weeks: Perform a deeper clean by scrubbing the feeder’s interior with a gentle detergent and warm water. Rinse thoroughly and let it air dry before refilling.
* Every 4-6 weeks: Inspect the feeder’s mechanical components, such as gears and motors, for signs of wear or corrosion. Lubricate any moving parts and replace worn-out parts if necessary.
Additionally, monitor your flock’s behavior and adjust your cleaning schedule accordingly. If you notice an increase in dust or debris accumulation, consider increasing the frequency of cleanings. Remember to also keep your feeder away from direct sunlight and moisture to prevent damage. By following this simple maintenance routine, you’ll be able to enjoy a reliable and efficient automatic chicken feeder for years to come.
Installing and Operating Your Automatic Chicken Feeder
Now that you’ve built your automatic chicken feeder, it’s time to learn how to install and operate it safely and efficiently in your backyard coop. This section covers essential setup steps and maintenance tips.
Placement and Orientation Tips
When it comes to placing and orienting your automatic chicken feeder, there are several factors to consider to ensure optimal performance and safety for both your birds and the feeder itself. Start by choosing a location near the coop that allows easy access for filling and maintenance. Consider positioning the feeder at least 10-15 feet away from any walls or corners of the coop to prevent predators from jumping onto it.
It’s also essential to think about predator protection when placing your feeder. For example, if you live in an area with raccoons or foxes, position the feeder under a covered area or use a fence to block access. You can also add a motion-activated sprinkler nearby to deter predators. In terms of orientation, make sure the feeder is facing away from prevailing winds and rain to prevent moisture buildup and keep your birds’ food fresh.
By carefully considering placement and orientation, you’ll be able to provide your flock with a reliable source of food while keeping them safe from potential threats. Remember to regularly inspect the feeder’s location and adjust as needed to ensure optimal performance and safety for both the feeder and your birds.
Setting Up Timers and Schedules
Setting up timers and schedules is crucial to ensure consistent feeding times for your chickens. This step not only helps maintain their health but also minimizes waste by preventing overeating.
To start, most automatic chicken feeders come with a built-in timer or scheduling feature that allows you to set specific feeding times. You can program the feeder to dispense food at set intervals, such as morning and evening, which is ideal for chickens.
When setting up your timer, consider the following:
* Set multiple feeding sessions if your flock requires it.
* Schedule feedings around the time when your chickens are most active (usually early morning or late afternoon).
* Adjust the feeding schedule to accommodate different times of year (e.g., more frequent feedings during colder months).
Remember to test and adjust the timer regularly to ensure it’s working correctly. Monitor your chicken’s behavior, appetite, and overall health to make necessary adjustments to their feeding schedule. This will help you strike a balance between providing enough food and preventing overeating.
Monitoring and Adjusting Feeding Patterns
Monitoring and adjusting feeding patterns is crucial to ensure your chickens receive the right amount of nutrients at the right time. As they grow, their nutritional needs change, and environmental factors can impact their appetite. Start by observing your flock’s behavior, noting any changes in eating habits, energy levels, or overall health.
Pay attention to seasonal variations: during hot summer months, chickens may eat more frequently to stay hydrated. Conversely, in winter, they may need less food due to reduced activity. Adjust the feeder settings accordingly to account for these fluctuations. Also, consider the age of your birds: young chicks require more frequent feedings than mature hens.
Keep an eye on feeder usage patterns: if you notice the feeder is being depleted rapidly, it may indicate excessive consumption or perhaps a problem with the feeder itself. Conversely, if the feeder remains full for too long, it could signal that your chickens are not eating as much as expected. Adjust the feeding schedule or feeder capacity as needed to maintain optimal nutrition and prevent overeating or malnutrition.
Conclusion: Benefits of DIY Automatic Chicken Feeders
Now that you’ve built your very own automatic chicken feeder, let’s recap on the benefits you’ll enjoy from making this project a reality for yourself. It’s time to see the rewards in action!
Recap of Key Points and Takeaways
In conclusion, we’ve covered the importance and benefits of DIY automatic chicken feeders for backyard chicken keepers. Let’s recap the key points to ensure you’re on the right track.
As discussed earlier, automated feeders can help reduce stress and labor associated with manual feeding, saving you time and energy to focus on other aspects of chicken keeping. By implementing an automatic feeder, you’ll also enjoy improved feeding accuracy and reduced waste, ensuring your flock is well-fed and healthy.
Moreover, automated feeders provide flexibility in meal scheduling and dispensing, allowing you to customize the feeding times and amounts according to your flock’s needs. This feature is particularly beneficial for chicken keepers with busy schedules or those who need to adjust their feeding routine due to changes in weather or season.
In terms of cost-effectiveness, building a DIY automatic feeder can be a cost-saving solution compared to purchasing commercial feeders. With some basic materials and tools, you can create an efficient and reliable automated feeder that meets your flock’s needs.
To recap, here are the key takeaways:
* Automated feeders reduce manual feeding stress and labor
* Improved feeding accuracy and reduced waste
* Customizable meal scheduling and dispensing
* Cost-effective solution through DIY construction
As a chicken keeper, it’s essential to weigh these benefits against your specific needs and preferences. If you’re new to backyard chicken keeping or looking for ways to simplify your flock’s care, consider building an automatic feeder as part of your setup. With proper planning and execution, automated feeders can be a game-changer in making chicken keeping more efficient and enjoyable.
Frequently Asked Questions
Can I use a pre-made automatic chicken feeder kit or do I need to build from scratch?
You can use a pre-made automatic chicken feeder kit, but keep in mind that building one from scratch allows for customization and tailoring to your flock’s specific needs. If you choose a kit, ensure it meets your requirements and is compatible with your existing setup.
How often should I clean my automated chicken feeder to prevent bacterial growth?
Regular cleaning is crucial to maintaining your chickens’ health. Clean the feeder at least once a week, or more frequently if you notice signs of mold or bacterial growth. Use mild soap and water, then rinse thoroughly to ensure any residue is removed.
What’s the ideal ratio for filling my automated chicken feeder, and how often should I refill it?
The ideal ratio depends on your flock size and individual needs. Aim for a 2-3% daily feed intake per bird. Refill the feeder according to its capacity and your chickens’ consumption rate, usually every 1-3 days.
Can I use an automated chicken feeder with both dry and wet food, or do I need separate units?
You can use some automated feeders for both dry and wet food, but ensure they’re specifically designed for dual-use. Some models may require modifications or separate compartments for each type of food.
How do I prevent moisture buildup in my automated chicken feeder, especially during humid climates?
To minimize moisture buildup, choose an automated feeder with a built-in ventilation system or install a small fan near the feeder to improve air circulation. Also, ensure proper storage and maintenance of the feeder to prevent water accumulation.