
As a backyard chicken keeper, there’s nothing more rewarding than watching your hens become devoted mothers to their own chicks. However, recognizing the signs of broodiness in your hens can be crucial to ensuring they receive the proper care during this delicate period. Brooding hen care is not just about providing food and water; it requires attention to specific temperature requirements, humidity levels, and a safe environment for the newborn chicks to thrive.
In this article, we’ll delve into comprehensive brooding hen care techniques, from identifying signs of broodiness in your hens to assistive breeding strategies that can help promote healthy hatch rates. We’ll also cover essential tips on caring for newborn chicks, including nutritional requirements and maintaining a safe, stress-free environment for their rapid growth and development. By the end of this article, you’ll be well-equipped to provide expert-level care for your hens and their precious brood.
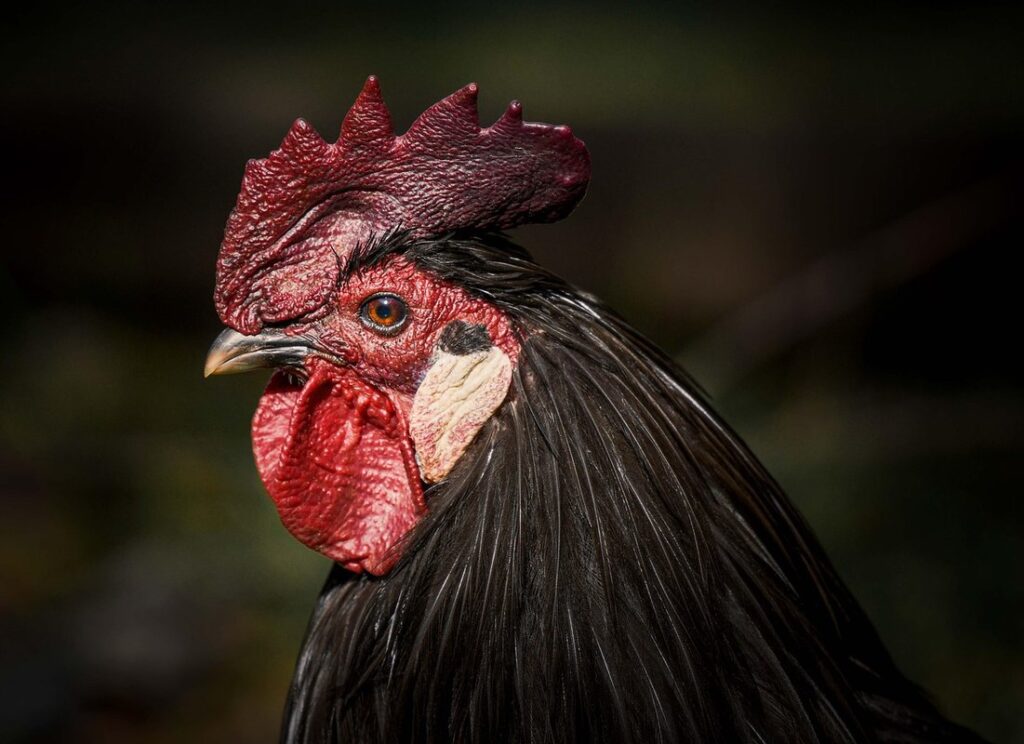
Understanding Broody Hens
As you start preparing for brooding season, it’s essential to understand the behavior and needs of your hen as she embarks on her motherly duties. This involves recognizing signs of broodiness in your flock.
Recognizing Signs of Broodiness
As a backyard chicken keeper, it’s essential to recognize the signs of broodiness in your hens. A broody hen is one that has become obsessed with incubating eggs and will fiercely defend her nest against other birds. So, how can you tell if your hen has gone broody?
One of the most common behaviors of a broody hen is piling eggs under her in the nesting box. You might notice a few eggs at first, but soon she’ll be adding to the collection, often pushing out any existing eggs to make room for new ones. Another warning sign is hissing or growling at other birds when they try to approach the nesting box.
You may also notice that your broody hen refuses to leave the nesting box, even to eat or drink. Her feathers might become ruffled and dull, and she’ll often pace back and forth in front of the nest, clucking softly to herself. If you suspect your hen has gone broody, observe her behavior closely over the next few days. If these signs persist, it’s likely she’s incubating eggs and will require some specialized care to ensure the health and well-being of both her and any potential chicks.
Causes of Broodiness in Hens
If you’ve ever kept chickens, chances are you’ve encountered a broody hen at some point. But have you ever wondered what triggers this behavior? A combination of factors can contribute to a hen becoming broody, and understanding these reasons is key to managing broodiness effectively.
One significant factor is age: hens typically start showing broody tendencies between 1-3 years old. This may seem unrelated, but as hens mature, their reproductive instincts intensify, making them more prone to wanting to incubate eggs. Genetics also play a role – some breeds, such as Orpingtons and Silkies, are naturally more inclined towards broodiness than others.
Nutritional factors can also influence a hen’s likelihood of becoming broody. For instance, a diet rich in protein can stimulate reproductive behavior. Egg production levels are another important factor: hens that produce fewer eggs may be more likely to become broody due to an imbalance between egg-laying and reproductive cycles. Finally, environmental factors like temperature, light exposure, and stress levels can all impact a hen’s likelihood of going brood. By understanding these contributing factors, you’ll be better equipped to recognize the signs of impending broodiness in your flock.
Managing a Broody Hen
When you’ve successfully hatched chicks, your broody hen may still be sitting on eggs – here’s how to handle the transition and encourage her to move back into the flock.
Providing Adequate Food and Water
When it comes to caring for a broody hen, ensuring she has access to essential nutrients and hydration is crucial. As you know, sitting on eggs can be a demanding process, and pregnant hens require more energy than usual.
A good starting point is to provide a high-quality layer feed specifically formulated for breeding hens. These feeds typically contain more protein, calcium, and other essential nutrients to support egg production and fetal development. Aim to offer about 1-2 cups of this feed per day, divided into two meals to prevent overeating.
When it comes to placing food and water near the nesting box, be mindful of disturbing your broody hen. Try placing a shallow dish of water just outside the nest, where she can easily access it without having to leave her eggs. For food, consider using a hanging feeder or a tray that allows her to eat without having to lift her head off the nest.
You can also place a small amount of treats like oats or sunflower seeds nearby to supplement her diet.
Maintaining Egg Health
During the brooding period, maintaining egg health is crucial for ensuring they remain fertile and healthy. Temperature regulation plays a significant role in this process. A consistent temperature between 50°F to 60°F (10°C to 15°C) is essential for incubation, but it’s equally important for eggs left under the hen. Make sure to maintain a similar range in the area where the broody hen lays her eggs.
Turning the eggs regularly can also help prevent breakage and promote health. A gentle turning motion should be done at least twice a day to ensure even distribution of weight and prevent pressure on any one egg. Handling eggs safely is also essential, so avoid picking them up by the ends or touching the eggs excessively with your bare hands.
To further prevent breakage, consider collecting the eggs gently in a carton lined with paper or cloth towels. Wash your hands before handling eggs to prevent bacterial contamination and use clean equipment for turning and storing the eggs. By following these simple tips, you can help maintain egg health during the brooding period.
Monitoring Fertility and Incubation Temperature
Monitoring fertility is crucial, especially during incubation, as it directly affects hatch rates; let’s dive into how to check for fertile eggs and maintain ideal temperature.
Determining Fertility
When it comes to determining fertility, you’ll want to inspect eggs regularly for signs of development. Start by gently holding each egg up to a bright light source, such as a lamp or the sun. This is known as candling, and it allows you to see through the shell and into the developing embryo.
Begin with new eggs, checking their condition before they’re even laid. Look for any visible cracks or damage – if an egg has been broken, its fertility will be compromised. Next, use a light source to observe the shape and clarity of the air sac at the large end of the egg. A fertile egg will have a cloudy or white appearance in this area.
If you’re unsure about the fertility of your eggs or want more detailed information, consider investing in an ovoscope or microscope. These tools allow for a closer look at the contents of the egg and can help identify any issues with development.
When interpreting what you see through candling or with the aid of an ovoscope or microscope, remember that it’s not always easy to determine fertility based on visual cues alone. Experience and practice will help refine your ability to identify fertile eggs.
Maintaining Optimal Incubation Temperature
Maintaining optimal incubation temperature is crucial for successful brooding. It’s essential to create an environment around the nesting box that maintains a consistent temperature between 99°F and 100°F (37°C-38°C). This can be achieved by regulating the heat sources, insulation, and maintaining humidity levels.
One effective way to regulate temperature is by using heat sources specifically designed for incubation. These devices usually have built-in thermostats that allow you to set a desired temperature range. Place the heat source in front of or above the nesting box, making sure it’s not directly touching the eggs. You can also use light bulbs, but ensure they’re at least 12 inches away from the nesting box.
It’s equally important to insulate the nesting box to prevent heat loss. Use materials like foam boards or straw to line the box and maintain a stable temperature. Don’t forget to monitor humidity levels, which should be kept between 50-60%. This can be achieved by misting water lightly into the incubator daily.
Assistive Breeding Strategies
For those who have had trouble breeding a strong and healthy flock, assistive breeding strategies can be a game-changer for your brooding hen care. This section will explore some innovative approaches to ensure success.
Artificial Insemination
When it comes to assistive breeding strategies, artificial insemination (AI) is a popular and effective method for many backyard chicken keepers. To perform AI on your flock, you’ll need some specialized equipment, including an AI pipette or syringe, a vaginal speculum, and a sperm strainer.
Timing is crucial when it comes to AI. You’ll want to inseminate hens at the peak of their fertile period, which is typically 4-6 days after egg laying has begun. To prepare your hens, make sure they’re healthy and well-nourished, as a strong immune system and optimal body condition are essential for successful breeding.
When storing semen, it’s essential to use cryogenic storage at -196°C or below to preserve its viability. When thawing, do so by placing the vial in warm water (around 35-37°C) for about 30 seconds. Once thawed, handle the semen carefully and use it immediately to avoid bacterial contamination.
To complete a successful insemination, gently restrain the hen, insert the vaginal speculum, and deposit the semen into the oviduct using the AI pipette or syringe.
Hand-Sitting or Candler-Assisted Incubation
When it comes to brooding hen care, some breeders opt for assistive breeding strategies like hand-sitting or candler-assisted incubation. These methods can help ensure the health and well-being of both the eggs and the mother hen.
Hand-sitting involves gently turning the eggs under the broody hen’s wings without disturbing her. This requires a delicate touch, as you don’t want to startle the hen or cause her to abandon the nest. To do this effectively, place your hand beneath the hen’s wing, feeling for the position of the eggs. Use your fingers to gently lift and turn each egg in turn, making sure not to disturb the surrounding feathers.
Alternatively, candler-assisted incubation uses a specialized device to simulate turning and maintain temperature consistency. This can be especially useful if you have multiple breeds or if the mother hen is not doing her job efficiently. The device typically consists of a heated base with rotating drums that move the eggs in a gentle, consistent motion, mimicking the natural turning action of a broody hen.
When using either method, it’s essential to keep an eye on the temperature and humidity levels in the incubator or nest. This will help ensure the optimal environment for healthy chick development.
Brooding Hen Care After Hatching
Now that your chicks have hatched, it’s essential to focus on their specific needs and create a safe environment for them to thrive after leaving the incubator. This section covers essential care tips for newly hatched chickens.
Initial Post-Hatch Care
When those precious little peeps emerge from their shells, it’s time to get down to business and ensure they receive the care they need to thrive. One of the most critical aspects of post-hatch care is stimulating chick respiration – this means gently rubbing some Vaseline on their beaks to encourage them to take in air. You’ll know you’ve done it right when you see them puff out their chests and start peeping.
Next up, warmth is essential for those tiny bodies to grow strong. A good brooder heat source should provide a temperature range of around 90-100°F (32-38°C) – this can be achieved using heat lamps or ceramic heat emitters. Just remember to always keep an eye on the chicks and adjust the heat accordingly, as they’ll quickly acclimate to their new environment.
Hydration is also crucial at this stage; make sure your chicks have access to fresh water at all times by placing a shallow dish in the brooder. As for feeding, it’s time to introduce starter feed – a high-protein feed specifically designed for young chickens. Start with a shallow dish and gradually increase the depth as they get accustomed to eating from a pan.
Managing the Flock Dynamics
When reintroducing newly hatched chicks into an existing flock, it’s essential to manage the dynamics carefully. A sudden introduction can be stressful for both the new birds and the established flock members. To avoid conflicts, consider a gradual introduction process.
Start by isolating the new chicks in a separate enclosure or area of the coop, allowing them to get accustomed to their new surroundings without feeling overwhelmed. Monitor the behavior of both the new birds and the existing flock closely, watching for signs of aggression, stress, or fear. If you notice any adverse reactions, slow down the introduction process or try different methods.
Adjust food and water availability as needed to ensure a smooth transition. Provide plenty of food and fresh water for all birds, but also consider separating resources temporarily to prevent competition. As the new chicks gain confidence, start integrating them into the flock under close supervision, rewarding calm behavior with treats and praise. Remember that reintroduction is an art, and every flock is different – be patient and adapt your approach as needed.
Frequently Asked Questions
Can I intervene if my hen shows signs of excessive broodiness, such as refusing to leave the nest for too long?
It’s generally recommended to let your hen’s natural instincts take over during the initial stages of broodiness. However, if you notice she’s becoming too extreme (e.g., refusing food and water), it may be necessary to intervene. Gently coax her out of the coop and provide a nutritious meal to help stabilize her condition.
How do I balance providing a safe environment for my newborn chicks with preventing over-crowding in the brooder?
It’s crucial to maintain optimal air circulation, space, and temperature control within the brooder. Aim for about 1-2 square feet of space per chick during their initial stages, gradually increasing as they grow. Monitor your chicks’ behavior and adjust the layout or size of the brooder accordingly.
Can I use a heat source other than an electric heat lamp to maintain optimal incubation temperature?
Yes. You can use alternative heat sources like heat mats or ceramic heat emitters for maintaining optimal incubation temperatures (around 99-100°F). Ensure the chosen method is safe and well-ventilated, as improper temperature control can be detrimental to chick development.
How do I differentiate between a healthy and unhealthy brood, especially during the initial post-hatch care period?
Watch out for signs of distress such as lethargy, labored breathing, or failure to nurse. Ensure proper ventilation and maintain a clean environment with adequate food, water, and shelter. Monitor your chicks’ behavior closely; any deviation from normal can indicate potential health issues that require prompt attention.
Can I use assistive breeding strategies for all breeds of chickens, including heritage birds?
While modern breeds often benefit significantly from assistive breeding methods like artificial insemination (AI) or hand-sitting, heritage breeds may have specific requirements. Some may be too aggressive or temperamental to withstand AI procedures, while others might require more hands-on assistance with mating. Research the unique needs of your flock and adapt your strategies accordingly.