
Composting chicken manure is an incredibly valuable skill for any backyard farmer, homesteader, or even urban gardener. Not only does it provide a free and natural fertilizer for your plants, but it also helps reduce waste and creates a nutrient-rich soil amendment that promotes healthy growth. However, many people are intimidated by the process due to concerns about odors and pests associated with chicken manure. If you’re one of them, worry no more! In this article, we’ll take you through a step-by-step guide on how to compost chicken manure safely and effectively, addressing those pesky odor and pest issues along the way. By the end of this post, you’ll be equipped with the knowledge to turn your chicken’s waste into a valuable natural fertilizer that will have your garden thriving in no time!
Benefits and Importance of Composting Chicken Manure
Composting chicken manure isn’t just good for your garden, but it also has numerous benefits that will make you wonder why you didn’t start doing it sooner! Let’s dive into the advantages of composting this valuable resource.
Understanding the Value of Chicken Manure as a Natural Fertilizer
Composting chicken manure is not just an eco-friendly practice; it’s also a valuable way to create a natural fertilizer for your garden. When done correctly, composted chicken manure can provide a rich source of nutrients for plants, promoting healthy growth and development.
One of the most significant benefits of using composted chicken manure as a fertilizer is its high nutrient content. It’s an excellent source of nitrogen, phosphorus, and potassium – essential elements that promote plant growth. In fact, research has shown that composted chicken manure can contain up to 4% nitrogen, making it an ideal substitute for synthetic fertilizers.
Another environmentally friendly attribute of composted chicken manure is its ability to reduce waste and minimize the carbon footprint associated with traditional farming practices. By repurposing a common agricultural byproduct into a valuable resource, we’re reducing the need for artificial fertilizers and minimizing our reliance on non-renewable resources.
Incorporating composted chicken manure into your garden can be as simple as mixing it into your soil or using it as a top dressing. A general rule of thumb is to apply 1-2 inches of composted chicken manure around the base of plants, working it gently into the soil as you go.
Addressing Concerns About Odor and Pests
Many people are hesitant to compost chicken manure due to concerns about unpleasant odors and attracting pests. However, these issues can be effectively managed with the right approach.
Firstly, let’s talk about odor control. Chicken manure is high in nitrogen and other volatile organic compounds (VOCs), which can give off strong smells when not properly managed. To minimize odor, it’s essential to maintain adequate carbon-to-nitrogen ratios during composting. You can achieve this by mixing chicken manure with other carbon-rich materials like straw or shredded newspaper.
Another crucial aspect is ensuring that your compost pile has sufficient aeration and moisture levels. This can be achieved by regularly turning the pile and monitoring its temperature, aiming for an ideal range of 130-140°F (54-60°C). Regular maintenance also helps to eliminate anaerobic conditions that foster pest-attracting odors.
Additionally, it’s vital to balance the C:N ratio in each batch of chicken manure before adding it to the compost pile. You can achieve this by mixing it with other organic materials like wood chips or sawdust. With these tips and a little practice, you’ll be able to create rich, pest-free compost from your chicken manure in no time.
Setting Up Your Composting System
Now that you have a solid understanding of why composting chicken manure is beneficial, let’s dive into setting up your system for optimal results. This includes choosing the right bin and location to ensure successful decomposition.
Choosing the Right Location for Your Compost Bin
When it comes to setting up your compost bin for chicken manure, choosing the right location is crucial. This may seem like a straightforward task, but trust me, selecting the wrong spot can lead to problems down the line. First and foremost, you want to place your compost bin in a well-ventilated area. This is essential for speeding up the decomposition process and preventing odors from becoming overwhelming.
Consider placing your bin near a water source, such as a hose or a nearby sink. This will make it easier to keep the pile moist, which is vital for optimal composting. However, be mindful of nearby living spaces. You’ll want to position the bin far enough away from windows and doors that you won’t be bothered by the inevitable smells.
Avoid areas with standing water or low-lying spots where water may collect – this can attract pests and create unpleasant conditions. By placing your compost bin in a location with good airflow, access to water, and consideration for nearby living spaces, you’ll set yourself up for success with your chicken manure composting project.
Selecting the Appropriate Compost Bin Type
When it comes to selecting a compost bin for chicken manure, you have several options to choose from. Each type of bin has its own set of benefits and drawbacks that can impact the efficiency of your composting process.
For example, wooden compost bins are a popular choice due to their eco-friendliness and affordability. They allow for good airflow and can be easily constructed or purchased in various sizes. However, they may require more maintenance than other types of bins, as they need to be regularly painted or sealed to prevent rotting.
On the other hand, plastic compost bins are a low-maintenance option that can withstand harsh weather conditions. They also come in various shapes and sizes, making them adaptable to different spaces and needs. However, their cost can be higher compared to wooden bins, and they may not allow for as much airflow.
If you’re looking for a more specialized solution, consider using a worm composter or vermicomposter. These bins are specifically designed for composting small amounts of chicken manure and other food waste with the help of red wiggler worms. They’re ideal for small spaces and can produce high-quality compost in as little as two weeks.
Ultimately, the choice between these types of compost bins will depend on your specific needs and preferences. Consider factors such as space constraints, budget, and maintenance requirements before making a decision.
Collecting and Preparing Chicken Manure
To start the composting process, you’ll need to collect and prepare chicken manure safely and effectively, which involves a few key steps that are crucial for success. Let’s take a closer look at how to do it right!
Managing Large Quantities of Chicken Manure
Managing large quantities of chicken manure can be a daunting task, especially if you’re dealing with a commercial-scale operation. However, proper collection and storage techniques can help maintain the quality of the manure and prevent spoilage.
To collect chicken manure efficiently, it’s essential to have a system in place that separates the manure from other materials like bedding and litter. This can be achieved through simple techniques such as sifting or using a conveyor belt system. Regular cleaning of the collection area is also crucial to preventing bacterial buildup and maintaining air quality.
Proper storage is equally important, as it helps prevent moisture buildup and reduces the risk of spoilage. Consider storing the manure in covered containers or piles with adequate ventilation. The ideal storage temperature should be between 50°F and 90°F (10°C and 32°C), which helps control bacterial growth and maintains nutrient levels.
Regular monitoring of pH levels, moisture content, and temperature is also necessary to ensure the quality of the stored manure. By following these guidelines, you can maintain high-quality chicken manure that’s perfect for composting.
Removing Contaminants and Additives from the Compost Pile
When removing contaminants and additives from the compost pile, it’s essential to consider their potential impact on the composting process. Bedding materials like straw, hay, or pine shavings can be contaminated with chemicals, pesticides, or heavy metals, which can harm microorganisms and create problems in the finished compost.
To minimize this risk, sort through the chicken manure and remove any large chunks of bedding material before adding it to the compost pile. You can also use a wire mesh screen or a fine-mesh sieve to sift out small particles and debris.
Medications, fertilizers, and other additives should be avoided altogether in the composting process. These chemicals can kill beneficial microorganisms, disrupt the carbon-to-nitrogen ratio, and even contaminate the finished compost with residues.
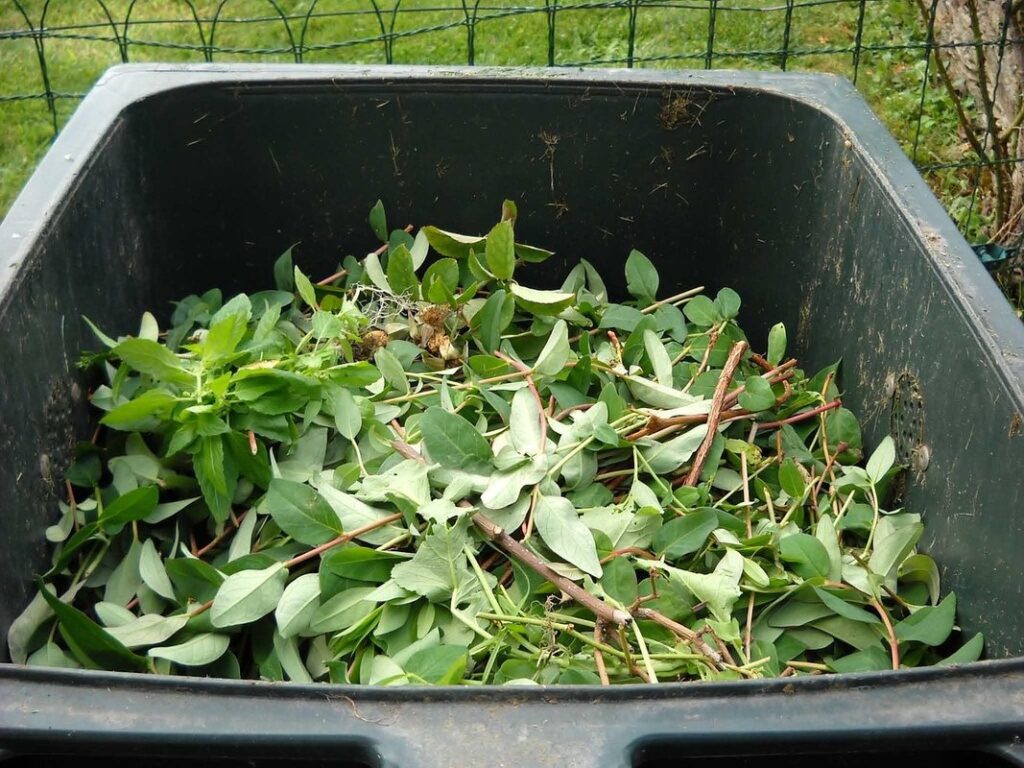
If you’re unsure whether a particular additive is safe for composting, err on the side of caution and discard it. Remember that a healthy compost pile should be rich in carbon-rich materials like leaves, straw, or shredded newspaper, which provide oxygen and support microbial activity. By keeping contaminants and additives out of your compost pile, you’ll create a nutrient-rich soil amendment for your garden while protecting the environment.
The Composting Process: Balancing Carbon and Nitrogen
To ensure your chicken manure compost turns into a rich, usable resource, you need to master the delicate balance of carbon-rich materials with nitrogen-rich ingredients. Let’s dive into the nitty-gritty of achieving this perfect blend.
Understanding the C:N Ratio and Its Impact on Composting
The C:N ratio is a crucial concept to grasp when it comes to composting chicken manure. In simple terms, the C:N ratio refers to the balance between carbon-rich materials (such as “brown” materials like leaves or straw) and nitrogen-rich materials (like “green” materials like food scraps or, in this case, chicken manure).
Aim for a mix of 2/3 “browns” and 1/3 “greens” to achieve an optimal C:N ratio. When the C:N ratio is too high (more carbon than nitrogen), the compost pile will become too dry and may not break down efficiently. Conversely, if the ratio is too low (more nitrogen than carbon), it can lead to anaerobic conditions, creating unpleasant odors and potentially producing pathogenic bacteria.
To apply this concept to your chicken manure composting efforts, ensure you’re adding sufficient amounts of “browns” like straw or shredded newspaper. This will help balance out the high nitrogen content in the chicken manure, promoting healthy microbial activity and efficient decomposition.
Monitoring pH Levels and Maintaining Optimal Conditions
Monitoring pH levels is crucial during composting as it significantly impacts microbial activity. Most pathogens and weed seeds are eliminated at a pH between 6.5 and 7.5, which also favors the growth of beneficial microbes like bacteria and fungi that break down organic matter.
To monitor pH levels, you can use pH test kits or send samples to a lab for analysis. Regular monitoring is necessary as pH levels can fluctuate during composting due to factors such as moisture content, carbon-to-nitrogen ratio, and temperature.
Maintaining optimal conditions involves balancing these factors. For example, maintaining adequate moisture (around 50-60% water content) helps keep pH stable and encourages microbial activity. A carbon-rich material like wood chips or straw can be added to absorb excess ammonia from the chicken manure, thereby reducing pH fluctuations.
By monitoring pH levels and maintaining optimal conditions, you can ensure a healthy composting process that produces high-quality finished compost. This can take several weeks to months, depending on factors such as temperature, moisture, and carbon-to-nitrogen ratio.
Turning and Aeration: Key Steps in Composting Chicken Manure
Now that we’ve covered how to mix chicken manure with other compost materials, it’s time to turn and aerate your pile to speed up decomposition. This crucial step can make all the difference in creating nutrient-rich compost.
Understanding the Importance of Aeration and Turning
Regular aeration and turning are essential steps in the composting process that can make all the difference between successful decomposition and a mess of rotting chicken manure. Without adequate oxygen, microorganisms responsible for breaking down organic matter will suffocate, leading to unpleasant odors and slow breakdown rates.
Think of it like a city’s infrastructure: just as roads need regular maintenance to ensure smooth traffic flow, your compost pile needs regular aeration to keep air circulating and microorganisms thriving. This is where turning comes in – by regularly flipping the pile, you’re allowing oxygen-rich air to penetrate deeper layers, which in turn accelerates decomposition.
How often should you aerate and turn? A good rule of thumb is every 3-5 days for small piles (less than 1 cubic yard) and every week or two for larger ones. You can use a pitchfork or shovel to gently mix the materials without compacting them. Don’t forget to wear gloves and a face mask when working with compost – the aerobic process can get quite intense!
Techniques for Speeding Up the Composting Process
When you’re working with chicken manure, speeding up the composting process is crucial to avoid odors and pests. Fortunately, there are several techniques that can help accelerate the decomposition process.
Hot composting is a popular method for breaking down organic matter quickly. This involves maintaining a consistent moisture level, temperature between 130-140°F (54-60°C), and regular turning of the pile. By doing so, you’ll create an optimal environment for microorganisms to thrive, which will speed up decomposition by up to 50%. For example, a hot composting system can turn chicken manure into finished compost in as little as two weeks.
Another technique is bokashi composting, which uses microorganisms to ferment organic matter. This method is ideal for cold climates or when you need to compost small amounts of waste. Bokashi involves mixing the chicken manure with a special blend of microbes and letting it sit for a week before burying it in the soil.
You can also try worm composting, which uses red wiggler worms to break down organic matter in as little as 2-3 weeks. This method is perfect for small-scale composting and requires minimal space and equipment. To get started with hot composting or bokashi, you’ll need to purchase specialized microorganisms or kits that contain the necessary microbes and instructions.
Managing Finished Compost: Application and Storage
Now that you’ve worked hard to create rich, nutrient-dense compost from your chicken manure, it’s time to think about how to use and store it effectively.
Safe Handling and Application of Finished Compost
When handling and applying finished compost to gardens or landscapes, it’s essential to follow best practices to ensure optimal results. First, inspect the compost for any signs of contamination, such as weed seeds, debris, or pests. Once you’ve determined that your compost is free from contaminants, it’s time to apply it.
Start by testing your soil pH and nutrient levels before applying compost. This will help you determine how much compost to add and whether additional amendments are needed. As a general rule, mix 2-3 inches of finished compost into the top 6-8 inches of soil to improve its structure and fertility. Be mindful of over-applying compost, as this can lead to nutrient imbalances.
When applying compost, consider the specific needs of your plants and the type of soil you’re working with. For example, if your soil is highly alkaline or acidic, adjust the amount of compost accordingly. Similarly, if you have a heavy clay or sandy soil, use a more balanced mix of compost and organic matter to improve its water-holding capacity.
Incorporating finished compost into your garden can have numerous benefits, including improved drainage, increased biodiversity, and enhanced soil fertility. By following these guidelines and adjusting for specific conditions, you’ll be able to maximize the potential of your compost and create a thriving ecosystem in your garden or landscape.
Long-Term Storage Options for Your Finished Compost
When you’ve finally completed your composting process and have a batch of finished compost on hand, it’s essential to consider where it will be stored long-term. Compost is a valuable resource that can take up a significant amount of space, and improper storage can lead to nutrient loss, pests, or even contamination.
One popular option for storing finished compost is in airtight containers. These containers are specifically designed to prevent air from entering or escaping, which helps maintain the optimal moisture levels within the compost. By sealing your finished compost in an airtight container, you can keep it fresh for several months and retain its nutrient-rich properties.
Another long-term storage option is under-slab storage systems. This method involves burying the finished compost beneath a concrete slab or floor, providing protection from pests and extreme weather conditions. Under-slab storage not only frees up valuable outdoor space but also eliminates the need for frequent turning or maintenance. Consider your specific needs and available resources when deciding which storage option is best suited for you.
It’s worth noting that both of these options require careful consideration to ensure successful long-term storage. Make sure to line containers with durable materials, seal them tightly, and store under-slab units in areas with easy access for future use.
Frequently Asked Questions
Can I use composted chicken manure on all types of plants, including those with sensitive roots?
Composted chicken manure can be used on a wide variety of plants, but it’s essential to note that some plants may require dilution before application. For example, seedlings or plants with delicate root systems should be started in a mix containing finished compost, then gradually transitioned to full-strength compost as they mature.
What if I notice my compost pile is attracting pests like rodents or flies?
To minimize pest attraction, ensure your compost bin has a secure lid and adequate ventilation. You can also add odor-reducing materials like shredded newspaper or sawdust to the pile. Regularly turning the compost will help maintain optimal conditions, reducing the likelihood of pest issues.
How do I store my finished compost if I don’t have space for an outdoor storage area?
Finished compost can be stored in airtight containers or bags and kept in a cool, dry location like a garage or basement. If you need to store large quantities, consider using bins with secure lids to maintain freshness. Always follow local regulations regarding bulk waste disposal.
Can I use my composting system for other organic materials besides chicken manure?
Composting systems can be adapted to process various organic materials, such as vegetable scraps, fruit peels, and coffee grounds. However, it’s essential to balance the carbon-to-nitrogen ratio in your compost pile by adding sufficient “brown” materials like straw or shredded newspaper.
How often should I turn my compost pile to maintain optimal conditions?
Regular turning is crucial for maintaining a healthy composting process. Aim to turn your pile every 7-10 days, especially during active decomposition phases. This ensures that oxygen reaches all areas of the pile, preventing anaerobic conditions and potential odors.