
If you’re like many backyard chicken keepers, you likely have a stash of chicken manure piling up. While it may seem like a nuisance, this nutrient-rich waste is actually a valuable resource for your garden. Composting chicken manure can help reduce odors and pathogens, turning a potential problem into a beneficial fertilizer. However, improper composting can lead to environmental issues and even health risks.
In this article, we’ll show you how to compost chicken manure safely and effectively, creating a nutrient-rich fertilizer for your garden. We’ll cover the dos and don’ts of composting chicken manure, including temperature guidelines, carbon-to-nitrogen ratios, and pest control methods. By following our simple steps and tips, you can turn your chicken’s waste into a valuable resource for your garden.
Understanding the Importance of Chicken Manure Composting
Composting chicken manure not only helps reduce waste but also provides a valuable source of nutrients for your garden, making it an essential practice for any backyard gardener. Let’s explore its importance in more detail now.
Benefits of Composting Chicken Manure
Composting chicken manure is a game-changer for gardeners and farmers alike. By doing so, you can significantly reduce odors associated with fresh manure. The composting process breaks down the volatile organic compounds (VOCs) responsible for unpleasant smells, making it a more pleasant addition to your garden.
In addition to eliminating odors, composting chicken manure also decreases pathogens that can be present in raw manure. These microorganisms can harm humans and pets if not properly managed. Through composting, you can kill off these pathogens, ensuring the safety of your family and the quality of your produce.
Perhaps most importantly, composted chicken manure is an excellent fertilizer for your garden. Rich in nutrients like nitrogen, phosphorus, and potassium, it can boost plant growth, improve soil structure, and increase crop yields. When applied correctly, this nutrient-rich fertilizer can also reduce the need for synthetic fertilizers, making it a more sustainable gardening practice.
When composting chicken manure, be sure to mix it with other carbon-rich materials like straw or leaves to create an optimal C:N ratio of 25:1. This will facilitate decomposition and prevent matting.
Risks Associated with Uncomposted Chicken Manure
When you have uncomposted chicken manure on your property, it can be hazardous to both humans and animals if not managed correctly. The risks associated with uncomposted chicken manure are considerable. For instance, the ammonia levels in the waste can lead to respiratory issues when inhaled by people or animals exposed to it.
Additionally, the presence of pathogens like Salmonella and E. coli in uncomposted chicken manure poses a significant health risk. These bacteria can cause severe gastrointestinal illness if ingested by humans or animals, leading to costly veterinary bills or even hospitalization. Moreover, if you have pets, their accidental ingestion of contaminated chicken manure can put them at risk as well.
If you’re using uncomposted chicken manure as fertilizer, the pathogens and heavy metals present in it can also contaminate your crops, making them unsafe for consumption. Furthermore, the presence of weed seeds in the waste can lead to invasive plant growth, further complicating your garden maintenance tasks.
To avoid these risks, it’s essential to compost your chicken manure properly, which we’ll cover in the next section.
Preparing Your Chicken Coop for Composting
Before you start collecting chicken manure, it’s essential to prepare your coop and surrounding area to prevent contamination and keep your compost healthy. This involves cleaning and disinfecting the coop to remove any lingering pathogens.
Setting Up a Composting System in Your Chicken Coop
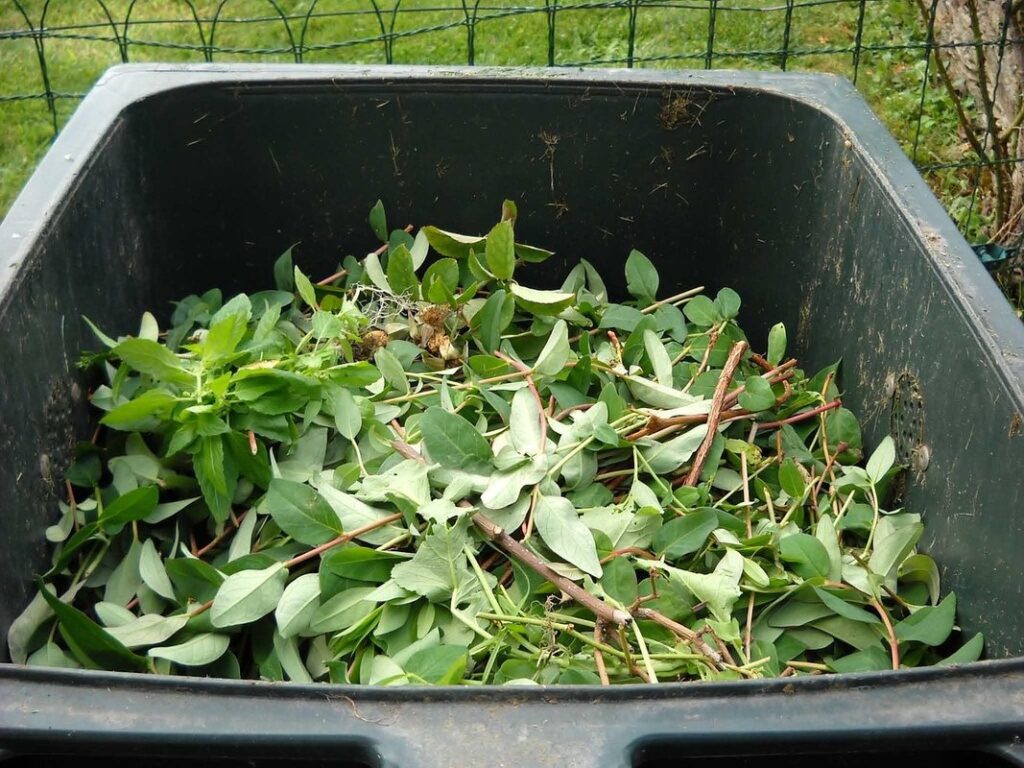
When setting up a composting system within your chicken coop, it’s essential to choose the right bin and location. Start by selecting a bin that is specifically designed for composting manure. These bins typically have ventilation holes and aeration systems to promote decomposition and prevent odors.
Consider the size of the bin in relation to the number of chickens you have. A general rule of thumb is to provide one square foot of composting space per chicken. This will help ensure that the manure breaks down efficiently without overflowing the bin.
Location is also crucial when setting up a composting system. Place the bin near the coop, but not so close that it becomes an eyesore or attracts pests. Aim for a spot with good airflow and sunlight to promote decomposition. Make sure the area is accessible for easy maintenance and turning of the compost pile.
When selecting a location, keep in mind that you’ll need to add bulking agents like straw or shredded newspaper to absorb excess moisture and odors. By choosing the right bin and location, you can create an efficient and odor-free composting system within your chicken coop.
Collecting and Storing Chicken Manure
Collecting chicken manure can be a messy task, but it’s essential to do it properly to avoid contamination and ensure effective composting. First, designate a collection area near the coop where you’ll store the droppings. This will make cleanup easier and prevent them from accumulating in other areas.
You’ll need a suitable container for storing the manure. Consider using a covered bucket or a dedicated compost bin specifically designed for chicken waste. Make sure it has a tight-fitting lid to keep pests out and odors contained.
Collect the manure daily, ideally during the cooler parts of the day to minimize odor release. Transfer it to the designated storage area immediately after collection to prevent moisture buildup. If you’re using a bucket, empty it into the compost bin once it’s about 2/3 full.
Regularly cleaning and disinfecting your coop will also help reduce odors and prevent disease transmission. Change bedding material regularly – typically every few weeks depending on usage – to maintain cleanliness and promote airflow.
Composting Process
Now that we’ve covered the importance of composting chicken manure, let’s dive into how it actually works. We’ll break down each step of the composting process in detail.
Turning and Aeration Techniques
Regular turning and aeration are crucial steps in the composting process that help break down chicken manure efficiently. When you mix the materials thoroughly, it introduces oxygen which helps to speed up decomposition. This is particularly important when dealing with ammonia-rich materials like chicken waste.
You can use a pitchfork or shovel to turn your compost pile every 7-10 days. It’s essential to turn it in one direction only, then flip it over and repeat the process. Avoid compacting the manure too much as this can lead to anaerobic conditions that create unpleasant odors.
Another effective technique is aeration. You can add materials like straw or shredded newspaper on top of your compost pile, which help to aerate it naturally. You can also use an electric aerator tool that pushes oxygen deep into the pile.
For best results, aim for a mix of “green” (nitrogen-rich) and “brown” (carbon-rich) materials in your compost pile. A general rule of thumb is to maintain a 2:1 ratio between green and brown materials.
Monitoring Temperature and Moisture Levels
When it comes to composting chicken manure, monitoring temperature and moisture levels is crucial for effective decomposition. Temperature can be a good indicator of microbial activity, which breaks down the organic matter into a nutrient-rich compost. A general rule of thumb is that temperatures between 130°F and 140°F (54°C to 60°C) are ideal for composting.
To monitor temperature, you can use a thermometer probe or even an old meat thermometer inserted into the pile. Check it daily to ensure the temperature remains within this optimal range. If it gets too hot, aerate the pile by turning it over to prevent overheating and potential fires.
Moisture levels are also vital for decomposition. The ideal moisture level is between 50% and 60%. You can check this by squeezing a handful of compost – if it sticks together but doesn’t form a tight ball, it’s likely in the correct moisture range. If it’s too dry, add water; if it’s too wet, turn the pile to aerate it.
Regular checks on temperature and moisture levels will help you adjust as needed, ensuring your composting process runs smoothly and efficiently.
Adding Bulking Agents and Carbon-Rich Materials
To effectively balance out your chicken manure compost, you’ll want to add bulking agents and carbon-rich materials that help absorb excess moisture and odors. These additions will also improve aeration and overall structure.
Choosing the Right Bulking Agent
When it comes to choosing the right bulking agent for your chicken manure composting project, you have several options to consider. Bulking agents help reduce odors and pathogens by absorbing excess moisture and providing a carbon-rich environment that’s less conducive to microbial growth.
One popular choice is straw or hay, which are readily available and relatively inexpensive. These materials provide a high carbon-to-nitrogen ratio, making them an ideal bulking agent for chicken manure composting. Another option is shredded newspaper or cardboard, which can help absorb moisture and reduce odors.
When selecting a bulking agent, consider the following factors: availability, cost, and ease of use. For example, straw may be readily available in your area but more expensive than hay. On the other hand, shredded newspaper may be free but harder to handle due to its lightweight nature. Aim for a mix of 2-3 parts bulking agent to 1 part chicken manure to achieve optimal results.
Ultimately, the best bulking agent is one that balances availability, cost, and ease of use with your specific needs and composting goals.
Incorporating Carbon-Rich Materials into Your Compost
When adding carbon-rich materials to your compost pile, it’s essential to strike the right balance between nitrogen and carbon. Chicken manure is high in nitrogen, but low in carbon. This imbalance can lead to a smelly mess and potentially even fire hazards. By incorporating carbon-rich materials like leaves or straw, you’ll help mitigate these risks and create a balanced compost.
So, how do you incorporate these materials effectively? Start by adding a 2:1 ratio of “brown” materials (carbon-rich) to “green” materials (nitrogen-rich). For example, add 2 pounds of dried leaves for every pound of chicken manure. You can also mix in shredded newspaper or cardboard for added carbon content.
Another trick is to layer your compost pile with a combination of brown and green materials. Start with a base layer of browns, followed by a layer of greens. Repeat this process until you reach the top of your pile. This will help create an even balance of nitrogen and carbon, ensuring a healthy and thriving compost ecosystem.
Remember, it’s not just about quantity – quality matters too. Choose high-carbon materials that are free from contaminants like pesticides or weed seeds.
Turning Your Compost into a Fertilizer
Now that you’ve collected and processed your chicken manure, let’s learn how to turn it into a nutrient-rich fertilizer for your garden. We’ll cover the final step: transforming compost into usable fertilizer.
Understanding the C:N Ratio
Achieving the perfect balance between “green” and “brown” materials is key to creating a nutrient-rich fertilizer from your composted chicken manure. The C:N ratio refers to the proportion of carbon (C) to nitrogen (N) in your compost pile, and it’s essential to get this balance just right.
Carbon-rich materials like dried leaves, straw, or shredded newspaper make up the “brown” component of your compost pile. These materials provide energy for the microorganisms breaking down the organic matter. Nitrogen-rich materials like chicken manure, grass clippings, or kitchen scraps are the “green” components. They provide the necessary nutrients for these microbes to thrive.
Aim for a C:N ratio of 25:1 to 30:1 for optimal composting results. To achieve this balance, start by adding a 4-6 inch layer of carbon-rich materials at the bottom of your pile. Then add a smaller amount of nitrogen-rich materials, making sure to mix them in well with the brown layer below.
For example, if you’re using 10 pounds of chicken manure, you’ll need about 3-5 pounds of dried leaves or straw to balance it out.
Applying Your Composted Chicken Manure
Now that you have your finished compost, it’s time to apply it to your garden beds. The key is to use the right amount at the right time. Composted chicken manure is a nutrient-rich fertilizer, but over-application can lead to burning your plants’ roots.
As a general rule of thumb, start with a small rate and gradually increase as needed. For most vegetables and fruits, mix 2-4 pounds of composted chicken manure into each square foot of soil. This is equivalent to about 1/2 cup to 1 cup per plant. If you’re new to using composted manure, begin with the lower end of this range and adjust as needed.
Timing is also crucial when applying your composted chicken manure. Apply it in the spring, either before planting or at planting time, for a boost of nutrients throughout the growing season. Avoid applying during peak summer months, as this can lead to excessive moisture retention and root rot.
Some additional tips: mix the compost into the top 6-8 inches of soil for optimal absorption, avoid getting it on plant leaves where it can burn them, and reapply every 4-6 weeks for continuous benefits.
Tips and Tricks for Successful Composting
Now that you’ve got your chicken manure composting underway, it’s time to tackle some of the common challenges and share tips on how to keep it thriving.
Troubleshooting Common Issues
If you’re experiencing issues with your chicken manure composting system, don’t worry – it’s not uncommon! Odors and pests are two common problems that can arise. To troubleshoot these issues, let’s start with the root cause: moisture levels.
High moisture content is often the culprit behind odors in a chicken manure composting system. If your pile is too wet, it can create an anaerobic environment, which fosters the growth of smelly microorganisms. To fix this, make sure to add brown materials like dry leaves or straw to balance out the green materials (chicken manure) and allow for better airflow.
Pests can also be a problem if your composting system isn’t properly managed. Regularly turning the pile will help aerate it and reduce pest habitats. You should also keep an eye out for signs of pests, like holes in the bin or uneaten food scraps.
Some specific examples to consider: If you notice a strong ammonia smell, it’s likely due to too much nitrogen-rich chicken manure. Add some carbon-rich materials to balance things out. Similarly, if you see ants or rodents around your compost bin, seal any entry points and keep the pile clean.
Expanding Your Composting Practice to Other Areas of Your Farm
As you become more comfortable with composting chicken manure, you may be wondering how to apply this knowledge to other areas of your farm. One way to expand your composting practice is by incorporating livestock manure from other animals into the mix. For example, if you have horses or cows on your property, their manure can be used as a nutrient-rich addition to your compost pile.
You can also explore ways to integrate food waste into your composting routine. Consider setting up a separate bin for vegetable and fruit scraps, which can be added to the chicken manure compost heap. This will not only reduce waste but also provide an additional source of nutrients for your plants.
When incorporating new materials into your compost pile, remember to maintain a balance between “green” (nitrogen-rich) and “brown” (carbon-rich) materials. Aim for a mix that includes 2/3 brown materials (such as straw or leaves) and 1/3 green materials (like chicken manure or food scraps). This will ensure the composting process runs smoothly and efficiently, producing high-quality fertilizer for your crops.
Conclusion
Now that you’ve successfully set up your backyard composting system, it’s time to review what you’ve learned and implement it into a sustainable habit. Let’s wrap up with some key takeaways from this process.
Recap of Key Takeaways
In summary, composting chicken manure is a simple and effective way to turn waste into a valuable resource for your garden. To achieve this, you need to create an ideal environment that promotes decomposition and minimizes odors. This involves maintaining the right carbon-to-nitrogen ratio by mixing the manure with other materials like leaves or grass clippings.
You also learned how to prepare the compost pile by adding a 2-3 inch layer of brown materials at the bottom, followed by a mix of chicken manure and green materials, and finally topping it off with another layer of brown materials. This layered approach helps to regulate moisture levels and prevent pests from invading your pile.
Another critical aspect of successful composting is maintaining adequate moisture levels. To achieve this, you can water the pile as needed, ideally when it feels dry to the touch but not soaking wet. Regular turning of the compost also ensures that oxygen reaches all areas of the pile, which helps to speed up decomposition and prevent anaerobic conditions.
Throughout this article, we highlighted the importance of temperature monitoring in ensuring efficient composting. By tracking temperatures regularly, you can identify when your pile is reaching its optimal decomposing phase (which should occur within 1-2 weeks).
To give you a clear understanding of how to set up your own chicken manure composting system, here are some key takeaways:
• Maintain the right carbon-to-nitrogen ratio by mixing manure with other materials.
• Prepare the compost pile in layers, starting with brown materials and finishing with green materials.
• Regularly turn the compost pile to ensure adequate oxygen levels and speed up decomposition.
By implementing these strategies and maintaining a well-balanced compost pile, you’ll be able to successfully convert your chicken manure into nutrient-rich fertilizer for your garden.
Frequently Asked Questions
Can I compost chicken manure from sick or medicated birds?
No, you should not compost chicken manure from birds that have been treated with medications or are showing signs of illness. This can contaminate the compost and potentially harm your garden or soil microorganisms.
How do I handle odors while composting chicken manure?
To minimize odors during the composting process, ensure adequate aeration by turning the pile regularly and incorporating bulking agents to absorb excess moisture. You can also use odor-absorbing materials like sawdust or wood chips to help control smells.
What if I notice pests in my compost pile? How do I prevent them?
If you notice pests in your compost pile, such as rodents or flies, it’s essential to take action promptly. Add more bulking agents like straw or hay to reduce moisture levels and make the environment less conducive to pest infestations.
Can I use shredded newspaper instead of sawdust for bulking up my compost?
Yes, you can use shredded newspaper as a bulking agent in your compost pile, especially if you have access to it. However, be sure to balance the carbon-to-nitrogen ratio by incorporating enough nitrogen-rich materials like chicken manure or other animal waste.
How often should I monitor temperature and moisture levels during the composting process?
Regular monitoring of temperature and moisture levels is crucial for ensuring proper decomposition. Check your compost pile daily, ideally at the same time each day, to track temperature fluctuations and adjust as needed to maintain optimal conditions (130°F – 140°F) for microbial activity.
Can I use composted chicken manure in containers or indoor gardens?
Yes, you can use composted chicken manure in containers or indoor gardens. However, make sure it has fully broken down into a stable, earthy-smelling material to avoid burning your plants’ roots with excess nitrogen. Also, follow the same application rates as for outdoor garden use.