
Are you an avid backyard chicken enthusiast eager to welcome new chicks into your flock? If so, you’re likely no stranger to the excitement and anticipation that comes with incubating eggs. However, sometimes even with proper care, not all eggs hatch successfully. This is where assisted hatching comes in – a technique that can significantly improve the chances of successful hatching.
In this article, we’ll delve into the world of assisted hatch, exploring its benefits and risks. You’ll learn how to identify when your eggs may need assistance, as well as step-by-step instructions on how to facilitate a healthy hatch. From the importance of maintaining proper egg temperature to recognizing signs of embryo development, our comprehensive guide will walk you through every aspect of successful assisted hatching.
Understanding Assisted Hatch
Now that you’re considering assisted hatch, let’s take a closer look at what it entails and how it can help increase your chances of successful hatching.
What is Assisted Hatch?
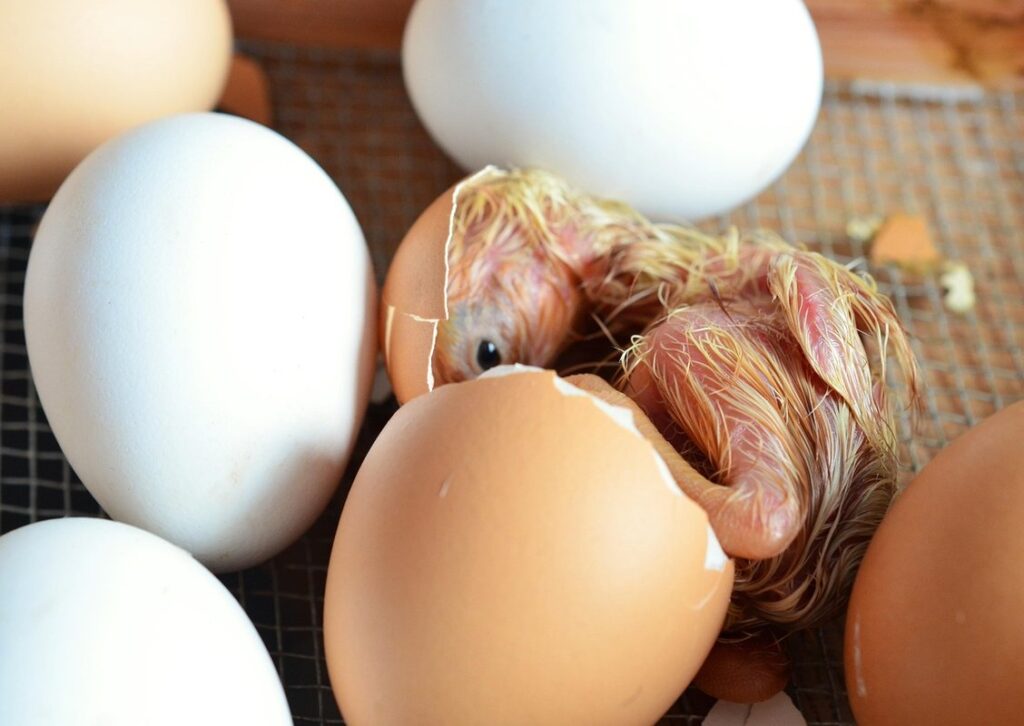
Assisted hatch refers to the process of helping chicks break free from their eggs by cracking them open before hatching. This method is often used when a chick is struggling to pip (break through the shell) on its own, or if an egg is at risk of becoming too fragile for natural hatching.
One common misconception about assisted hatch is that it’s a guarantee for successful hatching. However, this isn’t entirely accurate – it still requires proper care and handling. Many breeders believe that assisted hatch reduces the chick’s chances of survival, but research suggests otherwise. In fact, with gentle and precise cracking, chicks can thrive just as well as naturally hatched ones.
To clarify, a true assisted hatch doesn’t involve using force or breaking open the eggshell entirely. Instead, it involves carefully making small holes to allow air exchange while still protecting the embryo. This approach minimizes the risk of damage and promotes healthy development.
Benefits and Risks of Assisted Hatch
Assisted hatch has both benefits and risks that you need to consider before making a decision. On the positive side, it can increase egg fertility, allowing more viable embryos to develop. This is especially useful for breeders who are experiencing low fertility rates or have difficulty getting eggs to hatch naturally.
One of the main advantages of assisted hatch is that it allows embryologists to carefully examine and assess the embryo’s development, increasing the chances of successful hatching. Additionally, assisted hatch can help to reduce the risk of egg breakage during natural incubation, which can be a major concern for breeders.
However, there are also risks associated with assisted hatch. One potential issue is that the process can cause damage to the delicate embryo, particularly if it’s not done carefully or at the right stage of development. This can lead to reduced fertility or even embryonic death.
To minimize these risks, it’s essential to work with an experienced embryologist who has a good understanding of the assisted hatch procedure and its associated risks. Regular monitoring of the embryos is also crucial to ensure that any potential issues are caught early on.
Preparing for Assisted Hatch
As you get ready to assist your eggs, it’s crucial to understand the preparation process and what to expect during each step of assisted hatch. This section will walk you through the key steps to take before starting the assisted hatch procedure.
Choosing the Right Equipment
When it comes to assisted hatch, having the right equipment is crucial for success. Let’s start with the basics: pipettes are essential for handling embryos and chicks during the process. Look for a high-quality, adjustable pipette that allows for precise movement and control.
Next, you’ll need an incubator specifically designed for hatching eggs. Make sure it has a reliable temperature control system, as this is critical for embryo development. Some popular options include digital incubators with automatic egg turning and temperature monitoring features.
Don’t forget about ventilation! A good ventilation system will help maintain optimal humidity levels and prevent ammonia buildup in the incubator. Consider investing in a separate ventilation unit or a high-velocity fan to ensure proper air circulation.
It’s also essential to invest in a reliable thermometer, hygrometer, and egg candler for monitoring embryo development and adjusting conditions as needed. Remember, each piece of equipment plays a vital role in ensuring successful assisted hatch outcomes.
Setting Up Your Incubator for Assisted Hatch
To set up your incubator for successful assisted hatching, you’ll want to follow these crucial steps. First, make sure your incubator is at the correct temperature and humidity levels. For most assisted hatch procedures, this means maintaining a temperature between 99°F and 100°F (37°C to 38°C) with a relative humidity of around 50-60%. It’s essential to monitor these conditions closely, as even slight deviations can impact embryonic development.
Next, prepare your incubator for the specific needs of assisted hatching. This may involve using a specialized hatcher tray or adjusting the incubator’s air circulation system to ensure optimal airflow. Some incubators also require manual adjustment of the temperature and humidity settings during the final stages of incubation. Familiarize yourself with your incubator’s unique features and requirements before initiating the assisted hatch process.
Remember, precise control over temperature and humidity is critical for successful assisted hatching. Regularly check your incubator’s readings and make any necessary adjustments to ensure optimal conditions for embryonic development.
The Assisted Hatching Process
So, you’re curious about how assisted hatching actually works? Let’s dive into the details of the process and what you can expect.
Preparing the Egg for Hatching
Preparing the egg for hatching is a crucial step in the assisted hatching process. Before you can proceed with the hatching procedure, it’s essential to ensure that the egg is clean and disinfected to prevent any potential infections or contamination.
To begin, gently remove the egg from its storage container and place it on a sterile surface. Use a soft-bristled brush to carefully sweep away any loose debris or particles that may be clinging to the eggshell. Next, mix a solution of 1 part bleach to 10 parts water in a clean bowl. Dip a cotton swab into the solution and gently wipe down the entire eggshell, making sure to cover every area evenly.
It’s essential to note that you should never use tap water for cleaning or disinfecting eggs, as it can contain bacteria and other contaminants that could harm the embryo. A 1% bleach solution is a common and effective disinfectant used in reproductive medicine. Be cautious not to scrub too hard, as this can damage the eggshell.
Once you’ve cleaned and disinfected the egg, allow it to air dry completely before proceeding with the assisted hatching procedure. This may take anywhere from 15-30 minutes, depending on the humidity level of your workspace.
Making a Small Opening in the Shell
Making a small opening in the shell is a delicate process that requires precision and care. The goal of this step is to create a subtle breach in the outer layer of the eggshell, allowing for a gentle exchange of nutrients and gases between the embryo and its surroundings. This can be particularly beneficial for embryos that are struggling to break free or need extra support.
To achieve this, embryologists will typically use a specialized tool called a laser drill or micro-needle to create a small opening in the shell. The size of the opening is critical – it needs to be just large enough to facilitate embryo growth without causing damage to the surrounding tissues.
The assisted hatching process involves making a precise incision in the zona pellucida, the outermost layer of the eggshell, using either a laser or micro-needle. This helps to weaken the shell’s adhesion and create a pathway for the embryo to hatch naturally. The opening should be no larger than 0.1 mm in diameter, as this is sufficient to allow for the necessary exchange of nutrients without compromising the integrity of the eggshell.
In many cases, assisted hatching has been shown to significantly improve implantation rates and live birth rates, particularly among women over 35 or those with previous IVF failures. By carefully creating a small opening in the shell, embryologists can provide essential support for fragile embryos, giving them the best chance of successful implantation and development.
The entire process is typically performed under sterile conditions using specialized equipment, ensuring the highest level of precision and minimizing any potential risks to the embryo or surrounding tissues.
Common Challenges and Solutions in Assisted Hatch
Assisted hatch can be a delicate process, so it’s essential to address common challenges that may arise during the process of incubating eggs. Let’s explore some solutions to these issues together.
Embryo Retardation or Death
One of the most critical challenges that can arise during assisted hatch is embryo retardation or death. This occurs when an embryo fails to develop at a normal rate or ceases to grow altogether after the hatching process has begun. Embryo retardation or death can be caused by various factors, including suboptimal culture conditions, inadequate nutrition, or damage to the zona pellucida during the assisted hatch procedure.
To minimize the risk of embryo retardation or death, it’s essential to closely monitor embryo development and adjust the hatching process accordingly. For instance, if an embryo appears to be lagging behind in its development, the embryologist may need to extend the incubation time or make adjustments to the culture medium. In some cases, assisted hatch may not be the most suitable option, and other methods such as ICSI (Intracytoplasmic Sperm Injection) may be recommended instead.
If embryo retardation or death does occur during assisted hatch, it’s crucial to promptly identify the underlying cause and take corrective action. This may involve re-evaluating the embryo’s developmental stage, reviewing the hatching technique, or even repeating the assisted hatch procedure under closer supervision.
Shell Membrane Rupture or Debris Build-Up
One of the most critical challenges you may face during assisted hatch is shell membrane rupture or debris build-up. These issues can hinder successful hatching and even lead to embryo mortality. Shell membrane rupture occurs when the membrane surrounding the embryo breaks down, exposing it to bacteria and other contaminants.
Debris build-up, on the other hand, refers to the accumulation of dead cells, tissue fragments, or other waste products that can clog the hatch canal and prevent the chick from emerging. Both issues can be caused by factors such as infection, stress, or inadequate culture conditions.
To mitigate these challenges, it’s essential to maintain a sterile environment and follow proper culture techniques. This includes regularly cleaning the incubator, monitoring temperature and humidity levels, and ensuring adequate oxygen supply. Additionally, you should inspect the eggs daily for signs of shell membrane rupture or debris build-up, taking prompt action if you notice any issues.
Regular maintenance and vigilance are key to preventing these challenges from arising in the first place. By staying on top of incubator upkeep and closely monitoring egg development, you can significantly reduce the risk of shell membrane rupture or debris build-up, increasing your chances of successful hatching.
Tips and Tricks for Successful Assisted Hatch
Now that you’ve mastered the art of setting up your incubator, let’s dive into some practical tips to ensure a successful assisted hatch. We’ll cover common mistakes and expert advice to help you navigate this critical step.
Monitoring Temperature and Humidity Levels
Monitoring temperature and humidity levels is crucial for successful assisted hatch. You see, the incubator’s environment plays a significant role in embryonic development, and even slight deviations can impact hatching rates. Ideally, you want to maintain temperatures between 99°F and 100°F (37°C to 38°C) during the first stages of incubation, gradually increasing it to around 102°F (39°C) towards the end.
Humidity levels should be kept relatively high, typically between 50% to 60%, to prevent drying out the eggs. However, as you approach hatching day, a drop in humidity is necessary to facilitate pip removal and the chick’s emergence from its shell. To maintain optimal levels, ensure your incubator has a precise temperature control system and a built-in hygrometer or invest in separate thermometers and humidistats.
Regular checks are essential to guarantee that these parameters remain within acceptable limits. Make it a habit to inspect your incubator daily, adjusting settings as needed to prevent any potential issues. This diligent approach will contribute significantly to the overall success of your assisted hatch program.
Rotating Eggs During Hatching
When it comes to rotating eggs during hatching, timing and technique are crucial. You want to ensure that you’re turning the eggs just right, without causing unnecessary stress on the embryo.
A general rule of thumb is to rotate the egg every 6-8 hours, but this can vary depending on your incubator’s settings and the specific needs of your flock. It’s essential to develop a consistent rotation schedule to prevent embryo rotation, which can lead to complications or even death.
To minimize risk, turn the eggs in a smooth, gentle motion, using one finger to support the egg while you rotate it. Avoid over-turning, as this can dislodge the yolk sac from its position near the air cell. If you notice any signs of embryo rotation, such as an uneven or bulging shape, stop rotating and consult with a veterinarian for guidance.
It’s also important to monitor your eggs’ temperature closely during hatching. Most incubators come equipped with automatic temperature control, but it’s still crucial to check on the eggs regularly to ensure they’re within the optimal range (around 99-100°F).
Conclusion: Maximizing Success with Assisted Hatch
Now that you’ve learned how to successfully hatch eggs with assisted technology, let’s discuss the final steps to maximizing your chances of success and raising healthy chicks.
Recap of Key Takeaways
As we conclude our exploration of assisted hatch, take a moment to revisit the key takeaways that will ensure your success with this technique.
When attempting assisted hatch, it’s essential to remember the importance of proper incubation temperature and humidity levels. A slight deviation from these parameters can significantly impact embryo development and increase the risk of failure.
Choose the right eggs: select those with visible air sacs or a consistent weight for optimal results. Be mindful of egg quality and avoid using eggs that show signs of age, cracks, or other damage.
Don’t underestimate the role of proper candling techniques in identifying fertile eggs. Regularly check on your eggs to detect any changes in air sac development, ensuring you intervene at the right moment.
Finally, have a plan in place for after-hatch care: prepare a brooder with adequate ventilation and heat sources, as chicks will require specific conditions to thrive. By keeping these factors in mind, you’ll be well-equipped to successfully implement assisted hatch and ensure the best possible outcome for your poultry endeavors.
Encouragement and Next Steps for Readers
Now that you’ve made it through the entire process of assisted hatching, we hope you feel confident and prepared to give this technique a try. Remember, with patience and practice, you can increase the chances of successful hatch rates for your embryos.
As you begin your assisted hatching journey, keep in mind that every egg is unique, and what works for one may not work for another. Be gentle when handling eggs, and take your time to carefully observe their development.
If you’re new to assisted hatching, consider starting with a small batch of eggs and gradually increasing the number as you gain experience. This will allow you to refine your technique and make adjustments as needed.
For further learning, we recommend checking out some online forums or communities dedicated to backyard chicken keeping and assisted hatching. These resources can provide valuable insights from experienced breeders and help you stay up-to-date on the latest techniques and best practices.
Frequently Asked Questions
Can I attempt assisted hatch with eggs that have been incubating for an extended period?
Yes, it’s possible to assist hatch eggs that have been incubating for longer than the usual 21 days. However, be aware that this may increase the risk of embryo retardation or death due to delayed development. Consult your incubator manual and carefully monitor temperature and humidity levels before making a decision.
What should I do if I notice shell membrane rupture or debris build-up during the assisted hatching process?
If you encounter shell membrane rupture or debris build-up, gently clean the area with sterile water or saline solution to avoid further complicating the hatching process. In some cases, it may be necessary to delay assisted hatch until the issue is resolved.
Can I use a regular incubator for assisted hatch, or do I need a specialized setup?
While you can use a regular incubator for assisted hatch, having a specialized setup with precise temperature and humidity controls will significantly improve your chances of successful hatching. Consider investing in an incubator specifically designed for assisted hatch to minimize risks.
How long does the assisted hatching process typically take, and what’s the expected outcome?
The assisted hatching process can take anywhere from 30 minutes to several hours, depending on the individual egg’s needs. With proper care and technique, you should expect a healthy chick to emerge within a few hours after assisting with the hatch.
What precautions should I take when handling eggs during the assisted hatching process?
When handling eggs, it’s essential to maintain strict cleanliness and hygiene standards to avoid introducing bacteria or other contaminants that can harm the developing embryo. Wear disposable gloves and ensure your workspace is free from drafts and moisture to minimize risks.