
As a backyard chicken keeper, you know how crucial it is to provide your chicks with a warm and safe environment to grow and thrive. A brooder heating lamp is an essential tool for this purpose, but choosing the right one can be overwhelming with so many options available. Not only do you need to consider the type of heat source, wattage, and maintenance requirements, but also ensure that it’s used safely to avoid any accidents or health risks. In this article, we’ll guide you through selecting and using a brooder heating lamp efficiently for your chicks’ optimal growth and health. We’ll cover the different types of lamps, ideal wattage, and provide valuable tips on maintaining a safe and comfortable environment for your feathered friends. By the end of it, you’ll be confident in choosing the perfect brooder heating lamp for your flock.
Understanding the Importance of a Brooder Heating Lamp
A brooder heating lamp is crucial for raising healthy chicks, and understanding its importance will help you provide a safe environment for your new feathered friends to thrive.
Types of Heat Sources in a Brooder
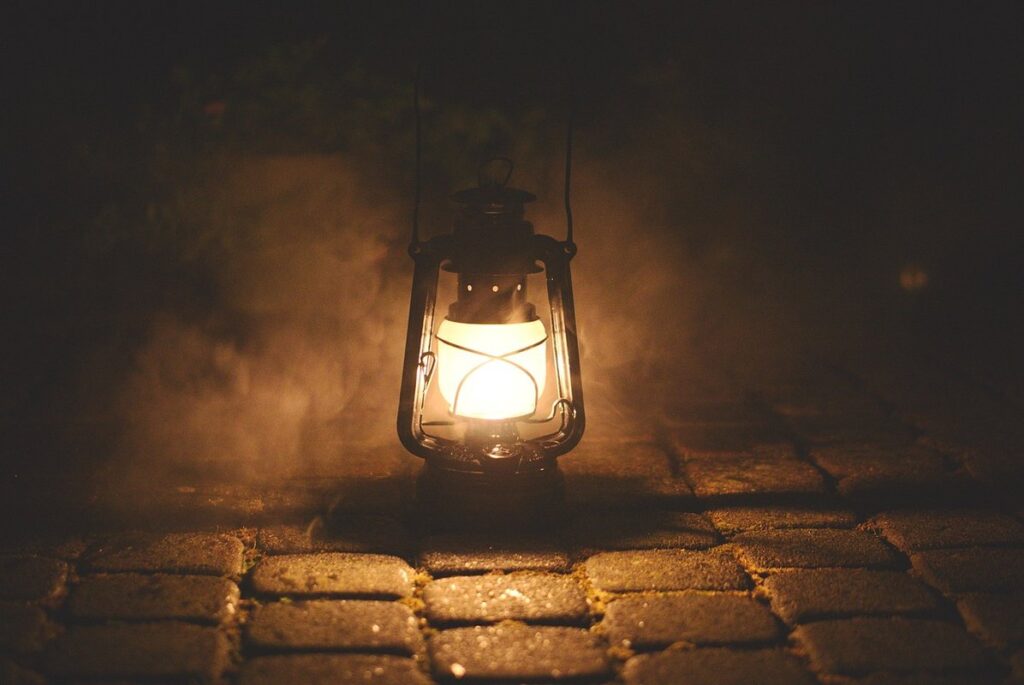
When it comes to choosing the right heat source for your brooder, you have several options. One of the most popular choices is a heat lamp. Heat lamps are a cost-effective option that can be easily adjusted to different temperatures. They’re also a good choice if you need to provide supplemental heat in addition to your main heat source.
However, some drawbacks to using heat lamps include the risk of fire and the potential for uneven heating. Ceramic heat emitters are another popular option that’s gaining popularity. These units are designed to be safer than heat lamps and can be more energy-efficient as well. They also tend to provide a more even distribution of heat.
Heat plates, which use electricity to warm up metal surfaces, offer an additional option for brooder heating. While they may require more initial investment, heat plates often last longer and are easier to clean than other options. It’s essential to consider the specific needs of your chicks or poults when choosing a heat source, including their age, size, and individual temperature requirements.
Keep in mind that even with these factors considered, it’s still crucial to monitor the temperature in your brooder closely to ensure your birds are receiving adequate heat.
Why a Heating Lamp is Necessary for Chicks
When chicks hatch from their eggs, they emerge into a warm and cozy environment that has been maintained by the mother hen. However, as soon as they leave the safety of the eggshell, they are exposed to the cooler temperature of the surrounding area. This sudden drop in temperature can be quite drastic, often resulting in a temperature difference of around 10-15°F (5-8°C) from what they were used to inside the egg.
This is why it’s crucial to provide chicks with a heating lamp as soon as possible after hatching. The heat provided by the lamp helps to bridge this temperature gap and maintain a warm environment for the chicks, which is essential for their growth and development. In fact, research has shown that chicks need an ambient temperature of around 90-100°F (32-38°C) during the first week of life to thrive.
A good brooder heating lamp can help to provide this optimal temperature range, ensuring that your chicks stay warm and healthy. By using a reliable and energy-efficient heating lamp, you can create a comfortable environment for your new arrivals, setting them up for success in their early days.
Safety Precautions When Using a Brooder Heating Lamp
When using a brooder heating lamp, it’s crucial to be aware of potential hazards and take necessary precautions to ensure both you and your chicks stay safe. Proper use and setup are key to avoiding accidents.
Preventing Burns and Fire Hazards
When using a brooder heating lamp, it’s essential to be aware of the potential risks associated with burns and fire hazards. Burns can occur when you accidentally touch the hot lamp or when your child gets too close to the heat source. Fire hazards are another concern, especially if the lamp malfunctions or is not installed correctly.
To prevent these accidents, make sure to position the brooder heating lamp at a safe distance from flammable materials such as bedding, nesting boxes, and nearby structures. Keep the area around the lamp clear of any obstructions that could cause the heat to be redirected towards combustible materials. Also, ensure that the lamp is installed according to the manufacturer’s instructions and regularly inspect it for any signs of wear or damage.
It’s also crucial to take extra precautions when handling the brooder heating lamp. Use oven mitts or a towel to handle the lamp, as this will provide an additional layer of protection against burns. Additionally, keep a fire extinguisher nearby in case of emergencies.
Placing the Heating Lamp Safely
When placing the heating lamp safely in the brooder, it’s essential to position it in a way that ensures even heat distribution and minimizes the risk of accidents. First, locate a secure spot for the lamp, ideally at least 12-18 inches above the bedding material, such as pine shavings or straw. This height will allow you to easily clean underneath the lamp and prevent the chicks from getting too close.
Avoid placing the lamp directly over the feeding troughs or waterers, as this can create a fire hazard. Instead, position it near but not directly above these areas. You should also ensure that the brooder has adequate ventilation to prevent overheating and carbon monoxide buildup.
Aim for a temperature gradient in the brooder by placing the lamp at one end, allowing the chicks to move towards or away from the heat source as needed. This will help them regulate their body temperature naturally. Always supervise the chicks when introducing a new heating lamp to ensure they’re adapting safely and comfortably.
Factors to Consider When Choosing a Brooder Heating Lamp
When selecting a brooder heating lamp, there are several key factors to consider that can impact the health and well-being of your chicks. Let’s take a closer look at what to prioritize.
Wattage and Size Requirements
When it comes to choosing a brooder heating lamp, selecting a unit with adequate wattage and size is crucial to ensure that your chicks stay warm and healthy. A common mistake many first-time flock owners make is underestimating the power requirements of their brooder.
As a general rule of thumb, you’ll want to consider the age and size of your chicks when determining the right wattage for your lamp. For example, baby chicks (0-4 weeks old) require around 100-200 watts per square foot of brooder space, while larger chicks (5-6 weeks old) can handle up to 300 watts. Failing to provide sufficient heat can lead to cold-stressed birds, reduced growth rates, and even increased mortality.
A good rule of thumb is to calculate the total wattage needed for your brooder by multiplying the square footage of the space by the recommended watts per square foot. Additionally, make sure to choose a lamp with a suitable size that fits comfortably in your brooder without overheating or causing drafts.
Energy Efficiency and Cost-Effectiveness
When it comes to choosing a brooder heating lamp, energy efficiency and cost-effectiveness are crucial considerations. Different types of lamps consume varying amounts of energy, which can significantly impact your running costs.
Let’s take a closer look at some popular options: ceramic heat emitters (CHEs), infrared bulbs, and traditional incandescent bulbs. CHEs are often the most energy-efficient option, using up to 50% less electricity than traditional bulbs. They also tend to have a longer lifespan, reducing replacement costs over time.
Infrared bulbs, on the other hand, can be more cost-effective in the short term due to their lower upfront cost. However, they may not provide the same level of heat distribution as CHEs or incandescent bulbs, potentially leading to colder spots and reduced chick growth.
To give you a better idea of the costs involved, consider this: a 40-watt infrared bulb might use around $0.03 per hour, while a 20-watt ceramic heat emitter uses approximately $0.02 per hour. While the difference may seem small, it can add up over the course of a year, especially if you’re heating multiple brooders.
When selecting a brooder heating lamp, factor in your energy costs and consider investing in an efficient option like CHEs to save money in the long run. Be sure to also check for certifications from organizations like Energy Star, which can ensure that the product meets certain energy efficiency standards.
Popular Types of Brooder Heating Lamps
Let’s take a closer look at some of the most popular types of brooder heating lamps on the market, each with its own unique features and benefits. From ceramic to infrared, we’ll explore them all.
Infrared Heat Lamps vs. Standard Heat Lamps
When it comes to choosing the right heating lamp for your brooder, you may be wondering whether infrared heat lamps or standard heat lamps are the better option. Both types of lamps have their benefits and drawbacks, which we’ll explore below.
Infrared heat lamps work by emitting radiation that warms objects directly, rather than heating the air around them. This makes them more efficient and energy-saving, as they don’t waste heat on warming the surrounding air. They’re also a safer option, as they reduce the risk of burns from touching hot surfaces or getting too close to the lamp.
Standard heat lamps, on the other hand, work by circulating warm air through the brooder. While they can be effective at maintaining a consistent temperature, they can also dry out your chicks’ skin and respiratory system if not used properly. They’re generally less energy-efficient than infrared lamps and require more frequent replacement of parts.
If you do choose to use standard heat lamps, it’s essential to ensure that the brooder is well-ventilated to prevent overheating and moisture buildup. In contrast, infrared lamps are often recommended for smaller brooders or in areas with high humidity levels.
Overall, infrared lamps offer a safer and more energy-efficient option for maintaining a warm and healthy environment for your chicks. However, it’s crucial to consider the specific needs of your brooder and chicks before making a decision.
Alternative Heat Sources: Ceramic Emitters and Heat Plates
Ceramic heat emitters and heat plates are gaining popularity as alternative heat sources in brooders due to their efficiency and safety. These devices use infrared radiation to warm the air rather than convection, making them ideal for small-scale poultry farming.
When choosing a ceramic emitter or heat plate, consider the size of your brooder and the number of chicks you’re raising. A larger unit will be needed for bigger batches, while smaller units are suitable for smaller operations. Additionally, look for units with adjustable thermostats to maintain a consistent temperature.
Some key benefits of ceramic emitters include their ability to dry out dampness in the air, reducing the risk of respiratory issues and fungal growth. They also provide a more even heat distribution than traditional brooder lamps, which can lead to hotspots. This reduced risk of burns makes them an attractive option for inexperienced poultry farmers.
When installing ceramic emitters or heat plates, ensure they’re at least 18 inches off the ground to prevent chicks from getting too close and burning themselves.
Maintenance and Replacement of the Brooder Heating Lamp
Proper maintenance is crucial for extending the life of your brooder heating lamp, so we’ll go over what to do when it’s time for replacement parts or repairs. This section will walk you through the process step by step.
Regular Cleaning and Inspection
Regular cleaning and inspection are crucial for maintaining the brooder heating lamp’s efficiency and safety. Dirt, dust, and debris can accumulate on the lamp’s surface, reducing its effectiveness and potentially causing a fire hazard.
Start by turning off the lamp and unplugging it from the power source before you begin cleaning. Use a soft brush or cloth to gently sweep away any visible dirt or dust particles from the lamp’s exterior. For more stubborn stains or grime buildup, mix a solution of equal parts water and white vinegar in a spray bottle. Spray the solution onto the affected area and wipe clean with a damp cloth.
Inspect the lamp’s wiring, connections, and thermostat regularly for signs of wear or damage. Check for any fraying wires, loose connections, or malfunctioning thermostats. Make sure all screws and fasteners are tightened securely to prevent accidental disconnections. Schedule regular cleaning sessions, ideally every 1-2 weeks, depending on the lamp’s usage and environment. This will help maintain the brooder heating lamp’s optimal performance and extend its lifespan.
Replacing Bulbs or Lamps
As you continue to use and maintain your brooder heating lamp, it’s essential to know when to replace bulbs or lamps to ensure the health and well-being of your chicks. One crucial sign that indicates a need for replacement is a significant drop in brightness. If the bulb or lamp is no longer providing sufficient heat, or if the light output has diminished, it’s time to consider replacing it.
Another indicator is the age of the bulb or lamp itself. Check the manufacturer’s instructions for the recommended lifespan, which can range from 500 to 1,000 hours, depending on the type and quality of the product. As a general rule of thumb, replace bulbs every 6-12 months, regardless of their remaining lifespan.
You should also inspect the bulb or lamp regularly for physical damage, such as cracks, chips, or burn marks. If you notice any of these signs, it’s best to err on the side of caution and replace the bulb or lamp to prevent any potential risks to your chicks’ health. By being proactive about replacing bulbs or lamps, you can ensure a safe and healthy environment for your growing birds.
Troubleshooting Common Issues with Brooder Heating Lamps
When issues arise with your brooder heating lamp, don’t panic – we’ve got you covered with practical solutions to common problems that’ll get you back on track quickly. This section tackles tricky scenarios you may encounter.
Unusual Temperature Fluctuations
Unusual temperature fluctuations can be a major concern when it comes to brooder heating lamps. One common issue is inconsistent temperatures across different areas of the brooder. This may be due to the lamp’s position, size, or wattage not being suitable for the space. To address this, ensure that the lamp is placed at least 12-18 inches above the feeding and drinking area to promote even heat distribution.
Another issue related to temperature fluctuations is the brooder’s insulation. If the brooder is not well-insulated, cold spots can develop, causing temperatures to drop rapidly. Check the brooder’s walls, floor, and ceiling for adequate insulation. Consider adding extra insulation or ensuring that any gaps are sealed properly.
Additionally, it’s essential to monitor temperature fluctuations regularly using a thermometer. Keep an eye out for sudden drops in temperature, which may indicate a problem with the heating element or a drafty area. Addressing these issues promptly can help prevent stress and discomfort for your chicks. Regularly check the lamp’s wattage and adjust as necessary to maintain optimal temperatures.
Handling Malfunctioning Heat Sources
If your brooder heating lamp’s heat source malfunctions, it’s essential to address the issue promptly to prevent hypothermia and potential losses. First, verify that the problem lies with the heat source itself and not with another component of the system.
To troubleshoot a malfunctioning heat source:
* Check for power supply issues: Ensure the brooder is receiving adequate electricity. Verify that the power cord is securely plugged into both the heating lamp and the electrical outlet.
* Inspect the heating element: Visually inspect the heating coil or ceramic element for signs of damage, such as burn marks, cracks, or broken wires. If you notice any damage, it’s best to replace the heat source immediately.
If the issue persists after checking these basic components, consider repairing or replacing the heat source. Consult your brooder’s user manual for guidance on disassembling and maintaining the heating lamp.
Frequently Asked Questions
Can I use a brooder heating lamp for both chicks and adult chickens?
Yes, you can use a brooder heating lamp for both chicks and adult chickens, but it’s essential to consider the size of your flock and adjust the wattage accordingly. Adult chickens require less heat than chicks, so make sure to reduce the temperature gradually as they mature.
What if I notice unusual temperature fluctuations in my brooder?
Unusual temperature fluctuations can be caused by a malfunctioning heat source or inadequate ventilation. Check your thermometer regularly and ensure proper airflow in the brooder. If the issue persists, consider investing in a thermostat to regulate the temperature more accurately.
Can I use a standard heat lamp for chicks with featherlessness or downy feathers?
While standard heat lamps can be used for chicks, it’s recommended to opt for infrared heat lamps for those with featherlessness or downy feathers. Infrared heat is gentler on their sensitive skin and helps prevent burns.
How often should I clean my brooder heating lamp and its surroundings?
Regular cleaning of your brooder heating lamp and its surroundings is crucial for maintaining a safe environment. Clean the lamp’s reflector, glass shade, and surrounding area at least once a week to prevent dust buildup and ensure optimal heat distribution.
Can I use a ceramic emitter as a replacement for my standard heat lamp?
Yes, you can use a ceramic emitter as a replacement for your standard heat lamp. Ceramic emitters are energy-efficient, quiet, and provide a consistent heat output. However, consider the initial investment cost and ensure it’s compatible with your existing brooder setup before making the switch.