
Are you tired of stepping into a messy chicken coop every day? A clean and safe environment is essential for your flock’s health, but managing droppings can be a real challenge. That’s where a well-designed droppings board comes in – it’s a crucial component of any backyard chicken-keeping setup. But not just any droppings board will do; you need one that fits your coop’s design and is easy to clean and maintain.
In this article, we’ll walk you through the process of choosing, installing, and maintaining a chicken coop droppings board the right way. You’ll learn how to design and integrate it into your existing setup, as well as best practices for cleaning and upkeep. By the end of this post, you’ll have a better understanding of what makes a great droppings board – one that keeps your flock safe and healthy.
Benefits of a Droppings Board
A droppings board is one of the most underrated features of a chicken coop, offering several benefits that can greatly improve your overall backyard chicken-keeping experience. Let’s dive into what these advantages are!
Importance of Droppings Management
Managing droppings in your chicken coop is not just a matter of cleanliness; it’s crucial for maintaining a healthy environment for both your chickens and yourself. Chicken droppings can harbor diseases and parasites that can affect the health of your flock, as well as pose risks to human health if not handled properly.
If you’ve ever noticed an ammonia smell emanating from your coop or seen evidence of wet droppings on the walls and floors, it’s likely due to inadequate ventilation and poor droppings management. When droppings sit for too long in a warm environment, they create a breeding ground for pathogens like E. coli, Salmonella, and Campylobacter.
To mitigate these risks, make sure to clean out your coop regularly, removing soiled bedding and replacing it with fresh material. This will help reduce odors, prevent the buildup of pathogens, and give your chickens a cleaner living space. Consider using droppings boards that can be easily removed for cleaning, or implementing a regular schedule for scraping down surfaces.
Don’t underestimate the importance of proper droppings management – it’s a vital step in maintaining a safe and healthy coop environment.
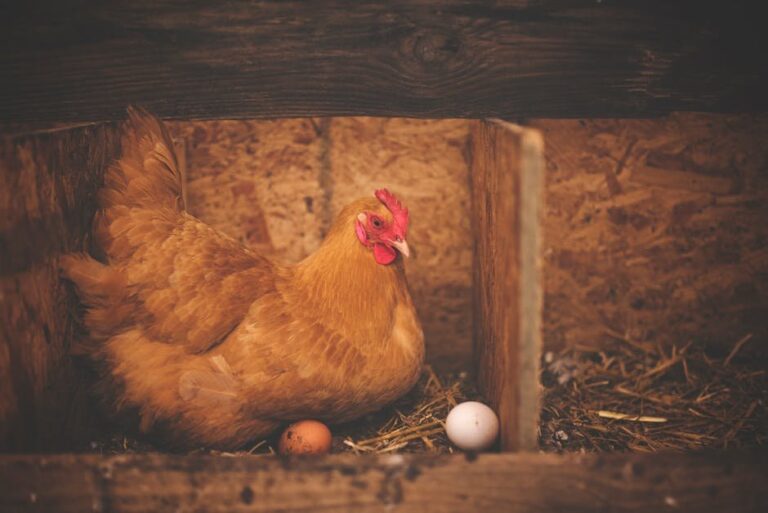
Types of Droppings Boards
When it comes to choosing a droppings board for your chicken coop, you’ll find that there are several options available. One popular choice is wooden droppings boards, made from durable and rot-resistant woods like cedar or cypress. These boards are easy to clean and maintain, but may require more frequent replacement than other materials.
Plastic droppings boards are another option, offering a low-maintenance alternative that’s resistant to moisture and easy to disinfect. However, some owners have reported issues with durability and cracking over time. Metal droppings boards are also available, providing a sturdy and long-lasting solution that can withstand heavy use.
It’s essential to consider your flock’s size, breed, and feeding habits when selecting a droppings board. For example, if you have a large flock or free-range chickens, a metal or plastic board may be more suitable due to their durability and ease of cleaning. Ultimately, the right type of droppings board will depend on your specific needs and preferences.
Design Considerations for a Chicken Coop Droppings Board
When designing a droppings board, consider the coop’s layout and how the board will be used to collect waste in an efficient and easy-to-clean manner. Effective design can save you time and stress.
Measuring Your Space
Measuring your chicken coop space correctly is crucial to choosing a droppings board that meets your needs. To start, take note of the dimensions of your coop and the area where you plan to install the droppings board. Measure from wall to wall, including any obstructions like windows or doors.
Consider the size of your flock and how much waste they produce. A general rule of thumb is to allow about 3-4 square feet per bird for movement and comfort. For a droppings board, you’ll want to leave enough space between each bird’s roosting area and the board itself. Aim for at least 12 inches between each roost.
Next, think about the type of droppings board you need. Do you have a lot of space available, or are you working with a small area? Different types of boards come in various sizes and styles to suit different needs. Take note of any obstacles like feeders, nesting boxes, or perches that may impact your measurement.
When measuring, don’t forget about the height clearance needed for easy access and cleaning. A good rule of thumb is to have at least 3-4 feet of clearance between the board and the coop’s ceiling.
Choosing the Right Material
When it comes to choosing the right material for your chicken coop droppings board, you’ve got several options to consider. Wood is a popular choice, as it’s eco-friendly and can be easily sourced from local suppliers. However, it may require more maintenance than other materials, as it can rot or warp if not properly treated.
On the other hand, plastic boards are low-maintenance and easy to clean, but they can become brittle over time and crack under pressure. Metal droppings boards are durable and long-lasting, but they can be noisy when egg-laying chickens scratch on them.
Consider your flock’s size and egg-laying habits when selecting a material. If you have a small flock that lays fewer eggs, wood or plastic may suffice. However, if you’re raising a large number of hens that produce a high volume of droppings, metal is likely the better choice.
It’s also worth thinking about your personal preferences and budget. For example, if you’re looking for an eco-friendly option that won’t break the bank, wood or recycled plastic may be the way to go.
Installation and Setup of a Chicken Coop Droppings Board
To ensure your chicken coop remains safe and clean, it’s essential to properly install and set up a droppings board, which we’ll cover next. This step-by-step guide will walk you through the process.
Step-by-Step Instructions
To install and set up a chicken coop droppings board effectively, follow these step-by-step instructions. First, position the droppings board under the roosting bars, making sure it’s aligned with the bars to facilitate easy cleaning.
Secure the board by attaching it to the coop floor using screws or nails. Ensure the screws are countersunk so they don’t interfere with the chickens’ movement or create sharp edges. For added stability, consider attaching a small lip around the edges of the board to prevent droppings from spilling over.
Next, check that the board is level and securely fastened. You can use shims or wedges to adjust its position if necessary. It’s essential to ensure the board is stable to prevent it from shifting during cleaning or when the chickens are in use.
To make cleaning easier, place a tray or pan under the droppings board to collect waste. Consider adding a small lip around the edges of the tray to contain spills and make cleanup more efficient.
Common Mistakes to Avoid
When installing a chicken coop droppings board, it’s easy to overlook some crucial details that can lead to problems down the line. One common mistake people make is not considering the weight of the droppings board itself and the weight of the waste it will collect. This can cause the board to sag or even collapse under the weight, making it difficult for your chickens to access food and water.
Another mistake is installing the board at an incorrect angle. If it’s too steep, chicken manure will slide right off, defeating the purpose of the droppings board. On the other hand, if it’s too shallow, waste will build up quickly, creating unpleasant odors and attracting pests. To avoid this, make sure to install the board at a slight slope, allowing for efficient drainage.
It’s also crucial to secure the droppings board properly to prevent shifting or lifting off the ground. This can be achieved by using screws or nails, or even anchoring it to the coop with ropes or chains. By avoiding these common mistakes and taking your time during installation, you’ll ensure a safe and effective chicken coop droppings board system that benefits both your birds and your yard.
Maintenance and Cleaning of a Chicken Coop Droppings Board
To keep your chicken coop clean and healthy, regular maintenance and cleaning of the droppings board is essential. This includes daily removal of waste and thorough weekly cleans.
Daily Cleaning Routine
Developing a daily cleaning routine for your chicken coop droppings board is crucial to maintaining a healthy environment for both your chickens and yourself. To begin with, it’s essential to remove soiled bedding material from the droppings board at least once a day. This can be done by scooping out the manure and old bedding into a bucket or shovel and disposing of it properly.
Next, thoroughly disinfect all surfaces with a solution of 1 part white vinegar to 10 parts water. Be sure to let the solution sit for about 5 minutes to allow it to penetrate and kill any bacteria that may be present. Afterward, rinse the droppings board with clean water to remove any residue.
As part of your routine, also take time to check for any signs of pests or diseases. Regular cleaning can help prevent these issues from arising in the first place. Remember to always wear gloves when handling soiled bedding and disinfecting surfaces to minimize exposure to potential pathogens. By incorporating these tasks into your daily schedule, you’ll be well on your way to maintaining a clean and hygienic droppings board for your flock.
Deep Cleaning and Replacement
When it comes to maintaining a chicken coop droppings board, there are times when deep cleaning and even replacement become necessary. If you notice the board is no longer effective at containing waste, it’s likely time for a deeper clean or replacement.
To deep clean the droppings board, start by removing all the bedding material from the coop. Dispose of any soiled bedding and scrub the entire board with a mixture of one part white vinegar to four parts water. Use a stiff brush to remove any stubborn stains or buildup. Rinse thoroughly and let it dry before reassembling the coop.
However, if the droppings board is excessively damaged or worn out, replacement might be the better option. Inspect the board for cracks, gaps, or rust spots that can lead to waste escaping from the coop. Consider replacing the entire unit if you notice any of these issues.
Remember to inspect your droppings board regularly and perform deep cleaning as needed. This will help maintain a clean and hygienic environment for your chickens.
Health Considerations for Chicken Coop Droppings Boards
When it comes to collecting chicken droppings, there are some important health considerations to keep in mind when choosing a coop droppings board. Let’s take a closer look at these essential factors.
Biosecurity Measures
Biosecurity measures are crucial when it comes to preventing disease transmission through chicken coop droppings boards. When you have multiple birds using the same board, there’s a risk of transferring diseases and parasites from one bird to another. In fact, studies have shown that up to 50% of backyard chickens can be carriers of salmonella, which can lead to serious health issues in humans.
To prevent disease transmission through the droppings board, it’s essential to implement proper biosecurity measures. First, ensure that you’re cleaning and disinfecting the droppings board regularly. You can use a solution of 1 part bleach to 10 parts water to kill bacteria and viruses. Additionally, make sure to remove any manure or debris from the area around the board.
It’s also vital to maintain good hygiene practices when handling your chickens and their droppings. Wash your hands thoroughly after cleaning up after your birds, and avoid touching your face while working with them. By following these simple steps, you can significantly reduce the risk of disease transmission through the droppings board and keep your flock healthy.
Potential Health Risks
When it comes to chicken coop droppings boards, proper maintenance is crucial not only for keeping your flock healthy but also for ensuring a safe environment for yourself and others. A poorly maintained droppings board can pose significant health risks, including respiratory issues and the spread of parasites.
Respiratory problems can arise from inhaling dust and pathogens that accumulate on an inadequately cleaned droppings board. When chickens drop waste onto the board, it dries out into a fine powder that becomes airborne when disturbed or swept up. This particulate matter can cause irritation to lungs and exacerbate conditions like asthma.
Parasites are another health concern associated with a dirty droppings board. These unwanted critters thrive in damp environments and feed on waste, eggs, and even the birds themselves. Regular cleaning of the droppings board not only keeps these pests at bay but also reduces odors and minimizes disease transmission between chickens.
Cleaning your coop’s droppings board should be done regularly to prevent these risks. It’s recommended to remove accumulated waste daily and disinfect the area with a pet-safe cleaner twice a week. By taking this simple yet crucial step, you can safeguard not only your flock but also yourself from potential health hazards associated with an improperly maintained chicken coop droppings board.
Additional Tips and Considerations for Chicken Coop Droppings Boards
When it comes to chicken coop droppings boards, there are a few extra details you might not have considered, but are definitely worth thinking about. Let’s explore some additional tips and considerations that’ll help you get it just right.
Integration with Other Equipment
When it comes to setting up an efficient and hygienic chicken coop, integrating your droppings board with other equipment is crucial. One of the most important connections to make is between the droppings board and nesting boxes.
Nesting boxes should be placed close enough to the droppings board that chickens can easily transition between laying eggs and using the droppings board for waste elimination. This proximity not only encourages good hygiene but also helps reduce the amount of mess within the coop.
Another essential connection is with your feeding system. Consider investing in a feeder that allows you to easily remove and clean the food troughs without having to navigate through the coop. This will prevent cross-contamination between food and waste areas, keeping your chickens healthier.
When integrating these systems, think about the layout of your coop. Plan for easy access to all areas, including the droppings board, nesting boxes, and feeding station. A well-designed coop with efficient equipment integration will make your life as a chicken keeper significantly easier.
DIY Projects and Upgrades
If you’re looking to give your chicken coop droppings board an upgrade or want to try something new, there are plenty of DIY project ideas that can enhance its functionality. One popular option is to add a waterproof liner to the board, which will make cleanup a breeze and prevent any potential messes from seeping into the surrounding area.
Another idea is to incorporate a self-cleaning feature into your droppings board. You can do this by installing a slight slope or incline on the surface of the board, allowing waste to easily roll off and away from the coop. This design element not only makes maintenance simpler but also promotes better airflow within the coop.
You can also consider adding a roof or canopy above the droppings board to protect it from rain and extreme temperatures. Not only will this keep your droppings board in good condition, but it’ll also prevent any potential damage to the surrounding area. By taking these DIY upgrades into consideration, you can create a more efficient and low-maintenance chicken coop droppings board that meets all of your backyard chickens’ needs.
Frequently Asked Questions
How do I measure my coop’s space to choose the right-sized droppings board?
To accurately determine the size of your droppings board, you’ll need to calculate the total floor area of your coop. Measure the length and width of the coop in feet, then multiply these numbers together to get the square footage. Consider the number of chickens you have and any additional features like nesting boxes or perches when choosing a droppings board size.
Can I use a pre-made droppings board with my existing coop design?
Yes, many manufacturers offer custom-sized droppings boards that can fit your unique coop layout. Measure your coop’s dimensions carefully and choose a board that fits snugly into the space. This will help prevent wasted space and make cleaning easier.
How often should I clean and maintain my droppings board?
Daily cleaning is crucial to maintaining a healthy environment for both your chickens and yourself. Remove soiled bedding material, disinfect the board with a pet-safe solution, and refill the bedding as needed. Deep cleaning and replacement of the board should occur every 6-12 months.
What materials can I use for my droppings board if I’m on a budget?
If you’re working with a limited budget, consider using recycled plastic or wood products for your droppings board. These options are often more affordable than metal or composite boards but still offer durability and ease of cleaning.
How do I integrate my droppings board with other coop equipment, like feeders and waterers?
When installing your droppings board, ensure it’s positioned in a way that allows for easy access to the surrounding area. Consider placing feeders and waterers on opposite sides of the coop to prevent overcrowding and make cleaning simpler. This layout will also help reduce the risk of disease transmission through contaminated feed or water.