
Cleaning eggs before incubation is an essential step in ensuring a successful hatch, but many beginners overlook this crucial process. You might be wondering what factors affect egg quality and how to identify clean eggs that are ready for hatching. In reality, even small imperfections can significantly impact hatch rates and chick health.
To boost your chances of success, it’s vital to learn how to properly clean eggs before incubation. But where do you start? This guide will cover everything you need to know about cleaning eggs, including common mistakes to avoid and expert tips for improving hatch rates. We’ll delve into the factors that affect egg quality, sharing practical advice on how to select the healthiest eggs and prepare them for incubation. By following our comprehensive guide, you’ll be well on your way to achieving a higher success rate in your next hatching project.
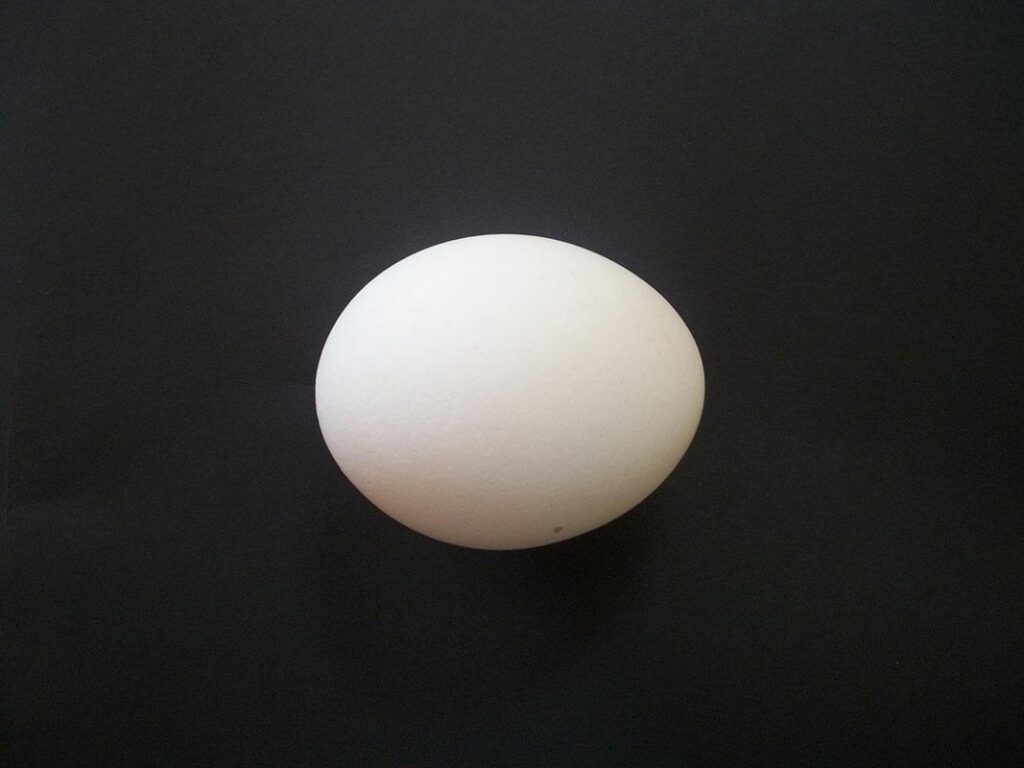
Importance of Cleaning Eggs
Cleaning eggs before incubation is a crucial step that can significantly impact hatch rates and chick health. Let’s dive into the importance of cleaning those precious eggs to ensure optimal results!
Understanding the Role of Egg Quality
Egg quality plays a crucial role in determining the success of incubation. A single high-quality egg can produce a healthy chick, while an inferior one may result in poor hatch rates or even embryo death. When it comes to cleaning eggs, many breeders assume that this step is merely cosmetic. However, a clean egg not only looks better but also provides essential benefits for the developing embryo.
Dirt and bacteria on the eggshell can compromise the health of the chick, affecting its growth rate, immune system, and overall well-being. When an egg is not properly cleaned before incubation, these external contaminants can penetrate the shell membranes, potentially leading to respiratory infections or other issues in the developing chick.
Cleaning eggs thoroughly before incubation is therefore essential for achieving optimal hatch rates and healthy chicks. Use a soft-bristled brush to gently remove any debris from the eggshell, followed by a mild soap solution to sanitize it. Rinse the egg with clean water and dry it with a paper towel to prevent bacterial growth. This simple yet critical step can significantly impact the quality of your incubation results.
Factors That Affect Egg Quality
When it comes to egg quality, several factors come into play that can either enhance or detract from its overall health and viability. Breed is one such factor – some breeds are naturally more prolific layers with cleaner eggs, while others may require extra attention.
Storage conditions also have a significant impact on egg quality. For example, exposing eggs to extreme temperatures (either too hot or too cold) can cause the yolk to become discolored or even lead to bacterial contamination. Similarly, humidity levels play a crucial role – high humidity can cause mold growth, while low humidity can dry out the eggshell.
Handling practices are another critical aspect that affects egg quality. Rough handling during collection and transportation can cause cracks in the eggshell, making it more susceptible to microbial invasion. It’s essential to handle eggs with care, using designated containers or boxes specifically designed for transporting eggs.
To improve egg quality, it’s recommended to collect eggs frequently from your flock, ideally twice a day, to minimize bacterial contamination and prevent breakage due to accumulation. Additionally, storing eggs in a cool, dry place – such as a refrigerator at a consistent temperature below 40°F (4°C) – can help maintain their quality for longer periods.
Consequences of Unclean Eggs
When you don’t clean eggs before incubation, you’re putting your birds at risk of contracting serious diseases. Salmonella and E. coli are two common bacteria that can be present on the eggshells, and if they hatch inside an unclean egg, they can spread rapidly among the flock. For example, a study in the UK found that out of 3000 eggs, over 90% contained some level of contamination.
But it’s not just diseases you need to worry about – dirty eggs can also affect fertility. When an egg is contaminated with bacteria or debris, it can damage the embryo inside, reducing the chances of successful hatching. In fact, research has shown that even minor cracks in the shell can lead to a significant decrease in hatch rates.
To avoid these risks, make sure to clean your eggs thoroughly before incubation. This means gently wiping down each egg with a damp cloth and checking for any visible signs of contamination or damage. If you’re unsure whether an egg is safe to use, it’s better to err on the side of caution and discard it – it’s always better to be safe than sorry when it comes to hatching healthy chicks.
Pre-Cleaning Preparation
Before you start cleaning eggs for incubation, it’s essential to prepare properly. This section will guide you through the crucial steps to ensure your eggs are ready for hatching success.
Choosing the Right Cleaning Tools
When it comes to cleaning eggs before incubation, having the right tools for the job is essential. Let’s take a look at some common cleaning tools used specifically for eggs.
First and foremost, you’ll need a sanitizing solution that’s safe for egg cleaning. Popular options include bleach solutions (1:10 or 1:20 ratio of bleach to water), vinegar, and hydrogen peroxide. However, always make sure to dilute any harsh chemicals according to the manufacturer’s instructions to avoid damaging the eggs.
Next up are brushes specifically designed for egg cleaning. Look for soft-bristled or microfiber brushes that won’t scratch the eggshell. These gentle brushes will help remove dirt and debris without causing damage to the egg.
You’ll also want an egg washer or a rotating brush cleaner, which can be especially helpful if you’re dealing with a large number of eggs. These tools use a combination of water and gentle scrubbing action to clean the eggs. When choosing an egg washer, make sure it’s designed specifically for cleaning eggs and not other types of surfaces.
By having these essential cleaning tools on hand, you’ll be well-prepared to give your eggs the thorough cleaning they need before incubation.
Selecting a Suitable Cleaning Area
When selecting a designated area for egg cleaning and preparation, there are several essential features to consider. First and foremost, ensure that the area is easily accessible and has sufficient space to accommodate the equipment and tools you’ll need.
A clean and stable surface is also crucial. Look for a flat area with minimal foot traffic to avoid contamination risks. Consider using a dedicated egg cleaning table or a stainless steel surface, which can be sanitized more effectively than wood or other porous materials.
Good ventilation is another vital aspect to consider. Egg cleaning can release dust and bacteria into the air, so ensure that the area has adequate airflow to prevent the buildup of pollutants. Additionally, position your egg cleaning station near a sink with hot water for easy washing and sanitizing.
Remember, the designated area should also be protected from extreme temperatures and humidity fluctuations, which can affect egg viability. By considering these factors, you’ll create an ideal space for thorough egg cleaning and preparation before incubation.
Personal Protective Equipment (PPE)
When handling eggs for incubation, personal protective equipment (PPE) is crucial to prevent contamination and ensure safe working conditions. Gloves are a must-have, as they provide a barrier between your hands and the eggs, preventing oils from your skin from transferring onto the eggs. Latex or nitrile gloves are ideal choices.
In addition to gloves, it’s essential to wear a mask while handling eggs. This helps prevent you from accidentally inhaling bacteria that may be present on the eggs or in the surrounding environment. A surgical mask is sufficient for this purpose, and it’s also recommended to avoid touching your face or mouth after handling eggs.
Safety glasses are another important aspect of PPE when working with eggs. They protect your eyes from potential splashes or spills of disinfectants or cleaning solutions. If you’re planning to use a fogging device to disinfect the incubation environment, safety glasses will also shield your eyes from the fine mist.
Remember, wearing PPE is not just about protecting yourself – it’s also crucial for maintaining the health and cleanliness of the eggs. By taking these simple precautions, you can help prevent contamination and ensure a successful incubation process.
The Egg Cleaning Process
When it comes time to clean your eggs, knowing what works best for each type of egg is crucial. We’ll walk you through the process step by step in this essential guide.
Removing Debris and Dirt
Cleaning the eggshell is an essential step before incubation. Before you can even think about placing the eggs under the heat lamp, it’s crucial to remove any dirt, debris, or visible cracks that might hinder the development of your precious chicks.
To start, gently hold the egg between your thumb and index finger, with the large end facing up. Inspect the shell for any visible imperfections, such as stains or scratches. If you notice any cracks, don’t worry – a few minor cracks won’t harm the embryo, but it’s essential to clean them thoroughly to prevent bacterial growth.
Using a soft-bristled brush, gently sweep away any dirt or debris from the eggshell. Be careful not to scratch the surface, as this can create openings for bacteria to enter. Next, dip a cotton swab in warm water and lightly wipe down the shell, paying attention to any stubborn stains. Rinse the swab clean and repeat if necessary.
Now that your egg is sparkling clean, take a closer look at the air sac end (the small end of the egg). Make sure it’s free from debris and has no visible cracks. If you’re still unsure about the cleanliness or integrity of the eggshell, it’s always better to err on the side of caution and discard the egg.
Sanitizing the Eggshell
When it comes to sanitizing the eggshell, you’ll want to focus on reducing the bacterial load to prevent contamination and potential issues with incubation. One popular method is soaking eggs in a vinegar solution. Mix 1 part white vinegar with 9 parts water, and submerge your eggs for about 2-3 minutes. The acid in the vinegar will help break down and kill bacteria on the shell.
Another option is using an egg sanitizer specifically designed for this purpose. These products usually contain gentle yet effective antimicrobial agents that target pathogens without damaging the eggshell. Follow the manufacturer’s instructions for proper use, as over-sanitizing can strip away natural oils and cause moisture issues.
It’s essential to note that some sanitizing methods may not be suitable for all types of eggs or incubation situations. Always research and consult with experienced breeders before trying new techniques. Regular cleaning practices will help maintain a healthy bacterial balance on the eggshell, reducing the risk of contamination during incubation.
Drying and Storage
After cleaning your eggs, it’s essential to dry and store them properly before incubation. Failing to do so can lead to moisture-related issues, such as bacterial growth, mold, and even egg breakage.
To dry your cleaned eggs, you’ll need a clean, dry surface and a way to gently pat the eggs dry. You can use a lint-free cloth or paper towels for this purpose. It’s crucial to be gentle when drying the eggs to avoid creating micro-scratches on the shell that can compromise its integrity. Hold each egg at an angle and allow excess water to drip off before blotting it dry with your chosen material.
Once you’ve dried all the eggs, store them in a cool, dry place away from direct sunlight. A cardboard box or a plastic container with ventilation is ideal for storing cleaned eggs. Avoid stacking the eggs on top of each other as this can cause damage to their delicate points. Instead, lay them flat in a single layer, making sure they’re not touching one another. This will prevent any moisture-related issues and ensure your eggs are ready for incubation.
Common Cleaning Mistakes to Avoid
When it comes to preparing eggs for incubation, many people make common mistakes that can affect fertility and hatch rates. Let’s explore some of these errors together.
Over-Cleaning and Under-Cleaning
When cleaning eggs before incubation, it’s easy to go overboard and end up making mistakes that can harm the embryo. You see, eggshell membranes are incredibly thin and fragile, and excessive cleaning can cause irreparable damage.
In fact, research has shown that even gentle cleaning methods can disrupt the natural moisture balance of the eggshell, leading to increased risk of bacterial contamination and fungal growth. On the other hand, under-cleaning eggs can also be detrimental, as dirt and bacteria can still seep into the egg through tiny cracks or pores.
So, what’s the sweet spot? Aim for gentle cleaning with a soft-bristled brush and lukewarm water only. Avoid using harsh chemicals, soap, or abrasive materials that can strip away the delicate protective layer of the eggshell membrane. Dry the eggs thoroughly after cleaning to prevent moisture buildup.
Remember, the goal is to maintain a healthy balance between cleanliness and preservation of the egg’s natural defenses. By taking care not to over-clean or under-clean your eggs, you’ll be giving your chicks the best chance at a happy, healthy hatch.
Contaminating Cleaned Eggs
Cleaning eggs before incubation is a crucial step to ensure their health and viability. However, it’s easy to contaminate cleaned eggs if you’re not careful. One of the main sources of contamination is your environment. If your hands or equipment aren’t clean, you can transfer bacteria from one egg to another.
To prevent re-contamination after cleaning, it’s essential to maintain a sterile workspace and use proper sanitation techniques. Start by washing your hands thoroughly with soap and water before handling eggs. Then, make sure your equipment is sanitized regularly, including any tools or containers used for cleaning and storing the eggs.
Another common source of contamination is humidity. If the air is too dry or too humid, it can affect the egg’s inner membrane, making it more susceptible to bacteria growth. To prevent this, store cleaned eggs in a cool, dry place with consistent humidity levels, ideally around 50-60%. Regularly check on your eggs and replace any contaminated ones promptly to avoid infecting others.
Tips for Improving Egg Quality
To ensure the healthiest chicks possible, it’s essential to clean eggs before incubation to prevent contamination and improve egg quality. Here are some tips to help you do just that.
Handling Practices During Collection
When collecting eggs from your flock, it’s essential to handle them with care to prevent damage and maintain cleanliness. Start by gently scooping up the egg from under the hen or from a clean nesting box. Support the egg with one hand, making sure not to touch the pointed end where bacteria can enter. This will also help you avoid cracking the eggshell.
Next, carefully transfer the egg to a designated collection container filled with a layer of paper towels or a clean cloth for cushioning. Avoid touching the eggshell excessively, as oils from your skin can weaken it and make it more susceptible to breakage. If collecting eggs by hand is not feasible, use an egg-gathering tool specifically designed for this purpose.
To further minimize the risk of contamination, wash your hands before handling eggs, and ensure the collection area is clean and free of debris. Regularly cleaning the nesting box and surrounding areas will also help maintain a hygienic environment for your hens and reduce the likelihood of dirty or damaged eggs being collected.
Breeding Considerations for Improved Egg Quality
When it comes to improving egg quality, breeding practices play a crucial role. Genetics and nutrition are key factors that can significantly impact the quality of eggs produced by your flock. To produce high-quality eggs, you’ll want to focus on selecting breeds known for their excellent egg-laying abilities and robust health.
Consider incorporating genetics from breeds like Leghorns or Orpingtons into your breeding program. These breeds have been selectively bred over centuries for their exceptional egg-laying capabilities. When it comes to nutrition, ensure that your flock is receiving a balanced diet rich in essential nutrients such as protein, calcium, and vitamins A and D.
A well-planned breeding program can help you identify birds with desirable traits, such as strong immune systems or high fertility rates. By incorporating these genetics into your breeding stock, you’ll be one step closer to producing healthier, higher-quality eggs. To get started, take a close look at the health and productivity of your current flock. Identify the most robust individuals and consider using them for future breeding purposes.
Additional Recommendations for Incubation Success
To further optimize hatch rates, it’s essential to set up and maintain an ideal incubation environment. This involves more than just placing eggs under a heating source; it requires precise temperature control, humidity levels, and proper airflow.
When setting up your incubator, ensure that the temperature is consistently between 99°F and 100°F (37°C to 38°C). Avoid placing it near drafts or windows, as this can cause inconsistent temperatures. You can use thermometers to monitor temperature fluctuations and adjust as needed.
Humidity levels also play a crucial role in successful hatching. Aim for a relative humidity of 50-60% during the first 18 days of incubation, increasing to 70-80% from day 18 onwards. To achieve this, you can use a humidifier or maintain high humidity by misting the incubator with water daily.
Proper ventilation is also essential; ensure that air flows freely in and out of the incubator to prevent the buildup of toxic gases. By paying attention to these details, you’ll create an optimal environment for your eggs to develop and hatch successfully.
Conclusion: Prioritizing Clean Eggs for Successful Incubation
Now that you’ve learned how to properly clean your eggs before incubation, it’s essential to prioritize this step in your overall process. Remember, a clean egg is crucial for successful hatching. Think of it as the foundation upon which everything else builds – if the egg isn’t free from bacteria and debris, the chances of a healthy chick emerging are significantly reduced.
To reinforce good habits, make cleaning eggs a regular part of your routine. Always wash your hands before handling eggs, and use a soft-bristled brush to gently scrub away any dirt or debris. Don’t be too hard on yourself if you miss a spot – just take your time and ensure the egg is thoroughly cleaned.
By prioritizing clean eggs, you’ll set your incubation project up for success.
Frequently Asked Questions
How do I know if my eggs have been properly cleaned before incubation?
After cleaning your eggs, inspect them for any remaining dirt or debris. Check the eggshell’s texture and appearance; a well-cleaned egg should have a smooth, clean surface. If you’re still unsure, it’s always better to err on the side of caution and re-clean the egg.
Can I use tap water to rinse cleaned eggs before incubation?
No, using tap water can introduce chemicals or bacteria into the egg, potentially harming the developing embryo. Instead, use a sterile or distilled water specifically designed for cleaning eggs or hatching equipment.
What’s the best way to store clean eggs after they’ve been prepared for incubation?
After cleaning and drying your eggs, store them in a cool, dry place away from direct sunlight. You can also consider using an egg carton or specialized storage containers with adequate ventilation to maintain humidity levels. Always keep them separate from other eggs that haven’t undergone the same cleaning process.
How often should I clean my incubation equipment and tools?
Regularly clean your incubation equipment, including turners, humidifiers, and fans, after each hatching cycle. Use a mixture of mild soap and warm water to remove any debris or bacteria. Dry all equipment thoroughly before storing it for the next use.
What are some common mistakes breeders make when cleaning eggs for incubation?
Some common errors include over-cleaning, which can strip the eggshell of essential oils; under-cleaning, leaving behind dirt and bacteria that can harm the developing embryo; and failing to properly dry cleaned eggs before storage. Be mindful of these pitfalls to ensure optimal results in your hatching project.