
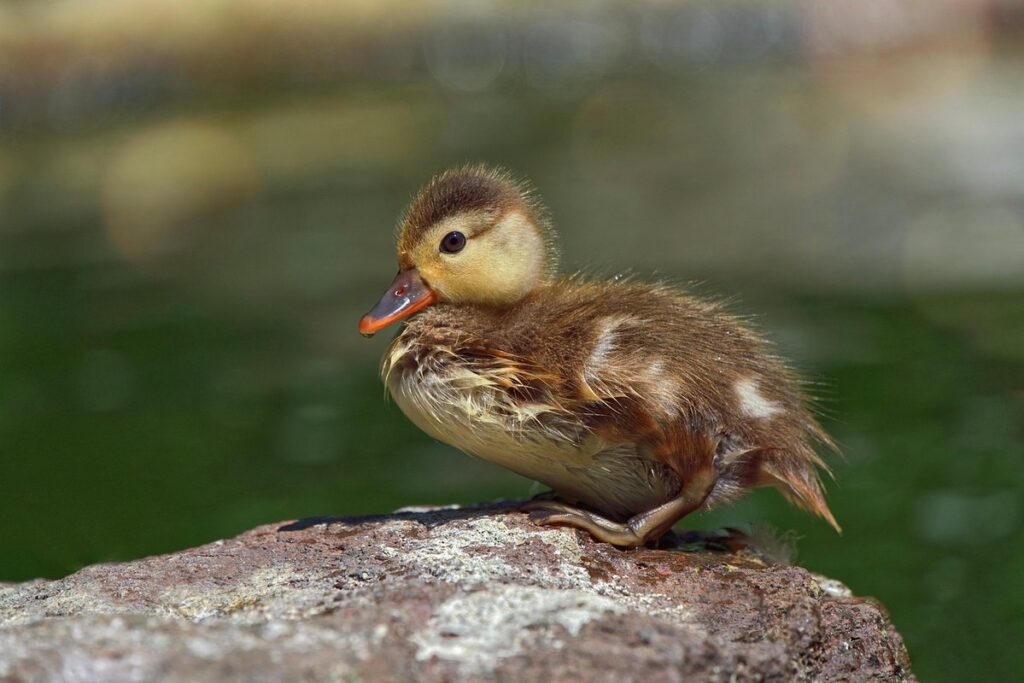
Maintaining a clean duckling brooder is crucial for raising healthy young ducks. As any duck breeder or owner knows, a dirty environment can quickly lead to disease and health issues in your feathered friends. With so much at stake, it’s essential to know how to properly remove waste, disinfect surfaces, and prevent the spread of disease in your brooder. In this article, we’ll share our expert tips and tricks for keeping your duckling brooder spotless. From daily cleaning routines to deep-cleaning strategies, you’ll learn everything you need to create a safe and hygienic environment for your young ducks to thrive. By following these essential guidelines, you can rest assured that your brooder is a healthy haven for your ducklings to grow strong and healthy.
Understanding Duckling Needs
To raise happy and healthy ducklings, it’s essential to understand their specific needs and how they impact your brooder cleaning schedule. Let’s dive into what ducklings require from you daily.
Importance of a Clean Environment
Maintaining a clean environment is crucial for ducklings’ overall health and well-being. A dirty brooder can harbor diseases, bacteria, and parasites that can quickly spread among the quacking flock. When ducklings are exposed to unsanitary conditions, their immune systems are weakened, making them more susceptible to illnesses.
Dirt and debris in the brooder can also lead to respiratory problems, as particles become airborne and are breathed in by the ducklings. This can cause coughing, sneezing, and even pneumonia in severe cases. Additionally, a dirty environment can reduce the nutritional value of food and water, as they may become contaminated with bacteria or mold.
To prevent these issues, it’s essential to clean the brooder regularly, at least once a day. Remove soiled bedding, disinfect feeding troughs and waterers, and thoroughly scrub all surfaces with a mild detergent. Change the bedding completely every week or two, depending on the number of ducklings and their age. By prioritizing cleanliness, you’ll create a safe and healthy environment for your feathered friends to grow and thrive.
Essential Components of a Duckling Brooder
When setting up an effective duckling brooder, there are several essential components to consider. First and foremost, adequate ventilation is crucial to prevent ammonia buildup from droppings and maintain a healthy environment for the ducklings. A good rule of thumb is to provide at least 1 square inch of venting per chick (or in this case, duckling) to ensure proper airflow.
Temperature control is also vital, as ducklings require a consistent temperature between 90-100°F for the first week after hatching. You can use heat lamps or ceramic heat emitters to maintain the desired temperature, but be sure to monitor it closely and adjust as needed.
Another important aspect is providing sufficient space for the ducklings to move around comfortably. A good starting point is to allocate at least 2-3 square feet of floor space per duckling, with adequate room for movement and exercise. This will not only prevent overcrowding but also promote healthy growth and development.
Setting Up Your Brooder
Before you start bringing home those adorable ducklings, make sure your brooder is set up safely and hygienically to prevent health issues and ensure a smooth transition. Let’s cover the essential steps for setting up your brooder properly.
Choosing the Right Location
When it comes to setting up your duckling brooder, choosing the right location is crucial for their health and well-being. Proximity to water sources is essential, as ducklings need access to clean drinking water at all times. Consider placing your brooder near a water source, such as a hose or a large container, to make it easy to refill the waterer without having to lift heavy containers.
Shelter from extreme weather conditions is also vital. Avoid placing your brooder in direct sunlight, which can lead to heat stress and dehydration in ducklings. Similarly, ensure that your brooder is protected from strong winds and precipitation. A covered porch or a garage can be an excellent location for your brooder, providing shelter and protection from the elements.
Accessibility is another key consideration when choosing a location for your duckling brooder. Make sure it’s easily accessible for cleaning and maintenance, allowing you to quickly and efficiently remove soiled bedding and clean the area without straining yourself.
Preparing the Brooder Area
Preparing the brooder area is an essential step to ensure your ducklings stay healthy and thrive. Before introducing your new arrivals, thoroughly disinfect all surfaces with a poultry-safe solution to eliminate any bacteria or viruses that might be lingering from previous use. Pay particular attention to corners, crevices, and areas around feeding and watering troughs where moisture tends to accumulate.
Next, lay down bedding materials like straw or shredded newspaper, which will help absorb droppings and maintain a dry environment. A 2-3 inch layer should suffice for the first week or two, but be prepared to add more as needed. Arrange your equipment strategically – place feeders and waterers at duckling height to prevent waste and splashing.
Consider investing in a brooder with built-in nesting boxes if you plan on raising multiple ducklings together. This will help minimize stress and promote a healthy environment for growth. Once everything is set up, give the area a final once-over to ensure it’s clean and safe for your new feathered friends.
Cleaning the Brooder on a Daily Basis
To keep your ducklings happy and healthy, it’s essential to clean their brooder daily, removing any soiled bedding and disinfecting surfaces. This section will walk you through the simple steps involved.
Removing Waste and Odors
Removing waste and odors from the brooder on a daily basis is crucial to maintaining a healthy environment for your ducklings. To start, make it a habit to scoop out droppings at least twice a day, or more often if you have a large number of ducklings. Use a shovel or a scoop specifically designed for this task to pick up any visible waste and dispose of it in a designated area.
Changing bedding materials is another essential step in removing odors from the brooder. Opt for absorbent materials like pine shavings, aspen shavings, or recycled paper products that can help absorb moisture and reduce odor buildup. Replace bedding completely every 7-10 days, or sooner if you notice it becoming saturated with urine.
To minimize odors further, consider adding a layer of activated charcoal or baking soda to the brooder. These natural odor-absorbers can help neutralize any lingering smells. Regular cleaning will also prevent waste from accumulating and reduce the risk of disease transmission among your ducklings.
Disinfecting Surfaces and Equipment
Disinfecting surfaces and equipment is a crucial step in maintaining a healthy brooder environment. To prevent disease transmission, it’s essential to regularly disinfect all surfaces and equipment that come into contact with the ducklings.
Begin by removing soiled bedding, droppings, and any debris from the brooder floor. Dispose of these materials properly to avoid contaminating other areas of your farm or coop. Next, clean and disinfect all surfaces with a solution of 1 part bleach to 10 parts water. Focus on high-touch areas such as feeders, waterers, and nesting boxes.
Don’t forget to disinfect equipment like thermometers, lamps, and heat sources. These items can harbor bacteria that can spread disease among the ducklings. Use a soft-bristled brush or cloth to scrub away any stubborn stains or debris before disinfecting. Allow all surfaces and equipment to air dry completely after cleaning and disinfecting.
For especially sensitive areas like nesting boxes, consider using a gentler disinfectant specifically designed for poultry environments. Always read and follow the label instructions carefully to ensure effective and safe use.
Deep Cleaning the Brooder (Weekly/Monthly)
As a duck parent, you’ll want to deep clean your brooder regularly to keep your ducklings healthy and happy. This includes daily cleaning tasks and deeper monthly scrubdowns.
Removing Old Bedding and Cleaning Equipment
Removing old bedding and cleaning equipment is an essential step in deep cleaning the brooder. It’s crucial to do this regularly to maintain a healthy environment for your ducklings. Old bedding can harbor bacteria, mites, and other microorganisms that can cause diseases.
Start by removing all the old bedding from the brooder. You can simply scoop it out with a shovel or use a vacuum cleaner with a gentle suction setting to avoid disturbing the equipment. Take this opportunity to inspect the brooder’s walls, floor, and corners for any signs of moisture or debris buildup. Make sure to remove any debris you find to prevent mold and mildew growth.
Next, clean all the equipment used in the brooder, including the feeders, waterers, and heaters. Wash them with warm soapy water, then sanitize them by soaking them in a solution of 1 part white vinegar to 9 parts water for at least 10 minutes. Rinse thoroughly and dry before returning them to the brooder.
Remember to always wear gloves when handling dirty bedding or cleaning equipment to prevent transferring bacteria to your hands and other areas of the brooder.
Replacing Bedding Materials and Sanitizing Surfaces
When it’s time to replace the bedding materials and sanitize surfaces in the brooder, it’s essential to do so regularly to maintain a healthy environment for your ducklings. A general rule of thumb is to change the bedding material completely every week or two, depending on the size of the brooder and the number of ducklings.
First, remove all ducklings from the area to be cleaned. Then, carefully lift out any wet or soiled bedding material, taking care not to disrupt the remaining clean bedding. Dispose of the used bedding in a sealed bag to prevent contamination.
Next, thoroughly sanitize all surfaces with a solution of 1 part white vinegar to 9 parts water. Use a scrub brush to remove any stubborn stains or debris, and rinse the surface with fresh water. Allow the area to air dry completely before reintroducing the ducklings.
Regular cleaning will help prevent the buildup of bacteria and other pathogens that can harm your ducklings.
Maintaining Hygiene and Preventing Disease Spread
Maintaining a clean brooder is crucial for your ducklings’ health, so let’s dive into the importance of hygiene and how to prevent disease spread.
Monitoring Duckling Health
Monitoring duckling health is crucial to prevent disease spread and ensure a healthy flock. When it comes to monitoring duckling health, it’s essential to be vigilant for signs of illness. Some common indicators include labored breathing, lethargy, loss of appetite, and unusual droppings. If you notice any of these symptoms in your ducklings, isolate them immediately and consult with a veterinarian.
Preventing disease transmission is also vital. To achieve this, maintain strict hygiene practices within the brooder. Ensure that all equipment, feeders, and waterers are regularly disinfected with a 1:10 solution of white vinegar to water. Clean and disinfect any surfaces or areas where ducklings have come into contact.
Keep an eye out for potential sources of disease transmission, such as wild birds and rodents, which can carry bacteria like Salmonella and Campylobacter. Regularly inspect the brooder’s surroundings to prevent these pests from entering the area.
Regular weighing and monitoring of your ducklings’ growth rates can also help identify any health issues early on. If you notice a significant drop in weight or an unusual pattern in their growth, take immediate action by consulting with a veterinarian.
Managing Stress and Promoting Well-being
Managing stress and promoting well-being is crucial for ducklings to grow into healthy and robust ducks. A clean environment plays a significant role in this process. To minimize stress, it’s essential to maintain a brooder that is free from drafts, noise, and extreme temperatures. This can be achieved by placing the brooder away from windows, doors, and heating vents.
A well-ventilated brooder is also crucial for reducing ammonia levels, which can cause respiratory problems in ducklings. Ensure good airflow by installing a window or using a ventilation system specifically designed for brooders. Provide adequate lighting, aiming for 14-16 hours of light per day to simulate natural daylight.
Regular cleaning and disinfection of the brooder will help prevent disease spread and maintain a clean environment. Remove soiled bedding, scrub the walls and floors with a mild detergent, and rinse thoroughly. Replace bedding completely every week or two, depending on usage. This regular maintenance will not only reduce stress but also promote well-being in your ducklings.
Troubleshooting Common Issues
We know things don’t always go as planned, so let’s tackle some of the most common issues that can arise during duckling brooder cleaning and maintenance.
Identifying Causes of Unpleasant Odors
When it comes to maintaining a clean and healthy environment for your ducklings, unpleasant odors can be a major concern. Identifying the causes of these smells is crucial to resolving the issue and preventing future problems.
One common cause of unpleasant odors in the brooder is bacterial growth. Bacteria thrive in warm, moist environments, which are perfect conditions for your ducklings’ growth but also ideal breeding grounds for bacteria. If you notice a strong ammonia smell or a sweet, sour odor coming from the brooder, it’s likely due to bacterial growth. To combat this issue, ensure that the brooder is well-ventilated and maintain proper temperature control.
Poor ventilation can lead to stagnation of air, allowing bacteria to multiply rapidly. Regularly inspect the brooder for any signs of moisture accumulation or debris buildup, which can contribute to a musty smell. Additionally, keep an eye on the ducklings’ bedding – it’s essential to change their bedding frequently to prevent bacterial growth.
To prevent unpleasant odors from arising in the first place, consider implementing regular cleaning and disinfecting routines for your brooder. This will not only eliminate existing bacteria but also create a healthier environment for your ducklings.
Managing Pests and Vermin Infestations
When it comes to raising healthy ducklings, managing pests and vermin infestations is an essential aspect of brooder cleaning. Rats, mice, and other unwanted animals can quickly take over a dirty brooder, putting the health of your young ducks at risk.
To prevent pest infestations, ensure that your brooder remains clean and well-maintained. This includes regularly removing soiled bedding, disinfecting surfaces, and controlling humidity levels. For example, a study found that rodent infestations were significantly reduced in brooders with adequate ventilation (1). To create an inhospitable environment for pests, seal any holes or gaps around vents, pipes, and electrical outlets.
If you do encounter a pest problem, act quickly to contain the issue. Remove any affected ducklings and quarantine them separately from the rest of the flock. Use humane traps or repellents to capture and deter the pests, rather than resorting to toxic chemicals. Remember, prevention is key – stay on top of brooder cleaning and maintenance tasks to minimize the risk of pest infestations. Regularly inspect your brooder for signs of rodents, such as droppings, gnaw marks, or burrows.
Conclusion and Best Practices
Now that you’ve learned how to clean your duckling brooder, let’s summarize key takeaways and share best practices for maintaining a healthy environment for your feathered friends.
Recap of Key Takeaways
As we conclude our comprehensive guide to duckling brooder cleaning, let’s recap the key takeaways that will help you maintain a clean and healthy environment for your ducklings.
A clean brooder is essential for the health and well-being of your ducklings. This includes regular cleaning and disinfection, proper ventilation, and monitoring temperature and humidity levels. We’ve discussed in detail how to create a suitable brooding area, including choosing the right size, location, and equipment. Remember, a clean and safe environment will help prevent diseases such as pneumonia and respiratory infections.
To maintain a healthy duckling brooder, it’s crucial to follow a regular cleaning schedule. This includes daily removal of soiled bedding, weekly disinfection, and monthly deep cleaning. Don’t forget to wash your hands thoroughly after handling the ducklings or their surroundings to prevent cross-contamination. You should also make sure to store cleaning supplies safely and out of reach of curious ducklings.
Some essential components to keep in mind include:
* A minimum temperature of 90°F (32°C) for the first week, gradually reducing it by 5-10°F (3-6°C) each week.
* Proper ventilation, ensuring at least 1 square foot of space per duckling.
* Regular monitoring of humidity levels, aiming for a range between 40-60%.
* A balanced diet and fresh water supply.
By following these best practices and maintaining a clean environment, you’ll be well on your way to raising healthy, happy ducklings. Remember, consistency is key when it comes to cleaning and caring for your brooder.
Frequently Asked Questions
What if I notice a strong odor in the brooder despite regular cleaning?
If you notice a persistent or pungent smell, it may indicate a buildup of ammonia from uric acid crystals or bacterial growth. Check for adequate ventilation and consider increasing airflow by opening windows or using a fan. You can also try adding a small amount of baking soda to absorb odors.
Can I use bleach to disinfect the brooder surfaces?
Bleach is not recommended as it can leave toxic residues harmful to ducklings. Instead, opt for a pet-safe disinfectant specifically designed for animal enclosures. Follow the manufacturer’s instructions and ensure proper ventilation to avoid exposure risks.
How often should I replace old bedding materials completely?
Replace bedding every 1-2 weeks or sooner if you notice signs of soiling or dampness. Fresh bedding helps maintain a clean environment and reduces the risk of disease transmission.
What about ducklings that are more prone to wetting their bedding – how can I minimize messes?
Ducklings that struggle with wetting may require adjustments to the brooder’s temperature, humidity levels, or feeding schedule. Consider using a heat source or humidifier to create a more comfortable environment and encourage potty training.
Can I use a UV light to sanitize my duckling brooder?
UV lights are not an effective replacement for regular cleaning and disinfection. However, they can be used as an additional measure to reduce bacterial growth and maintain hygiene. Always follow the manufacturer’s guidelines and ensure the light is positioned correctly to avoid harming your feathered friends.