
If you’re like many backyard chicken keepers, you’re probably generating a significant amount of chicken bedding waste every month. But did you know that this waste can be turned into a valuable resource for your garden? Composting chicken bedding is an effective way to reduce waste, create nutrient-rich soil, and promote sustainable gardening practices.
In this comprehensive guide, we’ll walk you through the benefits and process of composting chicken bedding, covering everything from setting up your compost pile to maintaining optimal conditions. We’ll also share expert tips on how to speed up decomposition, avoid common mistakes, and incorporate finished compost into your garden beds. By following these steps, you can turn what was once waste into a valuable resource that will give your plants the boost they need to thrive.
Introduction to Chicken Bedding Composting
Welcome to our guide on composting chicken bedding, where we’ll walk you through the basics of turning waste into a valuable resource for your garden. Let’s start with the fundamentals.
What is Chicken Bedding Compost?
Chicken bedding composting is a natural process that involves turning chicken coop waste into a nutrient-rich soil amendment. Essentially, it’s a method of breaking down manure, bedding materials, and other organic matter to create a valuable resource for gardens and farms. This process has been practiced for centuries, but its benefits are still being discovered by many backyard chicken keepers.
By composting chicken bedding, you can reduce waste, minimize odor issues, and create a sustainable gardening practice. The end result is a nutrient-dense compost that can be used to fertilize plants, improve soil structure, and support beneficial microorganisms in the soil. Some of the key benefits of chicken bedding compost include improved crop yields, increased soil fertility, and reduced water consumption.
To get started with chicken bedding composting, you’ll need to collect materials from your coop, including manure, droppings, and soiled bedding. You can then mix these materials with other organic matter like leaves, straw, or shredded newspaper, and allow the mixture to decompose over time. The specific ratio of “green” (manure-rich) materials to “brown” (dry carbon-rich) materials will vary depending on your setup, but a general rule of thumb is to aim for a 2:1 ratio of brown to green materials.
Importance of Sustainable Chicken Keeping Practices
As you venture into backyard chicken keeping, it’s essential to adopt sustainable practices that not only benefit your flock but also minimize waste and reduce your environmental footprint. Sustainable chicken keeping is crucial for several reasons.
Firstly, it helps reduce the staggering amount of waste generated by chickens. According to a study, a single layer hen can produce up to 1 pound of droppings daily. If left unmanaged, this waste can lead to ammonia buildup in the coop and surrounding areas, posing health risks to both humans and birds. Composting chicken bedding is an effective way to manage this waste, turning it into a valuable nutrient-rich fertilizer for your garden.
By adopting sustainable practices, you’ll also be reducing your carbon footprint. Chicken farming contributes significantly to greenhouse gas emissions, mainly due to the production of fertilizers, transportation, and feed. By implementing efficient composting methods and using locally sourced materials, you can minimize your impact on the environment.
Additionally, sustainable chicken keeping encourages responsible resource management, which includes feeding your flock a balanced diet and ensuring proper waste disposal. This not only benefits the environment but also promotes animal welfare and healthy egg production.
Benefits of Composting Chicken Bedding
Composting chicken bedding is an excellent way to reduce waste and create a nutrient-rich soil amendment for your garden. One of the most significant benefits of composting chicken bedding is that it helps divert large quantities of waste from landfills. According to the US Environmental Protection Agency, animal waste, including chicken bedding, accounts for approximately 30% of municipal solid waste in the United States.
Not only does composting chicken bedding reduce waste, but it also creates a valuable resource for your garden. Composted chicken bedding is an excellent source of nutrients like nitrogen, phosphorus, and potassium, which are essential for healthy plant growth. By incorporating composted chicken bedding into your soil, you can improve its structure, increase water retention, and support beneficial microbial activity.
When done correctly, composting chicken bedding can also help reduce odors associated with traditional compost piles. A well-balanced compost pile that includes a mix of “green” materials (like fresh manure) and “brown” materials (like dried straw or shredded newspaper) will minimize odor issues. This balance is crucial in creating an efficient composting process that yields high-quality compost for your garden.
Understanding the Composting Process
Now that you’ve collected your chicken bedding, let’s dive into the composting process and explore how to break it down into a nutrient-rich soil amendment. This section will walk you through each stage of composting.
Choosing the Right Materials for Composting
When choosing materials for composting chicken bedding, it’s essential to understand the balance of carbon-rich and nitrogen-rich components. Carbon-rich bedding materials such as straw, hay, and shredded newspaper are great additions to your compost pile. These materials provide a slow release of energy for the microorganisms breaking down the manure.
Nitrogen-rich manure from chickens is an excellent source of nutrients, but it’s essential to balance its addition with carbon-rich materials. Aim for a mix of 2/3 “brown” materials (carbon-rich) and 1/3 “green” materials (nitrogen-rich). Additives like finished compost, worm castings, or dried kelp meal can enhance the decomposition process.
For example, if you’re using a lot of manure from free-range chickens, balance it with straw or hay to avoid creating an anaerobic environment. Similarly, if you’re adding shredded newspaper, mix it with chicken droppings and a handful of finished compost to speed up the decomposition.
When selecting materials, consider their carbon-to-nitrogen ratio (C:N). Aim for a mix that’s at least 25:1, but ideally closer to 30:1. This balance will ensure efficient decomposition and minimize odors or pests in your compost pile.
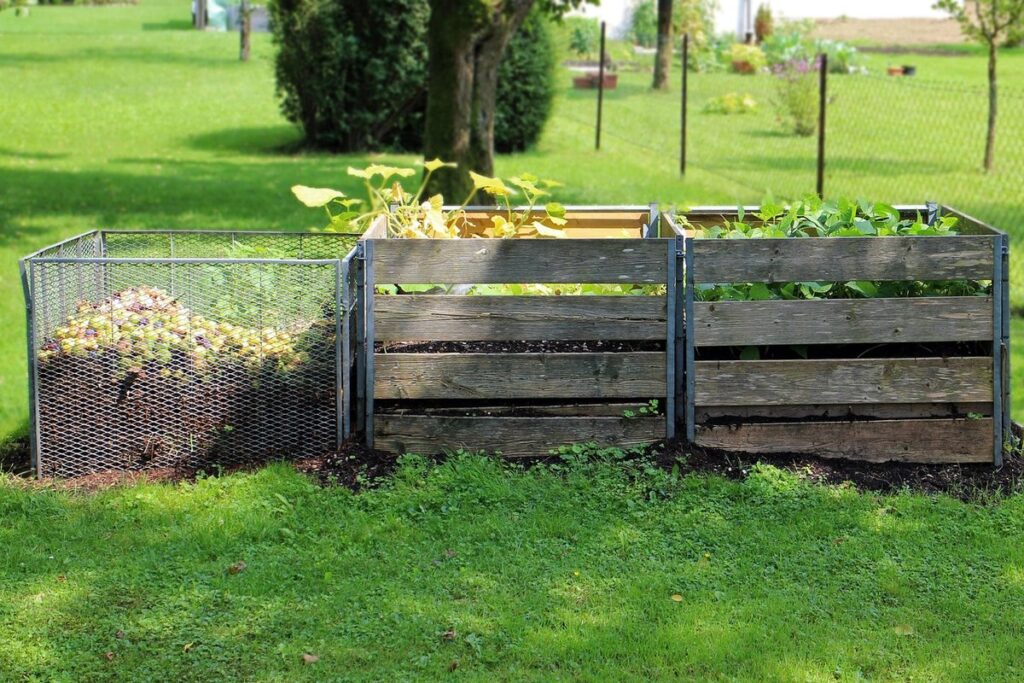
Setting Up a Composting System
When it comes to setting up a composting system for chicken bedding, you have several options to choose from. The type of system you select will depend on factors like space, budget, and desired level of maintenance. Here are some common types of composting systems, their pros and cons, and how they can be used with chicken bedding.
Tumblers are a popular choice for composting because they’re easy to turn and aerate, which helps speed up the decomposition process. They’re also compact and perfect for small spaces. However, tumblers can be expensive upfront, and you may need to purchase additional accessories like aeration tools. Worm composting, also known as vermicomposting, is another option that’s ideal for small-scale composting. It uses worms to break down the organic matter, producing a nutrient-rich fertilizer in just a few weeks. However, worm composting requires a steady food supply and regular monitoring of moisture levels.
When choosing a composting system, consider your specific needs and preferences. If you have limited space or want a low-maintenance option, a tumbler might be the way to go. On the other hand, if you’re interested in producing a high-quality fertilizer quickly, worm composting could be the better choice. A traditional pile-based system is also an option, but it requires more space and manual turning. Ultimately, the key to successful composting is regular maintenance and monitoring of temperature, moisture, and carbon-to-nitrogen ratios.
Some systems can handle small amounts of chicken bedding without issue, while others may require additional materials like straw or wood chips to balance out the mixture. Research each system thoroughly before making a decision, and consider factors like space, budget, and desired level of maintenance when choosing the best composting system for your needs.
Maintaining Optimal Compost Conditions
Maintaining optimal compost conditions is crucial to ensure that the decomposing process occurs efficiently and effectively. This means balancing moisture levels, temperature, carbon-to-nitrogen ratio, and aeration within your compost pile.
To achieve the right balance of moisture, aim for a mix of dry and wet materials. Aim for 50-60% humidity level. You can test this by sticking your hand into the compost – if it feels damp but not soggy, you’re on the right track. Ensure there’s adequate carbon-rich materials like dried leaves, straw, or shredded newspaper to balance out the nitrogen-rich chicken bedding.
Temperature is also vital in maintaining optimal compost conditions. The ideal temperature range for composting is between 130°F and 140°F (54°C to 60°C). If it gets too hot, your compost might become anaerobic, leading to unpleasant odors and slow decomposition.
Regular turning of the pile will help maintain aeration, which ensures healthy microbial growth and prevents matting. Aim for every 7-10 days for smaller piles or once a week for larger ones. By maintaining these conditions, you’ll create a nutrient-rich compost perfect for fertilizing your garden beds.
Managing Odor and Pest Issues in Chicken Bedding Compost
When managing chicken bedding compost, unpleasant odors and pest infestations can be a major concern. This section will cover strategies to minimize these issues effectively.
Strategies for Reducing Odors in Compost
Reducing odors in compost is crucial for maintaining a healthy and thriving pile. One effective strategy is to ensure adequate aeration within the pile. As carbon-rich materials like straw or shredded newspaper break down, they release oxygen, which helps speed up decomposition and reduces putrid smells. To achieve optimal airflow, turn your compost regularly – about once every week or two, depending on the size of the pile.
Another approach is to mix ‘green’ and ‘brown’ materials carefully. Green materials like chicken bedding, food scraps, or manure are high in nitrogen and moisture content, which can contribute to unpleasant odors if left unbalanced. Balance these with sufficient brown materials – carbon-rich resources such as leaves, straw, or shredded newspaper – to absorb excess moisture and control odor release.
Consider adding odor-reducing additives like baking soda, activated charcoal, or lime to your compost pile as well. These natural agents can help neutralize pH levels and minimize ammonia production, leading to fresher air around the pile.
Preventing Pests and Diseases in Compost
Preventing pests and diseases in compost is crucial to maintaining a healthy and safe composting process. When chicken bedding compost is not properly managed, it can become a breeding ground for pests and diseases that can contaminate the finished compost. Some common pests found in compost include rodents, flies, and ants.
To prevent pests from taking over your compost pile, it’s essential to maintain good housekeeping practices. This includes regularly turning the pile, ensuring adequate carbon-to-nitrogen ratios, and keeping the area around the compost pile clean. You should also be aware of any nearby food sources or potential entry points for pests.
Aim to maintain a temperature within the compost pile that is hot enough (at least 130°F) to kill off pathogens and pests. This can be achieved by ensuring adequate moisture levels, oxygen supply, and sufficient carbon-rich materials like leaves or straw. By following these guidelines, you can create an environment in your compost pile that discourages pests and diseases from taking hold.
As a general rule of thumb, it’s also essential to regularly inspect your compost pile for signs of pest activity or disease. If you notice any issues, take swift action to correct the problem before it spreads.
Monitoring and Maintaining the Quality of Compost
To ensure your compost is usable, it’s crucial to regularly monitor its temperature, moisture levels, and carbon-to-nitrogen ratio to prevent contamination and maintain quality. This will guide you through that process.
Testing and Evaluating Compost Quality
Testing and evaluating the quality of finished compost is crucial to ensure it meets the desired standards for nutrient content and microbe activity. One simple yet effective method to assess compost quality is through a series of visual and tactile inspections. Look for an earthy aroma, dark brown color, and crumbly texture – these characteristics indicate a high level of decomposition and microbial activity.
To further evaluate nutrient content, consider conducting a pH test using a pH meter or litmus paper. The ideal pH range for compost is between 6.5 and 7.5, which allows for optimal microbial growth and nutrient availability.
Microbe activity can be evaluated through the presence of worms or other invertebrates, such as fruit flies, that indicate a thriving ecosystem. You can also test for microbial activity by placing a small sample of compost in a sealed container – if it starts to bubble within 24 hours, this is a sign of healthy microbe populations.
Incorporating a nutrient analysis using methods like the Kjeldahl method or Dumas method can provide a more precise measure of nitrogen, phosphorus, and potassium levels. These values will help you determine whether your compost meets the required standards for soil amendment applications.
Storing and Using Finished Compost
Once you’ve reached the end of the composting process and have collected a batch of finished compost, it’s essential to store and use it correctly. Finished compost should be stored in a clean, dry container with a lid to prevent contamination and moisture from seeping back in.
When storing your compost, consider the following:
* Keep the container off the ground to avoid pest infestations
* Regularly check the compost for any signs of mold or fungal growth, which can indicate improper storage conditions
To use your finished compost, start by adding a 2-3 inch layer to your garden beds or potting mix. You can also mix it into existing soil to improve its structure and fertility.
Some essential tips when using finished compost:
* Start with small amounts (about 10% of the total soil volume) and gradually increase as needed
* Mix it well with existing soil before planting to avoid any settling or separation issues
Remember, a key part of maintaining high-quality compost is proper storage and usage. By following these guidelines, you can ensure that your finished compost continues to provide excellent benefits for your garden.
Best Practices for Implementing Chicken Bedding Composting in Your Flock
To ensure a smooth composting process, let’s dive into some essential best practices that’ll make a big difference in your flock’s well-being and your gardening success.
Integrating Composting into Existing Flock Management
Incorporating composting into your existing flock management practices requires thoughtful planning and coordination. Start by reviewing your current scheduling to determine the best time for composting. Consider adding a weekly “composting day” where you collect soiled bedding, add it to the compost pile, and replenish with fresh bedding.
When allocating space for composting, identify an area that is easily accessible, protected from the elements, and close to your flock’s living quarters. This will minimize labor costs and make monitoring the compost process more efficient. Allocate sufficient space for both the compost pile and storage containers for finished compost.
To effectively integrate composting into your daily routine, allocate a small amount of labor time each week (about 30 minutes per day). This can be divided among multiple individuals, making it manageable even with limited resources. Be sure to educate all flock caretakers on their roles in maintaining the compost pile, including adding materials, turning the pile, and monitoring temperature.
By incorporating these simple steps into your existing flock management practices, you’ll be well on your way to creating a sustainable composting system that not only reduces waste but also generates valuable nutrient-rich fertilizer for your garden.
Training and Educating Family Members or Helpers
Training and educating family members or helpers is crucial for the success of your composting chicken bedding system. Assign each person a specific role to ensure everyone understands their responsibilities. Start by explaining why composting is essential, such as reducing waste, creating nutrient-rich fertilizer, and promoting a healthier environment.
When teaching family members how to manage the compost pile, emphasize the importance of maintaining optimal moisture levels, carbon-to-nitrogen ratios, and turning the pile regularly. Show them how to monitor temperature using a thermometer and explain that the pile should reach temperatures between 130°F and 140°F for effective pathogens destruction.
To make it more engaging, consider setting up a demonstration area or creating a visual guide with pictures or diagrams. Encourage family members to ask questions and share their observations throughout the process. By educating everyone involved, you’ll not only promote teamwork but also ensure that your composting system runs smoothly and efficiently. Regularly review and discuss progress to identify areas for improvement and make adjustments as needed.
Frequently Asked Questions
Can I compost chicken bedding with other types of waste, like vegetable scraps or coffee grounds?
Yes! Composting chicken bedding can be combined with other organic materials to create a diverse and nutrient-rich compost blend. Vegetable scraps, coffee grounds, and eggshells are all great additions to your compost pile, as they add carbon and nitrogen-rich elements that help speed up decomposition.
How often should I turn or aerate my chicken bedding compost pile?
Turn or aerate your compost pile every 7-10 days to ensure oxygen reaches all areas and prevents anaerobic conditions. This frequency may vary depending on the size of your pile, climate, and specific materials being composted.
What’s the best way to handle pests or diseases in my chicken bedding compost pile?
To prevent pests and diseases in your compost, maintain optimal moisture levels (around 50-60%), keep your pile covered, and ensure adequate carbon-to-nitrogen ratios. If you notice issues, use physical barriers, beneficial insects, or natural deterrents like diatomaceous earth to control pest populations.
Can I use finished compost directly on my garden beds without mixing it with other soil amendments?
Yes, but it’s recommended to mix finished compost with existing soil at a ratio of 10-20% compost to 80-90% soil. This helps prevent nutrient shock and allows plants to gradually adjust to the new soil conditions.
How long does it take for chicken bedding compost to be ready for use in my garden?
The time it takes for chicken bedding compost to mature can range from a few weeks to several months, depending on factors like temperature, moisture, and carbon-to-nitrogen ratios. As a general rule, finished compost should have an earthy aroma, crumbly texture, and be free of recognizable materials.