
Composting is an amazing way to reduce your environmental impact while giving back to your garden or landscape. But did you know that you can take this sustainable practice a step further by composting chicken carcasses? Yes, you read that right! Turning what would otherwise be waste into a valuable resource for your soil is not only eco-friendly but also incredibly beneficial for your plants.
In this article, we’ll dive into the world of composting and explore how to turn those pesky chicken remains into nutrient-rich soil. We’ll cover the process from start to finish, including how to prepare the carcasses, what types of materials to mix with them, and how to ensure that your compost is safe for use in your garden or landscape. By the end of this article, you’ll be equipped with the knowledge and confidence to give new life to waste and create a healthier, more sustainable environment for yourself and your loved ones.
Benefits and Importance of Composting Chicken Carcasses
Composting chicken carcasses is not only a sustainable way to manage your farm’s waste, but also provides numerous benefits for your garden. Let’s dive into what makes it so valuable for your backyard ecosystem.
Environmental Impact of Traditional Waste Disposal
When we send chicken waste to landfills, it has severe environmental consequences. One of the primary issues is methane production. As organic materials decompose, they release methane, a potent greenhouse gas that contributes to climate change. In fact, according to the Environmental Protection Agency (EPA), landfills are the third-largest source of human-related methane emissions in the United States.
Another significant problem associated with traditional waste disposal methods is water pollution. When chicken carcasses and other organic materials decompose, they can leach into nearby water sources, contaminating them with pathogens and pollutants. This can have devastating effects on local ecosystems and even pose health risks to humans who consume contaminated water or food.
The statistics are alarming: it’s estimated that every year, over 1 billion pounds of chicken waste end up in landfills in the United States alone. By composting our chicken carcasses, we not only reduce greenhouse gas emissions but also prevent these pollutants from entering our waterways.
Nutrient-Rich Compost for Gardening and Landscaping
Composting chicken carcasses can be a game-changer for gardeners and landscapers looking to create nutrient-rich soil without relying on synthetic fertilizers. When broken down, the high-protein content of chicken bones and meat becomes available to plants, promoting healthy growth and development.
Not only does composted chicken provide essential nutrients like nitrogen, phosphorus, and potassium, but it also adds beneficial microorganisms to the soil. These microbes help to break down organic matter, making it easier for plants to absorb water and nutrients. This, in turn, can lead to increased crop yields and improved soil structure.
To incorporate this nutrient-rich compost into your gardening routine, start by setting aside a dedicated space for decomposition. Add coarsely chopped chicken carcasses, along with other “green” materials like vegetable scraps or grass clippings, to the pile. As it breaks down, mix in “brown” materials like shredded leaves or newspaper to balance out the carbon-to-nitrogen ratio and prevent odors.
By composting your own chicken carcasses, you can create a sustainable solution for your backyard garden while reducing waste and promoting eco-friendly gardening practices.
Reducing Your Carbon Footprint through Sustainable Practices
By incorporating composting chicken carcasses into your sustainable practices, you’re not only reducing waste but also contributing to a more environmentally conscious approach to backyard living. Composting is an effective way to minimize your carbon footprint by reusing organic materials that would otherwise end up in landfills. By breaking down these materials, you conserve natural resources, such as water and energy, typically required for processing and manufacturing.
According to the Environmental Protection Agency (EPA), food waste accounts for approximately 21% of municipal solid waste in the United States. Composting chicken carcasses is a simple yet impactful way to divert this waste from landfills. By composting at home, you can create nutrient-rich soil amendments that promote healthy plant growth and reduce your reliance on synthetic fertilizers.
To get started with composting chicken carcasses, first ensure you have a dedicated composting area or bin that’s easily accessible for regular maintenance. Next, mix the carcass with other organic materials like leaves, grass clippings, or vegetable scraps to maintain a carbon-to-nitrogen ratio. Regularly turning and monitoring the pile will help speed up decomposition while minimizing odors and pests.
Setting Up a Composting System for Chicken Carcasses
To set up a successful composting system for chicken carcasses, you’ll need to choose the right location and prepare it with essential materials like bins and carbon-rich additives. Let’s get started!
Choosing the Right Location for Your Compost Pile
When selecting a location for your compost pile, there are several factors to consider. First and foremost, think about sunlight exposure. Your compost pile needs direct sunlight to help speed up the decomposition process, so choose a spot that receives at least 6 hours of direct sunlight per day.
Accessibility is also crucial. You’ll need to be able to easily add materials to your compost pile, as well as turn it regularly. Consider a location near an entrance or pathway, making it simple to transport chicken carcasses and other organic matter.
Proximity to water sources is another important consideration. While you don’t want standing water nearby, having access to a hose or watering can will make it easier to maintain the right moisture levels in your compost pile. Ideally, choose a spot that’s within 10-15 feet of a water source.
Remember to also consider the aesthetics and odor management when selecting a location for your compost pile. Choose a discreet area away from living spaces and neighbor’s homes to avoid any potential issues.
Types of Composting Systems: Aerobic vs. Anaerobic
When it comes to composting chicken carcasses, understanding the differences between aerobic and anaerobic composting systems is crucial. Aerobic composting systems involve the presence of oxygen, which breaks down organic matter through microbial action. This method is ideal for composting small quantities of kitchen scraps, including meat, as it reduces pathogens and odors.
Anaerobic composting systems, on the other hand, operate without oxygen. They are often used for larger-scale industrial applications but can be adapted for home use. However, anaerobic composting requires careful monitoring to prevent odor buildup and pest attraction. For composting chicken carcasses, aerobic systems are generally recommended due to their ability to reduce pathogens effectively.
When choosing a composting system, consider the size of your operation, local regulations, and personal preferences. If you’re new to composting, start with an aerobic system and monitor its performance before scaling up or switching to anaerobic. Keep in mind that both systems require regular maintenance, such as turning piles and monitoring moisture levels.
When using an aerobic system, ensure adequate oxygen flow by maintaining a 3:1 carbon-to-nitrogen ratio and keeping the pile moist but not soggy. This will help create a balanced environment for microbial activity to thrive, reducing pathogens and odors effectively.
Building Your Compost Pile: Layering and Maintenance
Building a compost pile is not as daunting as it seems. In fact, with some simple layering principles and regular maintenance, you’ll be turning your chicken carcasses into nutrient-rich soil in no time. Start by creating a base layer of “brown” materials like leaves or shredded newspaper. This provides carbon-rich ingredients that will help balance out the nitrogen from the carcasses.
Next, add a layer of chicken carcass scraps, breaking them up to increase their surface area. Aim for a mix of 2/3 “brown” materials and 1/3 “green” (nitrogen-rich) materials like chicken carcasses. To maintain the ideal carbon-to-nitrogen ratio, monitor your pile’s temperature – it should reach 130-140°F within a few days. Regular maintenance tasks include turning the pile every week or two to ensure oxygen flow and speeding up decomposition.
To speed up the process even further, add some water to keep the materials moist but not soggy. Aim for the consistency of a damp sponge. Avoid adding meat scraps with high fat content, as they can attract pests and create odors. With these simple layering principles and regular maintenance tasks, you’ll be on your way to creating nutrient-rich compost from your chicken carcasses in no time!
Preparing Chicken Carcasses for Composting
Before adding chicken carcasses to your compost pile, you need to properly prepare them to ensure a safe and healthy process. Let’s break down the steps to get your scraps ready.
Removing Feathers and Guts from the Compost Process
When adding chicken carcasses to your compost pile, it’s crucial to remove feathers and guts first. These components can create several issues that may hinder the composting process. Feathers, for instance, are primarily composed of keratin, a protein that doesn’t break down easily in typical compost piles. As a result, they can attract pests like rodents and flies, which can be detrimental to your compost’s overall health.
Removing guts is equally important as they contain a high concentration of ammonia, which can emit unpleasant odors and potentially harm microorganisms essential for the decomposition process. Additionally, undigested parts of internal organs can take an inordinate amount of time to decompose, leading to imbalances in the carbon-to-nitrogen ratio and possibly causing your compost pile to become too wet.
To remove feathers and guts effectively, first, ensure you have a designated area for processing your chicken carcasses. Wear gloves when handling raw meat or poultry parts, then thoroughly rinse them under cold running water before separating the edible portions from the inedible bits. Set aside any usable parts like bones, skin, and fat to be added back into the compost pile later. Next, carefully remove feathers by hand or using a gentle scraping motion, followed by setting them aside for further processing (such as through a meat grinder).
Cutting and Grinding: Breaking Down Large Pieces
When working with large chicken carcasses, breaking them down into smaller pieces can make a significant difference in their composting process. One effective way to do this is through cutting and grinding. Cutting the carcass into manageable chunks allows for increased surface area, which aids in decomposition by exposing more material to microorganisms.
This technique also helps to prevent matting, where large pieces of flesh stick together, slowing down the composting process. A meat cleaver or sharp knife can be used to cut larger bones and joints into smaller sections. For grinding, a meat grinder or even a food processor with a coarse grating attachment can be utilized.
It’s essential to aim for pieces around 1-2 inches in size to ensure proper decomposition. This will allow the microorganisms to work efficiently and prevent any potential odors or pests from being attracted to the pile. By cutting and grinding large chicken carcasses, you’ll be able to create a more balanced and easily breakable compost pile, ultimately leading to a successful and odor-free composting experience.
Adding Other Organic Materials for Optimal Composting
When adding chicken carcasses to your compost pile, it’s essential to balance them with other organic materials. This combination will not only enhance decomposition but also increase nutrient availability for your garden.
Some excellent additions to complement chicken carcasses are fruit scraps and vegetable peels. Rich in carbon, these materials help counterbalance the high nitrogen levels found in meat. By adding a mix of 2/3 brown materials (such as leaves or straw) with 1/3 green materials (like fruit scraps or grass clippings), you’ll create an optimal composting environment.
Other beneficial additions include coffee grounds and tea bags, which are rich in micronutrients like copper and iron. These can be added to the pile in moderation. Additionally, shredded newspaper and cardboard can help absorb excess moisture and odors. Just remember to balance your green and brown materials to maintain a carbon-to-nitrogen ratio of 20:1 for efficient decomposition.
As you add these organic materials, mix them well into the compost pile to ensure even breakdown and nutrient distribution. By incorporating a variety of additions, you’ll create a nutrient-rich compost perfect for fertilizing your backyard garden.
Common Challenges and Troubleshooting Tips
When composting chicken carcasses, you may encounter some unexpected issues – don’t worry, we’ve got you covered with common challenges and troubleshooting tips to keep your process smooth.
Odors and Pests: Managing Unwanted Effects
When composting chicken carcasses, you may encounter unwanted odors and pests that can make the process unpleasant. To minimize mess and maintain a healthy ecosystem, it’s essential to address these issues promptly.
To control odors, ensure your pile has adequate carbon-to-nitrogen ratio (about 25-30 parts “brown” materials like leaves or straw to one part “green” materials like food scraps). This balance will help speed up decomposition and reduce unpleasant smells. Regular turning of the pile also helps to aerate it, reducing odors caused by anaerobic conditions.
Common pests like rodents, flies, and ants can be attracted to your compost pile due to the nutrient-rich environment it provides. To deter them, use physical barriers or repellents. For example, you can sprinkle diatomaceous earth around the perimeter of your pile to repel insects. Regularly monitoring your pile and maintaining its integrity will also help prevent pest infestations.
By following these tips, you’ll be able to manage odors and pests effectively, allowing your composting chicken carcasses process to run smoothly and efficiently. This will not only make the process more enjoyable but also ensure that your finished compost is healthy and free of contaminants.
Temperature Fluctuations: Monitoring and Maintaining Optimal Conditions
Temperature fluctuations can significantly impact the decomposition process of chicken carcasses in your compost pile. It’s essential to monitor temperatures regularly to ensure optimal conditions for efficient decomposition.
Aim for a temperature range between 135°F and 150°F, which is ideal for breaking down proteins and fats in meat. To achieve this, it’s crucial to balance carbon-rich materials like leaves or straw with nitrogen-rich materials like chicken manure or grass clippings.
Here are some tips for maintaining optimal temperatures:
* Check your compost pile temperature daily using a thermometer.
* Add more green materials (nitrogen-rich) if the temperature drops below 135°F, and more brown materials (carbon-rich) if it exceeds 150°F.
* Ensure adequate moisture by sprinkling water on the pile when necessary. Excessive dryness can slow decomposition.
Remember that temperatures will fluctuate naturally as bacteria break down the organic matter. Be patient and make adjustments accordingly to maintain the ideal temperature range for efficient composting.
Pathogens and Safety Precautions: Ensuring Compost Quality
When composting chicken carcasses, it’s essential to consider the risks associated with pathogenic microorganisms. These bacteria can survive the composting process and potentially pose a health risk if not handled properly. Pathogens like Salmonella, E. coli, and Campylobacter are commonly found in animal waste and can be transferred through contaminated compost.
To ensure the quality of your finished compost, follow these safety guidelines: Maintain a consistent carbon-to-nitrogen ratio, monitor temperature, and turn the pile regularly to facilitate aerobic decomposition. A minimum temperature of 131°F (55°C) is required to kill most pathogens.
When handling finished compost, always wash your hands thoroughly afterward. If you plan to use the compost as mulch or fertilizer for edible crops, ensure it has reached a temperature of at least 160°F (71°C) to eliminate any remaining pathogens. It’s also crucial to let the compost mature for an extended period, allowing any potential pathogens to break down.
Always err on the side of caution when working with potentially contaminated materials like chicken carcasses. Proper safety precautions and regular monitoring can help minimize risks and produce a high-quality compost that’s safe for use in your backyard garden.
Harvesting and Using Your Finished Compost
Now that you’ve created nutrient-rich compost from your chicken carcasses, let’s explore how to harvest it and put its benefits to use in your garden. We’ll walk through the process of finishing and applying your finished compost.
Testing for Nutrient Content and pH Levels
Now that you’ve completed the composting process and have your finished product, it’s essential to test its quality before using it as fertilizer for your garden. Testing will ensure that your compost meets the necessary standards for nutrient content, pH levels, and other critical parameters.
You can use a variety of methods to test your compost, including chemical tests or DIY kits available at gardening stores. These kits usually include pH testing strips, nutrient analysis, and other parameters such as electrical conductivity (EC) and oxygen levels. For example, the LaMotte Compost Test Kit is a popular choice among gardeners.
When testing for nutrient content, look for nitrogen (N), phosphorus (P), and potassium (K) levels. Aim for the following balance: N-P-K ratio of 10-5-5 or 20-10-10. pH levels should fall within the range of 6.0 to 7.0, which is suitable for most vegetables and fruits.
It’s also crucial to check for contaminants like heavy metals or pathogens that can harm your plants. You can do this by sending a sample to a lab for analysis or using DIY kits specifically designed for pathogen detection.
Remember, testing your compost is not just about meeting specific requirements; it’s about ensuring that your finished product is safe and beneficial for your garden.
Application Methods: Incorporating Compost into Soil
Once you have finished composting your chicken carcasses and it’s fully broken down into nutrient-rich soil, it’s time to incorporate it back into your garden. There are several methods for doing so, each with its own advantages depending on your specific needs.
You can mix the compost directly into your existing soil by digging it in about 8-10 inches deep. This is a great way to improve soil structure and fertility, especially if you’re working with poor or depleted soil. However, be careful not to overdo it – adding too much compost at once can cause nitrogen spikes that might burn your plants.
Alternatively, you can use the compost as a top dressing by sprinkling it evenly around the base of your plants. This is ideal for established gardens where you don’t want to disturb the soil or for areas with poor drainage. Simply rake the compost in gently and water well to help it settle.
When mixing compost into existing soil, start by adding a 2-inch layer of compost on top of the tilled area before incorporating it further. This helps prevent any potential nitrogen spikes and allows you to control the amount being added.
Long-Term Benefits of Using Composted Chicken Carcasses
Using composted chicken carcasses can have a profound impact on the health and fertility of your soil over time. One of the most significant benefits is improved soil structure, which allows for better water retention and root growth. This, in turn, enables plants to thrive, resulting in healthier and more resilient gardens.
As you continue to use composted chicken carcasses in your garden, you’ll notice an increase in soil fertility due to the high nutrient content of these materials. Chicken manure is particularly rich in nitrogen, phosphorus, and potassium – essential macronutrients for plant growth. By incorporating this nutrient-dense material into your compost pile, you’re creating a fertile foundation for your plants.
As your soil becomes more fertile and well-structured, you’ll experience improved crop yields, reduced erosion, and enhanced overall ecosystem health. Regularly incorporating composted chicken carcasses will also lead to increased microbial activity in the soil, further supporting plant growth and promoting a balanced ecosystem. By making this simple switch, you’ll be amazed at the transformative impact it has on your garden’s long-term health and productivity.
Frequently Asked Questions
What if I don’t have a dedicated composting area, can I still compost chicken carcasses?
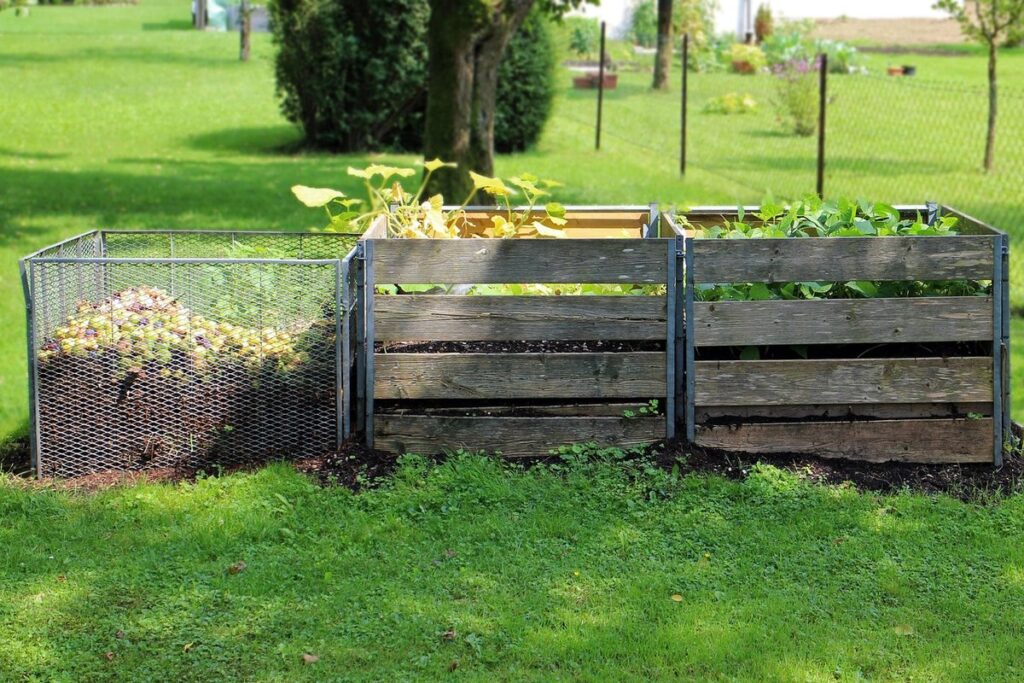
Yes, you can compost chicken carcasses even without a designated composting area. However, it’s essential to choose a location with good airflow and adequate space for the pile to breathe. You may need to create a makeshift compost bin using wire mesh or wood pallets, ensuring easy access for maintenance and turning.
Can I compost chicken carcasses in an urban setting?
Yes, you can compost chicken carcasses in an urban setting, but it requires careful planning. Consider vermicomposting (worm composting) as a viable option, which is ideal for small-scale waste management in confined spaces. This method breaks down organic matter quickly and efficiently.
How do I know if my compost pile has reached optimal temperatures?
Monitoring temperature fluctuations is crucial to ensure your compost pile reaches the required temperatures for decomposition. Use a thermometer to check the internal temperature of your pile, aiming for 130°F – 140°F (54°C – 60°C) for optimal breakdown and pathogen elimination.
Can I add other types of meat, like pork or beef, to my compost pile?
No, it’s generally not recommended to mix different types of animal waste in the same compost pile. Each type of meat has unique decomposition characteristics and may introduce pathogens or off-flavors to your final compost product. Stick to chicken carcasses for optimal results.
What if I notice unpleasant odors during the composting process?
Unpleasant odors are a common issue when composting, especially with high-nitrogen materials like chicken carcasses. To manage odors, ensure good airflow by turning the pile regularly and adding carbon-rich materials (like straw or shredded newspaper) to balance out the nitrogen levels. You can also try adding microorganisms specifically designed to break down organic matter quickly and efficiently.