
As a backyard chicken keeper, you’re well aware of the importance of creating a safe and healthy environment for your flock. But have you ever stopped to think about the ammonia levels in your coop? It’s a crucial aspect of coop design and daily maintenance that can make all the difference in keeping your birds happy and healthy. Ammonia buildup is a common issue in coops, caused by droppings and urine, but it doesn’t have to be a problem. With expert tips on design, daily practices, and long-term strategies, you’ll learn how to control ammonia levels and reduce the risk of respiratory problems, stress, and even disease in your flock. In this article, we’ll dive into the world of ammonia control, providing you with practical advice to create a healthier coop for your beloved chickens.
Understanding the Risks of Ammonia in Coop Environments
High ammonia levels can have serious consequences for your flock’s health, so it’s crucial to understand how to prevent these risks and create a safe coop environment. In this section, we’ll explore the dangers of ammonia buildup in coops.
The Dangers of High Ammonia Levels
High levels of ammonia in coop environments pose significant health risks to both birds and humans. When ammonia combines with moisture in the air, it forms toxic fumes that can cause respiratory problems. Prolonged exposure can lead to chronic conditions such as bronchitis and pneumonia, resulting in mortality rates.
One key indicator of high ammonia levels is the presence of feather pecking and cannibalism among birds. These behaviors are often linked to stress caused by poor air quality. To mitigate this risk, it’s essential to maintain a clean coop environment with adequate ventilation. Ensure that your coop has proper airflow by installing windows or vents, and regularly removing droppings.
It’s also crucial to monitor ammonia levels using test kits. When the readings exceed 50 ppm, take immediate action to reduce the levels. This may involve increasing ventilation rates, providing more nesting boxes to reduce congestion, or even considering a different type of bedding material. Regularly cleaning and disinfecting your coop will also help minimize ammonia buildup. By being proactive about ammonia control, you can create a healthier environment for both birds and humans.
Causes of Ammonia Buildup in Coops
Ammonia buildup in coops can be caused by several factors that are often within our control. One of the most common causes is overcrowding. When there are too many birds in a coop, they produce more waste, which decomposes and releases ammonia into the air. This is especially problematic if the coop is not designed to accommodate large flocks or if the birds are not given enough space to move around comfortably.
Poor ventilation is another major contributor to ammonia buildup. If a coop doesn’t have adequate airflow, moisture becomes trapped, creating an ideal environment for ammonia-producing bacteria to thrive. Inadequate bedding also plays a role in ammonia buildup, as soiled bedding can harbor these bacteria and release ammonia into the air.
Some coops may be more prone to ammonia buildup due to factors such as climate or geography. For example, coops in humid climates are at greater risk of moisture-related issues that contribute to ammonia buildup.
Identifying Sources of Ammonia in Your Flock
When it comes to ammonia control in your coop, pinpointing the source is crucial. Let’s take a closer look at common sources of ammonia and how to identify them.
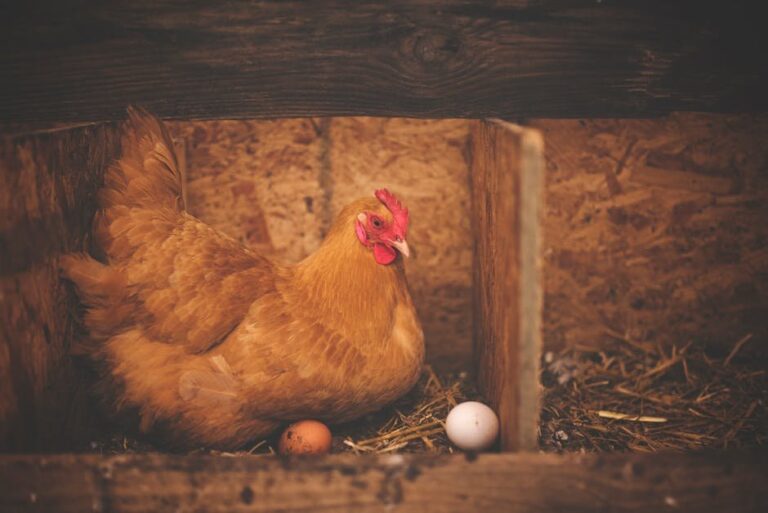
Wet Droppings: A Major Source of Ammonia
Wet droppings are a significant source of ammonia in coops. This is because bacteria like E. coli and Salmonella thrive in moist environments, feeding on the nitrogen-rich waste and producing ammonia as a byproduct. When droppings accumulate wet or soggy, it creates an ideal breeding ground for these microorganisms.
High levels of ammonia can be particularly problematic during cold weather when ventilation might be reduced to conserve heat. Moisture trapped within the coop can exacerbate the issue, making it essential to monitor and manage wet droppings closely. Some strategies for mitigating this problem include:
* Increasing the frequency of litter removal
* Ensuring adequate airflow through the coop by using fans or adjusting doorways
* Implementing a dry bedding material like wood shavings or straw that absorbs moisture
By recognizing the role of wet droppings in ammonia production, you can take targeted steps to reduce this source of contamination and keep your flock healthy. Regular monitoring and maintenance will help minimize the impact of wet droppings on ammonia levels in your coop.
Other Potential Sources of Ammonia
In addition to droppings and urates, there are other potential sources of ammonia that can contribute to high levels in your coop. One such source is the feed you’re providing to your flock. Some types of feed, particularly those high in protein, can be more ammonia-rich than others. For example, if you’re feeding a layer feed with 16% or higher protein content, this could be contributing to higher ammonia levels.
Another potential source of ammonia is the water supply. If the water is not changed frequently enough, bacteria can multiply and produce ammonia as a byproduct. This is especially true in warm weather when bacterial growth is accelerated. Regularly changing the water and cleaning the watering system can help minimize this issue.
Some bedding materials can also release ammonia as they break down. Pine shavings, for instance, can give off more ammonia than other types of bedding like straw or recycled paper products. Consider switching to a different type of bedding if you find that it’s contributing to high ammonia levels in your coop.
Reducing Ammonia Levels with Coop Design
When it comes to ammonia control, a well-designed coop can be a game-changer for reducing levels of this toxic gas and keeping your flock safe. Let’s explore some innovative coop design ideas that can help.
Proper Ventilation: The Key to Ammonia Control
Proper ventilation is often overlooked as a crucial factor in reducing ammonia levels within a coop. However, it plays a vital role in maintaining air quality and keeping the environment safe for birds. When waste material breaks down, it releases ammonia gas into the atmosphere. Without adequate ventilation, this toxic substance accumulates and can lead to respiratory issues, eye irritation, and decreased egg production.
To implement effective ventilation systems, consider the following: Ensure that your coop has at least 2-3 square feet of vent space per bird. This can be achieved by installing windows or vents in well-insulated areas of the coop, such as near the roof or ceiling. Additionally, you should position vents to maximize airflow and prevent heat buildup.
Regularly clean and maintain ventilation systems to ensure they remain functional. Clogged filters or dusty vents can obstruct airflow and exacerbate ammonia levels. Consider using UV-reflective materials on your coop’s exterior to reduce heat absorption during summer months.
Strategic Location and Layout
When designing a coop to minimize ammonia levels, strategic location and layout play a crucial role. One of the most effective ways to reduce ammonia levels is by maximizing natural ventilation. This can be achieved by placing the coop on a slope or a slight incline, allowing air to flow freely through the building. Ensure that windows are strategically positioned to capture prevailing winds, which can help disperse ammonia vapors outside.
Consider the direction of sunlight when siting your coop. If possible, orient the coop east-west to prevent direct sunlight from heating up the interior, reducing ventilation efficiency and creating an ideal breeding ground for bacteria that contribute to ammonia production. Similarly, incorporate natural light during daylight hours by installing skylights or larger windows on the north side.
Keep in mind that accessibility is also essential when designing a coop. Ensure that you can easily clean the coop and move around it without obstacles. A well-designed coop layout will enable efficient cleaning, reducing the risk of ammonia buildup and promoting overall health for your flock.
Managing Ammonia with Daily Practices
When it comes to managing ammonia levels, daily practices play a crucial role in keeping your coop clean and healthy for your birds. Let’s dive into some essential habits that’ll make a big impact.
Regular Cleaning and Disinfection
Regular cleaning and disinfection are crucial components of reducing ammonia levels in coops. When waste accumulates, it breaks down into ammonia gas, which can be toxic to chickens and humans alike. To keep your coop clean and ammonia-free, establish a regular cleaning schedule that includes daily tasks as well as deeper cleans on a weekly or monthly basis.
Daily tasks should include removing soiled bedding from the nesting boxes and replacing it with fresh material. This not only reduces waste but also prevents moisture buildup, which can exacerbate ammonia production. You should also clean the feeding troughs and waterers daily to prevent bacterial growth. For more thorough cleaning, set aside a day each week for scrubbing the coop’s walls and floor, removing any stubborn stains or debris.
When disinfecting your coop, use a solution of 1 part white vinegar to 9 parts water, which is gentle on surfaces yet effective against bacteria and ammonia-causing microorganisms. Always follow the manufacturer’s instructions when using any cleaning product, and make sure to rinse thoroughly to prevent residue buildup.
Monitoring Temperature and Humidity
Temperature and humidity play a crucial role in maintaining optimal conditions within your coop. When temperatures soar, it can cause ammonia levels to rise significantly. This is because high temperatures accelerate the breakdown of organic matter, releasing more ammonia into the air. Conversely, low temperatures can slow down this process, but they also reduce air circulation, leading to stagnation and further ammonia buildup.
To monitor temperature and humidity effectively, consider investing in a hygrometer and thermometer. These devices will give you accurate readings on both factors, enabling you to make necessary adjustments. For example, if the temperature is consistently above 75°F (24°C), it’s essential to increase ventilation by opening windows or installing a fan.
Aiming for a relative humidity of 50-60% can help minimize ammonia buildup. You can achieve this by using dehumidifiers or adding moisture-absorbing products like silica gel to your coop. Regularly checking temperature and humidity levels will help you identify potential issues before they escalate, allowing you to take corrective action and maintain a healthy environment for your flock.
Choosing Ammonia-Friendly Bedding Materials
When it comes to bedding materials, some options are better than others when it comes to managing ammonia levels in your coop. We’ll explore our top picks for ammonia-friendly bedding choices next.
Natural vs. Synthetic Bedding Options
When it comes to choosing bedding materials for your coop, two popular options are natural and synthetic. Both have their pros and cons when it comes to ammonia control.
Natural bedding options like straw, hay, and pine shavings are a popular choice among backyard chicken keepers. They’re inexpensive, easy to find, and can be composted at the end of their lifespan. However, they can harbor moisture and create an ideal environment for ammonia production. If not changed frequently enough, natural bedding materials can lead to high ammonia levels in your coop.
Synthetic options like fleece, cotton, or polypropylene pellets are another option. They’re often considered easier to clean and maintain than natural bedding materials. However, they can be more expensive upfront and may require frequent replacement to prevent bacterial growth and ammonia buildup. Some synthetic materials also have the potential for off-gassing, which can further contribute to high ammonia levels in your coop.
Ultimately, a combination of both natural and synthetic bedding options or regular rotation between the two can help keep ammonia levels under control. Regularly monitoring moisture levels and changing bedding frequently can also minimize the risks associated with either type of material.
The Role of Bedding Depth and Material Density
When it comes to controlling ammonia levels in coops, bedding depth and material density play a crucial role. The type of bedding you use can greatly impact the level of ammonia present in the coop.
First, let’s talk about bedding depth. A general rule of thumb is to maintain a minimum of 2-3 inches of bedding material to absorb moisture and waste effectively. However, it’s essential to note that too little bedding can lead to ammonia buildup, while excessive amounts can cause respiratory issues for your birds. To strike the right balance, aim for a depth of around 4-6 inches.
Material density is another critical factor in controlling ammonia levels. High-density materials like wood shavings or straw tend to absorb moisture more efficiently than low-density materials like pine shavings or hay. As a general guideline, opt for materials with a density range of 12-18 pounds per cubic foot. This will help reduce the likelihood of ammonia buildup and promote a healthier coop environment.
By understanding the interplay between bedding depth and material density, you can take proactive steps to minimize ammonia levels in your coop.
Long-Term Strategies for Ammonia Control
Now that you’ve learned how to manage ammonia levels on a daily basis, it’s time to think long-term: implementing strategies that will keep your coop fresh and safe year-round. This section explores effective ways to prevent ammonia buildup in the long run.
Integrating Misting Systems or Fans
When it comes to long-term ammonia control strategies for coops, integrating misting systems or fans can be an effective solution. These systems work by dispersing a fine mist of water into the air, which helps to neutralize and dilute ammonia vapors before they reach toxic levels.
Misting systems are particularly useful in areas with high humidity, as the increased moisture helps to break down and eliminate ammonia more efficiently. For example, a coop in a tropical climate might see significant reductions in ammonia levels by using a misting system.
Fans can also be effective when used strategically. By circulating air and increasing ventilation rates, fans help to remove ammonia-laden air from the coop and replace it with fresh air. This approach is particularly useful for larger coops or those with poor ventilation.
When integrating misting systems or fans, consider factors such as airflow patterns, humidity levels, and system maintenance requirements to ensure optimal performance.
Regular Health Checks and Flock Management
Regular health checks are crucial to maintaining healthy birds and preventing ammonia-related issues. A thriving flock is less likely to contribute to high ammonia levels in the coop. To begin with, monitor your birds’ overall health by regularly checking for signs of illness or stress. These include labored breathing, lethargy, loss of appetite, or unusual droppings.
Proper flock management practices also play a significant role in reducing ammonia levels. Ensure adequate ventilation and maintain a clean coop environment. Keep perches and nesting boxes clean and free from debris. Consider implementing roosting bars to reduce the concentration of birds’ droppings.
In addition, nutritional adjustments can help alleviate ammonia issues. Consult with a veterinarian or poultry expert to ensure your flock’s diet is balanced and complete. A well-fed flock will be less likely to engage in abnormal behaviors that increase ammonia levels, such as excessive droppings or feather pecking.
Conclusion
Now that you’ve learned how to manage ammonia levels in your coop, it’s time to put everything into practice and create a plan for long-term success. Here’s what to consider moving forward.
Recap of Key Takeaways
In this comprehensive guide to ammonia control in coops, we’ve covered everything from understanding the risks of high ammonia levels to implementing effective strategies for mitigation. As you prepare to put these lessons into practice, let’s recap some key takeaways.
Effective ventilation is crucial for removing excess ammonia and moisture from your coop. Consider adding windows or installing a fan to improve airflow. Not only will this reduce the risk of respiratory problems in your flock, but it will also help prevent bacterial growth that can lead to disease.
Another essential aspect of ammonia control is maintaining cleanliness within the coop. Regularly remove soiled bedding and replace it with fresh material. This simple step can significantly reduce ammonia levels by preventing the buildup of waste products. Don’t forget to clean hard-to-reach areas like nest boxes and roosts, where bacteria and odors tend to accumulate.
Strategic feeding practices can also play a role in ammonia control. Consider reducing your flock’s protein intake during warmer months when they’re more prone to producing nitrogen-rich waste. Additionally, providing access to grit can help regulate their digestive system and reduce the likelihood of excessive urine production.
Remember that prevention is key when it comes to ammonia control. Regularly monitor your coop’s conditions, checking for signs of high ammonia levels or moisture buildup. If you do encounter problems, don’t hesitate to implement additional measures like using a dehumidifier or upgrading to a more efficient ventilation system.
By incorporating these best practices into your daily routine, you’ll be well on your way to creating a safe and healthy environment for your flock.
Frequently Asked Questions
Can I still use my current coop design, or do I need to start from scratch?
While it’s possible to modify your existing coop to improve ammonia control, a complete overhaul might be necessary if the design is severely flawed. Identify the root causes of ammonia buildup in your coop and address those issues first. This may involve adding ventilation systems, changing bedding materials, or implementing other strategies outlined in this article.
How often should I monitor temperature and humidity levels in my coop?
Monitoring temperature and humidity levels daily can help prevent ammonia buildup. However, it’s essential to establish a consistent monitoring schedule to ensure you catch any issues early on. Aim to check these factors at the same time every day, ideally during peak morning hours when the flock is most active.
What are some signs that my bedding material is contributing to high ammonia levels?
If your bedding material is prone to retaining moisture or has low absorbency, it may be contributing to high ammonia levels. Look for signs such as dampness, mold growth, or a strong ammonia smell emanating from the bedding. Consider switching to natural, dry bedding materials like pine shavings or straw.
Can I use misting systems or fans in combination with other ammonia control methods?
Yes, using misting systems or fans in conjunction with other strategies can be an effective way to manage ammonia levels. These systems help reduce dust and moisture buildup while promoting airflow and evaporation of ammonia-rich substances. However, ensure proper installation and maintenance to avoid creating more problems.
How do I balance the need for adequate ventilation with keeping my coop secure from predators?
A delicate balance exists between providing sufficient ventilation and ensuring your flock’s safety. To achieve this equilibrium, consider installing a secure and easily cleanable screen or mesh material that still allows for airflow while preventing predator entry. Regularly inspect and maintain these screens to prevent damage or gaps.