
As an aspiring backyard chicken keeper or seasoned farmer, you’ve likely encountered your fair share of challenges when it comes to hatching eggs. One common issue is cracked eggs, which can be frustrating and disappointing. However, with the right techniques and knowledge, you can still successfully incubate these imperfect eggs and boost hatch rates. In this article, we’ll delve into the world of cracked egg incubation, exploring expert tips on handling, turning, and monitoring embryo development to increase fertility. We’ll cover everything from identifying viable eggs to creating a conducive environment for healthy growth, providing actionable advice that you can apply in your own incubation setup. Whether you’re just starting out or looking to improve existing results, this guide will help you get the most out of every cracked egg and celebrate more successful hatches.
Understanding Cracked Eggs in Incubation
Cracked eggs are a common issue in incubation, and understanding what causes them is crucial to ensuring healthy hatch rates. Let’s explore the reasons behind cracked eggs and how you can prevent them from happening.
Causes of Cracks During Handling
When handling eggs for incubation, it’s not uncommon to encounter cracks. These unsightly fissures can arise from a variety of factors related to temperature fluctuations and humidity levels.
Temperature is a crucial aspect of egg handling, as sudden changes can cause the eggshell to contract or expand rapidly. When this happens, the shell may crack under stress. For instance, if you’ve left eggs in a cold vehicle on a hot day, they might be exposed to rapid temperature shifts upon being brought indoors. This temperature shock can lead to cracking.
Humidity also plays a significant role in egg handling. Eggs are more prone to cracking when the surrounding environment is too dry or too humid. Ideally, the storage area should maintain a humidity level between 50-60%. If it’s too low, the eggs may lose moisture rapidly, causing them to shrink and crack.
It’s worth noting that improper storage can also contribute to egg cracking. Store eggs in a single layer, pointed end down, to prevent damage from stacking or rolling. By understanding these factors and taking preventative measures, you can minimize the likelihood of cracked eggs making it into your incubator.
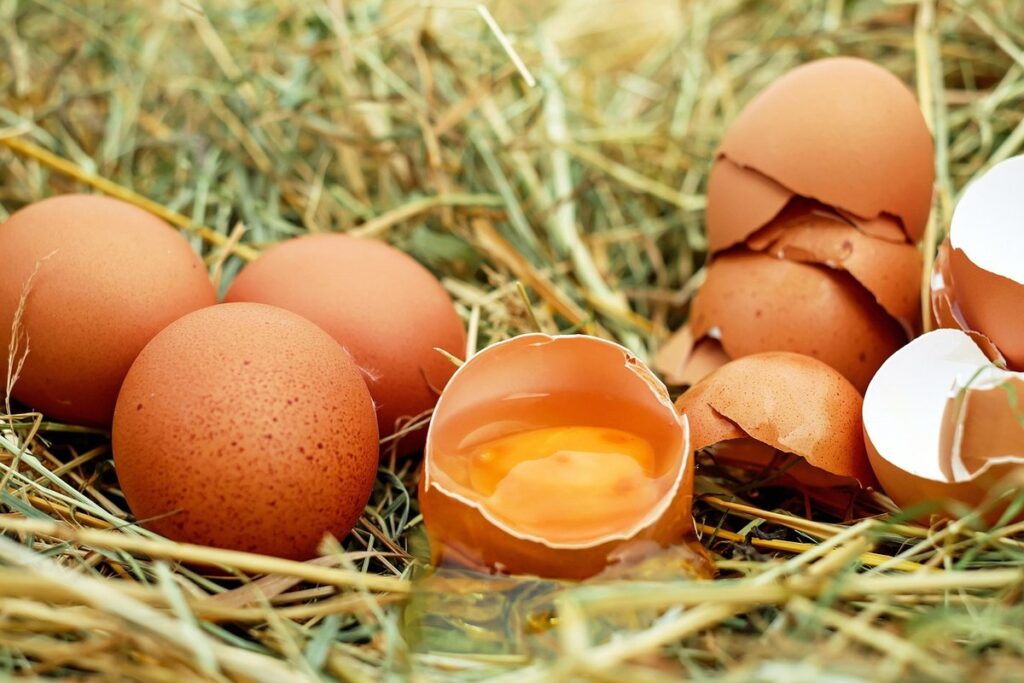
Types of Cracks in Eggs
When it comes to cracked eggs in incubation, understanding the different types of cracks is crucial for determining the best course of action. There are several types of cracks that can occur in eggs, each with its own implications for embryo development and hatchability.
Hairline cracks are one of the most common types of cracks, characterized by a thin, almost imperceptible line on the eggshell. These cracks often don’t affect fertility or embryonic development, but they do compromise the integrity of the shell, making it more susceptible to further damage. If you notice a hairline crack, it’s essential to monitor the egg closely for any signs of moisture loss or other issues.
Large cracks, on the other hand, are more serious and can expose the embryo to infection or dehydration. These cracks often require immediate attention, including transferring the embryo to a new eggshell or providing supplemental humidity to prevent further drying out.
Cracked shells are another type of crack that can occur during incubation. This is usually caused by excessive moisture loss or handling errors. When an egg has a cracked shell, it’s best to err on the side of caution and prioritize the health and well-being of the embryo over any potential hatch success. In some cases, it may be necessary to euthanize the embryo to prevent further suffering.
It’s worth noting that not all cracks are created equal, and the type of crack can significantly impact the outcome for the embryo. By understanding the different types of cracks, you’ll be better equipped to make informed decisions about how to proceed with your incubation efforts.
Stages of Incubation with a Cracked Egg
As you navigate the challenges of incubating a cracked egg, it’s essential to understand each stage of development, from day one through hatch. Let’s break down what to expect during this critical period.
Initial Assessment and Decision-Making
When receiving a cracked egg, it’s essential to conduct an initial assessment to determine its viability for incubation. This involves examining several key factors that can indicate the embryo’s chances of survival and development.
Firstly, inspect the blood ring size, which should be around 1-2 mm in diameter. A larger blood ring can indicate a more developed embryo, but it’s not the only factor to consider. Next, check the yolk color – a pale or cloudy yolk may suggest that the egg has been damaged and is less likely to hatch successfully.
Another crucial aspect is embryo development. Look for visible signs of movement, pulsing, or heartbeat within the air cell. If you notice any movement or activity, it’s a positive sign, but lack thereof doesn’t necessarily mean the egg is doomed. Factors like temperature fluctuations, handling, and storage conditions can all impact embryo development.
To give you a better idea, consider this: if you’re incubating multiple eggs, it’s common to experience a range of blood ring sizes. Typically, 10-20% of eggs will have larger rings, indicating more developed embryos. However, it’s crucial to remember that these factors alone are not foolproof indicators of viability.
When in doubt, err on the side of caution and monitor the egg closely for signs of development or failure. Keep a close eye on temperature, humidity, and turning patterns to minimize the risk of embryo death. With patience and observation, you can make an informed decision about which eggs to keep incubating and which might be better off being set aside.
Adjusting the Incubator Settings
When dealing with a cracked egg, it’s crucial to adjust the incubator settings to ensure optimal hatching conditions. First and foremost, temperature is a critical factor. Since the crack can compromise the egg’s ability to maintain its internal temperature, you may need to reduce the temperature by 1-2°F (0.5-1°C) to prevent overheating. This adjustment will help slow down the development process, giving the embryo a better chance of survival.
Humidity is another vital aspect to consider. A cracked egg can lead to water loss, so maintaining high humidity levels within the incubator will help compensate for this loss. Aim for 50-60% relative humidity, but be prepared to adjust as needed based on the egg’s condition and the incubator’s performance.
Turning is also an essential factor when it comes to a cracked egg. You’ll need to manually turn the egg every 6-8 hours to ensure even development and prevent the embryo from becoming stuck to one side of the shell. Make sure to wear gloves or wash your hands thoroughly before handling the egg to prevent transferring bacteria that can cause infection.
Managing a Cracked Egg Through Incubation
When you discover a cracked egg, it can be devastating, but don’t worry, we’ve got some valuable tips to increase its chances of hatching successfully in this section.
Turning and Positioning Strategies
When an egg is cracked during incubation, it’s essential to implement specialized turning and positioning strategies to minimize the risk of further damage and promote healthy development. One effective technique is rotation, where you gently turn the egg every few hours to ensure that the damaged area doesn’t become a weak spot for bacteria to penetrate.
You can use a manual or automatic turner, depending on your setup’s capabilities. For example, if you’re using an incubator with built-in turning, follow the manufacturer’s guidelines for rotation speed and frequency. If not, you’ll need to manually turn the eggs every 2-3 hours, taking care not to apply excessive pressure that might further damage the shell.
Support devices can also be used to elevate and stabilize cracked eggs, reducing strain on the delicate membrane. You can place a small piece of soft cloth or paper towel under the egg to cushion it, or use a specialized egg cradle designed for this purpose.
Monitoring Embryo Development
Monitoring embryo development closely is crucial when incubating cracked eggs. As you track their growth, look for signs of abnormal development, such as uneven formation of the embryonic disk, delayed or absent heartbeats, and lack of movement.
Abnormal development can be caused by a variety of factors, including low fertility of the parents, inadequate egg handling, or issues with incubation conditions. It’s essential to identify these complications early on to avoid potential losses.
Some common signs of abnormal growth in cracked eggs include:
• Uneven or off-center embryonic disk formation
• Delayed or absent heartbeats
• Lack of movement or uncoordinated movements
• Poor or weak blood vessel development
Keep a close eye on your eggs, especially during the critical stages between days 3-5 and 9-10. If you notice any unusual growth patterns or signs of distress, consult with an experienced incubator to ensure the best possible outcome.
Remember that every egg is different, and some may exhibit variations in development. However, by monitoring their progress closely, you can make informed decisions about which eggs to transfer or discard.
Risks Associated with Cracked Eggs
When incubating cracked eggs, it’s essential to be aware of the potential risks and consequences that can arise from this practice. Let’s discuss some of the common hazards involved.
Bacterial Contamination and Infection
When it comes to incubating eggs, one of the biggest risks associated with cracked eggs is bacterial contamination and infection. Cracks in the eggshell provide a direct entry point for bacteria to enter the egg, which can lead to the growth of pathogens such as Salmonella or E. coli. These bacteria can contaminate not only the eggs but also the incubation equipment, environment, and even the people handling them.
According to the Centers for Disease Control and Prevention (CDC), cracked eggs are a significant source of Salmonella outbreaks in humans. In fact, it’s estimated that up to 50% of all cracked eggs can be contaminated with bacteria. To put this into perspective, consider this: if you’re incubating 100 eggs and only 2-5 of them crack during the process, you’re still facing a potential contamination risk.
To mitigate this risk, it’s essential to handle cracked eggs safely and humanely. If an egg cracks during incubation, carefully transfer the embryo to a new, sterile container or a well-sealed vial filled with clean water. Discard any broken shells or debris immediately, and thoroughly wash your hands afterward.
Fertility and Hatchability Rates
When you crack an egg during incubation, it can have far-reaching consequences that extend beyond the immediate damage. One of the most significant concerns is the impact on fertility and hatchability rates. Eggshell integrity plays a crucial role in maintaining the delicate balance between the embryo and its environment.
A cracked egg compromises this balance, allowing bacteria to seep into the sterile interior and pose a threat to the developing chick. If the crack is particularly severe or allows for significant air exchange, it can be disastrous, rendering the egg infertile. Moreover, even if the crack doesn’t seem too bad at first glance, it can still cause damage that affects embryo viability.
Cracked eggs are more likely to suffer from contamination-related issues, which significantly reduce their chances of successful incubation and hatching. In fact, studies have shown that the risk of mortality increases by up to 40% for eggs with minor cracks, rising to as high as 80% in severe cases. To mitigate this risk, it’s essential to inspect your eggs regularly and promptly remove any showing signs of damage or weakness. Regular candling can help identify potential issues before they become too serious.
Best Practices for Handling Cracked Eggs
When it comes to incubating cracked eggs, there are specific best practices you should follow to ensure the health and well-being of your developing embryos. Let’s explore these crucial guidelines together.
Egg Storage and Transportation
Proper storage and transportation of cracked eggs are crucial to maintain their viability during incubation. When handling cracked eggs, it’s essential to minimize damage and prevent contamination.
To store cracked eggs, keep them upright in a sealed container or plastic bag with airholes to allow for airflow. The eggs should be stored at room temperature (around 70-75°F) away from direct sunlight and heat sources. Avoid storing them near strong-smelling foods as the crack can absorb odors easily.
When transporting cracked eggs, use a well-ventilated container or bag to prevent moisture buildup. If transporting over long distances, consider using insulated containers with ice packs to maintain a consistent temperature between 60-70°F.
Cracked eggs should never be stacked on top of each other as pressure can cause further damage to the embryo. Always transport them individually wrapped in paper towels or cloth to provide cushioning.
Remember to check the eggs regularly for any signs of spoilage or drying out, especially if you’re storing them for an extended period. This will ensure that they remain viable and ready for incubation when needed.
Incubator Maintenance and Cleaning
Regular maintenance and cleaning of the incubator is crucial to prevent bacterial contamination and ensure optimal conditions for cracked eggs. When an incubator is not properly cleaned, bacteria can accumulate on surfaces and spread disease among the eggs. This can lead to reduced hatch rates, and even the death of embryos.
To maintain your incubator effectively, it’s recommended that you clean it at least once a week. Start by removing all trays and racks from the incubator and washing them in warm soapy water. Next, use a damp cloth to wipe down all surfaces within the incubator, paying particular attention to any areas where eggs are placed. Make sure to sanitize these surfaces with a 3% bleach solution after cleaning.
It’s also essential to monitor temperature and humidity levels regularly to ensure they remain within the optimal range for incubation. This can be done using the built-in thermometer and hygrometer or purchasing external devices that provide real-time readings. By following these simple steps, you can prevent bacterial contamination and create an environment conducive to successful hatching of cracked eggs.
Frequently Asked Questions
Can I still use eggs with very small cracks in incubation?
Yes, eggs with tiny cracks can often be successfully incubated, but it’s essential to assess their viability before placing them in the incubator. Gently submerge the egg in a bowl of water and observe its buoyancy; if it sinks to the bottom or stays suspended, it may still develop.
How often should I turn a cracked egg during incubation?
Turning frequency remains crucial even with cracked eggs. Aim for 5-7 turns per day, ensuring each turn is gentle to avoid causing further damage to the delicate membranes surrounding the embryo.
What’s the best way to manage humidity levels when incubating cracked eggs?
Maintaining proper humidity is vital for healthy development. For cracked eggs, aim for a slightly higher relative humidity (RH) level of 55-60% during the first 18 days and adjust it accordingly based on your incubator’s settings.
Can I reuse an incubator that has housed cracked eggs without any issues?
While it might be tempting to save time by reusing an incubator, it’s generally not recommended. Cracked eggs can lead to bacterial contamination, which may affect future hatch rates or even cause infections in the incubator itself. Clean and sanitize your equipment thoroughly before using it for fresh batches.
How long after the initial crack can I expect to see visible embryo development?
Embryo development is usually visible 7-10 days post-incubation, regardless of whether an egg has cracked initially. Look for small blood vessels and a darkening of the embryo sac; these signs indicate that your cracked egg is still developing healthily within its fragile shell.