
If you’re an aspiring backyard farmer or simply someone who loves raising ducks, you know that monitoring their eggs is crucial for the health of your flock. As a duck egg nears the end of its life cycle, it’s essential to recognize the signs and understand how long you have before it’s no longer safe to use. The last days of a duck egg are marked by visible changes in appearance, including cracks, softening of the shell, and potentially even mold. In this article, we’ll delve into the factors that influence a duck egg’s life cycle, discuss best practices for collecting and handling eggs nearing the end of their shelf life, and provide guidance on when to expect a duck egg’s last days. By understanding these critical details, you can ensure your ducks remain healthy and your farm runs smoothly.
Understanding the Life Cycle of a Duck Egg
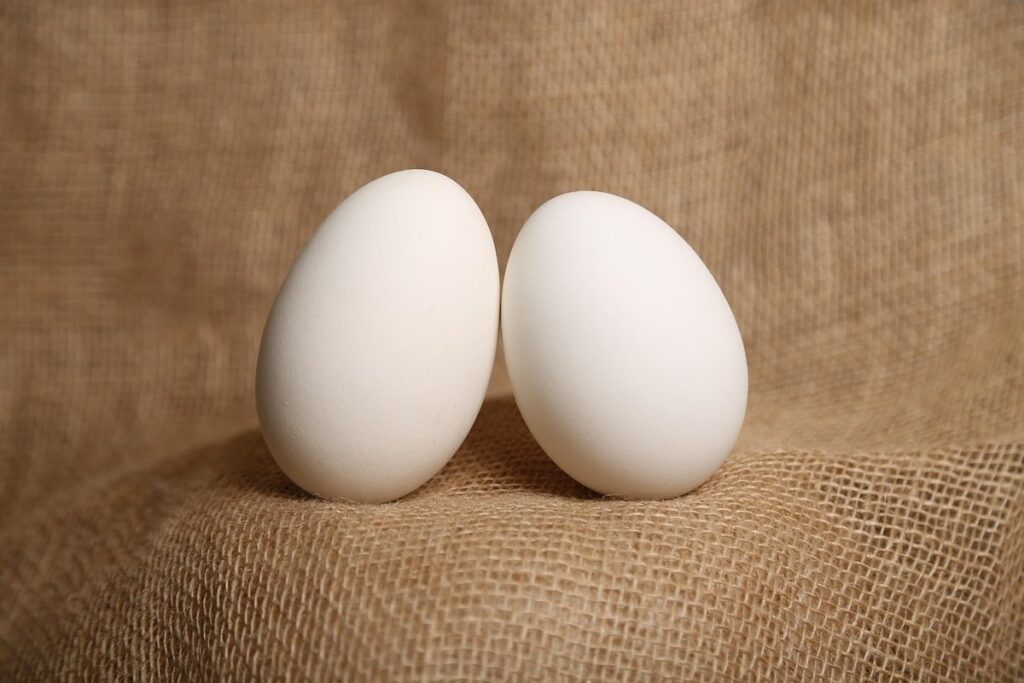
As you care for your duck eggs, it’s essential to understand their life cycle, from laying to hatching, to ensure a healthy and successful brood. Let’s take a closer look at this critical process.
Stage 1: Breeding and Fertilization
When it comes to the life cycle of a duck egg, understanding the process of breeding and fertilization is crucial. This stage sets the foundation for the development of the embryo inside the egg.
Breeding involves selecting male and female ducks with desirable traits such as high-quality eggs, good temperament, or specific feather patterns. The chosen ducks are then mated to produce fertile eggs. Fertilization typically occurs within 24 hours after mating, when the male’s sperm meets the female’s egg yolk in the oviduct.
The fertilized egg begins its journey down the oviduct, where it picks up nutrients and receives the necessary stimuli for development. This initial stage is critical in determining the viability of the embryo and the overall quality of the egg.
As an egg farmer or enthusiast, understanding this process can help you make informed decisions about breeding programs and optimal incubation conditions. By selecting top-notch breeders and ensuring proper fertilization, you can significantly increase the chances of successful hatch rates and healthier ducklings.
Stage 2: Incubation Process
As we continue to explore the life cycle of a duck egg, it’s essential to understand the incubation process, which marks the transition from fertilization to hatching. This critical period typically lasts between 28-32 days for most domesticated ducks, although it can vary depending on factors such as breed and individual characteristics.
Temperature control is paramount during this stage. A consistent temperature range of around 99°F (37°C) is ideal, with slight variations allowed. The mother duck instinctively adjusts her brood nest to maintain the perfect temperature, often rearranging her feathers or moving to a new location if necessary. This ensures that the embryo develops at an optimal pace.
As the embryo grows, it becomes increasingly sensitive to changes in temperature and humidity. A fluctuation of even 1-2°F (0.5-1°C) can impact development, so the mother duck’s ability to regulate her surroundings is crucial. You can replicate this process by maintaining a consistent temperature in your incubator or brooder, ideally using a temperature controller to ensure precise control.
Factors Affecting Egg Development
Several factors come into play during a duck egg’s last days, influencing its final stages of development and potential hatch. Let’s explore these critical elements together.
Influence of Temperature on Embryonic Growth
When it comes to the last days of a duck egg, temperature plays a crucial role in determining the health and viability of the embryo. Temperature fluctuations can have a significant impact on embryonic growth, affecting the development of vital organs, bone formation, and even the sex of the chick.
For instance, if the incubator’s temperature drops below 99°F (37°C), it can cause a delay in hatching, while temperatures above 101°F (38.3°C) can lead to respiratory problems or even death of the embryo. Conversely, optimal temperatures for different stages of development are essential for a healthy hatch.
Typically, an incubator’s temperature is set between 99.5°F (37.5°C) and 100.5°F (38°C). During the first 18 days, it’s crucial to maintain this narrow temperature range to prevent any adverse effects on embryonic growth. After day 18, the temperature can be slightly increased to around 101°F (38.3°C) for a few hours before hatching. Keeping the incubator at these precise temperatures will ensure a healthy and successful hatch.
The Role of Humidity in Incubation
Maintaining a stable humidity level during incubation is crucial for the healthy development of duck eggs. When the air is too dry, it can cause the embryo to dehydrate, leading to defects and even death. Conversely, if the humidity is too high, it can promote bacterial growth and mold formation, which can contaminate the egg.
A general rule of thumb is to maintain a humidity level between 40-60% during the first 7-10 days of incubation. This allows for the initial stages of embryo development without compromising the egg’s internal environment. As the embryos grow, the humidity levels should be adjusted to around 50-70%. It’s essential to monitor the humidity levels closely, especially in the last few days before hatching.
If you’re using an incubator, ensure it has a built-in hygrometer and humidistat to maintain optimal humidity levels. For DIY incubators or those without these features, invest in a separate hygrometer and maintain the recommended humidity range. Failure to do so may result in failed hatch rates, deformed embryos, or even contamination of the eggs.
Keep an eye on the humidity level every day, adjusting as necessary to ensure optimal conditions for your duck egg’s development.
Signs of Fading Health in Duck Eggs
As you monitor your duck eggs, it’s essential to recognize the subtle signs that indicate a decline in their health and fertility. Look out for unusual behaviors and physical changes.
Monitoring Egg Temperature and Moisture Levels
Monitoring egg temperature and moisture levels is crucial to determine the viability of your duck eggs during their last days. To do this accurately, you’ll need a thermometer and hygrometer specifically designed for measuring egg temperatures and humidity.
A digital egg thermometer can be inserted into the large end of the egg, avoiding the yolk for an accurate reading. For example, most viable duck eggs have internal temperatures ranging between 99°F (37°C) and 100°F (38°C). On the other hand, a hygrometer should be placed in close proximity to your incubator or storage area to monitor humidity levels.
Maintaining optimal temperature ranges is vital for successful hatching. It’s recommended that the egg be stored at temperatures between 65-75°F (18-24°C), while maintaining relative humidity levels of 50-60%. This balance ensures an environment conducive to embryo development during the last days of incubation.
Visual Indicators of Declining Health
As you care for your duck eggs, it’s essential to be aware of visual signs that indicate they’re nearing the end of their life cycle. Cracks are one of the most obvious indicators; if you notice even a small crack, it’s likely the egg is no longer viable. These cracks can appear anywhere on the surface but often start at the large or small end.
Discoloration is another warning sign – look for unusual color changes such as greenish, bluish, or purplish tones. While some minor discoloration may be normal, more pronounced or widespread discoloration signals a problem. Keep an eye out for mold growth on the eggshell; this can spread quickly and indicate that the egg is contaminated.
Regularly inspect your duck eggs to catch these signs early. If you do notice cracks or discoloration, carefully remove any affected eggs from the incubator or storage area to prevent cross-contamination with healthy eggs. Always prioritize egg safety to minimize the risk of disease transmission in your flock.
Best Practices for Collecting and Handling Duck Eggs
When it comes to collecting and handling duck eggs, proper care is crucial for ensuring their quality and safety. We’ll walk you through best practices to get it just right.
Timing and Frequency of Collection
When collecting duck eggs, timing and frequency are crucial to minimize stress on both mother and eggs. A general rule of thumb is to collect eggs daily, especially during peak laying periods when hens can produce up to two dozen eggs per week. This frequency helps prevent over-crowding in the nesting box, reducing the likelihood of broken eggs.
Age is another critical factor to consider. Collecting eggs at around 21-24 days of incubation ensures they are mature enough for human consumption while minimizing the risk of accidental brooding. Monitor egg size as well – larger eggs tend to hatch earlier than smaller ones.
To gauge readiness, gently remove an egg from the nesting box and carefully inspect its contents through a small opening near the large end. A developed yolk and white indicate maturity. Remember, it’s essential to handle eggs with care to prevent damage and maintain cleanliness. Regular collection also helps keep your duck flock healthy by reducing stress caused by overcrowding and potential disease transmission.
Proper Handling Techniques
When handling duck eggs during their last days, it’s essential to be gentle to avoid damage. Duck eggs are more delicate than chicken eggs due to their thicker shells and smaller size. To minimize the risk of cracking or breakage, use specialized equipment such as egg cartons specifically designed for duck eggs.
These cartons have individual compartments that cradle the eggs, preventing them from colliding with each other. You can also use foam inserts or paper filler to cushion the eggs in a standard carton. When transferring eggs between containers, do so carefully, avoiding sudden drops or jerks. If you’re transporting eggs over long distances, consider using insulated bags or containers to maintain a consistent temperature.
It’s also crucial to handle duck eggs by their apex – the larger end of the egg. Holding them from this point reduces the likelihood of applying excessive pressure on the shell, which can cause cracks. When washing duck eggs, gently submerge them in cold water and avoid scrubbing too hard with your fingers or a brush, as this can also lead to damage.
Caring for Failing Duck Eggs: Last Resort Options
When a duck egg’s viability is uncertain, it’s essential to explore last resort options that prioritize both your birds’ health and potential fertility. This section outlines those final steps you can take.
Artificial Incubation Methods
When it comes to caring for failing duck eggs, artificial incubation methods can be a viable last resort option. One such method is using an incubator or hatcher. These devices are specifically designed to simulate the natural conditions required for embryonic development, allowing you to give your eggs a fighting chance at hatching.
There are various types of incubators available on the market, ranging from basic manual models to advanced digital ones with precise temperature and humidity control. Prices can vary greatly, with basic models starting from around $50 and high-end digital ones exceeding $1,000. Consider factors such as the number of eggs you need to hatch, your budget, and the level of monitoring required.
Some popular brands to consider include Brinsea, HovaBator, and Rcom. When choosing an incubator or hatcher, look for features like precise temperature control (typically between 99-101°F), humidity control, and a turner mechanism to ensure even embryo development. Always follow the manufacturer’s instructions for use and calibration, as improper setup can lead to failed hatch rates.
It’s also essential to note that artificial incubation methods may not guarantee hatching success, especially if the eggs are already failing. However, they can provide an extra layer of care and support during the final stages of development.
Humane Euthanasia Methods
When it’s clear that an egg is no longer viable, it’s essential to prioritize the well-being of both the mother duck and her flock. Humane euthanasia methods can be employed to humanely end the life of a non-viable egg, minimizing stress on the mother.
The most common method for duck eggs is CO2 or air injection. This involves inserting CO2 gas into the egg through the shell’s micropores, causing the embryo to stop developing within minutes. Alternatively, some farmers use air injection, where compressed air is blown into the egg, ending embryonic development. These methods are quick and humane, with minimal stress on the mother.
To ensure a smooth process, it’s crucial to handle the egg gently and humanely. Gently grasp the egg with both hands, supporting its base to prevent any sudden movements that may cause shock or injury. Next, insert the needle or gas injector into the egg carefully through the air cell, following the manufacturer’s guidelines for the chosen method.
It’s also important to be mindful of timing when carrying out humane euthanasia methods. Do it as soon as possible after determining the egg is non-viable, to prevent any undue stress on the mother duck and her flock.
Frequently Asked Questions
What are the most common mistakes to avoid when collecting duck eggs nearing their end of shelf life?
When collecting eggs, make sure to handle them gently to prevent damage. Be aware of any visible signs of cracking or mold, and avoid touching the egg’s surface if possible. Regularly inspect your collection points for any issues that may lead to contamination.
How often should I collect duck eggs during their last days to ensure they remain safe?
The frequency of collection depends on various factors, including the size of your flock and individual egg health. Generally, it’s a good idea to check on eggs daily or every other day, especially as they approach the end of their shelf life.
Can I still use duck eggs if some have started to crack but not yet mold?
While a cracked shell can be unsightly, it doesn’t necessarily render an egg unusable. However, it’s essential to assess the egg’s overall condition and prioritize those with more severe damage or signs of contamination.
What are some humane euthanasia methods I can use for failing duck eggs?
For failing duck eggs that are beyond saving, consider using a gentle method like placing them in cold water to slow down metabolism. This method should be done humanely to prevent unnecessary suffering and maintain the integrity of your flock’s health.
How do I determine if it’s time to stop collecting duck eggs altogether due to disease or contamination?
If you notice an unusual number of eggs failing within a short period, inspect your collection points for signs of contamination. Be on the lookout for any symptoms that may indicate a larger issue with your ducks’ health, such as droppings in unusual colors or odors.