
If you’re anything like me, you’ve probably been itching to try your hand at a new hobby during these long lockdown days. But have you considered the art of duck egg turning? It’s a unique and creative pursuit that not only brings a sense of accomplishment but also yields beautiful results – stunning, one-of-a-kind eggs that will impress anyone who sees them. From its fascinating history to essential techniques and expert tips for staying motivated during isolation, we’ll take you through everything you need to know to get started. In this comprehensive guide, we’ll cover the basics of duck egg turning from scratch, so whether you’re a seasoned crafter or a complete beginner, by the end of it, you’ll be well on your way to creating gorgeous, hand-turned eggs that are sure to delight.
History and Background of Duck Egg Turning
You may be wondering where this fascinating craft originated, so let’s take a step back and explore the history behind duck egg turning. It all began with traditional crafts in rural England.
Early Beginnings: How the Craft Evolved
Duck egg turning has its roots in traditional craftsmanship, dating back to ancient civilizations where eggs were considered a luxury item. In many cultures, eggs were reserved for special occasions and celebrations, leading to the development of intricate designs and patterns on their surfaces. The art form gained popularity in Europe during the 17th and 18th centuries, particularly among aristocrats who sought to showcase their wealth and status.
As the craft evolved, techniques such as dyeing, gilding, and etching became more sophisticated, allowing artisans to create increasingly complex designs. By the mid-19th century, duck egg turning had become a staple of English country crafts, with many skilled potters and craftsmen perfecting their skills in workshops across the countryside.
The rise of industrialization brought about significant changes to the craft, with new technologies and machinery allowing for mass production and increased accessibility. Despite this shift, traditional methods remained alive, particularly among enthusiasts who continued to practice and pass on their knowledge to future generations.
Techniques Influenced from Other Arts
Duck egg turning has evolved significantly over the years, and its development can be attributed to various art forms that have influenced it. One of the most notable influences is from pottery and ceramics, which share similarities with duck egg turning in terms of techniques and materials used.
For instance, the process of shaping and molding materials like clay, wood, or metal has been adopted in duck egg turning. Potters often use techniques such as coiling, pinching, and throwing to create symmetrical and balanced shapes. Similarly, in duck egg turning, artisans apply these techniques to shape the eggshell into intricate designs. The understanding of ceramic glazing also plays a significant role in duck egg turning. By applying various glazes to the eggshell, artists can achieve unique colors and textures that add an extra layer of beauty to their work.
To incorporate this knowledge into your own duck egg turning practice, try experimenting with different materials and techniques. You can use wire or metal tools to shape the eggshell, just like potters do with clay. Additionally, research various ceramic glazing techniques and apply them to your duck egg turning creations for stunning results.
The Rise to Popularity: What Contributed to Its Growth
As duck egg turning gained momentum, several factors contributed to its rise to popularity. One key factor was the growing interest in artisanal and handmade crafts during the early 2010s. Duck egg turning offered a unique combination of traditional techniques and bespoke pieces that appealed to enthusiasts seeking distinctive home decor items.
Social media played a significant role in spreading the word about duck egg turning. Platforms like Instagram and YouTube enabled talented craftsmen to showcase their work, share their processes, and connect with potential customers. This online exposure not only helped build a community around the craft but also inspired others to try their hand at it.
The rise of artisanal markets and craft fairs also provided opportunities for duck egg turners to showcase their creations and gain recognition. These events allowed enthusiasts to see and touch the intricate, delicate pieces up close, fostering an appreciation for the art form.
As a result of these factors, duck egg turning experienced a significant surge in popularity among craft enthusiasts and collectors.
Preparing for Lockdown: Essential Tools and Materials
Before lockdown hits, make sure you have all the essential tools and materials to keep your duck egg turning project on track. This includes must-haves like egg cups, a mandrel, and more.
Choosing the Right Equipment
When it comes to duck egg turning, having the right equipment is crucial for success. As we prepare for lockdown, it’s essential to choose tools that will withstand regular use and provide accurate results.
For hand tools, invest in a good quality wire, which should be flexible yet robust enough to handle delicate eggs without breaking them. A pair of tweezers with fine tips is also necessary for gently removing small twigs or debris from the egg. Don’t forget a soft-bristled brush to dust off any stray particles.
Machinery-wise, you’ll need an incubator that can maintain precise temperature and humidity levels. Look for one with adjustable controls and a reliable thermostat. A turner or turntable is also necessary to rotate your eggs at regular intervals, ensuring even development.
Safety equipment should not be overlooked either. Wear gloves when handling the wire and eggs to prevent oils from your skin damaging the eggshell. Eye protection is also vital when working with sharp objects or machinery. Finally, keep a vacuum cleaner nearby to quickly clean up any debris that might fall during turning.
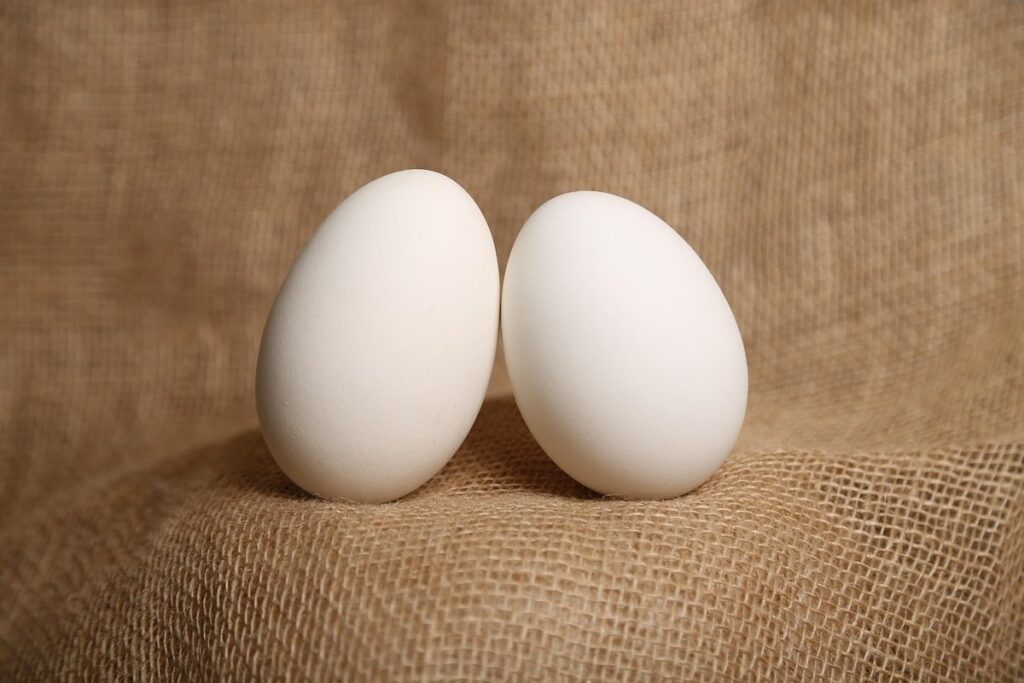
Material Selection: What Makes a Good Duck Egg
When it comes to duck egg turning, having high-quality eggs is crucial for achieving the best results. A good duck egg should have a few key characteristics that set it apart from others.
Look for eggs with firm, clean shells and no visible cracks or breaks. The egg should be heavy for its size, indicating a larger yolk. Avoid eggs with any visible blood spots or discoloration on the shell, as these can affect the quality of the contents.
When selecting duck eggs, consider the breed and diet of the duck. Heritage breeds like Khaki Campbells and Muscovy ducks are known for producing high-quality eggs. Eggs from ducks that have been fed a balanced diet rich in protein and calcium will also be stronger and more consistent in size.
In terms of appearance, look for eggs with clean, smooth shells that are evenly colored. Avoid any eggs with unusual shapes or sizes, as these can affect the turning process. By choosing high-quality duck eggs, you’ll set yourself up for success when it comes to achieving beautiful, symmetrical turned eggs.
Storage and Preparation: Tips for Keeping Eggs Fresh
When storing and preparing duck eggs for turning during lockdown, it’s essential to maintain their freshness. A cool, dry place is ideal for storage, away from direct sunlight and strong odors. If you don’t have a dedicated egg storage container, a clean cardboard box or plastic container will suffice.
To keep your duck eggs fresh, make sure the storage area remains at a consistent temperature between 40°F to 50°F (4°C to 10°C). A refrigerator is perfect for this purpose, as long as it’s not too cold. For instance, if you store them in the coldest part of your fridge, they may become too chilled and develop condensation issues when brought out.
When preparing duck eggs for turning, gently wash them with soap and water to remove any dirt or debris. Dry them thoroughly before storing. This step helps prevent bacterial growth and keeps the eggs clean during handling.
Techniques for Turning Duck Eggs
If you’re new to duck egg turning, understanding different techniques is crucial for producing consistently beautiful results. Let’s explore some key methods that will elevate your skills and artistry.
Basic Shaping and Forming Techniques
When it comes to turning duck eggs, mastering basic shaping and forming techniques is essential for creating beautiful, unique pieces. To begin with, you’ll need a good understanding of the different types of cuts and shapes used in duck egg turning.
Start by learning about the various cutting techniques, such as the ‘tuning fork’ cut, which involves making two parallel cuts on either side of the egg to create a narrow channel. This is often used to create intricate designs and patterns. Another key cut is the ‘keyhole’ cut, where a small circular hole is made at one end of the egg.
In terms of shapes, you can use various tools such as gouges, chisels, and loop tools to create simple forms like spheres, cylinders, or pyramids. For example, using a ball-ended gouge will allow you to easily shape the egg into a rounded form, while a cylinder-shaped tool can help you create long, flowing lines.
Practice is key, so be sure to experiment with different techniques and shapes to develop your skills and style. With patience and persistence, you’ll soon be creating stunning duck egg pieces that showcase your artistic flair.
Advanced Techniques: How to Create Unique Designs
Creating unique designs on duck eggs is an art that requires patience, practice, and a little creativity. To get started, you’ll need to experiment with different techniques, such as scratching, etching, and wax resist. For example, you can use a sharp tool to scratch intricate patterns onto the eggshell, or apply wax in specific designs using a resist technique.
Another way to create unique designs is by using stencils or stickers. You can find various shapes and patterns online or create your own custom designs using cardstock or paper. Simply place the stencil or sticker on the egg, and use a paintbrush to add color and details. This method is perfect for creating intricate designs without too much fuss.
Don’t be afraid to try new things and experiment with different materials. Combine scratching and wax resist techniques to achieve stunning results. With practice, you’ll develop your own unique style and flair, making each duck egg a one-of-a-kind piece of art.
Troubleshooting Common Issues
As you navigate the world of duck egg turning, it’s not uncommon to encounter some common issues that can throw a spanner in the works. Don’t worry, we’ve all been there! Here are some troubleshooting solutions to help you overcome these hurdles.
One of the most frustrating problems is when your eggs get stuck in their position, making it difficult to turn them. This can happen if the egg is not properly positioned in the incubator or if the turning mechanism is faulty. To avoid this issue, make sure to place the egg in the correct position and check that the turning mechanism is working smoothly. If you’re still having trouble, try gently tilting the incubator to help loosen the stuck egg.
Another common problem is when the eggs don’t turn at all, or they keep getting stuck in a particular position. This could be due to over-crowding in the incubator, which can cause the eggs to collide and get jammed. To resolve this issue, consider spacing out the eggs more evenly or reducing the number of eggs you’re turning.
Some eggs may also experience uneven development, causing one end to grow faster than the other. This is often due to irregular temperature fluctuations in the incubator. To prevent this from happening, ensure that your incubator is maintaining a consistent temperature and humidity level. If you do encounter an unevenly developed egg, carefully remove it from the incubator and manually turn it several times until it reaches a more even stage of development.
By addressing these common issues proactively, you’ll be well on your way to achieving success with duck egg turning – even during lockdown! Remember to stay vigilant, monitor your eggs regularly, and don’t hesitate to reach out for help if you need it. With practice and patience, you’ll become a master duck egg turner in no time.
Decorating and Finishing Duck Eggs
Now that you’ve mastered the basics of duck egg turning, it’s time to get creative and add some extra flair with decorating and finishing techniques. You’ll learn various methods to enhance your eggs’ appearance.
Basic Decorating Techniques: Paints and Stains
When it comes to decorating duck eggs using paints and stains, there are several basic techniques you can try at home. One of the most important things to keep in mind is to always read the instructions on the paint or stain carefully before applying it to your egg.
To achieve an even coat with paint, use a soft-bristled brush to gently cover the entire surface of the egg. Make sure to work in thin layers, allowing each layer to dry completely before adding more color. This will help prevent drips and unevenness. For best results, use high-quality acrylic or tempera paints specifically designed for egg decorating.
If you prefer a more subtle look, consider using stains instead. Food-grade dyes can be used to create beautiful, intricate designs on the eggs’ surface. Start by mixing the dye with water according to the manufacturer’s instructions, then dip the egg into the mixture and let it sit for a few minutes before rinsing off excess color.
Remember that practice makes perfect when it comes to painting or staining duck eggs. Don’t be discouraged if your first attempts don’t turn out exactly as you envisioned – just try again with different techniques until you achieve the look you want!
Advanced Decorating Methods: Enameling and Gilding
Enameling and gilding are advanced decorating methods that add an extra layer of sophistication to your duck eggs. These techniques require some practice, but the results are well worth the effort.
When it comes to enameling, you’ll need a kiln or a heat source specifically designed for enameling. Start by applying a thin layer of clear glass enamel to the egg, using a brush to get into all the nooks and crannies. Once dry, apply additional layers in your chosen color. Keep in mind that enameling can be quite delicate, so make sure to follow the manufacturer’s instructions and take necessary safety precautions.
Gilding involves applying a thin layer of metal leaf – typically gold or silver – using a specialized adhesive. This method requires patience and attention to detail, as the metal leaf needs to be applied carefully to avoid air bubbles or excess adhesive. Use a soft brush to apply the gilding medium and gently press the metal leaf onto the egg. Be sure to follow all safety guidelines when working with metals and adhesives.
Remember, practice makes perfect, so don’t be discouraged if your first attempts at enameling or gilding don’t turn out as expected. With time and patience, you’ll master these techniques and create truly stunning duck eggs that will be the envy of friends and family alike.
Final Touches: How to Seal and Protect the Eggs
To ensure your beautifully decorated duck eggs remain vibrant and protected from damage, it’s essential to seal and coat them with a suitable varnish. This step is crucial, as it not only enhances the aesthetic appeal but also safeguards against moisture, dust, and scratches.
When choosing a varnish, select one specifically designed for ceramics or glass. These types of varnishes are usually formulated to withstand heat and will dry quickly. Popular options include water-based and solvent-based varnishes, each with its own characteristics. For instance, water-based varnishes emit fewer fumes but might require multiple coats.
To seal your duck eggs, follow these steps:
* Clean the eggs thoroughly to remove any residue or debris.
* Apply a thin layer of varnish using a soft brush or cloth.
* Allow the first coat to dry completely before applying additional layers (follow the manufacturer’s instructions for recommended drying times).
* Repeat this process until you achieve your desired level of protection and shine.
This finishing touch will not only preserve your duck egg art but also prevent it from becoming discolored over time.
Marketing and Selling Your Work
Now that you’ve honed your duck egg turning skills, let’s explore how to turn them into a successful business, including marketing and selling strategies.
Identifying Your Target Market
Identifying your target market is crucial for selling duck egg turned items effectively. To do this, you need to consider who might be interested in buying these unique pieces. Start by thinking about the types of people who would appreciate handcrafted, one-of-a-kind items.
Consider your local community, friends, and family as potential customers. They may appreciate the personal touch and uniqueness of duck egg turned items. Additionally, think about local craft fairs, markets, or festivals where you can showcase and sell your work.
You should also research online marketplaces like Etsy or eBay to see what types of products are in demand and how much people are willing to pay for similar items. Join online forums or social media groups dedicated to handmade crafts to connect with potential customers and get feedback on your work.
When identifying your target market, remember that it’s not just about who will buy from you, but also about who you can create products for. Think about their needs, preferences, and what they might be looking for in a duck egg turned item. By understanding your audience, you’ll be able to tailor your products and marketing efforts to meet their needs, increasing the likelihood of making sales.
Creating a Brand Identity: Logos, Packaging, and More
As you establish yourself as a skilled duck egg turner until lockdown, it’s essential to create a brand identity that reflects your unique style and craftsmanship. This will help you stand out from competitors and build trust with potential customers.
When designing your logo, consider incorporating elements that are meaningful to your business or personal brand. For instance, if you specialize in turning eggs for wedding favors, your logo could feature a stylized pair of eggshells intertwined with flowers. Make sure the design is simple enough to be recognizable when used on various platforms, from social media profiles to packaging.
In addition to a well-designed logo, packaging also plays a crucial role in showcasing your brand’s personality and values. Choose materials that are eco-friendly or locally sourced to appeal to customers who prioritize sustainability. Use clear labels with your business name, contact information, and any relevant certifications (e.g., cruelty-free) to ensure transparency.
When creating marketing materials, consider the following tips:
* Develop a consistent color palette across all platforms to create visual cohesion
* Include high-quality images of your finished egg turning pieces in promotional materials
* Use social media consistently to share behind-the-scenes content and engage with customers
Online and Offline Sales Strategies
As you continue to hone your duck egg turning skills until lockdown, it’s essential to think about getting your creations into the hands of customers. Sales strategies can be as diverse as the eggs themselves, and both online and offline marketplaces have their unique strengths.
When it comes to selling your hand-turned duck eggs online, consider platforms like social media, e-commerce websites, or specialized craft markets. Showcase high-quality images that highlight the intricate details and textures of each piece. Engage with potential buyers by sharing behind-the-scenes content, demonstrating your techniques, and responding promptly to inquiries.
Offline sales strategies might involve partnering with local galleries, craft fairs, or farmers’ markets. This allows you to connect directly with customers, showcase your work in person, and respond to their needs immediately. To maximize offline exposure, make sure to have business cards, promotional materials, and a clear pitch ready at all times.
When deciding between online and offline sales channels, remember that both can complement each other effectively. By maintaining an online presence while also participating in local events, you’ll be able to reach a wider audience and build a loyal customer base.
Tips for Staying Motivated During Lockdown
As we near the end of our duck egg turning journey, let’s talk about how to stay motivated when lockdown eventually hits and our studios are closed.
Maintaining Routine: How to Stay Productive at Home
Staying productive while working from home can be challenging, especially when you’re passionate about activities like duck egg turning. As we navigate this lockdown period together, maintaining a routine will help you stay focused and motivated.
To create a schedule that works for you, consider your energy levels throughout the day. If you’re an early riser, dedicate those morning hours to turning duck eggs or practicing techniques. Allocate specific times for tasks like preparing ingredients, setting up equipment, and actual turning time. Break down larger projects into smaller tasks to avoid feeling overwhelmed.
Establishing boundaries with family members is also crucial when working from home. Communicate your needs and schedule with them so they understand when you’re available for breaks or quality time. This will help prevent distractions and maintain a healthy work-life balance.
Remember, consistency is key to achieving productivity while working from home. Set realistic goals and reward yourself for milestones reached. With dedication and persistence, you’ll stay on track and continue perfecting your duck egg turning skills until lockdown ends.
Managing Time Effectively: Scheduling and Prioritizing Tasks
When you’re stuck at home during lockdown, it’s easy to fall into the trap of procrastination and let productivity slip away. As a duck egg turner, you know that every passing day means delayed progress on your projects. To stay motivated and focused, you need to manage your time effectively.
Start by scheduling dedicated blocks of time for duck egg turning. Set aside specific hours each day or week, depending on your project’s requirements. Be realistic about how much time you have available, and don’t overload yourself with too many tasks. Prioritize the most critical ones first, such as preparing new eggs or practicing new techniques.
To stay on track, break down larger projects into smaller, manageable tasks. This will help you avoid feeling overwhelmed and make progress feel more tangible. Use a planner, calendar, or app to keep track of your schedule and deadlines. Remember, every small step counts, even if it’s just 15-20 minutes of focused work per day.
Staying Inspired: Resources and Communities for Support
As we navigate the challenges of lockdown, it’s easy to feel isolated and uninspired. But as duck egg turners, we’re lucky to have a supportive community that can help us stay motivated and creative. If you’re feeling stuck or need some fresh ideas, don’t worry – there are plenty of online resources and communities at your fingertips.
Firstly, join online forums like the Duck Egg Turning Community on Facebook or Reddit’s r/DuckEggTurning subreddit. These platforms connect turners from all over the world, sharing tips, techniques, and inspiring projects. You can also follow talented turners on Instagram, where you’ll find stunning examples of egg-turned art pieces.
Additionally, YouTube channels like “The Art of Duck Egg Turning” and “Duck Egg Crafts” offer tutorials, demonstrations, and workshops to help you improve your skills. Don’t be afraid to reach out to these creators or other online communities with questions – they’re passionate about sharing their expertise and love for the craft. By connecting with fellow turners and learning from each other’s experiences, we can stay inspired and motivated until lockdown is over.
Conclusion
Now that we’ve explored the art of duck egg turning, let’s take a moment to summarize what you’ve learned and how you can put it into practice.
Recap of Key Takeaways
To ensure you can continue to enjoy this hobby even after lockdown, let’s recap the key takeaways from our guide. First and foremost, it’s essential to understand that duck egg turning is not just a pastime but also an art form that requires patience, skill, and attention to detail.
In this article, we’ve covered various techniques for preparing and decorating duck eggs, including blow-and-fold, layering, wax resist, and natural dyes. We’ve also discussed how to create unique designs using everyday materials like coffee filters, sponges, and stencils.
Another crucial aspect of duck egg turning is the importance of safety precautions when working with hot tools and chemicals. Always work in a well-ventilated area, wear protective gloves and eyewear, and keep flammable materials away from your workspace.
Finally, don’t be afraid to experiment and try new techniques – it’s all part of the creative process! With practice and patience, you can create stunning pieces that will make perfect gifts or decorations for your home. Remember, even when lockdown restrictions are lifted, there’s still much to learn and discover in the world of duck egg turning.
Final Thoughts and Encouragement
As you reflect on your duck egg turning journey, I want to leave you with some final thoughts and encouragement. Lockdown might have presented its challenges, but it’s also given us the perfect opportunity to hone our skills, experiment with new techniques, and tap into our creative potential.
Remember that every successful project starts with a single step – in this case, cracking open that first duck egg. Don’t be discouraged if your early attempts don’t yield the desired results; practice makes perfect, and it’s essential to keep trying. To stay motivated during lockdown, try setting aside dedicated time for your craft, exploring new recipes, or joining online communities where you can share ideas with fellow enthusiasts.
Your hard work will pay off – whether it’s mastering a new glaze, creating intricate designs, or crafting unique vessels. Don’t let the current circumstances get in the way of your artistic growth; instead, use this time to develop your skills and come back stronger than ever when life returns to normal.
Frequently Asked Questions
Can I start duck egg turning with no prior crafting experience?
Yes, the beauty of this craft is that it’s accessible to beginners! With patience and practice, you can develop the necessary skills to create stunning duck eggs. Start by familiarizing yourself with basic shaping and forming techniques, and gradually move on to more complex designs.
How do I keep my finished duck eggs fresh for a longer period?
To maintain the quality of your finished duck eggs, store them in a cool, dry place away from direct sunlight. You can also apply a sealant or wax coating to protect the surface from dust and moisture. Regularly cleaning and handling your eggs will help prevent bacterial growth.
What if I encounter problems with my egg turning tools? Are there any troubleshooting tips available?
Don’t worry; common issues are a normal part of the learning process! Check for loose or worn-out parts, and ensure that your tools are properly cleaned and maintained. Consult online forums or reach out to experienced duck egg turners for guidance on resolving specific problems.
How do I determine the right size and shape of my eggs for a particular design?
Consider the style you’re aiming for – rustic, elegant, or abstract – when selecting the size and shape of your duck eggs. If it’s your first time creating a piece, start with smaller eggs to practice working within different proportions.
Can I use any type of paint or stain on my duck eggs, or are there specific requirements?
When choosing paints or stains for decorating your duck eggs, opt for those specifically designed for ceramics or glass. These products will provide the best results and ensure a durable finish that resists fading or chipping. Research different brands to find suitable options for your unique design needs.