
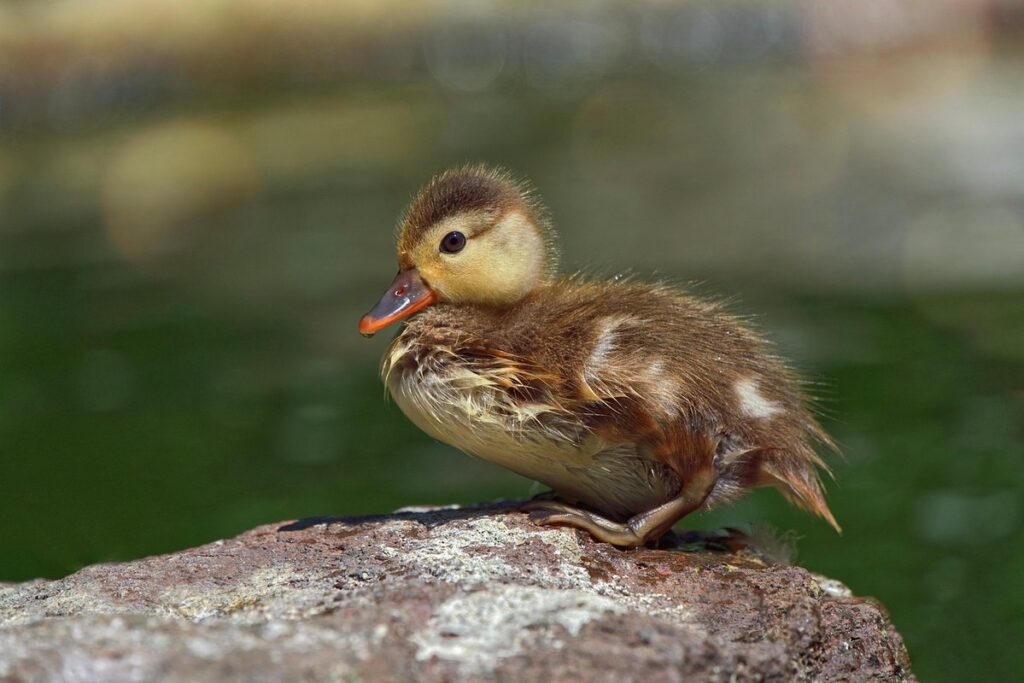
As a new duck parent, you’re probably eager to get your adorable ducklings settled into their own little home. But before they can start waddling around and playing in the pond, they need a safe and comfortable environment to grow and thrive – that’s where the brooder comes in. A well-set-up brooder is crucial for the first few weeks of your ducklings’ lives, providing them with the right temperature control, nutrition, and hygiene practices to prevent disease and ensure healthy development. In this article, we’ll walk you through a step-by-step guide on how to create the perfect brooder setup, covering everything from choosing the right equipment to maintaining optimal temperatures and keeping your babies fed and happy. By following our expert tips, you’ll be well-prepared to give your ducklings the best possible start in life.
Choosing the Right Brooder Type
When it comes to raising healthy and happy ducklings, selecting the right brooder type is crucial. Let’s explore your options for a successful and stress-free brooding experience.
Traditional vs. Tupperware Brooders: Pros and Cons
When it comes to choosing the right brooder for your ducklings, you’ll likely come across two popular options: traditional brooder boxes and unconventional alternatives like Tupperware containers. Each has its pros and cons, which are essential to consider before making a decision.
Traditional brooder boxes are often preferred by experienced breeders due to their durability and ease of use. They’re usually made of sturdy materials, such as plastic or metal, and come in various sizes to accommodate different numbers of ducklings. However, they can be expensive, especially for larger models. Additionally, they might not provide the most efficient heat distribution, leading to uneven temperature spots within the brooder.
Tupperware containers, on the other hand, offer an affordable alternative. They’re lightweight, easy to clean, and provide excellent insulation properties. However, they may not be as durable as traditional brooders and can be prone to cracking under stress. It’s also crucial to ensure proper ventilation when using Tupperware containers, as they can trap heat and moisture.
When deciding between the two options, consider your budget, experience level, and the specific needs of your ducklings. For example, if you’re a first-time breeder or have limited space, a Tupperware container might be an excellent choice. However, if you’re willing to invest in a more durable option and prioritize ease of use, a traditional brooder box might be the better fit.
Considerations for Large vs. Small Breedings
When it comes to choosing the right brooder for ducklings, one crucial consideration is the type of duck breed you’re working with. Large breeds, such as Muscovy and Pekin ducks, require more space than smaller breeds like Khaki Campbells or Welsh Harlequins.
For large-scale duckling raisings, a brooder designed for high-capacity production may be necessary. These units typically feature larger enclosures with greater ventilation to accommodate the increased number of birds. When selecting a brooder for large breed ducks, look for features such as:
* Ample space for movement and exercise (at least 2-3 square feet per bird)
* Sufficient ventilation to prevent ammonia buildup and maintain air quality
* Easy access for cleaning and monitoring
On the other hand, small-scale duckling raisings can thrive in smaller, more compact brooders. These units often include features such as:
* Nesting areas for parent ducks or hens
* Built-in feeding troughs and watering systems
* Integrated egg collectors (for those raising heritage breeds)
Consider your space constraints, breed requirements, and production goals to determine the ideal brooder size and type for your duckling operation.
Creating a Safe and Comfortable Environment
When setting up your duckling brooder, it’s crucial to create a space that feels secure and cozy for your little ones. Let’s explore some essential tips to achieve this safe haven.
Temperature Control: The Key to Healthy Ducklings
Precise temperature control is crucial for healthy ducklings. A consistent and optimal range of temperatures ensures their growth and development. Ducklings require a brooder temperature between 90°F to 95°F (32°C to 35°C) during the first few weeks after hatching.
However, as they grow, you’ll need to gradually reduce the temperature by about 5°F each week until it reaches a comfortable range of around 70°F to 80°F. This can be achieved using heat lamps or ceramic heat emitters in conjunction with insulation and ventilation.
To maintain precise temperature control, monitor the brooder’s thermometer regularly and adjust the heat source accordingly. It’s also essential to ensure proper air circulation within the brooder box. You can achieve this by providing adequate ventilation and maintaining a clean environment.
Maintaining optimal temperatures will not only promote healthy growth but also reduce stress and disease susceptibility in your ducklings.
Humidity Management: A Critical Aspect of Brooder Care
As you work to create a safe and comfortable environment for your ducklings, it’s essential to consider the often-overlooked aspect of humidity management. High humidity can lead to respiratory issues, skin problems, and even death, making it crucial to maintain optimal levels.
Ducklings have a unique physiology that makes them more susceptible to humidity-related health issues. Their tiny lungs are still developing, and excess moisture in the air can cause their airways to become inflamed. In extreme cases, this can lead to pneumonia, a common killer of young ducklings. On the other hand, extremely low humidity levels can also be detrimental, causing dehydration and stress.
To maintain optimal humidity levels, aim for between 50-60%. You can achieve this by using a humidifier or dehumidifier in conjunction with adequate ventilation. Monitor the environment closely, checking temperature and humidity readings regularly. If you notice your ducklings panting excessively or showing signs of distress, take immediate action to adjust the humidity level.
In addition to monitoring humidity levels, ensure proper air circulation by keeping windows open or using a fan. This will help prevent moisture buildup and reduce the risk of respiratory issues. By paying attention to these details, you’ll be well on your way to creating a safe and healthy environment for your ducklings to thrive in.
Nutrition and Water Supply
When it comes to raising healthy ducklings, providing them with a steady supply of fresh water and nutrient-rich food is crucial. Make sure to plan accordingly for these essential needs in your brooder setup.
The Importance of Starter Feed and Nutritional Supplements
When it comes to raising healthy and thriving ducklings, providing them with the right food is crucial. Young ducks have specific dietary needs that must be met during their first few weeks of life. This is where starter feed comes into play.
Starter feed is specifically formulated for young waterfowl like ducklings, providing them with the necessary nutrients to grow strong and healthy. It typically contains a balanced mix of proteins, fats, carbohydrates, vitamins, and minerals that support growth and development. Look for a starter feed that’s high in protein (around 20-25%) and has added calcium and phosphorus to support strong bone growth.
In addition to starter feed, you may also need to provide nutritional supplements, especially if you’re raising ducklings from day-old or have a flock with specific health needs. For example, if your ducklings are having trouble digesting their food, adding probiotics to their water can help support gut health. You can also offer crushed eggshells as a calcium supplement to promote strong beak and bone growth.
When introducing supplements, remember to start with small amounts and monitor your ducklings’ response closely. Also, ensure that you’re providing fresh, clean water at all times to prevent bacterial growth and disease.
Access to Clean Water: A Duckling’s Lifeline
When it comes to raising healthy ducklings, access to clean water is just as crucial as a nutritious diet. A duckling’s lifeline depends on having a constant supply of fresh, clean drinking water. In the early stages, they’ll drink more water than food, so maintaining water quality is essential.
To keep your ducklings’ water clean, change it frequently – ideally every 8-12 hours. You can also add a water conditioner to remove chlorine and other impurities that might be present in tap water. This will help prevent bacterial growth and keep the water fresh.
Monitor your ducklings’ behavior too; if they seem hesitant to drink from their waterer or show signs of illness, it’s likely due to contaminated water. Inspect their water regularly for signs of algae growth, mold, or a musty smell – these can be indicators of poor water quality. By prioritizing clean water and changing it often, you’ll help keep your ducklings healthy and thriving.
Hygiene and Cleaning Practices
When setting up a duckling brooder, maintaining cleanliness is crucial for preventing health issues. This section will walk you through essential hygiene and cleaning practices to ensure your ducklings stay happy and healthy.
Disinfecting and Sanitizing Brooder Equipment
Properly disinfecting and sanitizing brooder equipment is crucial to prevent disease and ensure healthy growth for your ducklings. Before starting, make sure to read the manufacturer’s instructions for any specific cleaning recommendations for your equipment.
First, gather necessary supplies: a scrub brush, soap or detergent specifically designed for poultry use, a disinfectant solution (containing 5-10% bleach), and a clean water source. Remove all food and bedding from the brooder, and wash the equipment thoroughly with soap and warm water to loosen dirt and debris.
Next, mix a disinfectant solution according to the manufacturer’s instructions and apply it evenly to all surfaces using a spray bottle or mop. Allow the solution to sit for 10-15 minutes before rinsing with clean water and allowing the equipment to air dry. For particularly stubborn stains or buildup, repeat the cleaning process as needed.
It’s also essential to disinfect any new additions to your brooder, such as toys, perches, or feeders, to prevent introducing potential pathogens into your duckling environment. By following these simple steps, you’ll be able to keep your brooder equipment clean and disinfected, reducing the risk of disease and ensuring a healthy start for your ducklings.
Maintaining a Clean Environment: Tips and Tricks
As you’re setting up your duckling brooder, it’s essential to create an environment that not only keeps them safe but also clean. A dirty brooder can be a breeding ground for bacteria and diseases, which could harm your precious ducklings.
To maintain a clean brooder area, you’ll want to establish a waste management plan. This includes removing soiled bedding material daily and replacing it with fresh, dry bedding. You can use wood shavings or pine pellets as these are easy to clean up and absorb moisture well.
Another crucial aspect is minimizing odors. One way to do this is by ensuring good ventilation in the brooder area. Open windows and ensure airflow to prevent stale air from accumulating. Additionally, you can sprinkle a small amount of baking soda on the bedding to help neutralize any unpleasant smells.
Regular cleaning also involves washing your ducklings’ food and water dishes daily and disinfecting the feeding equipment.
Monitoring Health and Behavior
Regularly monitoring your ducklings’ health and behavior is crucial for detecting potential issues early on, such as respiratory problems or injury. Keep a close eye out for changes in appetite, energy levels, and stool quality.
Recognizing Common Health Issues in Ducklings
As you care for your ducklings, it’s essential to be aware of common health issues that can arise. Ducklings are vulnerable to certain illnesses due to their immature immune systems and constant exposure to bacteria and viruses.
One of the most prevalent issues is respiratory problems. These can manifest as labored breathing, wheezing sounds, or coughing fits. Be on the lookout for these symptoms, especially in drafty areas or if your brooder’s ventilation isn’t sufficient. If you notice any unusual respiratory behavior, it’s crucial to consult a veterinarian experienced in poultry care.
Another common concern is bacterial infections, which can lead to wet or crusty eyes, lethargy, and loss of appetite. Keep an eye on your ducklings’ overall demeanor and be prepared to provide antibiotics if necessary.
Keep track of any unusual behaviors or physical changes by creating a health log. This will help you identify potential issues early on and ensure that your veterinarian can diagnose and treat problems effectively. Regular checks with a qualified poultry expert are also vital for maintaining the optimal health of your ducklings.
Understanding Normal vs. Abnormal Behavior in Ducklings
When it comes to monitoring the health and behavior of your ducklings, it’s essential to understand what constitutes normal behavior. Young ducklings are naturally curious and energetic creatures, and they may exhibit behaviors that seem unusual or alarming at first glance. However, some behaviors can be indicative of potential problems.
For instance, if you notice your ducklings swimming erratically or struggling to breathe while swimming, it could be a sign of respiratory issues. On the other hand, seeing them huddle together for extended periods might indicate they’re too cold. Normal behavior in ducklings typically includes pecking at food, exploring their surroundings, and engaging in social interactions with each other.
Pay attention to changes in appetite, stool quality, or overall activity levels. For example, if your ducklings seem lethargic or reluctant to eat, it may be a sign of an underlying health issue. Keep an eye out for signs of stress, such as excessive feather pecking, pacing, or vocalization.
Keep the brooder well-ventilated and at a comfortable temperature (around 90-95°F) to promote healthy development. Regularly inspect your ducklings’ living quarters for cleanliness and ensure they have access to fresh food and water at all times.
Preparing for the Transition to Outdoor Housing
As you get closer to raising your ducklings outdoors, it’s essential to prepare them and your outdoor area for a seamless transition. This section will walk you through crucial steps to ensure their success.
Gradual Acclimation: The Key to Successful Flock Integration
Gradual acclimation is essential when introducing ducklings to outdoor housing. This process helps prevent stress and potential health issues associated with sudden exposure to new environments. Start by allowing the ducklings access to a covered porch or a fenced area adjacent to their brooder for short periods each day.
As they become more comfortable, gradually increase the duration of their time outdoors. Monitor their behavior and adjust the transition pace accordingly. It’s also crucial to provide a safe and secure outdoor enclosure that protects them from predators and harsh weather conditions.
During this acclimation period, ensure the ducklings have access to food, water, and shelter at all times. A gradual introduction to new sights, sounds, and environments will help your ducklings adapt more efficiently. For example, you can begin by exposing them to a small outdoor space with some shade and then gradually expand their territory as they become more confident.
Remember, patience is key when acclimating ducklings to outdoor housing. Avoid rushing the process, and you’ll be rewarded with healthier, happier ducks that thrive in their new environment.
Essential Equipment for Outdoor Duck Enclosures
As you prepare to transition your ducklings from their brooder to an outdoor environment, it’s essential to ensure that their new enclosure is safe and suitable for their needs. When building or purchasing an outdoor duck enclosure, there are several pieces of equipment you’ll need to consider.
Fencing is the most critical aspect of an outdoor duck enclosure. You’ll want to install a sturdy fence that stands at least 3 feet high to prevent your ducks from escaping. The material and design will depend on your specific climate, terrain, and local regulations. Consider using hardware cloth or chicken wire with openings of about 1 inch to prevent predators like foxes and coyotes from getting through.
You’ll also need to provide a secure entrance that allows easy access for you but keeps out potential predators. A simple latch or lock should suffice. Don’t forget to add a roof or canopy to protect your ducks from the elements, including sun, rain, and snow. Consider using waterproof materials like asphalt shingles or metal roofing.
In addition to these basic components, you may also want to include some enrichment features such as perches, nesting boxes, and feeding areas. These will not only provide your ducks with a comfortable living space but also help keep them healthy and happy.
Frequently Asked Questions
How do I maintain optimal temperature control in my brooder during power outages?
In the event of a power outage, it’s essential to have a backup plan for maintaining optimal temperatures in your brooder. Consider investing in a battery-powered heat source or a heat lamp with an automatic shut-off feature. This will ensure that your ducklings stay within the recommended temperature range (90-95°F) even during unexpected power outages.
Can I use a hot water bottle to regulate temperature instead of a heat lamp?
Yes, using a hot water bottle can be an effective alternative for regulating temperature in small brooder setups. Simply fill the bottle with warm water and place it near your ducklings to maintain a comfortable temperature. However, keep in mind that this method may not provide consistent heat distribution throughout the brooder.
What’s the recommended ratio of starter feed to nutritional supplements in my brooder?
The ideal ratio of starter feed to nutritional supplements can vary depending on factors like age, breed, and individual duckling needs. As a general rule, start with a 1:1 ratio (one part starter feed to one part supplement) and adjust as needed based on your ducklings’ growth rate and health.
How often should I disinfect and sanitize brooder equipment during the brooding period?
Yes, it’s recommended to disinfect and sanitize brooder equipment daily, especially during the first few weeks of the brooding period when ducklings are most susceptible to disease. Use a pet-safe disinfectant or sanitizer, following manufacturer instructions for application and drying times.
What’s the best way to transition my ducklings from starter feed to layer feed?
Gradually introduce layer feed by mixing it with starter feed at a ratio of 25:75 (one quarter layer feed to three quarters starter feed) over a period of 7-10 days. Monitor your ducklings’ growth rate and adjust the ratio as needed to ensure a smooth transition to layer feed.