
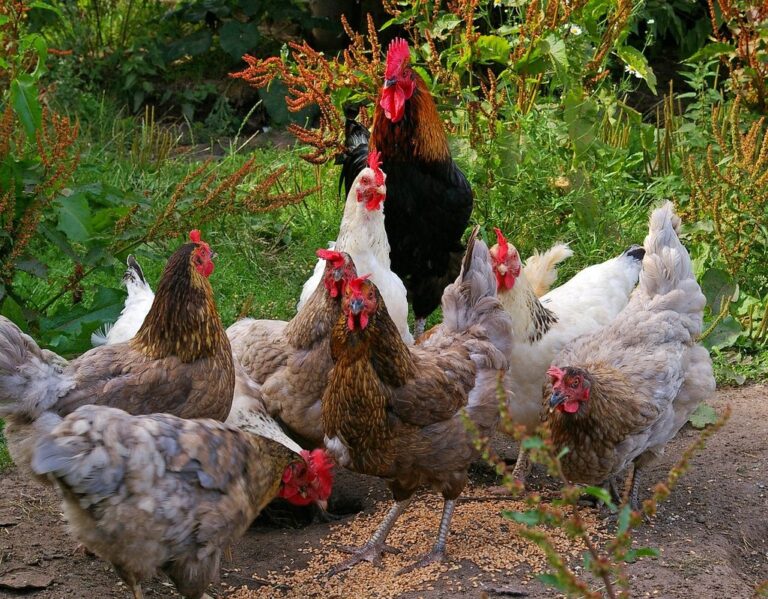
Are you looking to supercharge your backyard chickens‘ diet with a nutrient-rich feed? Fermenting chicken feed is an incredible way to unlock its full potential. By harnessing the power of fermentation, you can create a feed that’s not only delicious but also packed with beneficial probiotics and enzymes that will keep your flock healthy and thriving.
In this comprehensive guide, we’ll take you through the ins and outs of fermenting chicken feed. We’ll start by exploring the benefits of fermented feed, from improved digestion to increased immunity. Then, we’ll dive into the nitty-gritty details of maintaining a consistent fermentation process, including how to choose the right ingredients, monitor temperature, and store your fermented feed.
By following our expert tips and tricks, you’ll be well on your way to creating a high-quality, nutrient-rich feed that will give your chickens the best chance at a happy and healthy life.
Understanding the Benefits of Fermented Feed
Fermenting chicken feed can have a significant impact on your flock’s health and wellbeing, but understanding its benefits is key to making informed decisions. In this section, we’ll break down what you need to know.
Introduction to Fermentation and Its Importance in Animal Nutrition
Fermentation is a process that has been used for centuries to preserve food and improve its nutritional value. It involves allowing microorganisms such as bacteria and yeast to break down the complex compounds in feed, resulting in a more easily digestible and nutrient-rich product. This process not only enhances the palatability of feed but also unlocks its full potential in terms of nutritional benefits.
When it comes to animal health, fermentation plays a crucial role. By breaking down anti-nutrients and toxins present in plant-based feeds, fermented feed helps improve the overall gut health of chickens. This, in turn, leads to enhanced immunity, better digestion, and improved growth rates. Moreover, fermented feed has been shown to increase the bioavailability of essential nutrients such as protein, vitamins, and minerals.
If you’re considering switching to fermented feed for your flock, it’s essential to understand its importance. Fermented feed can help reduce stress on your chickens’ digestive system, promote a balanced gut microbiome, and even lower the risk of disease. By incorporating fermented feed into their diet, you’ll be giving your birds the best chance at optimal health and productivity.
The Science Behind Fermentation and Microorganisms
Fermentation is a complex process that relies on microorganisms to break down nutrients and create a nutrient-rich feed. These microorganisms are the unsung heroes of fermentation, playing a crucial role in creating a balanced and healthy feed for your chickens.
There are several types of beneficial bacteria that contribute to this process, including Lactobacillus, Bifidobacterium, and Streptococcus. These bacteria work together to break down carbohydrates, proteins, and fats into simpler compounds that can be easily absorbed by your birds. This not only increases the nutritional value of the feed but also enhances its palatability.
The process of fermentation is made possible through the presence of yeast, mold, and other microorganisms that feed on the sugars in the feed. As these microorganisms break down the nutrients, they release enzymes that further enhance the nutrient-rich profile of the feed. For example, Lactobacillus acidophilus can increase the digestibility of phytates by up to 60%, making it easier for your birds to access essential minerals like calcium and phosphorus.
By understanding how microorganisms contribute to fermentation, you can take steps to optimize this process in your own backyard flock.
Preparing Your Chicken Feed for Fermentation
Before you start fermenting your chicken feed, it’s essential to prepare the ingredients properly to ensure a healthy and balanced fermentation process. This involves selecting the right grains and nutrients.
Selecting the Right Ingredients for Fermented Feed
When it comes to fermenting chicken feed, selecting the right ingredients is crucial for creating a nutrient-rich and easily digestible feed for your flock. The ideal fermented chicken feed should consist of grains, vegetables, and supplements that work together to provide essential nutrients.
For grains, choose whole, organic options like oats, barley, or wheat. These will serve as the base of your feed, providing carbohydrates and fiber. Consider adding a mix of vegetables such as carrots, sweet potatoes, and leafy greens to increase the feed’s nutritional value. Dark leafy greens are particularly beneficial for chickens, providing essential vitamins and minerals.
When it comes to supplements, consider adding probiotics or live cultures to promote gut health in your birds. You can also add crushed eggshells or oyster shells to provide calcium and support strong bone growth. When selecting ingredients, choose organic options whenever possible and avoid fillers like corn and soy. By carefully selecting high-quality grains, vegetables, and supplements, you’ll be able to create a fermented chicken feed that’s both nutritious and easily digestible for your flock.
Mixing the Perfect Blend: Ratios and Proportions
When creating a fermented chicken feed blend, it’s essential to get the ratios and proportions just right. This ensures that your flock gets the nutrients they need while minimizing waste and potential health risks.
To calculate the optimal mix, start by identifying the primary components: grains, proteins (such as beans or peas), fiber sources (like beet pulp or alfalfa meal), and any additional supplements like vitamins or minerals. A general rule of thumb is to aim for a balance of:
* 50-60% grains (oats, barley, or wheat)
* 20-25% protein-rich ingredients
* 10-15% fiber sources
* 5-10% other supplements
For example, if you’re making a batch with 100 pounds of total ingredients, your calculations might look like this:
* Grains: 50-60 pounds (e.g., 55 pounds oats)
* Protein-rich ingredients: 20-25 pounds (e.g., 22 pounds beans)
* Fiber sources: 10-15 pounds (e.g., 12 pounds beet pulp)
Remember, these are just rough estimates. The key is to find the perfect balance for your flock based on their individual needs and preferences. Keep in mind that some ingredients may have varying nutrient profiles, so be sure to research each component carefully before mixing. With a little practice and patience, you’ll develop a winning formula for your fermented chicken feed blend.
Setting Up Your Fermentation System
To get started with fermenting your chicken feed, you’ll need to set up a fermentation system that provides a healthy environment for beneficial microbes to thrive in. This section will guide you through setting it up.
Equipment Needed for Fermenting Chicken Feed
To get started with fermenting chicken feed, you’ll need some essential equipment. This includes containers to hold the feed, tools for mixing and aerating, and storage solutions to keep everything organized.
First and foremost, you’ll need a container that’s specifically designed for fermentation. Glass or ceramic crocks are ideal as they’re easy to clean and won’t impart any flavors or odors into your fermented feed. Look for one with a wide mouth to make it easy to add and remove the feed. A 1-2 gallon capacity is a good starting point, but you can always scale up later.
You’ll also need some basic tools like a spoon or spatula for mixing, a cheese cloth or mesh strainer for separating liquid from solids, and a pH meter to monitor acidity levels. Store these items in a designated area, such as a shed or a dedicated fermentation station, to keep them clean and within reach. Consider investing in a set of scales to accurately measure out ingredients and a thermometer to track temperature fluctuations.
Safe Handling Practices: Preventing Contamination and Over-Fermentation
When handling fermented chicken feed, it’s essential to follow safe practices to prevent contamination and over-fermentation. First, ensure you’re working in a clean environment with a designated area for fermentation. This will help contain any potential mess or spills.
To prevent contamination, always wash your hands thoroughly before and after handling the fermented feed. Use gloves if possible, especially when transferring the feed from one container to another. Keep raw materials and ingredients separate from the fermented feed to avoid cross-contamination.
Regularly monitor the fermentation process by checking for signs of over-fermentation or spoilage. Look out for off smells, slimy texture, or mold growth on the surface. If you notice any of these symptoms, discard the entire batch immediately. Check temperature and pH levels regularly to ensure they’re within a safe range (typically 10-20°C and pH 3.5-4.5) for fermentation.
Regular cleaning and maintenance of your fermentation equipment will also help prevent contamination and spoilage.
The Fermentation Process: Monitoring Progress and Timing
Monitoring progress and timing are crucial steps in fermenting chicken feed, as they ensure a safe and effective fermentation process that meets your flock’s nutritional needs. Let’s dive into the key indicators to look out for.
Understanding the Different Stages of Fermentation
When you start fermenting chicken feed, it’s essential to understand the various stages involved. This process can be broken down into four primary phases: initial mixing, lactic acid production, secondary fermentation, and completion.
Initially, when you mix the ingredients, you’ll notice a somewhat uniform texture. The microorganisms will begin to activate and break down the proteins within 24-48 hours, causing a noticeable change in consistency and smell. During this phase, it’s crucial to monitor temperature and moisture levels, as these factors can significantly impact the fermentation process.
As lactic acid production kicks in, you’ll observe a significant decrease in pH levels, often accompanied by a more sour aroma. This is a sign that the beneficial bacteria are thriving and doing their job. Secondary fermentation will typically occur between 48-72 hours after initial mixing, marked by an increase in carbon dioxide production and a slightly sweeter smell.
Key indicators of a successful process include a well-defined ‘bubble’ or foam on top of the mixture and a consistent decrease in pH levels throughout the stages.
Monitoring pH Levels and Temperature: Ensuring Optimal Conditions
Monitoring pH levels and temperature is crucial to creating an optimal environment for microorganisms to thrive during fermentation. You’ll want to track these parameters closely, as they can significantly impact the health and productivity of your chickens.
Start by investing in a pH meter that’s specifically designed for measuring feed pH. Calibrate it regularly to ensure accuracy. Aim for a pH range between 5.5 and 6.5, as this is optimal for most lactic acid bacteria. If your readings are consistently above or below this range, you may need to adjust the recipe or add a buffering agent.
Temperature control is equally important. Lactic acid bacteria thrive in temperatures between 25°C (77°F) and 35°C (95°F). Aim for a temperature around 30°C (86°F), as this will promote optimal bacterial growth. Keep your fermentation environment consistent, with minimal fluctuations in temperature or pH levels. This will help prevent contamination and ensure that your chickens receive the healthiest possible feed. By monitoring and adjusting these parameters, you’ll be able to create an optimal environment for microorganisms to thrive, leading to healthier and more productive birds.
Troubleshooting Common Issues in Fermentation
Don’t worry, we’ve all been there – a batch of fermented chicken feed that’s not quite right. This section will walk you through common issues and their easy fixes to get you back on track.
Identifying Signs of Over-Fermentation or Under-Fermentation
When it comes to fermenting chicken feed, achieving the perfect balance of fermentation is crucial. Over-fermentation and under-fermentation can have significant effects on your flock’s health and productivity.
Signs of over-fermentation include a strong, unpleasant odor emanating from the feed, which can be accompanied by mold growth or an oily texture. This can lead to digestive issues in your chickens, such as diarrhea, vomiting, or even respiratory problems. Over-fermentation can also cause nutrient imbalances, making it difficult for your flock to absorb essential vitamins and minerals.
On the other hand, under-fermentation may not exhibit any obvious symptoms at first, but prolonged consumption of unfermented feed can lead to digestive issues and reduced egg production. Chickens may appear lethargic or show a decrease in appetite due to the lack of beneficial microbes that fermented feed provides.
To identify whether your feed is over- or under-fermented, monitor its appearance, smell, and texture regularly. If you notice any unusual changes, it’s time to reassess your fermentation process and make adjustments accordingly.
Strategies for Reviving a Failed Batch or Preventing Future Issues
When you’re faced with a failed batch of fermented chicken feed, it can be frustrating and disappointing. However, don’t throw the entire batch away just yet! Depending on the severity of the issue, you might be able to salvage some or all of it.
First, assess the extent of the problem. If the fermentation process has been disrupted due to contamination, temperature fluctuations, or inadequate moisture, you may still have some usable feed left over. In such cases, separate the affected portion from the rest and either re-fry or cook the good part before feeding it to your birds.
To prevent similar issues in future batches, consider implementing the following strategies: Monitor temperature and pH levels closely during fermentation. Regularly check for signs of mold, mildew, or other contaminants. Ensure adequate airflow and maintain a consistent moisture level. Keep your equipment clean and sanitized to minimize the risk of contamination.
Maintaining a Consistent Fermentation Process
To maintain a consistent fermentation process, it’s essential to establish a routine and track your progress, ensuring each batch turns out as expected. Let’s explore some practical tips for achieving consistency.
Creating a Routine for Regular Fermentations
Regular fermentations are essential to maintaining a consistent fermentation process for chicken feed. By incorporating regular batch ferments into your routine, you’ll be able to monitor the health and quality of your flock’s diet more effectively.
To schedule regular fermentations, consider mapping out a calendar with specific days and times allocated for fermentation tasks. This could include setting aside dedicated time each week for monitoring and maintenance checks on existing batches, as well as planning for upcoming ferments. Be sure to account for factors like batch size, nutrient levels, and the needs of your flock when determining scheduling.
Aim to ferment at least one or two batches per week, depending on your flock’s size and dietary requirements. This will allow you to maintain a consistent supply of fermented feed while also having some buffer in case of unexpected delays or setbacks. Consider batch sizes ranging from 5-20 gallons, depending on the space available for fermentation.
By incorporating regular fermentations into your routine, you’ll be able to better monitor nutrient levels and make informed decisions about your flock’s diet.
Monitoring Feed Quality and Adjusting the Fermentation Process as Needed
Monitoring feed quality over time is crucial to maintaining the nutritional benefits for chickens. This involves tracking the pH levels, moisture content, and nutrient availability of the fermented feed. Regularly check the pH level using a pH meter to ensure it remains within the optimal range of 4.5-5.5. If the pH level exceeds this range, it may indicate an imbalance in the fermentation process.
To adjust the fermentation process as needed, you can make adjustments to the temperature, retention time, or the ratio of microorganisms added to the feed. For example, if the pH level is too high, try increasing the retention time by 24 hours to allow for further breakdown of nutrients. Conversely, if the pH level is too low, reduce the retention time and increase the airflow in the fermentation chamber.
Regularly sampling the fermented feed and testing its nutritional content will help you identify areas where adjustments are needed. By monitoring and adjusting the fermentation process over time, you can maintain consistent quality and ensure that your chickens receive the nutrients they need to thrive.
Frequently Asked Questions
How do I know if my fermented feed is too acidic?
The ideal pH level for fermented chicken feed is between 4.2 and 6.0. If your feed’s pH level drops below 4.2, it may be too acidic. Monitor the pH levels regularly using a pH meter or pH paper to ensure optimal conditions.
Can I use any type of container for fermenting my chicken feed?
While you can use various containers for fermentation, not all are suitable. Metal and wooden containers can harbor bacteria and fungi, potentially contaminating your feed. Opt for food-grade plastic buckets or ceramic crocks specifically designed for fermentation to maintain cleanliness and prevent contamination.
What if I notice mold growing on the surface of my fermented feed?
Yes. Mold growth is a common issue in fermentation, but it doesn’t necessarily mean your feed is spoiled. If you notice mold, carefully scrape off the affected area and continue monitoring its progress. However, if the mold persists or spreads, it’s best to start over with fresh ingredients.
How often should I monitor my fermented feed’s temperature?
Yes. Monitoring temperature is crucial in fermentation. Check your feed regularly, ideally twice a day, to ensure optimal temperatures (between 64°F and 75°F) for microbial activity. Adjust your storage location or use insulation if necessary to maintain consistent conditions.
Can I add supplements to my fermented chicken feed without affecting the fermentation process?
It’s generally recommended not to add supplements until after fermentation is complete. Supplements can interfere with the fermentation process, altering the balance of microorganisms and potentially compromising the nutritional value of your feed. Wait until the fermentation is finished before adding any supplements or mix-ins.