
The unpleasant odor of ammonia in your backyard chicken coop is not just an annoyance, but also a serious health concern for both humans and animals. Prolonged exposure to this toxic gas can cause respiratory problems, eye irritation, and skin rashes in your family members and flock. It’s time to address the issue head-on and eliminate the sources of ammonia smell from your coop. In this article, we’ll guide you through a step-by-step process to identify and fix the root causes of ammonia buildup, ensuring a healthier living environment for both you and your feathered friends. We’ll cover topics such as moisture control, ventilation, and waste management, providing you with practical solutions to prevent ammonia smell in your coop once and for all.
Understanding the Problem
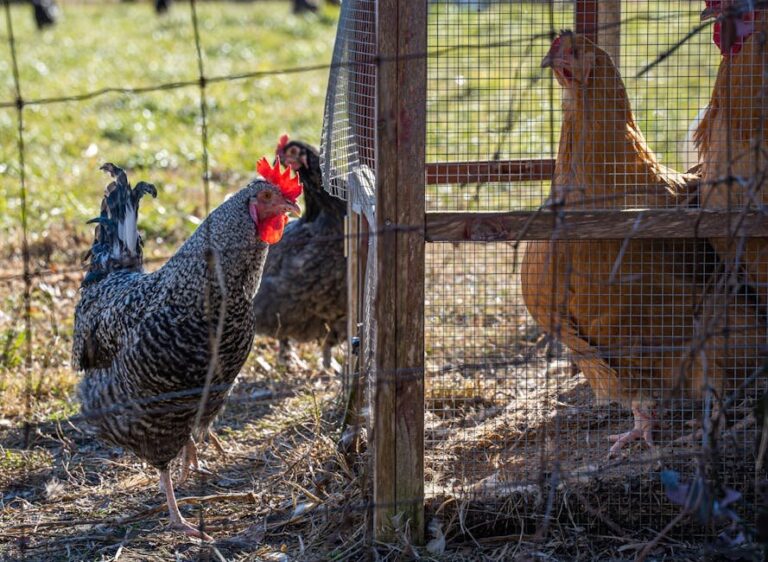
Let’s dive into the root cause of the ammonia smell: excessive uric acid and poor ventilation, which can lead to a buildup of toxic fumes.
Identifying Sources of Ammonia
When it comes to identifying the sources of ammonia smell in your chicken coop, there are several common culprits you should be aware of. Excess moisture is one of the primary contributors to ammonia buildup. This can come from a variety of sources, including wet bedding, poor drainage, or even condensation on walls and windows.
Poor ventilation is another significant issue that allows ammonia to accumulate in your coop. If air doesn’t circulate freely, it becomes trapped, leading to high concentrations of ammonia gas. To address this problem, ensure that your coop has adequate airflow by installing windows, vents, or fans.
Overcrowding can also exacerbate the issue by concentrating waste and urine under a smaller space. This creates an ideal environment for bacteria like E. coli to thrive, which in turn produces large amounts of ammonia as a byproduct.
Inadequate feeding and watering practices can also contribute to excessive moisture levels in your coop. For example, if you overfeed your chickens or don’t provide enough water, they may produce more waste than usual, leading to higher ammonia levels. Make sure to monitor your flock’s consumption and adjust their diet accordingly.
Health Risks for Humans and Animals
Prolonged exposure to ammonia fumes can have severe health consequences for both humans and animals living in close proximity to the coop. Respiratory problems are a common issue, as ammonia vapor irritates the lungs and airways, making it difficult to breathe. If you’re experiencing persistent coughing or shortness of breath, it may be a sign that your coop is producing excessive ammonia.
Eye irritation is another concerning symptom, particularly for people who frequently visit the coop. Irritation can cause redness, itching, and tearing, while prolonged exposure may lead to more severe conditions like conjunctivitis. Skin rashes are also possible due to direct contact with ammonia or contaminated hands touching your face.
The health risks don’t stop there – chickens are also affected by ammonia buildup in their coop. Excessive fumes can cause stress, reduce egg production, and negatively impact overall chicken health. Ammonia can even lead to beak lesions, respiratory infections, and reduced appetite.
Causes of Ammonia Smell in Coop
So, you’ve got a coop and you’re wondering why it smells so strongly of ammonia. Let’s explore some common causes that might be behind this unpleasant odor.
Droppings and Urine Management
Managing chicken droppings and urine effectively is crucial to eliminating ammonia smell from your coop. When these waste products accumulate, they can create an ideal breeding ground for bacteria that produce ammonia gas. To prevent this, make it a habit to clean out the coop regularly. Remove soiled bedding, droppings, and uneaten food daily or every other day, depending on the number of chickens you have.
Using absorbent materials or litter is another excellent way to manage moisture levels in your coop. Wood shavings, straw, and pine straw are popular options that help keep your flock’s waste dry and reduce ammonia production. Additionally, consider using a litter that’s specifically designed to control odor, such as silica gel or zeolite.
To further minimize the risk of ammonia buildup, ensure proper ventilation in your coop. This can be achieved by installing windows, vents, or fans that allow fresh air to circulate and stale air to escape. By combining these strategies – regular cleaning, absorbent materials, and adequate ventilation – you’ll significantly reduce the likelihood of ammonia smell issues in your coop.
Diet and Nutrition Factors
When it comes to ammonia smell in coops, diet and nutrition play a crucial role. A well-balanced diet is essential for maintaining your flock’s overall health, but an imbalance can lead to the production of excess waste, which contributes to ammonia buildup.
Protein imbalance is one common dietary issue that can cause ammonia smell. If your flock’s protein intake is too high, it can lead to an overproduction of nitrogen-rich waste, which, when combined with moisture and heat, creates ammonia. For example, if you’re feeding your chickens a diet rich in high-protein feed or relying heavily on treats like mealworms, this could be exacerbating the problem.
Excess dietary nitrogen is another critical factor to consider. When birds consume too much protein, their bodies can’t process it efficiently, resulting in excess waste production. This, combined with inadequate vitamin and mineral intake, can create an ideal environment for ammonia buildup. Ensure your flock’s diet includes a balanced mix of vitamins and minerals to support healthy digestion and minimize waste production.
Aiming for the right balance is key. A diet that consists of 16-18% protein for layers and 14-16% protein for pullets is generally recommended. Monitor your birds’ feed intake, adjust their diets accordingly, and provide plenty of fresh water to dilute urine and reduce ammonia levels.
Identifying and Fixing Leaks
Now that we’ve discussed possible causes of ammonia smell, let’s focus on tracking down the source and fixing any leaks to get your coop fresh and healthy again.
Water System Checks
When inspecting your coop’s plumbing system, it’s essential to check for any signs of leaks or water damage that might be contributing to the ammonia smell. Begin by visually inspecting the pipes and fittings for any signs of rust, corrosion, or mineral buildup. Look for droplets of water on the walls, floor, or equipment, which can indicate a leak.
Check the coop’s drainage system to ensure it’s functioning correctly. A clogged drain can cause water to back up into the coop, leading to moisture issues and ammonia buildup. Check for any signs of water seepage around pipes, electrical outlets, and other areas where pipes are exposed.
If you find any damaged or corroded areas, make sure to repair them promptly. Use a pipe wrench to loosen any stubborn fittings, then replace any damaged sections with new ones. Ensure all connections are tightened securely to prevent leaks. Regularly inspecting your coop’s plumbing system can help prevent water damage and reduce the risk of ammonia buildup.
Roof and Wall Repairs
When it comes to ammonia smell in the coop, one of the most critical areas to inspect is the roof and walls. Water leaks can seep into these areas, causing dampness that fosters bacterial growth, which in turn contributes to the pungent odor.
To address this issue, it’s essential to identify and seal any gaps or cracks in the roof and walls. Check for worn-out shingles, missing or damaged flashing around vents and skylights, and loose or corroded hardware. These weaknesses can allow water to penetrate, exacerbating the problem.
Replacing worn-out materials with new ones is a straightforward fix. However, it’s equally important to ensure proper waterproofing. Apply a coat of roof sealant or waterproofing membrane to protect against future leaks. When sealing gaps, use a silicone-based caulk specifically designed for outdoor use. This will help prevent water intrusion and reduce the risk of ammonia smell in your coop.
Regular maintenance is key to preventing these issues from arising in the first place. Schedule regular inspections and address any problems promptly to keep your flock healthy and happy.
Improving Ventilation
To effectively eliminate ammonia smell from your coop, you need a well-designed ventilation system that brings fresh air in and stale air out. Let’s explore some practical ways to improve airflow in your chicken house.
Installing Ventilation Systems
Installing ventilation systems is a crucial step in reducing ammonia smell in your coop. The first type of ventilation system to consider is natural ventilation methods. This can be achieved through the use of windows and vents strategically placed around the coop. Make sure to open these during warm weather to allow fresh air to circulate, but ensure they are closed when it’s cold outside to prevent heat loss.
Another option is mechanical ventilation systems, which can provide more control over airflow. Fans and blowers can be installed in the coop to actively pull out stale air and bring in fresh air from outside. You can also consider installing a exhaust fan above the roosting bars or nesting boxes to specifically target areas where ammonia smell tends to accumulate.
When choosing a ventilation system, consider factors such as the size of your coop, the number of birds, and local climate conditions. Proper installation is key to ensure that these systems function efficiently and effectively reduce ammonia levels. Regular maintenance of your ventilation system, including cleaning filters and inspecting for blockages, will also help keep it running smoothly.
Enhancing Air Circulation
Enhancing air circulation is crucial to reducing ammonia levels within the coop. One effective way to improve airflow is by raising nesting boxes and perches off the floor. This allows for better air circulation underneath, preventing the buildup of moisture that can contribute to ammonia production. Consider elevating them at least 12-18 inches above the floor.
Increasing space between birds also helps in reducing ammonia levels. When hens are packed tightly together, their droppings and urine become concentrated, leading to higher ammonia emissions. By providing adequate space (around 3-4 square feet per hen), you can reduce the density of waste production and promote better air circulation.
Lastly, improve airflow patterns within the coop by considering its layout. Ensure that there are no obstacles or bottlenecks in the ventilation paths. Strategically place windows, vents, or fans to create a smooth flow of air throughout the coop. This simple yet effective measure can make a significant difference in reducing ammonia levels and promoting healthier living conditions for your hens.
Maintaining a Clean Coop
To prevent ammonia buildup, maintaining a clean coop is crucial and that’s exactly what we’ll cover next: essential cleaning tasks to keep your birds’ living space healthy.
Regular Cleaning Schedules
Regular cleaning schedules are crucial for maintaining a clean coop that’s free from ammonia smell. The frequency and duration of cleanings will depend on the size of your flock and the coop itself. As a general rule, you should aim to clean the coop at least once a week, with daily spot cleaning in between. This means setting aside 30 minutes to an hour each day to quickly pick up after your birds.
When it comes to thorough cleaning, plan for about 2-3 hours on the weekend or a day off. Tasks involved in the cleaning process include removing soiled bedding, scrubbing surfaces with a gentle detergent, disinfecting high-touch areas, and replacing fresh bedding. Don’t forget to clean hard-to-reach areas like nesting boxes and windowsills. A thorough clean will help eliminate ammonia smell by breaking down uric acid crystals that cause it. By incorporating regular cleaning schedules into your coop maintenance routine, you’ll be taking a proactive approach to preventing ammonia smell and keeping your flock happy and healthy.
Sanitation Practices
Effective sanitation practices are crucial to preventing ammonia smell buildup in your coop. One of the most critical steps is disinfecting surfaces and equipment regularly. Use a solution of 1 part white vinegar to 9 parts water to clean all surfaces, including feeding troughs, nesting boxes, and perches. This will help kill bacteria that can contribute to the ammonia smell.
Removing droppings and soiled bedding on a daily basis is also essential. This not only prevents the buildup of ammonia but also keeps your coop clean and healthy for your chickens. Use gloves or a scoop to remove all waste, and replace the bedding with fresh material as needed.
Maintaining a dry environment is another key factor in preventing ammonia smell. Remove any wet spots or puddles immediately, and ensure that there’s good airflow within the coop. By keeping surfaces dry and clean, you’ll significantly reduce the likelihood of ammonia buildup, making it easier to keep your coop smelling fresh and clean. Regular cleaning and maintenance can go a long way in preventing this issue.
Frequently Asked Questions
Can I use a fan to improve ventilation in my coop immediately?
Yes, you can install a fan temporarily to improve airflow and reduce ammonia buildup, but it’s essential to address the root causes of poor ventilation, such as installing proper ventilation systems or enhancing air circulation, for long-term solutions.
How often should I clean my chicken coop to prevent ammonia smell?
Regular cleaning is crucial in maintaining a healthy environment. Clean your coop at least once a week, removing all bedding and droppings, disinfecting surfaces, and replacing fresh bedding. This will help control moisture and reduce the risk of ammonia buildup.
What if I have a large flock with high ammonia levels? How can I manage their waste effectively?
Managing waste from a large flock requires careful planning. Consider implementing a deep litter system or using a combination of dry litter and regular droppings removal to maintain a healthy balance between moisture control and waste management.
Are there any specific things I should look for when inspecting my coop’s roof and walls for leaks?
When inspecting your coop’s roof and walls, look for signs of wear, rust, or damage that could be allowing water to seep in. Check the condition of flashing around vents, chimneys, and skylights, and ensure all seals are intact to prevent moisture accumulation.
Can I use ammonia-neutralizing products as a quick fix, or do I need to address the underlying issues?
While ammonia-neutralizing products can provide temporary relief, they don’t address the root causes of ammonia buildup. To truly eliminate the issue, you must identify and fix the sources of moisture, improve ventilation, and maintain proper sanitation practices in your coop.