
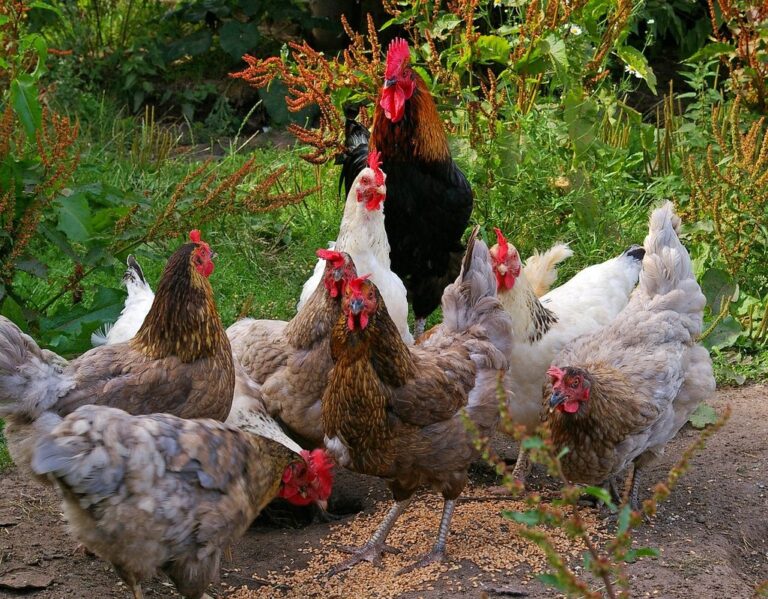
As the winter months approach, many backyard chicken keepers are faced with the challenge of providing their flocks with nutritious food that can withstand the harsh weather conditions. Commercial chicken feed can be expensive and may not always meet your flock’s needs. That’s why growing high-quality, nutritious chicken feed at home using winter crops is a great alternative. Not only will you save money on feed costs, but you’ll also ensure your chickens are getting the best possible nutrition to keep them healthy and thriving throughout the cold winter months. In this article, we’ll show you how to produce nutritious chicken feed for winter using easy-to-grow crops like oats, barley, and wheat, providing you with a cost-effective and sustainable solution for your backyard flock.
Understanding the Importance of Localized Feed Production
When it comes to growing your own chicken feed, understanding the importance of localized production can make all the difference during winter months when supply chains are strained. Let’s explore why this matters for a thriving backyard flock.
Benefits of Growing Own Chicken Feed
Growing your own chicken feed on-farm offers numerous benefits that can significantly impact your poultry operation’s bottom line. One of the most significant advantages is cost savings. When you produce your own feed, you eliminate the need to purchase commercial feed from suppliers, which can be a substantial expense. According to the US Department of Agriculture, up to 50% of a farmer’s costs are attributed to feed purchases.
By growing your own feed, you can also improve the nutrition and quality of your chicken’s diet. You have control over the ingredients and nutrient levels, allowing for more precise formulation and customization to meet the specific needs of your flock. This is particularly important during winter months when chickens may require additional nutrients to maintain their health and productivity.
Reducing reliance on commercial feed suppliers also provides you with greater flexibility and independence. You’re no longer subject to supply chain disruptions or price fluctuations that can impact your operation’s profitability. With your own on-farm feed production, you can adjust your formulations and schedules as needed to meet changing demands.
Challenges Faced by Small-Scale Farmers
Small-scale farmers face numerous challenges when it comes to growing their own chicken feed. One of the most significant hurdles is limited resources. Many small farms lack the financial means to invest in specialized equipment or high-quality seeds, making it difficult to produce a consistent and nutritious feed for their chickens.
Space constraints are another major challenge. Small farms often have limited land available, which can make it hard to establish a large enough crop to meet the feed requirements of the flock. For instance, if you’re growing oats or barley as a component of your chicken feed, you’ll need about 2-3 acres of land to produce enough for a small farm.
Moreover, lack of expertise is another significant obstacle for many small-scale farmers. Growing chicken feed requires specific knowledge and skills, including crop rotation, soil management, and pest control. Without proper guidance or experience, it’s easy to make mistakes that can compromise the quality of your feed and ultimately harm your chickens’ health.
Choosing the Right Crops for Chicken Feed
When it comes to growing your own chicken feed, selecting the right crops is crucial. In this section, we’ll guide you through choosing nutritious and easy-to-grow options.
Nutrient-Rich Crops for Winter Feed
When it comes to growing nutrient-rich crops for winter chicken feed, there are several excellent options to consider. One of the most popular choices is oats, which are high in fiber and contain a decent amount of protein (around 12-15%). They’re also relatively easy to grow and can tolerate cooler temperatures, making them an ideal crop for winter production.
Another option is barley, which boasts a higher protein content than oats (around 18-20%) and contains more calories per pound. This makes it an excellent choice for providing energy-rich feed for your flock during the colder months. Winter rye is also a great option, offering high yields and resistance to cold temperatures. It’s particularly well-suited for regions with harsh winters.
When growing these crops, be sure to plant them in areas with well-draining soil and adequate sunlight. Aim to harvest when they’re mature but not yet ripe, as this will help preserve their nutritional content. Additionally, consider combining multiple crops together to create a balanced feed mix that meets your flock’s specific needs.
Complementary Crops for a Balanced Diet
When it comes to creating a balanced diet for your chickens, incorporating complementary crops can be a great way to supplement their nutrient intake. Consider adding sunflower seeds, pumpkin seeds, and flaxseeds to their feed. These nutritious options are rich in healthy fats, vitamins, and minerals that can help bridge any nutritional gaps.
Sunflower seeds, for instance, are an excellent source of vitamin E, which plays a crucial role in maintaining the health of your chicken’s skin, feathers, and immune system. Pumpkin seeds, on the other hand, offer a boost of protein, magnesium, and zinc – essential nutrients that promote strong bone growth and immunity.
To incorporate these seeds into your chicken feed, simply mix them into their existing ration at a rate of about 10-15% of their total diet. You can also use them as a treat to encourage foraging behavior and add some variety to mealtime. When choosing sunflower or pumpkin seeds, be sure to select ones that are high in oil content – these will provide the most nutritional benefits for your flock.
Planting and Harvesting Strategies for Winter Production
When it comes to winter production, knowing when and how to plant and harvest your chicken feed crops is crucial to a successful harvest. Let’s dive into some key strategies to ensure you’re getting the most from your winter crop.
Crop Selection and Planting Dates
When it comes to growing chicken feed for winter production, selecting the right crops and planting them at the optimal time is crucial. As a backyard farmer, you’ll want to choose crops that mature quickly, can thrive in cooler temperatures, and provide a high nutritional value for your chickens.
For cool-season crops like oats, barley, and triticale, plant them 8-10 weeks before the first frost date. These crops prefer temperatures between 40°F and 70°F (4°C and 21°C) and will continue to grow even after the soil freezes. Sunflowers and winter rye, on the other hand, can be planted up to 12 weeks before the first frost date.
Consider planting a mix of fast-growing crops like radish and turnip, which mature in as little as 20-30 days. These crops will provide a quick source of nutrients for your chickens during the harsh winter months. When selecting specific crop varieties, look for those with high protein content and fiber-rich characteristics to ensure optimal nutrition for your flock.
Efficient Harvesting Techniques
When it comes to harvesting crops for winter chicken feed, efficiency is key. Minimizing waste and maximizing yield not only saves you time and resources but also ensures that your flock receives the nutrients they need to stay healthy.
One of the most critical factors in efficient harvesting is timing. Harvesting too early or late can lead to overproduction or underutilization of crops, resulting in wasted energy and resources. For example, if you’re growing oats for chicken feed, it’s essential to harvest them when the grain is at 30-40% moisture content. This allows for optimal drying and storage.
Another crucial aspect is harvesting with precision. Using the right tools and techniques can significantly reduce waste. For instance, using a swather or combine harvester with adjustable settings can help minimize crop damage and ensure that only mature crops are collected. Additionally, consider implementing a ‘cut-and-come-again’ approach for leafy greens like kale or spinach, allowing you to harvest individual leaves without sacrificing the entire plant.
By paying attention to timing and harvesting with precision, you can significantly reduce waste and increase yields, ultimately providing your flock with the high-quality feed they need to thrive.
Processing and Storage of Homegrown Feed
Now that you’ve harvested your homegrown feed, it’s time to process and store it properly to keep your flock healthy and happy throughout winter. Proper handling is crucial at this stage.
Grains Milling and Mixing Options
When it comes to processing and mixing grains for your homegrown chicken feed, you have several options to consider. One of the most common methods is manual grinding using a grain mill or flour grinder. These electric or hand-cranked mills are relatively inexpensive and can be used to grind various types of grains, such as oats, wheat, and barley.
For larger batches or more frequent milling needs, mechanized options like hammer mills or plate mills may be more suitable. Hammer mills use high-speed hammers to crush the grain into a coarse flour, while plate mills employ a rotating grinding stone to achieve a finer texture.
Regardless of the method you choose, it’s essential to store your milled grains in a cool, dry place to preserve their nutritional value and prevent spoilage. When mixing your homegrown feed, be sure to follow a balanced formula that includes protein-rich sources like soybeans or peas, calcium supplements, and essential vitamins and minerals.
A general rule of thumb is to aim for the following percentages: 16-18% protein, 3-4% calcium, and 1.5-2% phosphorus.
Long-Term Storage Solutions
When it comes to storing homegrown feed for an extended period, you’ll want to ensure that you have a reliable and effective long-term storage solution. This means considering the type of container, its location, and the maintenance requirements to keep your feed fresh and protected from pests and moisture.
For container types, metal containers are often preferred due to their durability and ease of cleaning. However, plastic containers can also be an option if you’re looking for something more lightweight and portable. When choosing a container, make sure it’s specifically designed for storing dry goods and has a tight-fitting lid to prevent air from entering.
It’s essential to store your feed in a cool, dry location that’s protected from direct sunlight and moisture. A basement or garage is an ideal spot, but if you don’t have either of these options available, a shaded area on the side of your home will do. Be sure to keep your containers off the ground to prevent rodents and pests from accessing them.
Regular maintenance is crucial in keeping your stored feed fresh. Check on your containers every few months to ensure there are no signs of moisture or pest infestation. Store your feed away from strong-smelling items, as it can absorb odors easily.
Integrating Homegrown Feed into Your Flock’s Diet
Now that you’ve successfully grown your homegrown chicken feed, it’s time to incorporate it into your flock’s diet in a way that ensures their health and happiness. We’ll show you how to do this effectively.
Gradual Transition Methods
When introducing homegrown feed to your flock’s diet, it’s essential to do so gradually to prevent digestive upset. A sudden switch can lead to health issues and even death. One way to ensure a smooth transition is by using gradual transition methods.
Here are some strategies you can use:
* Start by mixing 25% of the new feed with 75% of their existing diet for 3-5 days.
* Gradually increase the proportion of homegrown feed over the next week, monitoring your flock’s health and adjusting as needed. For example, you could mix 50% new feed to 50% old diet for a few days before gradually increasing the ratio again.
The key is to be patient and attentive to your flock’s response. Some birds may take longer than others to adjust, so it’s crucial to observe their behavior and health closely. By transitioning slowly, you can minimize the risk of digestive upset and ensure your flock thrives on a balanced diet that includes homegrown feed.
Ensuring Adequate Nutrition through Regular Testing
As you begin to incorporate homegrown feed into your flock’s diet, it’s essential to regularly test the nutritional content to ensure it meets their needs. This may seem like an added step, but trust us, it’s crucial for maintaining the health and well-being of your birds.
Without regular testing, you risk providing inadequate nutrition, leading to a range of issues such as stunted growth, weakened immune systems, and even disease outbreaks. To avoid this, take a sample from your homegrown feed at least once a month and send it off for analysis. This can be done through a local laboratory or agricultural extension office.
Some key nutrients to focus on include protein levels, which should range between 15% and 20%. Your feed should also contain adequate amounts of calcium, phosphorus, and vitamins A and D3. You’ll need to consider these factors when selecting the right crops for your homegrown feed.
Overcoming Common Challenges and Optimizing Feed Production
As winter approaches, managing common challenges and optimizing feed production becomes crucial to keep your flock healthy and thriving. Let’s tackle these obstacles together and find solutions.
Troubleshooting Common Issues
As you navigate the challenges of growing chicken feed for winter, it’s inevitable that you’ll encounter common issues that can hinder production. Pests, diseases, and nutrient deficiencies are just a few of the problems you may face. To overcome these hurdles, let’s tackle them one by one.
Pests like rodents, insects, and birds can damage your feed ingredients or even contaminate your finished product. To prevent this, store grains in rodent-proof containers, use physical barriers to keep birds out, and consider using diatomaceous earth or other organic pest control methods to deter insects.
Diseases such as mold and mycotoxin contamination can also occur when grain is exposed to moisture or high temperatures during storage. Regularly inspect your stored feed for visible signs of mold and take steps to dry it if necessary. Consider implementing a rotation system to ensure older stock is used before newer, potentially contaminated batches.
Finally, nutrient deficiencies can arise from using low-quality feed ingredients or not providing a balanced diet. Ensure you’re sourcing high-protein grains like soybeans or peas, and consider consulting with a poultry nutritionist to formulate a customized feed mix for your flock.
Tips for Maximizing Yield and Efficiency
To maximize yield and efficiency in your winter chicken feed production, consider implementing a few key strategies. First, focus on crop selection: choose varieties of grains and legumes that mature quickly and are resistant to cold temperatures.
For example, oat and barley are excellent choices for winter production due to their fast maturation period and adaptability to cooler conditions. In contrast, corn and soybeans may not thrive in the colder months and should be planted earlier in the season.
Another crucial aspect is crop rotation: by alternating between different types of crops on your land, you’ll maintain soil health and reduce the risk of pests and diseases. This approach also helps prevent nutrient depletion and ensures optimal growth.
Additionally, consider investing in a reliable seed drill or precision planter to accurately spread seeds at the right depth and spacing. Regularly monitoring soil moisture levels will also enable you to identify potential issues before they impact crop yields. By following these guidelines, you’ll be well on your way to producing high-quality chicken feed while minimizing waste and optimizing efficiency.
Conclusion: Embracing Sustainable Feed Production Practices
As you’ve explored sustainable feed production practices for your chicken coop, it’s time to wrap up and summarize key takeaways on embracing a more eco-friendly approach. Let’s reflect on what we’ve learned together.
Recap of Key Takeaways
As we conclude our exploration of sustainable feed production practices for winter, let’s recap the key takeaways to help you implement these valuable insights on your farm.
Incorporating crop rotations and cover cropping can reduce soil erosion, increase biodiversity, and improve soil health. For instance, planting legumes like clover or beans can fix nitrogen in the soil, reducing the need for synthetic fertilizers. Similarly, incorporating winter-hardy crops like rye or oats into your rotation can provide a protective groundcover during harsh winter conditions.
Don’t forget to prioritize crop selection based on your region’s climate and available resources. Consider using perennial crops that require less maintenance and can thrive in challenging environments. By adopting these practices, you’ll not only improve the nutritional value of your chicken feed but also enhance soil fertility and biodiversity.
Incorporating fermented feed ingredients like mealworms or dairy manure into your chicken feed can provide essential micronutrients and promote gut health. To get started, consult with a local expert to determine the best crop rotation plan for your specific region and climate. Remember to monitor and adjust your strategies as needed to ensure optimal results.
Encouragement for Small-Scale Farmers to Take Action
As we conclude our journey into sustainable feed production practices for winter chicken management, I want to address the small-scale farmers who may be feeling overwhelmed or uncertain about taking the first steps towards growing their own chicken feed. You are not alone! Many of you have been raising chickens as a hobby or supplementing your family’s diet with fresh eggs, but may be unaware of the benefits and ease of producing your own feed.
Growing your own chicken feed can seem daunting, but with the right resources and support, it’s entirely manageable. Start by assessing your current feed costs and exploring what types of grains and legumes are readily available in your area. Consider enlisting the help of online communities or local gardening groups to share knowledge and best practices. Begin small by dedicating a plot of land to a few test beds, and gradually scale up as you gain experience and confidence.
Remember, every small step counts, and taking control of your chicken feed production can have a significant impact on your bottom line and the health of your flock. Don’t be afraid to ask questions or seek guidance – there’s a wealth of information available online and in local communities to support you on this journey!
Frequently Asked Questions
Can I use leftover crops from my garden to supplement my chickens’ winter feed?
You can definitely consider using leftover crops from your garden, but it’s essential to ensure they’re nutrient-rich and suitable for chicken consumption. Focus on crops like leafy greens, carrots, and sweet potatoes that are high in fiber and vitamins. However, be cautious of over-supplementing with vegetables, as this can lead to imbalanced nutrition. Consult a poultry expert or veterinarian for guidance on incorporating garden scraps into your flock’s diet.
How do I store homegrown chicken feed to maintain its nutritional value during winter months?
Proper storage is crucial to preserving the quality and nutritional content of homegrown chicken feed. Store grains in a dry, well-ventilated area protected from rodents and moisture. Consider using airtight containers or bins with tight-fitting lids to prevent spoilage and contamination. Keep the stored feed away from direct sunlight and heat sources to maintain its freshness.
Can I grow my own chickens’ feed if I have limited space on my property?
Yes, it’s possible to grow your own chicken feed even with limited space. Focus on compact or dwarf varieties of crops like oats, barley, and wheat that can thrive in smaller areas. Consider using vertical gardening techniques or container gardens to maximize space efficiency. Additionally, you can also explore cover cropping and companion planting strategies to optimize space usage.
What’s the ideal ratio of grains to other nutrient sources in homegrown chicken feed?
The ideal ratio of grains to other nutrient sources in homegrown chicken feed depends on your flock’s specific needs and dietary requirements. As a general guideline, aim for a 50:30:20 ratio of grains (oats, barley, wheat), protein sources (peas, beans), and supplements (calcium, vitamins). However, this ratio may vary based on factors like age, breed, and production level of your chickens.
How can I transition my flock to homegrown feed without causing digestive issues?
Transitioning your flock to homegrown feed requires a gradual approach to avoid digestive upset. Start by introducing small amounts (about 10-20%) of homegrown feed into their diet alongside commercial feed. Gradually increase the proportion of homegrown feed over a period of 2-4 weeks, monitoring your flock’s response and adjusting as needed. Consult with a poultry expert or veterinarian for personalized advice on transitioning your flock to homegrown feed.