
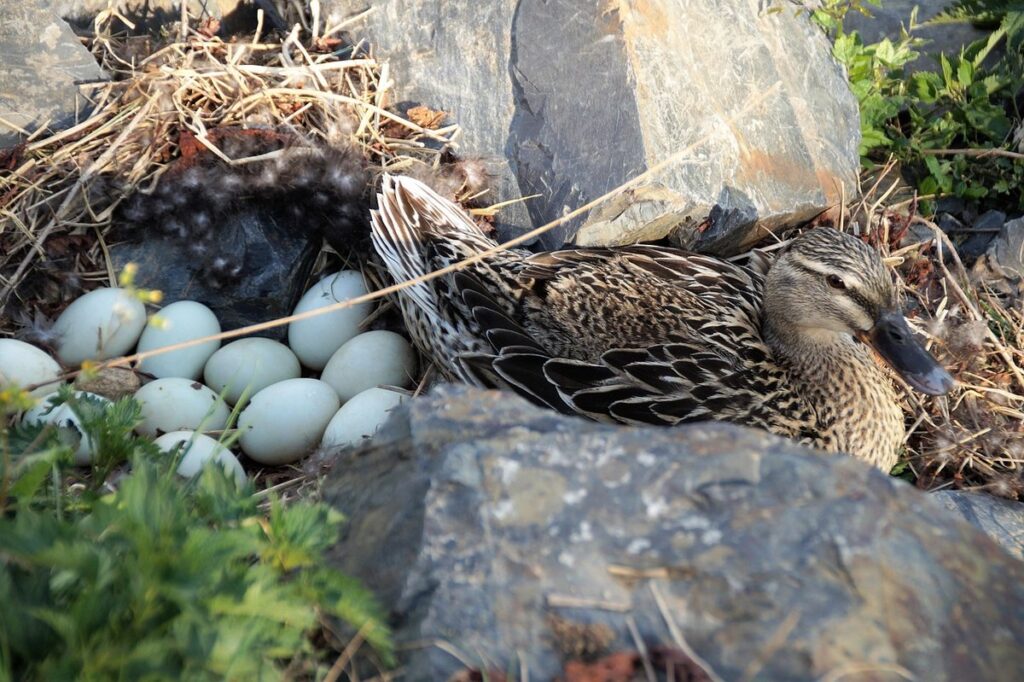
Hatching duck eggs can be an incredibly rewarding experience for backyard farmers and hobbyists alike. Not only do you get to see the miracle of life unfold before your eyes, but you also gain a sense of pride and accomplishment as you watch your newly hatched ducklings grow into healthy, thriving birds. However, it’s not always easy – many people struggle with the incubation process, or worry about common issues like broodiness or fungal infections that can harm your precious eggs. In this article, we’ll take a step-by-step approach to explaining how to hatch duck eggs successfully, from preparing the right environment for incubation all the way through to raising healthy, happy ducklings. By following our expert tips and advice, you’ll be well on your way to becoming a confident and successful duck egg hatcher!
Understanding Duck Egg Incubation
To successfully hatch duck eggs, you need a solid grasp on incubation basics, including temperature control and proper humidity levels for optimal embryo development.
What You Need to Know About Hatching Duck Eggs
When it comes to hatching duck eggs, understanding the basics of incubation requirements is crucial for success. To ensure that your ducklings develop properly and hatch healthy, you’ll need to create an optimal environment. This involves maintaining a stable temperature, precise humidity levels, and regular turning.
The ideal temperature range for incubating duck eggs is between 99°F (37°C) and 100°F (38°C). Any variations from this range can affect the development of your ducklings. For example, temperatures above 102°F (39°C) can lead to respiratory issues, while temperatures below 98°F (36°C) may cause stunted growth.
Humidity is also critical, as it helps prevent the eggs from drying out. Aim for a humidity level of around 50-60% during incubation. Turning your eggs regularly is essential, too – about 3-5 times per day will do. This ensures even development and prevents the yolks from sticking to the eggshell.
If you’re new to hatching duck eggs, consider investing in an automatic turner or a reliable thermometer to make monitoring easier. By following these guidelines and creating a conducive environment, you’ll be well on your way to raising healthy and thriving ducklings.
Choosing the Right Duck Breeds for Hatching
When it comes to hatching duck eggs, choosing the right breed is crucial for successful incubation and raising healthy ducklings. Not all duck breeds are suitable for hatching, as some may have specific requirements or characteristics that can affect their chances of survival.
For beginners, it’s recommended to start with popular breeds known for their egg-laying abilities and ease of handling. Some top picks include Khaki Campbells, White Pekins, and Muscovy ducks. These breeds are prolific layers, producing an average of 300-320 eggs per year, making them ideal for backyard farmers and duck enthusiasts.
Khaki Campbells, in particular, are known for their friendly and docile nature, making them a great choice for families with children. They also have excellent mothering instincts, which is essential for raising healthy ducklings. On the other hand, Muscovy ducks are known for their hardiness and resistance to diseases, making them a popular choice among farmers.
When selecting a breed for hatching eggs, consider factors such as egg size, shell thickness, and incubation requirements. Some breeds may require specialized care or equipment during incubation, so it’s essential to research the specific needs of your chosen breed.
The Importance of Cleanliness in Duck Egg Incubation
Maintaining a clean environment is essential during the duck egg incubation process. Bacteria and germs can easily contaminate the eggs, leading to embryonic death, delayed hatching, or even complete loss of embryos. This can be especially problematic if you’re raising ducks in a small backyard flock.
To prevent contamination, it’s crucial to clean your incubator regularly. Start by wiping down the exterior with a mild detergent and dry cloth. Next, remove any debris, feed, or bedding from the incubator tray. Clean the water container and syringe used for humidity control thoroughly, as bacteria can thrive in moist environments.
To maintain cleanliness within your incubation setup, ensure good ventilation and use of an air filter. It’s also essential to store eggs carefully to prevent damage and contamination during handling. Wash your hands before and after handling eggs or the incubator to avoid transferring germs. By taking these simple steps, you’ll minimize the risk of bacterial infection and help ensure a healthy start for your ducklings.
Preparing for Hatch Day: Setting Up Your Brooder
Before your precious ducklings arrive, it’s essential to set up a safe and comfortable brooder that meets their specific needs. This is where you’ll create their cozy home for the first few weeks of life.
Creating a Suitable Environment for Newborn Ducklings
When it comes to raising healthy ducklings, creating a suitable environment for them from the very start is crucial. Your brooder setup will play a significant role in their development and survival during the first few weeks of life. To create an ideal brooder environment, you’ll need to focus on three key areas: heat sources, ventilation, and bedding materials.
Firstly, ensure you have a reliable heat source. Ducklings are cold-blooded, so they require a warm environment to grow. A heat lamp or ceramic heat emitter is perfect for this purpose. Be sure to position the heat source in a way that allows the ducklings to move away from it if needed. Aim for a temperature range of 90-95°F (32-35°C) during the first week and gradually decrease it by 5-10°F (3-6°C) each week thereafter.
In addition to heat, adequate ventilation is essential to prevent respiratory issues in your ducklings. A well-ventilated brooder will help to remove ammonia from their droppings, which can cause health problems if left unchecked. Make sure the brooder has some open spaces or mesh panels to allow for airflow. You can also use a fan on low speed to circulate the air.
The bedding material you choose is also vital. Wood shavings, straw, and sand are all good options. Avoid using pine or cedar shavings as they contain oils that can be toxic to ducklings. Bedding should be at least 2-3 inches deep to absorb droppings and keep the brooder clean. Change the bedding material frequently to prevent the buildup of bacteria and odor.
Remember, a clean and well-maintained brooder is not only essential for your ducklings’ health but also for preventing stress and promoting growth. With these simple tips, you’ll be creating an ideal environment for your newborn ducklings to thrive in.
Introducing the Ducklings to Their New Home
When introducing your ducklings to their new home, it’s essential to do so safely and humanely. This is a critical moment for them, as they will be adjusting to a completely new environment, food sources, and social structures.
First, ensure the brooder is at a comfortable temperature – around 90-95°F (32-35°C) on the first day, gradually reducing it by 5°F (3°C) every few days. Also, make sure there’s adequate ventilation to prevent ammonia buildup from droppings.
To minimize stress, place the ducklings in their new home shortly after they emerge from the incubator or egg carton. You can begin with a small section of the brooder and gradually expand their territory as they grow. Provide hiding places like cardboard boxes or small tents to help them feel secure.
Offer food and water at the same location each time, so the ducklings learn where to find these essential resources. Make sure to keep an eye on them during this initial introduction period, monitoring for signs of stress or illness.
Understanding the Initial Needs of Newly Hatched Ducklings
Newly hatched ducklings have unique and essential needs that must be met to ensure their survival. The first few hours after hatching are crucial for setting the foundation of a healthy life. Nutrition plays a vital role, with ducklings requiring a diet rich in protein to support rapid growth. A starter feed specifically formulated for young waterfowl should be introduced within the first 24-48 hours.
Hydration is also critical, as ducklings lose moisture through their skin and respiratory system while adapting to air-breathing. Provide a shallow dish of warm, clean water for drinking and bathing purposes, changing it frequently to prevent bacterial growth. Ensure the temperature of the brooder remains at around 90°F (32°C) with adequate ventilation.
Social interaction is another vital aspect, as ducklings thrive in groups. Introduce the newly hatched ducklings to their flock-mates once they are active and mobile. Monitor for signs of stress or aggression among the group and adjust introductions accordingly.
The Stages of Embryonic Development in Duck Eggs
Let’s dive into the fascinating process of embryonic development, where a tiny duck embryo grows and develops inside the egg over several crucial stages. These stages are critical to raising healthy ducklings.
Weeks 1-2: The Initial Stage of Embryonic Development
During the first two weeks of embryonic development, a duck egg undergoes significant changes to support the growth and formation of its future occupants. At this stage, the embryo is called a blastoderm, and it consists of about 15-20 cells that will eventually develop into the various tissues and organs of the duckling.
As the blastoderm divides, it begins to attach itself to the inner lining of the eggshell, establishing a vital connection between the embryo and its surroundings. This attachment is crucial for nutrient exchange and waste removal, allowing the embryo to grow and thrive. By day 7-8, the embryo has begun to form its initial body structures, including the heart, liver, and nervous system.
During this period, it’s essential to maintain a stable egg incubation temperature between 99°F and 100°F (37°C to 38°C) to support proper development. You should also ensure that the eggs are turned regularly to prevent the embryo from sticking to the shell membrane. Failure to do so can lead to embryonic mortality or deformities.
By day 14, the embryo has formed most of its major organs and is preparing for the next stage of growth. However, it’s still vulnerable to external factors like temperature fluctuations, humidity changes, and egg handling errors. As an egg collector, you must be vigilant about maintaining a stable incubation environment and monitoring the eggs regularly to minimize the risk of embryonic failure.
Weeks 3-4: Organ Formation and Growth
In weeks 3-4 of embryonic development, the duckling’s organs begin to take shape and grow rapidly. The cardiovascular system starts to form with the heart dividing into four chambers, allowing for more efficient blood circulation. At this stage, you can expect the embryo’s heart rate to increase from around 150 beats per minute in week 3 to approximately 240 beats per minute by week 4.
The respiratory system also begins to develop during these weeks, with the formation of the lungs and trachea. Although the duckling is not yet breathing air, its developing lungs are preparing for life outside the egg. The nervous system continues to mature, with nerve cells and synapses forming at an incredible rate. By week 4, the embryo’s nervous system is almost fully developed.
During this critical period, it’s essential to maintain a stable temperature within the incubator between 99°F and 100°F (37°C to 38°C). This ensures that the duckling’s rapid growth and development proceed uninterrupted. Regular candling can also help you monitor the embryo’s progress, providing valuable insights into its overall health and well-being.
Weeks 5-6: Final Preparations for Hatching
As you approach weeks 5-6 of incubation, you’ll start to notice significant developments in the embryo’s growth. This is an exciting time, as your ducklings are almost ready to hatch. During these final weeks, focus on maintaining a stable and optimal environment for the developing embryos.
Feather growth accelerates rapidly, and by week 5, most ducklings will have developed their primary feathers, which will eventually cover their bodies. Beak formation is also underway, with the upper mandible (beak) starting to take shape. Meanwhile, muscles are developing, allowing your ducklings to prepare for life outside the egg.
Keep in mind that temperature fluctuations can impact these critical developmental stages. Ensure a consistent temperature of around 99-100°F (37-38°C), and avoid sudden changes. Monitor the eggs closely during this time, as any issues may indicate a problem with the incubation process.
Health Considerations for Hatch Duck Eggs
When it comes to hatching duck eggs, understanding the health considerations is crucial to ensure your new additions thrive. This section will cover essential tips and precautions to watch out for during the incubation process.
Common Issues Faced During Incubation and Brooding
During the incubation and brooding process, duck breeders often encounter common issues that can affect the health and well-being of their ducklings. One of the most significant concerns is bacterial infections, which can be caused by contaminated eggs or inadequate ventilation in the incubator. Aspergillosis and E. coli are two types of bacteria commonly associated with incubation-related illnesses.
Nutritional deficiencies are another issue that may arise during brooding. Ducklings require a balanced diet rich in protein, vitamins, and minerals to support their growth and development. A lack of essential nutrients can lead to stunted growth, weakened immune systems, or even death.
To mitigate these risks, it’s crucial to maintain proper incubation and brooding conditions. Ensure the incubator is kept at optimal temperatures (37-38°C) and humidity levels (50-60%). Regularly clean and disinfect the equipment, and monitor for signs of illness in your ducklings. Additionally, provide a balanced starter feed that meets their nutritional needs, and make sure they have access to fresh water at all times.
Maintaining a Clean and Hygienic Environment
Maintaining a clean and hygienic environment is crucial for raising healthy ducklings. You must make sure that their surroundings are free from bacteria, viruses, and other pathogens that can cause diseases. One of the most common ways to prevent disease outbreaks is by keeping their enclosure clean.
Clean the enclosure at least once a week, removing any waste or debris. Disinfect all surfaces with a solution of 1 part bleach to 10 parts water. Don’t forget to wash the ducklings’ food and water dishes regularly. It’s also essential to maintain good ventilation in their enclosure to prevent the buildup of ammonia from droppings.
Some other tips for maintaining hygiene include washing your hands before and after handling the ducklings, and making sure that all equipment is clean and sanitized. You can also use a UV light in the enclosure to help kill bacteria and other microorganisms. By following these simple steps, you’ll be able to provide a safe and healthy environment for your new additions to thrive.
Recognizing Signs of Health Problems in Ducklings
As you observe your ducklings grow and thrive, it’s essential to be aware of potential health problems that may arise. Recognizing early warning signs is crucial for providing prompt treatment and preventing more severe issues from developing. One way to identify potential health concerns is by monitoring your ducklings’ behavior and physical condition.
Look out for changes in their appetite, energy levels, or stool quality. For example, if a duckling suddenly stops eating or appears lethargic, it may be a sign of a gastrointestinal issue. Similarly, if their droppings become runny or loose, it could indicate a bacterial infection.
Be on the lookout for physical signs such as labored breathing, swelling around the eyes, or unusual feather patterns. If you notice any of these symptoms, isolate the affected duckling immediately to prevent cross-contamination. Keep in mind that some health issues are contagious, so swift action is necessary to protect your flock’s overall health.
Monitor your ducklings’ temperatures regularly, as hypothermia can be a significant concern. Make sure they have access to clean water and adequate shelter from extreme weather conditions. Regular checks will help you identify potential problems early on, allowing for prompt intervention and treatment.
Caring for Your Hatchling Ducks
As you care for your precious hatchling ducks, it’s essential to create a warm and safe environment that meets their specific needs until they’re ready to venture out into their coop. Here are some top tips to get you started!
Nutrition and Diet for Growing Ducklings
As your ducklings grow and develop, their nutritional needs change significantly. It’s essential to provide them with a balanced diet that meets their increasing demands for protein, calcium, and other essential nutrients. At around 1-2 weeks of age, ducklings can start transitioning from their starter feed to a more nutrient-rich diet.
You’ll want to offer your growing ducklings a mix of grains, proteins, and vegetables. A high-quality commercial duckling starter or grower feed should be the main staple in their diet, supplemented with fresh vegetables like leafy greens, fruits, and legumes. For example, you can provide chopped kale, spinach, or carrots as treats to encourage foraging and exploration.
Aim to divide your ducklings’ daily ration into 4-5 meals to prevent overeating and ensure they’re getting the nutrients they need. As they grow, you can gradually increase the amount of food offered while maintaining a balanced ratio of protein to energy sources. By around 6-8 weeks of age, your ducklings should be eating a more adult-formula feed that’s specifically designed for their growth stage.
Ensuring Adequate Hydration and Shelter
When it comes to raising healthy hatchling ducks, providing adequate hydration and shelter is crucial for their growth and development. A duckling’s first few weeks of life are critical, and ensuring they have access to clean water and a safe place to rest can make all the difference.
To provide your hatchlings with adequate hydration, offer them a shallow dish or pool of fresh water at all times. Change the water frequently to prevent bacterial growth and ensure it remains free from contamination. A good rule of thumb is to provide at least 1-2 gallons of water per duckling in the first few weeks.
For shelter, you’ll need a safe and draft-free enclosure that protects your hatchlings from extreme temperatures, predators, and disease. A brooder or a cardboard box with adequate ventilation can work well. Make sure the area is free from drafts and has a heat source nearby to maintain a consistent temperature between 90-100°F (32-38°C).
Some additional tips to keep in mind: ensure good air circulation by placing a fan near the enclosure, use a thermometer to monitor the temperature, and provide hiding places or toys to reduce stress. By following these guidelines, you’ll be able to provide your hatchling ducks with the best possible start in life.
Managing Social Interaction and Stress Levels
As you introduce your hatchling ducklings into their new home, it’s essential to consider their social interaction and stress levels. Ducks are highly social creatures that thrive in the company of others, so it’s crucial to ensure they have adequate flock members from an early age.
When introducing new ducklings to each other, start by keeping them in separate areas and allowing them to get used to each other’s presence, sounds, and scents before a face-to-face meeting. This gradual introduction helps prevent stress and fights among the young birds. For example, you can place their enclosures side-by-side for several days, giving them the opportunity to become familiar with each other.
Aim for a ratio of 1:2 or 1:3 (one adult duck per two or three hatchlings) to ensure your young ducks receive enough attention and interaction from more mature birds. This also helps reduce stress levels by providing a sense of security and companionship.
Regularly monitor the behavior of your ducklings, watching for signs of stress such as pacing, feather pecking, or unusual vocalizations. By being attentive to their needs and creating a harmonious flock environment, you can help minimize stress and promote happy, healthy growth in your young ducks.
Troubleshooting Common Issues with Hatch Duck Eggs
If you’re experiencing issues with your hatch duck eggs, don’t worry – we’ve got you covered. This section will walk you through common problems and provide solutions to ensure successful hatching.
Issues Arising During Incubation
During incubation, you may encounter some common issues that can affect the health and viability of your duck eggs. Temperature fluctuations are a significant concern, as they can impact the development of the embryo inside the egg. A temperature range of 99-100°F (37-38°C) is ideal for hatching duck eggs. However, if the temperature drops or rises significantly, it may cause the embryo to develop abnormally or even die.
Humidity problems are another issue that can arise during incubation. The recommended humidity level for hatching duck eggs is between 50-60%. If the humidity is too low, the egg may dry out and cause dehydration of the embryo. On the other hand, if the humidity is too high, it can lead to mold growth inside the egg.
To prevent these issues, it’s essential to maintain a consistent temperature and humidity level throughout the incubation period. You can use an incubator with automatic temperature control or manually monitor and adjust the temperature as needed. Regularly checking the eggs for any signs of abnormal development is also crucial in identifying potential problems early on.
Problems Encountered During Brooding
When brooding hatch duck eggs, it’s not uncommon to encounter some problems. One of the most common issues is health-related. Ducklings are prone to respiratory infections, and if you don’t have a proper ventilation system or clean environment, these can spread quickly.
Another concern is scaly leg mite infestations. These tiny parasites can cause discomfort and potentially lead to serious health issues if left untreated. Regular inspections of your ducklings’ legs and feet can help catch the problem early on.
Environmental concerns are also crucial during brooding. Temperature fluctuations can be detrimental to developing embryos, so it’s essential to maintain a consistent heat source in the brooder. Adequate lighting is also vital for preventing behavioral problems and ensuring the ducklings grow at an optimal rate.
Make sure your brooder has enough space for the ducklings to move around comfortably without overcrowding. Overcrowding can lead to stress and disease transmission among the ducklings.
Solutions to Common Hatchling Issues
If you notice that your newly hatched ducklings are struggling to thrive, it’s essential to address common issues promptly. Nutritional deficiencies can arise if the eggs didn’t receive adequate nutrition during incubation or if the brooder doesn’t have a balanced feed.
Some signs of nutritional deficiencies include lethargy, stunted growth, and dull feathers. To rectify this issue, ensure that you’re offering a high-quality starter feed specifically formulated for ducklings. You can also supplement their diet with foods rich in protein like mealworms or crickets.
Behavioral problems often stem from inadequate space, social interaction, or stress caused by temperature fluctuations. Provide your ducklings with enough room to move around comfortably and ensure they have access to fresh water at all times. A proper temperature range between 90°F to 95°F (32°C to 35°C) is also crucial.
Some common behavioral issues include pecking at each other’s feathers or becoming overly aggressive. To minimize these problems, introduce the ducklings slowly to each other and maintain a stable environment with minimal changes in temperature or lighting.
Frequently Asked Questions
How Long Does It Take for Ducklings to Grow Out of Their Down?
The downy coat usually lasts for several weeks, until the ducklings are about 2-3 months old. During this time, it’s essential to ensure proper nutrition and a clean environment to promote healthy growth. As you notice your ducklings’ feathers starting to develop, they’ll begin to shed their down. Be prepared to adjust their living space accordingly.
What Happens If I Notice Fungal Infections in My Duck Eggs or Brooder?
Fungal infections can be a significant concern for hatch duck eggs and brooders. If you suspect an infection, carefully examine the affected area and take immediate action. Disinfect all surfaces, provide a clean water source, and consider adding probiotics to your ducklings’ diet. Monitor their health closely, as fungal infections can spread quickly.
Can I Use a Fan in My Incubator or Brooder?
Using fans is generally recommended for maintaining proper airflow and preventing overheating. However, ensure the fan’s speed is adjusted correctly (usually around 1-2 feet per second) to prevent drafts from harming your developing embryos or newly hatched ducklings.
How Do I Prevent Overcrowding in My Duckling Brooder?
Proper space allocation is crucial for maintaining a healthy and stress-free environment. As a general rule, allow at least 2 square feet of space per duckling in the brooder. Monitor their growth and adjust living arrangements accordingly to prevent overcrowding.
Can I Use a Humidity Gauge in My Incubator or Brooder?
Yes, using a humidity gauge is highly recommended for maintaining optimal levels (around 50-60%) during incubation and brooding. This ensures proper embryo development and prevents issues related to moisture buildup. Regularly check the readings to adjust the environment as needed.