
As a chicken keeper, you’re likely no stranger to the challenges of keeping your flock warm and comfortable during the cold winter months. But did you know that using heaters in your chicken coop can be a game-changer for their health and happiness? Not only can it help prevent frostbite and respiratory problems, but it can also boost egg production and improve overall well-being.
In this article, we’ll explore the benefits of using heaters in your chicken coop, common issues to watch out for, and DIY solutions to get you up and running quickly. From choosing the right type of heater to installing and maintaining them safely, we’ll cover everything you need to know to keep your girls cozy and happy all winter long. Whether you’re a seasoned chicken keeper or just starting out, this guide will help you choose, install, and maintain heaters like a pro!
Benefits of Using Heaters in Chicken Coops
Using a heater in your chicken coop can be a game-changer for protecting your flock from harsh temperatures, ensuring their health and well-being year-round. Let’s explore the many benefits of this simple solution.
Why Heat is Essential for Chickens
Chickens need heat to stay healthy and productive, especially during cold weather. When temperatures drop, their metabolism slows down, making them more susceptible to illness. Lacking sufficient heat can lead to respiratory problems, reduced egg production, and even death.
In nature, chickens would usually forage for food and find shelter in warm spots, such as sun-exposed areas or under dense vegetation. However, in a coop setting, this is often not possible. Providing supplemental heat helps bridge the gap between their natural behavior and the physical environment.
The ideal temperature range for a chicken coop varies depending on factors like age, breed, and climate. Generally, young chicks need temperatures around 90-95°F (32-35°C), while adult hens can tolerate slightly cooler conditions of 40-50°F (4-10°C). It’s essential to monitor the coop temperature regularly and adjust heating as needed.
To ensure your chickens receive adequate heat, consider using a reliable heater specifically designed for chicken coops. Always follow safety guidelines when installing and operating these devices to prevent accidents or fires.
Types of Heating Systems for Chicken Coops
When it comes to choosing a heating system for your chicken coop, you have several options to consider. Let’s take a closer look at three common types of heaters: electric, gas, and oil-based.
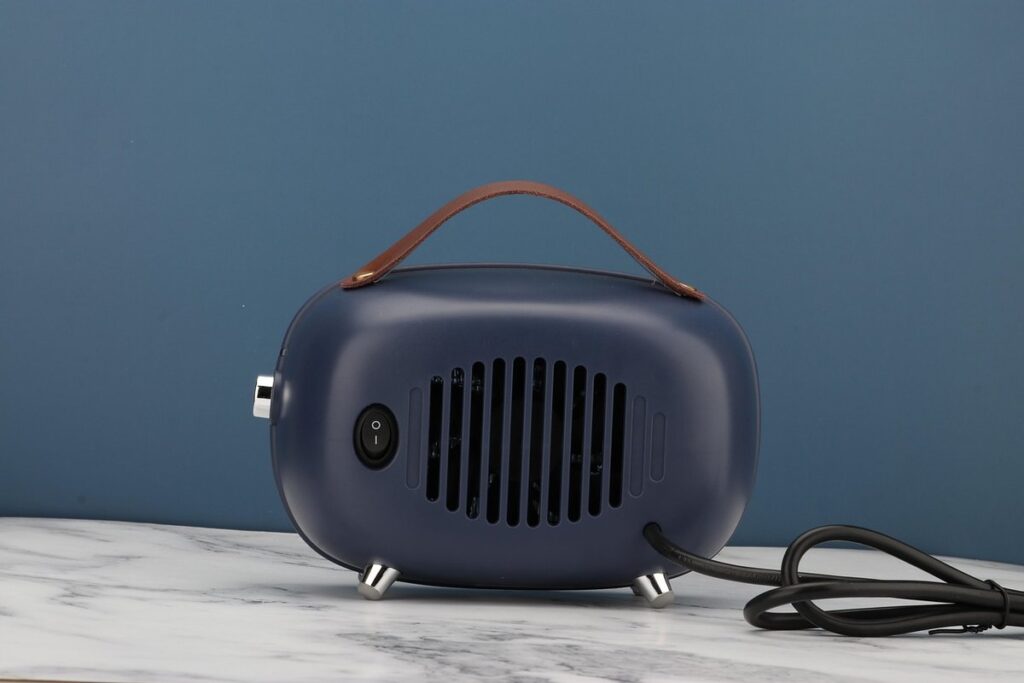
Electric heaters are one of the most popular choices due to their ease of use and low maintenance requirements. They’re also relatively affordable and come in a range of sizes to suit different coop sizes. However, they can be less efficient than other options and may not provide consistent heat on extremely cold nights.
Gas heaters, on the other hand, are known for their high efficiency and ability to heat large areas quickly. They’re often more expensive upfront, but can save you money in the long run. However, they do require a gas supply line to be installed, which can add complexity to your setup.
Oil-based heaters offer a mid-range option in terms of cost and performance. They’re often used as a backup heat source or for smaller coops due to their compact size and ease of installation. Keep in mind that oil-based heaters require regular maintenance to ensure safe operation.
Safety Considerations When Using Heaters in Chicken Coops
When using heaters in chicken coops, it’s essential to acknowledge and mitigate potential safety risks. Fire hazards are a primary concern, particularly if the heater is not properly installed or maintained. To minimize this risk, ensure that the heater is at least 3 feet away from flammable materials such as bedding, feed, and nesting boxes.
Electrical shock is another hazard to consider. Use heavy-duty extension cords rated for outdoor use, and never run them through water or mud. Also, inspect the cord regularly for damage or wear, and replace it if necessary. Additionally, keep the coop well-ventilated to prevent overheating and carbon monoxide buildup. Monitor your chickens closely when introducing heat sources, as they can be more susceptible to heat stress than humans.
Some popular heater models come with built-in safety features such as thermal cut-off switches or automatic shut-offs in case of overheating. Look for these features when choosing a heater for your coop. Regularly check and maintain the heater according to the manufacturer’s instructions to prevent malfunctions. By taking these precautions, you can ensure a safe and comfortable environment for your chickens during cold weather.
Choosing the Right Heater for Your Chicken Coop
When selecting a heater for your chicken coop, it’s essential to consider factors such as climate control, energy efficiency, and safety features that will keep your flock warm and healthy.
Factors to Consider When Selecting a Heater
When selecting a heater for your chicken coop, there are several key factors to consider. First and foremost, you’ll want to think about the size of the area that needs to be heated. A general rule of thumb is to choose a heater that can provide around 5-10 BTUs (British Thermal Units) per square foot of space. For example, if your coop measures 4×8 feet, you’ll need a heater with a capacity of at least 160-320 BTUs.
Another crucial consideration is the power output of the heater. Look for a model that offers adjustable heat settings to allow you to customize the temperature in different areas of the coop. You’ll also want to ensure the heater is designed to handle any drafts or cold spots that may be present.
Finally, don’t forget about energy efficiency. Opt for a heater with a high Energy Efficiency Rating (EER) and consider using a programmable thermostat to minimize standby heat loss when the chickens aren’t in the coop.
Popular Brands and Models of Heaters for Chickens
When it comes to selecting a heater for your chicken coop, you’ll want to consider popular brands and models that are specifically designed with chickens in mind. Some top picks include the Brinsea Octagon 7 Eco, the Zilla Heat Lamp, and the Powers Heat Lamps.
The Brinsea Octagon 7 Eco is a highly-regarded option for its energy efficiency and ability to maintain consistent temperatures. It features an adjustable thermostat and automatic shut-off, making it a safe choice for your flock. This heater is also relatively low maintenance, with easy-to-clean components and a durable design.
Another popular option is the Zilla Heat Lamp, which offers a compact and lightweight design perfect for smaller coops. Its ceramic heat emitter provides even heating, while its metal housing ensures durability and longevity. You can choose from various wattage options to suit your coop’s size and climate needs.
When selecting a heater, be sure to consider factors such as power output, temperature control, and safety features like automatic shut-off. By choosing a reputable brand and model, you’ll ensure your flock stays warm and comfortable throughout the winter months.
Installation and Maintenance of Heaters in Chicken Coops
To keep your flock warm and safe, it’s crucial to properly install and maintain heaters in their coop. This section guides you through essential steps for a successful installation.
Proper Installation Techniques to Ensure Safety and Efficiency
When installing a heater in your chicken coop, it’s essential to follow proper installation techniques to ensure both safety and efficiency. The first step is to choose the right location for the heater. Typically, this will be on an exterior wall or near a vent to allow for proper ventilation.
Next, you’ll need to consider wiring the heater. This should only be done if you’re comfortable with electrical work; otherwise, it’s best to hire a professional electrician. Make sure the power source is easily accessible and not obstructed by any obstacles.
Proper ventilation is also crucial when installing a heater in your chicken coop. Ensure that there are adequate air vents or windows to allow for airflow and help remove moisture. You may need to install additional vents if necessary, but be mindful of the size and placement to avoid drafts.
When connecting the wiring, ensure all connections are secure and not touching any other components. This will prevent damage from overheating or electrical shock.
Tips for Maintaining Your Heater and Ensuring Optimal Performance
As a chicken keeper, you know that maintaining your coop’s heater is crucial to ensure your flock stays warm and healthy throughout the year. Cleaning your heater regularly will not only keep it running efficiently but also prevent the buildup of dust, dirt, and bacteria that can spread disease among your birds. Start by turning off the power supply to the heater, then gently remove any loose debris from around the unit using a soft-bristled brush or cloth.
When cleaning the heating elements themselves, be sure to follow the manufacturer’s instructions for recommended cleaning products. Avoid using harsh chemicals or abrasive materials that can damage the components. Regularly inspect the thermostat and replace it if necessary, as a faulty thermostat can cause the heater to overheat or malfunction. By following these simple maintenance tips, you’ll be able to keep your coop warm and safe for your flock all winter long. Remember to also check and replace worn-out parts, such as fan motors or heating elements, to ensure optimal performance.
Health and Welfare of Chickens with Heaters
When using heaters for your flock, it’s essential to ensure you’re taking steps to maintain their health and welfare, particularly in extreme temperatures. This includes monitoring temperature levels carefully.
How Heaters Can Affect Chicken Behavior and Health
When you introduce heaters into your chicken coop, it’s essential to consider their impact on your birds’ behavior and health. On one hand, a well-placed heater can be a lifesaver during harsh winter months, reducing stress caused by cold temperatures.
However, if not installed or monitored correctly, heaters can also have adverse effects. For instance, sudden changes in temperature can lead to respiratory issues, as chickens may become more susceptible to diseases like bronchitis and pneumonia. This is particularly concerning for young or vulnerable birds.
To mitigate these risks, ensure that your heater is safely positioned and properly ventilated. You should also monitor the temperature closely, aiming for a range of 40-70°F (4-21°C). A consistent, gradual change in temperature is far less stressful than an abrupt one. By taking these precautions, you can create a comfortable environment that promotes the overall well-being of your flock. This attention to detail will help prevent potential health issues and keep your chickens happy and healthy throughout the winter months.
Monitoring Chicken Temperatures and Humidity Levels
Monitoring temperature and humidity levels is crucial to ensure optimal comfort for your flock. You see, chickens are sensitive to extreme temperatures and humidity fluctuations, which can lead to health issues like heat stress, respiratory problems, and even death.
To monitor temperature, you’ll need a reliable thermometer that can provide accurate readings in both Celsius and Fahrenheit. Place it in an area where the chickens tend to congregate, such as near their feeding or nesting areas. You can also use digital thermometers with wireless connectivity, which allow you to track temperature changes remotely via your smartphone.
Humidity levels are equally important, especially during cold winter months when dry air can cause respiratory issues. Aim for a humidity range of 40-60% by using humidifiers or ensuring adequate ventilation in the coop. You can also monitor humidity levels with hygrometers that provide accurate readings.
Remember to check temperature and humidity levels regularly, ideally at different times of the day, to ensure they’re within optimal ranges.
Budgeting and Cost Considerations for Heaters
When it comes to heating your chicken coop, budget is a crucial factor to consider. Let’s take a closer look at the costs involved in choosing the right heater for your flock.
Initial Costs vs. Long-Term Savings with a Proper Heater
When it comes to budgeting for heaters for your chickens, it’s essential to consider not only the initial costs but also the long-term savings. A proper heater can make a significant difference in reducing expenses on feed, veterinary care, and other related costs.
For instance, if you live in an area with harsh winters, a heater can help keep your chicken coop warm, which means your hens will require less energy to stay healthy and productive. This translates to reduced feed consumption, as they won’t need to burn as many calories to stay warm. According to the American Society for the Prevention of Cruelty to Animals (ASPCA), chickens that are kept in cold conditions can experience a 10-15% increase in feed consumption.
By investing in a reliable heater, you can also reduce your veterinary costs. When chickens are exposed to extreme temperatures, they’re more susceptible to respiratory issues and other health problems, which can lead to costly vet visits. In fact, a study by the Journal of Applied Poultry Research found that chicken flocks experiencing cold stress had a 25% higher mortality rate than those kept in optimal temperature conditions.
So, how much should you budget for an initial heater purchase? While prices vary depending on the type and size of the unit, a decent heater can cost anywhere from $50 to $200. Consider this investment as a long-term savings strategy – over time, your chickens will require less feed, veterinary care, and other resources, making up for the initial cost.
DIY vs. Purchasing a Pre-Made Heater Solution
When it comes to choosing a heating solution for your chickens, one decision you’ll need to make is whether to build your own heater or purchase a pre-made solution. Both options have their pros and cons, which are worth considering before making a final decision.
Building your own heater can be a cost-effective option, especially if you’re handy with tools and have experience working with electrical components. By using materials like PVC pipes, insulation, and thermostats, you can create a custom-built heater that meets the specific needs of your coop and flock. However, this approach requires careful planning and execution to ensure the safety of both your chickens and yourself.
On the other hand, purchasing a pre-made heater solution offers convenience and peace of mind. Many companies specialize in producing heaters specifically designed for chicken coops, which can be easily installed and require minimal maintenance. While these solutions may cost more upfront, they often come with warranties and guarantees that can provide added security in case something goes wrong.
Ultimately, the decision to build or buy a heater solution depends on your individual circumstances and expertise. If you’re unsure about what type of heating solution is best for your coop, it’s always a good idea to consult with a professional or do further research before making a final decision.
Troubleshooting Common Issues with Heaters in Chicken Coops
When using a heater for your chicken coop, it’s not uncommon to encounter issues – that’s why we’ve put together some common problems and solutions to get you back on track. Let’s tackle those heating headaches together!
Identifying and Resolving Common Problems with Heaters
When it comes to keeping your chicken coop warm and cozy, heaters can be a lifesaver. However, like any other appliance, they’re not immune to problems. As a chicken keeper, it’s essential to know how to identify and resolve common issues that may arise with your heater.
One of the most frustrating problems is temperature fluctuations. If your heater is struggling to maintain a consistent temperature, check for blockages in the airflow path or ensure that the unit is properly sized for your coop. You can also try adjusting the thermostat or replacing the heating element if it’s worn out.
Electrical issues are another common problem. If your heater suddenly stops working or won’t turn on, inspect the power cord and plug for any signs of damage. Also, make sure that the electrical connections to the coop are secure and not overloaded.
Safety hazards should never be ignored. Check for any signs of overheating, such as burning smells or melted plastic, and ensure that your heater is at least 3 feet away from combustible materials like bedding or nesting boxes.
Best Practices for Troubleshooting and Repairing Your Heater
When troubleshooting and repairing your heater, it’s essential to take a systematic approach to identify the issue and make the necessary repairs. First, turn off the heater and let it cool down completely before attempting any repairs. This will prevent you from getting injured by accidental electrical shock or burns.
Next, inspect the heater for any visible signs of damage, such as frayed cords, loose connections, or burned-out components. Check the user manual to understand the heater’s internal workings and identify potential trouble spots. For example, if your heater has a thermostatically controlled heating element, check that it’s not jammed or stuck in one position.
Some common issues with heaters include faulty thermostats, blown fuses, or worn-out heating elements. To troubleshoot these problems, consult the user manual for specific guidance on replacement procedures. For instance, if you’re dealing with a blown fuse, check your coop’s electrical panel to ensure that it’s not overloaded and causing the circuit to trip.
It’s also crucial to regularly clean and maintain your heater to prevent dust buildup and ensure optimal performance. Use a soft brush or cloth to wipe down the exterior and internal components, paying particular attention to areas around fans, vents, and grills. This will help extend the lifespan of your heater and minimize the risk of breakdowns.
When repairing your heater, always follow safety guidelines and use proper tools to avoid causing further damage or injury. If you’re unsure about any aspect of the repair process, consider consulting a professional electrician or manufacturer’s support for guidance.
If your heater is no longer repairable, it may be time to replace it with a new one. When selecting a replacement, consider factors such as energy efficiency, temperature range, and durability. Some popular options include ceramic heating elements, which are known for their long lifespan and low maintenance requirements.
In addition to regular cleaning and maintenance, there are several preventative measures you can take to minimize the risk of heater breakdowns. These include:
* Ensuring proper ventilation in your coop to prevent moisture buildup
* Regularly inspecting electrical connections for signs of wear or damage
* Keeping a spare fuse or replacement parts on hand
By following these best practices and staying proactive with maintenance, you’ll be able to identify and repair issues quickly, keeping your flock warm and safe throughout the winter months.
Frequently Asked Questions
Can I use a space heater or electric radiator for my chicken coop?
Yes, you can use a space heater or electric radiator as long as they are specifically designed for outdoor use and have a suitable safety rating for poultry. However, consider factors like size, ventilation, and power supply when choosing the right heating solution for your coop.
How do I know if my chickens need more heat?
Monitor temperature fluctuations in your coop and note changes in your flock’s behavior, egg production, and overall health. If temperatures drop below 40°F (4°C) or your hens appear stressed, it’s likely they need additional heat to stay healthy.
What are some common installation mistakes to watch out for?
Failing to ensure proper ventilation, inadequate wire protection, and installing the heater too close to flammable materials are common installation mistakes. Always follow manufacturer guidelines and safety considerations when setting up your heating system.
Can I use a DIY solution or should I purchase a pre-made heater?
Both options have their advantages and disadvantages. A pre-made heater offers convenience but may be more expensive; a DIY solution can save you money but requires more time and expertise to install safely. Consider your resources, skills, and the specific needs of your flock when deciding between these two approaches.
How do I maintain my heater to ensure optimal performance?
Regularly clean dust and debris from the heater, check for signs of wear or damage, and inspect ventilation systems to prevent overheating. Also, follow manufacturer guidelines for maintenance and replacement parts to keep your heating system running efficiently and safely.