
Raising baby chicks requires attention to detail and a nurturing touch. As any backyard chicken keeper knows, setting up a safe and healthy environment for your new arrivals is crucial for their survival and growth. But where do you start? From preparing the perfect brooder to feeding and monitoring their health, it’s easy to get overwhelmed with the responsibilities of chick care. That’s why we’ve put together this comprehensive guide on how to brood chicks. In this article, we’ll walk you through everything from setting up a suitable incubation space to advanced techniques for promoting healthy growth and development. By following our expert advice, you’ll be well on your way to raising happy and thriving young chickens.
Choosing the Right Setup
Now that you’ve decided to raise backyard chickens, let’s talk about selecting a brooder setup that suits your needs and keeps those adorable chicks safe and healthy. This is where things can get really fun!
Understanding Brooder Types
When it comes to choosing a brooder for your chicks, understanding the different types available is crucial. There are several options to consider, each with its own set of advantages and disadvantages.
Heat lamps are a popular choice among backyard chicken keepers, as they provide a concentrated heat source that can be directed at the chicks. However, they also come with some risks, such as the potential for burns or fires if not used properly. On the other hand, ceramic heat emitters are a safer alternative, providing a consistent and gentle warmth without the risk of burns.
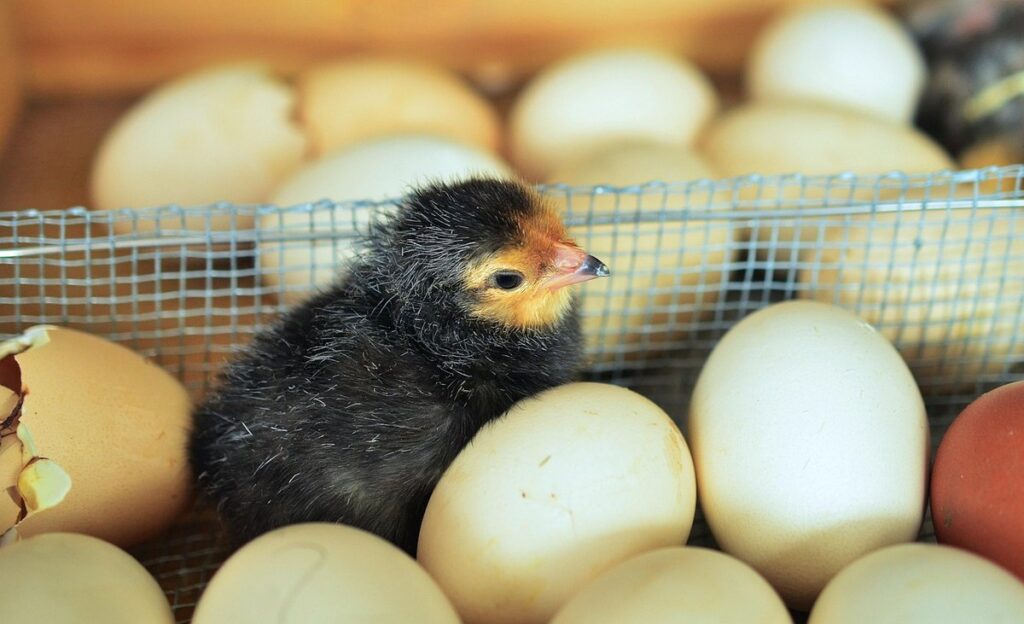
Incubators are another option to consider, especially for those who plan on hatching their own eggs from scratch. They provide a controlled environment that simulates the natural conditions found in a mother hen’s nesting box, allowing chicks to develop and hatch safely. However, incubators can be more expensive than other brooder options and may require more maintenance.
Ultimately, the type of brooder you choose will depend on your specific needs and preferences. Be sure to research each option thoroughly and consider factors such as cost, safety, and ease of use before making a decision.
Setting Up a Safe Environment
When setting up a safe environment for brooding chicks, ventilation is crucial. Chicks need fresh air to breathe and get rid of ammonia from their droppings, which can be toxic if allowed to build up. Ensure good airflow by opening windows or using vents that are directed away from the chick enclosure. You can also use fans to circulate air, but be cautious not to create drafts that might chill the chicks.
Temperature control is another vital aspect of creating a safe environment for brooding chicks. Chicks need a warm and consistent temperature between 90°F to 100°F (32°C to 38°C) in the first week. You can use heat lamps or ceramic heat emitters, but make sure they’re placed at least 2-3 feet away from the chick enclosure to prevent burns.
Maintaining optimal humidity levels is also essential for brooding chicks. High humidity can lead to respiratory problems, while low humidity can cause dehydration. A good rule of thumb is to maintain a relative humidity level between 50% to 60%. You can use a hygrometer to monitor the humidity levels and adjust them as needed by opening windows or using a dehumidifier.
Preparing the Chicks for Brooding
Now that you have your incubator hatching and chicks ready to emerge, it’s time to prepare their brooding setup, which includes a safe and warm environment. This section will guide you through essential preparations for a healthy start.
Acclimating Chicks to Temperature
When introducing chicks to the brooder’s temperature, it’s essential to do so gradually to prevent sudden temperature shock. Chicks are delicate and can’t regulate their body heat efficiently, making them susceptible to temperature-related stress.
To acclimate chicks to the brooder’s temperature, start by placing them in a separate, warm area within the brooder. You can use a heating lamp or a heat mat at a lower setting, around 90-95°F (32-35°C), for the first few hours after arrival. This allows them to get used to the warmth without feeling overwhelmed.
Over the next 24-48 hours, gradually increase the temperature by 5-10°F (3-6°C) increments every 4-6 hours. Monitor their behavior and adjust the temperature accordingly. If they seem stressed or lethargic, reduce the temperature slightly. Keep in mind that chicks can tolerate temperatures between 90-100°F (32-38°C), but it’s crucial to provide a range of temperatures for them to regulate their body heat.
As you increase the brooder’s temperature, make sure to maintain adequate ventilation to prevent overheating.
Introducing Chicks to Feed and Water
When introducing chicks to feeders and waterers, it’s essential to ensure they can access food and water easily. Start by placing shallow feeders and waterers within the brooder area to prevent the chicks from having to stretch or strain while feeding. A good rule of thumb is to position the feeders about 1-2 inches away from the back wall of the brooder, allowing the chicks to comfortably access food without feeling crowded.
Also, make sure the feeders and waterers are at a comfortable height for the chicks. You can place them on low-level shelves or elevated platforms specifically designed for this purpose. This will prevent the chicks from having to climb or jump, which can lead to injuries.
In addition, ensure that the feeders and waterers are easy to clean and maintain. Choose ones with removable parts or simple designs that allow for quick cleaning. This is crucial in preventing bacterial growth and keeping the brooder environment healthy.
Providing Adequate Nutrition
When it comes to raising healthy chicks, providing adequate nutrition is crucial from day one. This section will guide you through the essentials of feeding your brood for optimal growth and development.
Choosing the Right Starter Feed
When it comes to raising healthy chicks, providing them with a high-quality starter feed is essential. Young chicks have unique nutritional needs that differ from adult birds, and selecting the right feed can make all the difference in their development.
As you’re choosing a starter feed for your chicks, look for one that meets or exceeds the minimum standards set by organizations such as the National Research Council (NRC) or the Association of American Feed Control Officials (AAFCO). These organizations provide guidelines for the levels of essential nutrients like protein, energy, and vitamins that young birds require.
Some key factors to consider when selecting a starter feed include:
* Protein content: Chicks need a diet rich in protein to support growth and development. Look for feeds with at least 18% protein.
* Energy sources: Young birds require energy from sources like corn or soybean meal.
* Vitamin and mineral supplements: These are essential for healthy growth and immune function.
A high-quality starter feed will also contain other beneficial ingredients, such as probiotics to support digestive health. By selecting a feed that meets the needs of your chicks, you’ll be setting them up for a strong start in life.
Supplementing with Calcium and Probiotics
As you care for your new chicks, providing them with adequate nutrition is crucial for their healthy growth and development. Supplementing with calcium and probiotics can make a significant difference in supporting their overall well-being.
Calcium is essential for building strong bones and teeth in young chickens. A diet lacking sufficient calcium can lead to softening of the beak and legs, making it difficult for your chicks to walk or even stand. Feed high-quality commercial chick starter feed that contains around 1-2% calcium content, but consider supplementing with crushed oyster shells or cuttlebone to boost their intake. You can also mix crushed eggshells into their feed as a natural source of calcium.
Probiotics are beneficial bacteria that aid in digestion and immune system development. These tiny microorganisms help break down nutrients in the gut, making them more accessible for your chicks’ growth. Add probiotics specifically designed for poultry to their drinking water or mix it with their food according to the manufacturer’s instructions. A good probiotic can reduce stress, enhance appetite, and promote a healthy gut microbiome.
When selecting supplements, choose products from reputable manufacturers that are specifically formulated for young chickens. Always follow the recommended dosage and mix the supplement well to ensure even distribution among your chicks.
Monitoring Health and Hygiene
Now that you’ve brought your baby chicks home, it’s essential to monitor their health closely for any signs of illness or stress. This section will cover the key indicators of good health and how to maintain a clean and safe brooding environment.
Recognizing Common Health Issues
As you monitor your chicks’ health during brooding, it’s essential to be aware of common issues that can arise. One of the most prevalent problems is pasty butt, also known as vent prolapse. This occurs when a chick’s droppings become stuck to its vent (anus), causing discomfort and potentially leading to infection. Look for signs such as wet or dirty vents, lethargy, or refusal to move.
Respiratory problems are another common concern during brooding. Watch for symptoms like labored breathing, wheezing, or discharge from the nostrils or eyes. If you notice any of these signs, isolate the affected chick immediately and seek veterinary advice.
Other health issues to monitor include scours (diarrhea) and wet or soggy chicks. Keep an eye on your chicks’ overall behavior, appetite, and stool quality to catch any potential problems early on. Regularly inspecting your chicks can help you identify issues before they become severe. If you’re unsure about a chick’s health, err on the side of caution and consult with a veterinarian or poultry expert for guidance.
Maintaining Brooder Hygiene
Cleaning and disinfecting your brooder regularly is crucial to prevent disease outbreaks that can decimate your flock. When chicks are packed together in a small space, the risk of infection increases exponentially. Moisture, debris, and droppings create an ideal breeding ground for bacteria and pathogens.
To maintain hygiene, ensure you’re cleaning the brooder at least once a day, more often if possible. Remove any soiled bedding, scrub all surfaces with a mild detergent, and disinfect with a solution of 1 part white vinegar to 9 parts water. This will help eliminate Salmonella, E. coli, and other pathogens.
Don’t forget to disinfect the feeders, waterers, and any equipment that comes into contact with your chicks’ environment. After cleaning, rinse everything thoroughly and let it air dry before reintroducing your flock. It’s also essential to change bedding completely every 7-10 days to prevent ammonia buildup, which can be toxic to young birds.
By prioritizing brooder hygiene, you’ll reduce the risk of disease outbreaks and give your chicks the best chance at a healthy start in life.
Advanced Techniques for a Smooth Brooding Process
As you become more comfortable with the basics of brooding, it’s time to explore some advanced techniques that will help you streamline your process and reduce stress on both you and your chicks. We’ll dive into some expert tips.
Temperature Management Tips
When it comes to brooding chicks, temperature management is crucial for their health and survival. A stable environment helps them grow strong and develop a robust immune system. To ensure this, you’ll need to monitor the temperature fluctuations in the brooder closely.
First, understand that chicks have different thermal needs at various stages of growth. For example, newly hatched chicks require a warmer environment (around 99-100°F) for the first week or so. As they grow and develop feathers, their requirements decrease, and you can gradually lower the temperature to around 90-95°F by the end of the second week.
To maintain this stable environment, use a thermometer strategically placed in the brooder. Monitor the temperature regularly and adjust as needed, ideally every hour during the first few days. Consider using a heat lamp or ceramic heat emitter with a thermostat to regulate the temperature accurately. Also, be mindful of drafts from windows or doors, which can quickly drop the temperature.
By paying close attention to these temperature fluctuations and making adjustments accordingly, you’ll create a safe haven for your chicks to thrive in.
Managing Flock Dynamics
When introducing new chicks to an existing flock, it’s essential to consider the dynamics at play. Adult birds may view newcomers as competition for resources, leading to stress and potential aggression. To minimize this, it’s crucial to introduce chicks gradually, allowing them to get accustomed to each other’s presence.
Begin by placing the chicks in a separate area, such as a temporary brooder or a section of the main coop, before integrating them with the adult flock. This gives both parties time to adjust and reduces the likelihood of immediate conflict.
When finally introducing the groups, start with visual introductions: allow the birds to see each other through a divider or gate without direct contact. Monitor their behavior closely, intervening if you notice any signs of aggression. For example, if an adult bird is hissing or flapping at the new chicks, separate them immediately and try again later.
It’s also vital to ensure your flock has enough space and resources for all birds to thrive. Overcrowding can exacerbate tension between individuals, making integration even more challenging. By taking these steps, you can minimize stress and create a harmonious living environment for your entire flock.
Frequently Asked Questions
What’s the ideal temperature range for my chicks’ first week of life?
The ideal temperature for brooding depends on the age of your chicks. In the first week, keep it around 90-95°F (32-35°C) with a gradient to allow them to move away from the heat source if needed.
Can I use a thermometer without a probe to monitor my brooder’s temperature?
Yes, you can still monitor the temperature accurately using a digital or analog thermometer. However, for precise readings and peace of mind, consider investing in a thermometer with a probe that can be placed near the chicks’ location.
How often should I clean and disinfect the brooder to maintain hygiene?
Clean and disinfect the brooder at least once a week, removing any droppings or uneaten food. Disinfect all surfaces, especially around feeders, waterers, and heat sources. This will help prevent diseases from spreading.
What’s the best way to introduce new chicks to an existing flock, considering potential stress?
Introduce new chicks gradually by keeping them separated at first, allowing them to get used to each other’s sounds and scents. Once they seem comfortable with each other, you can start supervised interactions under close observation for any signs of stress or aggression.
How do I balance providing a nutritious starter feed with supplementing with calcium and probiotics?
A balanced starter feed should be the primary source of nutrition for your chicks. Supplement with calcium (around 1-2% of their diet) to support strong bone growth, and consider adding probiotics in small amounts (about 1/4 teaspoon per gallon of water) to promote digestive health and immunity.