
Hatching duck eggs can be an exciting and rewarding experience, but it requires careful planning and attention to detail. If you’re considering adding to your feathered family or trying your hand at raising ducks from scratch, learning how to hatch duck eggs is essential knowledge. With so many breeds to choose from, selecting the right ducklings for your needs can be overwhelming. In this article, we’ll take a step-by-step approach to hatching duck eggs, covering breed selection, incubation methods, and health considerations to help you achieve a high hatch rate and raise healthy ducks. Whether you’re a seasoned breeder or a beginner, our expert advice will guide you through the process, ensuring you’re well-equipped to care for your new arrivals.
Choosing the Right Duck Breeds for Egg Hatching
When it comes to hatching duck eggs, selecting the right breed is crucial for success. Let’s explore the characteristics of popular duck breeds suitable for egg hatching and incubation.
Selection Criteria for Breeding Programs
When selecting duck breeds for egg hatching, it’s essential to choose breeds that excel in fertility rates and egg size. A higher fertility rate ensures that more eggs will hatch successfully, reducing the risk of disappointment. Look for breeds with a reputation for prolific egg-laying, such as Khaki Campbells or Golden 300 Hybrids. These breeds can produce up to 300 large eggs per year, making them an excellent choice for commercial duck breeding.
Consider factors like temperature tolerance and egg-laying capacity when selecting a breed. Some ducks are more adapted to cold climates than others, while some may be better suited for warmer temperatures. For example, Muscovy ducks are hardy birds that thrive in hot and humid environments, making them an excellent choice for farmers in tropical regions. On the other hand, Wood Ducks prefer milder temperatures and are often found in temperate zones.
When evaluating breeds, also consider their temperament and ease of handling. Some ducks can be quite aggressive or skittish, which may make egg collection and incubation more challenging. By choosing a breed that’s known for being docile and easy to handle, you’ll reduce the risk of accidents and stress during the hatching process.
Researching the Pros and Cons of Different Breeds
When researching duck breeds for egg hatching, it’s essential to weigh the pros and cons of each popular breed. Let’s take a closer look at three top contenders: Khaki Campbell, Muscovy, and Indian Runner ducks.
Khaki Campbells are one of the most popular breeds for backyard farmers due to their exceptional laying ability – up to 300 eggs per year! They’re also friendly, docile, and easy to handle. However, they can be quite noisy and may require more space than other breeds. On the other hand, Muscovy ducks are known for their quiet nature and impressive egg-laying capabilities (up to 250 eggs annually). Their feathers are also relatively low-maintenance, but they can be a bit skittish around humans.
Indian Runner ducks, with their unique feather patterns, are another popular choice. They’re highly energetic and love water, making them perfect for farmers with ponds or lakes. However, their high energy levels require regular exercise and space to roam. When choosing a breed, consider your lifestyle, available space, and desired egg production – it’s crucial to select a duck that fits your needs.
Preparing for Egg Hatching: Setting Up Your Flock
Before you start incubating your duck eggs, it’s essential to set up a safe and healthy environment for both your flock and the new arrivals. This includes preparing a suitable brooder for the young ducks.
Creating a Suitable Environment for Duck Eggs
When it comes to hatching duck eggs, providing an ideal environment is crucial for successful incubation. Ducks require a specific set of conditions to thrive, and replicating these conditions will significantly increase the chances of successful hatching.
First and foremost, housing is essential. Provide a spacious area with adequate ventilation to prevent ammonia buildup from droppings. A minimum of 2-3 square feet per duck is recommended. Ensure the brooder or incubator has proper airflow to maintain a healthy environment.
Temperature control is also vital. Duck eggs require a consistent temperature between 99°F and 100°F (37°C – 38°C) for optimal incubation. If using an incubator, make sure it’s specifically designed for duck eggs and can accommodate their larger size. A brooder with heat lamps or ceramic heat emitters can be used as an alternative.
Maintain a humidity level of around 50-60% to prevent dehydration. Ensure the brooder or incubator is clean and free from drafts to minimize the risk of disease transmission. Regularly monitor temperature, humidity, and ventilation levels to ensure they remain within optimal ranges.
Providing Nutritious Food and Water for Your Ducks
As you prepare for egg hatching, it’s essential to ensure that your pregnant duck females are receiving the necessary nutrients to support healthy development. A well-balanced diet is crucial during this period, as it directly affects the quality and quantity of eggs produced.
Start by providing high-quality commercial duck feed that meets or exceeds industry standards. Avoid mixing different types of feed, as this can lead to nutrient deficiencies or excesses. Also, make sure to provide fresh water at all times, ensuring a pH level between 6.5 and 7.0 to prevent bacterial growth.
In addition to regular feed, consider adding essential supplements like calcium carbonate or crushed oyster shells to promote strong eggshell development. Aim for about 1-2% of the duck’s daily diet in terms of supplement content. For example, if you’re feeding a 5-pound duck, add about 0.25-0.50 pounds of supplement per week.
Regularly monitor your ducks’ feed intake and adjust their diets accordingly to prevent overeating or malnutrition. This will ensure that they remain healthy throughout the breeding season.
Incubation Methods: Choosing Between Natural and Mechanical
When it comes to hatching duck eggs, you’ll need to decide between natural incubation methods, such as under a broody hen, and mechanical incubators. We’ll weigh the pros and cons of each approach for you here.
Understanding the Basics of Natural Incubation
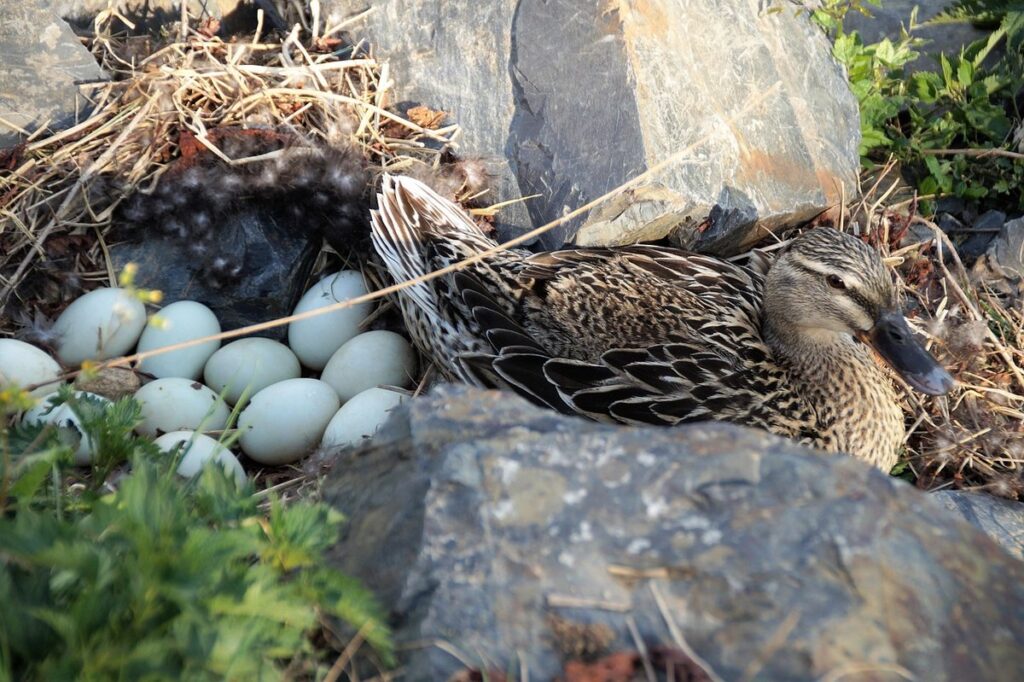
Natural incubation is the process of hatching duck eggs without human intervention. Ducks regulate temperature and humidity within their brood by adjusting their nesting behavior and body heat. For instance, a mother duck will turn her eggs regularly to ensure even development and prevent the embryo from adhering to the eggshell.
To replicate this in a home setting, it’s essential to create an environment that mimics the natural conditions. A temperature range of 99-100°F (37-38°C) is ideal for incubation, with humidity levels around 50-60%. To achieve these conditions, you can use a thermometer and hygrometer or invest in a high-quality incubator.
However, natural incubation comes with its own set of challenges. For one, it requires a significant amount of space and the ability to accommodate the mother duck’s needs. Moreover, there is always the risk of disease transmission and predation. With proper planning and attention to detail, you can successfully hatch duck eggs using natural incubation methods. Nonetheless, this method may not be feasible for many backyard poultry keepers due to its complexity and space requirements.
Setting Up an Incubator for Automated Egg Hatching
When it comes to hatching duck eggs, one of the most effective methods is using mechanical incubators. These specialized devices offer numerous benefits that can significantly improve hatch rates and reduce the risk of disease transmission.
One of the primary advantages of mechanical incubators is precise temperature control. Unlike natural incubation, where temperature fluctuations can be a major concern, mechanical incubators maintain a consistent heat level between 99°F to 100°F (37°C to 38°C). This ensures that the duck embryos develop optimally, leading to higher hatch rates and healthier chicks.
Another significant benefit of mechanical incubators is the reduced risk of disease transmission. In natural incubation settings, bacteria and other pathogens can easily spread through direct contact or contaminated environments. Mechanical incubators eliminate this risk by providing a clean, isolated environment for the eggs to incubate.
To set up an incubator for automated egg hatching, you’ll need to consider factors such as humidity levels (around 50-60%), air circulation, and egg turning mechanisms. Research different types of incubators, including digital and analog models, to determine which one best suits your needs.
Health Considerations: Reducing the Risk of Disease
When it comes to hatching duck eggs, you want to minimize the risk of disease that can affect both your ducks and the people who handle them. Let’s discuss some important health considerations to keep in mind.
Minimizing Stress and Disease Transmission
Stress and disease transmission are two critical concerns when it comes to hatching duck eggs. A stressful environment can lead to a weaker immune system, making ducks more susceptible to diseases. To minimize stress on your ducks, ensure they have access to clean water, nutritious food, and proper shelter.
A well-ventilated and spacious coop is essential for maintaining a healthy environment. Aim for at least 4 square feet of space per duck inside the coop. Provide adequate bedding material like straw or wood shavings to absorb droppings and keep the area dry. Ensure the coop is escape-proof and protected from predators.
Nutrition plays a vital role in stress reduction. Feed your ducks a balanced diet that includes protein-rich foods like oats, barley, and corn. Avoid overfeeding, as this can lead to obesity and other health issues. Consult with a veterinarian or poultry expert to determine the best feeding schedule for your flock.
Regular veterinary check-ups are also crucial in maintaining your ducks’ overall health. Schedule annual vaccinations and deworming treatments to prevent internal parasites. Keep a record of your ducks’ weight, egg production, and any health issues that may arise. This will help you identify potential problems early on, allowing you to take corrective action.
Identifying Common Health Issues in Duck Eggs
When it comes to hatching duck eggs, it’s essential to be aware of common health issues that can affect their quality and viability. Some of the most prevalent problems include bacterial infections such as Salmonella, which can contaminate the eggshell and pose a risk to human health. Fungal diseases like candidiasis are also a concern, particularly in warmer climates where moisture levels are higher.
Parasites, including mites and lice, can infest duck eggs and cause significant damage to the embryo or even lead to embryonic mortality. Regular monitoring is crucial to detect these issues early on. Keep an eye out for visible signs of contamination, such as cracks or unusual odors. If you notice any abnormalities, immediately separate the affected egg from the rest.
To minimize the risk of disease, maintain good hygiene practices, including frequent cleaning and disinfection of equipment, hands, and surfaces. Ensure that your duck house is well-ventilated to prevent moisture buildup, a breeding ground for fungal diseases. Regularly inspect your ducks for signs of illness or stress and take prompt action if you notice any issues.
In terms of prevention, always purchase eggs from reputable sources, ideally directly from the breeder. Wash hands thoroughly before handling eggs, and avoid touching your face after handling them to minimize the risk of cross-contamination.
Monitoring and Maintaining a Healthy Flock
Now that you’ve successfully hatched your duck eggs, it’s essential to monitor their growth and maintain a healthy flock. This involves regular checks on temperature, humidity, and brooder cleanliness.
Conducting Regular Check-Ups and Record Keeping
As you embark on the journey of hatching duck eggs, it’s essential to prioritize regular check-ups with a veterinarian to monitor your flock’s health and detect potential issues early. A healthy flock is crucial for successful egg hatching, and regular veterinary visits can help prevent problems from arising in the first place.
During these check-ups, your veterinarian will assess the overall health of your ducks, including their vaccination status, parasite control, and any signs of disease or stress. They may also provide guidance on improving living conditions, nutrition, and sanitation to create a healthy environment for your flock.
In addition to regular veterinary visits, maintaining accurate records is vital for tracking egg production, fertility rates, and hatch success. Keep a detailed log of the following: the number of eggs laid each day, the incubation period, and the hatching success rate. This information will help you identify trends and patterns, allowing you to make informed decisions about your flock’s care and improve future hatch rates.
To get started with record-keeping, consider investing in a dedicated poultry management app or spreadsheet software that allows for easy tracking and analysis of your data.
Developing a Plan for Emergency Situations
When it comes to raising duck eggs, unexpected events can be devastating. Power outages, disease outbreaks, and equipment failures can quickly compromise your entire operation. That’s why having a plan in place for emergency situations is crucial.
Start by identifying critical contact numbers: your veterinarian, local extension office, and suppliers of feed and medication should be on speed dial. Establish a contingency plan for power outages, which might include purchasing a generator or investing in solar panels to keep incubators running. For disease outbreaks, have a protocol for isolating affected birds and obtaining veterinary care as quickly as possible.
Don’t forget about backup systems for critical equipment like waterers and feeders. Consider installing redundant systems that can be easily switched on if the primary system fails. Regularly test your emergency plan to ensure everyone involved knows their role in case of an unexpected event. This might seem like a lot to handle, but trust us – being prepared will give you peace of mind and help you respond quickly when disaster strikes.
Conclusion: Successful Duck Egg Hatching
Now that you’ve successfully hatched your duck eggs, it’s time to learn how to care for and raise these adorable little quackers. We’ll wrap up this comprehensive guide with some final tips on their development and growth.
Recap of Key Points and Takeaways
To successfully hatch duck eggs, it’s essential to recall the key steps outlined throughout this comprehensive guide. Careful planning and research are crucial, as they ensure you’re well-prepared for the process. This includes choosing a healthy breeding stock, maintaining proper egg storage conditions, and selecting a suitable incubation method.
It’s also vital to remember that attention to detail is critical when it comes to temperature control, turning, and monitoring the eggs’ progress. Regular checks on humidity levels, air quality, and equipment function will help prevent potential issues. By adhering to these guidelines, you’ll be better equipped to identify any problems early on and take corrective action.
Some key factors to keep in mind include maintaining a consistent incubation temperature between 99.5°F and 100.5°F, ensuring adequate ventilation, and avoiding excessive handling of the eggs. Additionally, it’s essential to stay informed about your specific duck breed’s needs and requirements for successful hatching.
By reviewing these critical components, you’ll be well on your way to successfully hatching duck eggs. Remember that patience and persistence are also vital elements in achieving a high success rate.
Encouragement and Final Tips for Beginners
As you embark on the rewarding journey of hatching duck eggs, remember that it’s not just about successfully incubating eggs – it’s also a test of patience and persistence. Don’t be discouraged if things don’t go as planned at first; even experienced breeders encounter setbacks. The key is to stay calm, learn from your mistakes, and keep trying.
As you care for your ducklings after they hatch, remember that their early days are crucial in shaping their health, temperament, and overall well-being. Make sure to provide a safe, warm environment with adequate nutrition and social interaction. With time and practice, you’ll become more confident in your abilities as a duck breeder.
Remember, hatching duck eggs is an ongoing learning process. Stay updated on the latest research and best practices by attending workshops, joining online forums, or participating in local poultry clubs. Continuously challenge yourself to improve your skills and knowledge – this will not only help you succeed but also allow you to share your expertise with others.
Frequently Asked Questions
What is the ideal temperature range for incubating duck eggs?
The ideal temperature range for incubating duck eggs is between 99°F (37°C) and 100°F (38°C). It’s essential to maintain a consistent temperature within this range to ensure proper embryonic development. Always check your incubator’s thermometer to guarantee accuracy.
How long does it take for ducklings to hatch after the incubation period?
After the 28-day incubation period, you can expect ducklings to start pipping (breaking through their eggshell) around day 29-30. Hatching usually occurs within the next 24 hours, but be prepared for a longer process if any complications arise.
What are some common health issues that can affect duck eggs?
Common health issues affecting duck eggs include fungal infections, bacterial diseases like E. coli and Salmonella, and nutritional deficiencies. Regularly monitoring your flock’s health and providing proper nutrition can help minimize the risk of these issues.
Can I use a regular household fan to circulate air in my incubator?
No, it’s not recommended to use a regular household fan for circulating air in an incubator. Incubators require specific ventilation systems designed for controlled airflow and humidity levels to maintain a healthy environment for the eggs. Always invest in a proper ventilation system or consult with an expert.
What should I do if my ducklings are experiencing delayed development?
If your ducklings are experiencing delayed development, it’s essential to assess their living conditions, nutrition, and overall health. Check for any signs of disease or nutritional deficiencies and adjust their environment accordingly. Consult with a veterinarian specializing in poultry care for professional advice on addressing the issue.