
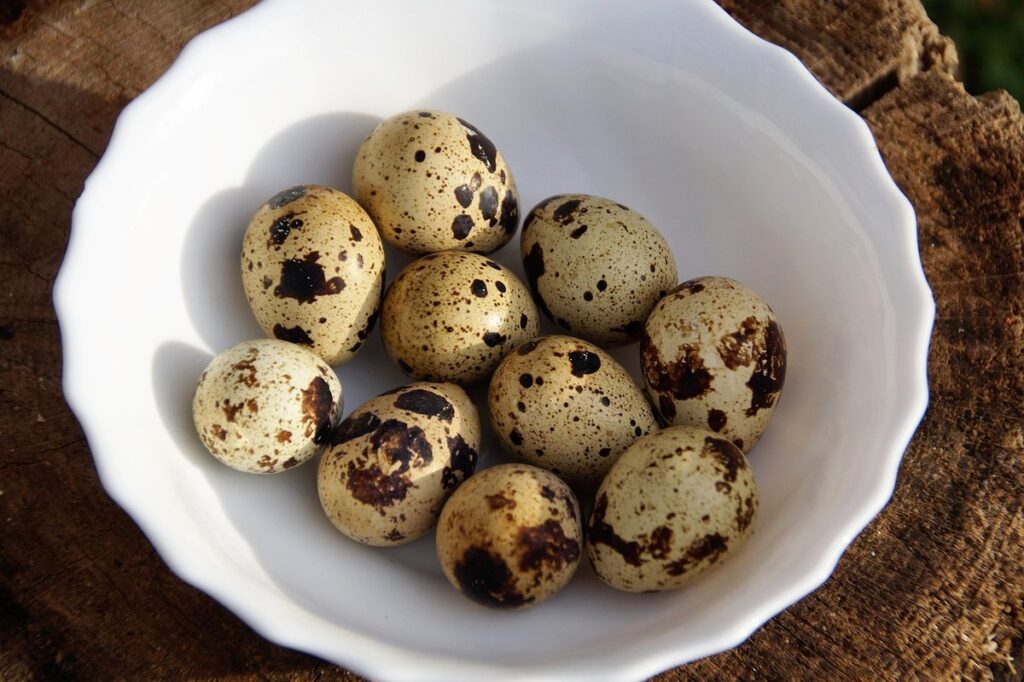
Raising bobwhite quail can be an exciting but challenging experience, especially when it comes to ensuring successful hatching. The incubation period is a critical phase in their development, and getting it right can make all the difference between raising healthy chicks or ending up with disappointing results. If you’re struggling to get your bobwhite quail eggs to hatch, you might be wondering what’s going wrong.
In this article, we’ll explore the importance of optimizing the incubation period for bobwhite quail, including temperature control tips and tricks that can help keep your eggs at the perfect level. We’ll also delve into nutrition and stress management, two key factors that are often overlooked but play a crucial role in successful hatching. By following our expert advice, you’ll be well on your way to raising strong, healthy chicks that will bring joy and fulfillment to your backyard or farm.
What is the Normal Incubation Period for Bobwhite Quail?
When raising bobwhite quail, understanding their normal incubation period is crucial to ensuring healthy hatch rates. Let’s take a closer look at what you can expect during this critical timeframe.
Average Incubation Time and Temperature
The average incubation time for bobwhite quail is around 24-26 days. However, this can vary depending on several factors, including the breed, health of the birds, and environmental conditions.
A good starting point for temperature control is to maintain a consistent temperature between 99°F (37°C) and 100°F (38°C). It’s essential to keep in mind that temperatures above or below this range can impact hatching rates and embryo development. A 1-2°F difference may not seem significant, but it can make all the difference in achieving successful hatchings.
To ensure optimal conditions, you should also maintain a consistent humidity level of around 50-60%. Low humidity can lead to dehydration and negatively affect embryonic development. If possible, use a humidifier or misting system to maintain a stable environment.
Keep in mind that even with proper temperature control, other factors such as egg quality, breed selection, and handling practices can influence the incubation process. Monitoring temperature and humidity levels closely is crucial for achieving successful hatchings.
Factors Affecting the Incubation Period
The incubation period for bobwhite quail can be influenced by several external factors. For instance, humidity levels play a crucial role in determining the length of time it takes for eggs to hatch. Eggs that are exposed to high humidity (above 60%) tend to hatch faster than those kept at low humidity levels.
Egg quality is also an essential factor to consider. Fresh and clean eggs with intact shells will generally have shorter incubation periods compared to dirty or old eggs. This is because fresh eggs have a stronger embryo, which enables them to develop more efficiently during the incubation period.
Breed variations can also impact the normal incubation period for bobwhite quail. Different breeds may exhibit varying levels of hardiness and reproductive vigor, resulting in different incubation times. For example, some lines of bobwhite quail may have a shorter incubation period due to their genetic makeup.
To ensure optimal results, it is essential to maintain a consistent humidity level (50-60%) during the incubation process. Regularly checking eggs for cleanliness and integrity can also help you monitor egg quality effectively. By controlling these external factors, you can increase your chances of successful hatching and healthy chicks.
Environmental and Nutritional Considerations During Incubation
When incubating bobwhite quail, it’s essential to provide optimal environmental conditions and a nutritious diet to support healthy growth and development of your chicks. This section explores key considerations for both aspects.
Importance of Proper Temperature Control
Maintaining a consistent temperature is crucial during incubation for bobwhite quail. Temperature fluctuations can significantly impact embryo development and hatchability rates. A temperature that’s too high or too low can lead to stunted growth, increased mortality, and even complete failure of the eggs.
To maintain optimal temperatures, it’s essential to have a thermometer in the incubator. Most manufacturers recommend a temperature range between 99°F and 100°F (37°C to 38°C) for the first 18 days, then gradually decreasing by about 0.5 degrees every day thereafter until hatching. It’s also vital to ensure proper ventilation within the incubator to prevent moisture buildup.
Monitor the temperature daily, and make adjustments as needed. A good rule of thumb is to check the temperature at least twice a day during peak temperatures and adjust accordingly. You can use an alarm feature on some incubators to notify you if the temperature deviates from the set range.
Nutrition and Egg Quality
When it comes to incubating bobwhite quail eggs, nutrition plays a significant role in determining egg quality. A well-nourished hen will lay eggs with better fertility and hatchability rates, which is crucial for successful incubation. Eggs from underfed hens may have lower fertility rates, leading to failed hatch attempts.
A balanced diet that includes high-quality protein sources such as grains, seeds, and insects is essential for maintaining optimal egg quality. For example, providing a mix of oats, corn, and sunflower seeds can support egg production and fertility. Additionally, supplementing with calcium-rich foods like crushed oyster shells or dark leafy greens ensures strong shell development.
It’s also important to note that water quality can impact nutrition. Ensure access to clean, fresh water at all times, as contaminated water can lead to nutrient deficiencies and decreased egg quality.
To promote optimal egg quality, provide a nutritious diet and ensure a clean living environment for your hens. Monitor their food and water intake regularly, and consider consulting with a veterinarian or poultry expert for personalized advice on maintaining healthy birds.
Humidity Levels and Their Impact
Humidity levels play a crucial role in the incubation period for bobwhite quail. The ideal humidity level for incubating quail eggs is between 40-60%. If the humidity is too low, eggs may not develop properly, leading to embryonic death or weak chicks. On the other hand, if the humidity is too high, it can cause moisture buildup and encourage bacterial growth, which can contaminate the eggs.
To maintain a stable humidity level, you can use a hygrometer to monitor the temperature and adjust your incubator accordingly. A good rule of thumb is to increase the humidity by 5-10% each day until it reaches the optimal range. For example, if you start with 30% humidity on day one, you would aim for 35-40% on day two.
It’s also essential to ensure that your incubator has adequate ventilation to prevent moisture buildup. This can be achieved by installing a ventilation system or increasing the air exchange rate within the incubator. By maintaining optimal humidity levels and ensuring proper ventilation, you’ll be well on your way to successfully incubating bobwhite quail eggs.
Proper humidity management can also reduce stress on the developing embryos, leading to healthier chicks and stronger immune systems.
Understanding the Incubation Process: A Step-by-Step Guide
If you’re new to raising bobwhite quail, understanding the incubation process can seem daunting. This step-by-step guide will walk you through the entire process from egg collection to hatching time.
Day 1-7: Early Developmental Stages
During the first week of incubation, several critical developmental stages occur within the bobwhite quail embryo. On day 1, fertilization typically takes place, and the egg white (albumen) is at its thickest. The embryo starts to divide into cells around this time. By day 3-4, the embryo has developed into a compact cluster of cells called the morula.
As incubation progresses, the morula undergoes cavitation on days 5-6, forming a fluid-filled cavity known as the blastocoel. This stage is crucial for proper development and hatching success. The developing chick’s organs begin to take shape during this period.
By day 7, the embryo has transformed into a distinct, though still relatively small, chick. The heart starts beating, and other vital organs begin functioning properly. It is essential to maintain precise temperature control (around 99-100°F) during these early stages of development to avoid any potential setbacks or hatching issues.
As an incubator user, it’s crucial to ensure your device is calibrated correctly and the environment remains stable throughout this critical first week. This will help guarantee a successful hatch and healthy chicks in the end.
Days 8-14: Organ Formation and Growth
Between days 8 and 14, some of the most critical developmental processes occur for bobwhite quail embryos. Organ formation is in full swing during this period, with the heart, lungs, liver, and kidneys all taking shape. The heart starts to pump blood through its chambers, while the lungs begin to expand and contract in preparation for life outside the egg.
The embryo’s nervous system also starts to take form, with neurons branching out to connect with each other. This is a crucial time for brain development, as the formation of neural connections lays the groundwork for learning and memory. If you’re incubating your own bobwhite quail eggs, it’s essential to maintain precise temperature control during this period.
A slight drop or rise in temperature can affect the development of sensitive organs like the heart and lungs. Monitor your incubator closely, ensuring that the temperature remains within the optimal range (99-100°F). Proper humidity levels are also crucial, as they help prevent dehydration and promote healthy growth. Aim for a relative humidity of 50-60% to support optimal embryo development.
Final Weeks of Incubation: Preparation for Hatching
As you enter the final weeks of incubation, it’s essential to focus on preparing your bobwhite quail eggs for hatching. During this critical period, make sure the incubator is functioning correctly and maintaining a consistent temperature between 99°F and 100°F (37°C – 38°C). Monitor the humidity levels closely, aiming for a range of 50-60%. You can achieve this by misting the incubator gently with water every day.
Keep an eye on the eggs’ position in the incubator. Ensure they are not overcrowded, which can lead to poor air circulation and increased risk of disease transmission. If necessary, adjust the egg positions or transfer them to a larger incubator. Check for any signs of infection or unusual development in the eggs, such as visible cracks, mold growth, or an abnormal weight loss.
Now is also an excellent time to prepare your brooder area, setting up adequate space and ventilation to accommodate the newly hatched chicks. Ensure you have sufficient food, water, and a heat source ready for their arrival. With proper care and attention during these final weeks, you’ll be well-prepared for a successful hatch and the start of a healthy bobwhite quail flock.
Managing Stress During Incubation: Tips for Success
As you care for your bobwhite quail during incubation, it’s essential to manage stress levels to ensure healthy development and a successful hatch. We’ll share practical tips to help you achieve this balance.
Minimizing Temperature Fluctuations
Maintaining a stable temperature environment is crucial during the incubation period to minimize stress on developing quail embryos. Temperature fluctuations can be caused by various factors such as equipment malfunctions, inadequate insulation, or improper ventilation.
To prevent temperature fluctuations, it’s essential to invest in a reliable incubator that can maintain a consistent temperature within a narrow range (usually between 99°F and 100°F). Regularly check the incubator’s temperature gauge to ensure it’s functioning correctly. Also, ensure proper ventilation by providing adequate airflow to remove heat generated by the incubator.
A slight deviation from the ideal temperature can significantly impact embryo development. For instance, a 1% decrease in fertility can result from every 0.5°F drop below 99°F. Similarly, temperatures above 100°F can cause embryos to develop abnormally or even lead to mortality.
To further minimize temperature fluctuations, consider using insulation materials such as foam or fiberglass to line the incubator’s walls and floor. This will help retain heat and maintain a stable temperature environment. Additionally, keep the incubation room at a consistent temperature (around 70°F) to prevent external factors from affecting the incubator’s performance.
Importance of Regular Egg Turning
Regular egg turning is an essential aspect of incubation that can significantly impact the success of hatching bobwhite quail eggs. When eggs are turned regularly, it helps to prevent the developing embryo from becoming stuck to one side of the shell. This can lead to a range of problems, including respiratory issues and even death.
To turn the eggs effectively, gently rotate them by about 90 degrees every 6-8 hours during the first 18 days of incubation. After day 18, you can reduce this frequency to every 12 hours. It’s essential to develop a consistent routine so that you don’t accidentally leave an egg in the same position for too long.
Remember, turning is not just about rotating the eggs – it’s also about checking on their condition and overall health. During each turn, make sure to inspect the eggs for any signs of cracking or damage. This simple practice can help ensure that your bobwhite quail eggs hatch successfully and grow into healthy chicks.
Recognizing Incubation Issues: Signs of Trouble
When incubating bobwhite quail eggs, it’s essential to be aware of potential issues that can arise during this critical period. Look out for signs like unusual temperature fluctuations and erratic egg turning.
Identifying Potential Problems Early On
When monitoring your bobwhite quail eggs during incubation, it’s essential to be aware of potential problems that can arise. One common sign of trouble is temperature fluctuations within the incubator. If the temperature drops too low or rises too high, it can lead to poor hatch rates or even embryo death.
A consistent temperature between 99°F and 100°F (37°C – 38°C) is crucial for healthy development. Check your thermometer regularly to ensure it’s accurate and functioning correctly. You may also want to invest in a backup thermometer to confirm readings.
Another critical factor is air quality. Poor ventilation or high humidity can lead to mold growth, which can harm the eggs and even contaminate the incubator. Monitor the incubator’s humidity levels closely, aiming for around 50-60%. Use a hygrometer to track moisture levels and make adjustments as needed. By catching these issues early on, you’ll increase your chances of successfully hatching healthy bobwhite quail chicks. Regularly inspect your equipment and take action if you notice any anomalies.
Knowing When to Intervene
Knowing when to intervene is crucial when it comes to incubating bobwhite quail. As an experienced breeder, you’ve likely encountered situations where the eggs are not hatching as expected. If you notice that 24-48 hours have passed since the last pip mark and there’s still no sign of hatching, it may be time to take a closer look.
Check for any signs of embryo development inside the egg, such as visible veins or a growing embryo sac. You can do this by carefully candling the eggs in front of a bright light source. If you’re still unsure about the status of the embryos, consider performing an egg float test. This involves submerging the eggs in water and observing whether they float.
If you determine that there’s no development or the embryo is not viable, it may be best to remove the egg from the incubator and dispose of it. On the other hand, if you suspect that the temperature fluctuations are affecting incubation, ensure your incubator is set at a consistent temperature between 99°F and 100°F.
Keep in mind that some eggs may take longer to hatch than others. If you’ve reached day 26 without any signs of hatching, it’s likely that something has gone wrong during incubation.
Conclusion: Optimizing the Incubation Period for Bobwhite Quail
Now that you’ve learned about setting a consistent temperature and humidity level, let’s dive into optimizing the incubation period to ensure healthy bobwhite quail hatchlings.
Recap of Key Takeaways
As we come to the end of our discussion on optimizing the incubation period for Bobwhite quail, let’s take a moment to recap the key takeaways from this article. By now, you should have a solid understanding of the crucial role that a well-managed incubation period plays in ensuring the success of your birds.
First and foremost, it’s essential to acknowledge that the optimal incubation temperature for Bobwhite quail is between 99°F and 100°F (37°C and 38°C) for the first 18 days, followed by a gradual decrease. Failure to maintain this precise temperature can result in reduced hatch rates or even complete failure.
Another critical aspect of incubation period management is maintaining proper humidity levels. This means keeping the environment at around 50-60% relative humidity during the first 18 days and reducing it slightly thereafter. Not only will this help prevent fungal infections, but it’ll also promote healthy growth in your chicks.
We’ve also discussed the importance of turning eggs regularly to prevent the embryo from becoming stuck or developing unevenly. It’s recommended that you turn your eggs at least 4-5 times a day to ensure even development and optimal hatch rates.
Another vital aspect of incubation period management is monitoring your eggs for any signs of distress or abnormalities. By doing so, you’ll be able to intervene promptly in case anything goes wrong, thereby reducing the risk of losing valuable birds.
In addition to these key takeaways, it’s also worth noting that proper incubation equipment and regular cleaning are crucial factors to consider when optimizing the incubation period for Bobwhite quail. Make sure your incubator is clean, well-maintained, and calibrated correctly to provide a precise environment for your eggs.
By implementing these strategies and maintaining a keen eye on your incubating birds, you’ll significantly increase your chances of success. Remember, every detail counts when it comes to optimizing the incubation period for Bobwhite quail – so take your time, stay vigilant, and reap the rewards of successful hatching.
Frequently Asked Questions
What should I do if my bobwhite quail eggs are not developing as expected during the incubation period?
If your eggs are not showing clear development after 7-10 days, it may be a sign of issues such as temperature fluctuations or poor egg quality. Check for any visible signs of cracks or damage on the eggs and make sure you’re maintaining optimal temperature (99°F to 100°F) and humidity levels (40-60%). If problems persist, consider consulting with a veterinarian or experienced breeder.
How can I optimize my incubation environment to ensure successful hatching rates?
In addition to maintaining proper temperature and humidity, it’s essential to keep your incubator clean and well-maintained. Regularly clean the interior with soap and water, and replace the air filter as recommended by the manufacturer. Also, ensure good ventilation to prevent the buildup of carbon dioxide.
Can I use a homemade incubation setup or do I need a specialized incubator?
While it’s possible to create a basic incubation setup using materials like Styrofoam boxes and heat lamps, investing in a high-quality incubator specifically designed for quail eggs is recommended. These devices provide precise temperature control, humidity management, and better air circulation.
What are some common mistakes that can lead to low hatch rates or failed hatching?
Mistakes such as incorrect temperature settings (too high or too low), inadequate egg turning, and poor incubation environment design can significantly impact your chances of successful hatching. Regularly monitor your setup, keep records, and adjust accordingly.
How do I handle a situation where eggs stop developing after day 18-20?
If eggs suddenly stop developing after this period, it could be due to various factors such as stress, inadequate nutrition for the mother quail, or poor incubation conditions. Investigate potential causes by re-examining your setup and reviewing your records for any previous issues. Consult with a veterinarian if necessary, and consider adjusting your care routine accordingly.